

I recently returned from a week-long trip to Tunisia where I spent some time working with the U.S. Embassy and the Tunisian Air Force. I spent the week in Tunis, which is near the ancient Roman city of Carthage. When our work was done the embassy hired a tour guide for us and we got a first-class guided tour of many ancient historical sites around Tunis and Carthage.
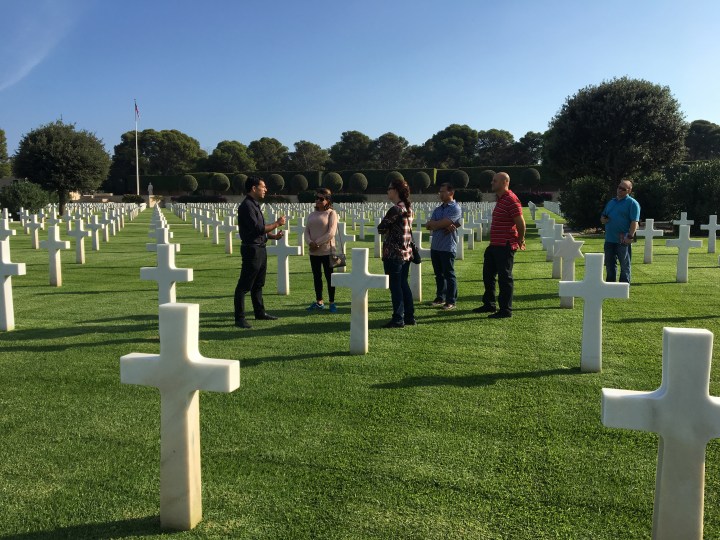
Above. We were honored to visit the North African American Cemetery in Carthage a few days after Memorial Day. This is the U.S.’s only WWII cemetery in Africa. The man in black is the Caretaker and he gave us a wonderful tour. My father served in the entire North African campaign was wounded somewhere in Tunisia. No doubt he would know some of the men resting here.
We also spent some time at the wonderful Bardo Museum in downtown Tunis. Among other things the Bardo Museum includes a large number of Roman-era mosaics. Mosaics have been uncovered all over Carthage and many of the best examples have been brought to the museum for display.
Mosaics were used mostly as floor decorations in public places, baths, and other public areas, and many wealthy individuals had mosaics added to their private homes. According to our tour guide, the larger mosaics used in public places took up to five years to complete.
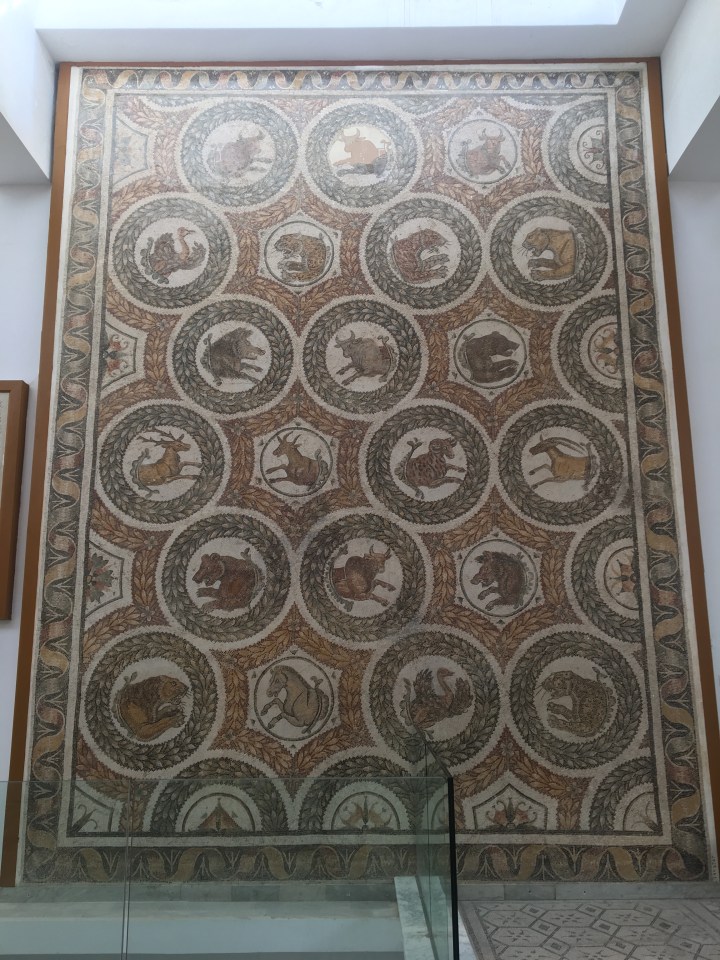
Above. This gigantic mosaic—probably 40 x 30 feet—depicts all the African animals that fought in the Coliseum in Carthage.
So what’s the big deal about mosaics? The Roman mosaics are made of thousands—sometimes millions—of small, specially-cut and colored pieces of tile, each about half as big as your pinky fingernail. Each piece is expertly laid to lend color, texture, shadowing, and other features to the overall picture. The close-up below shows one of the mosaics in a little more detail.
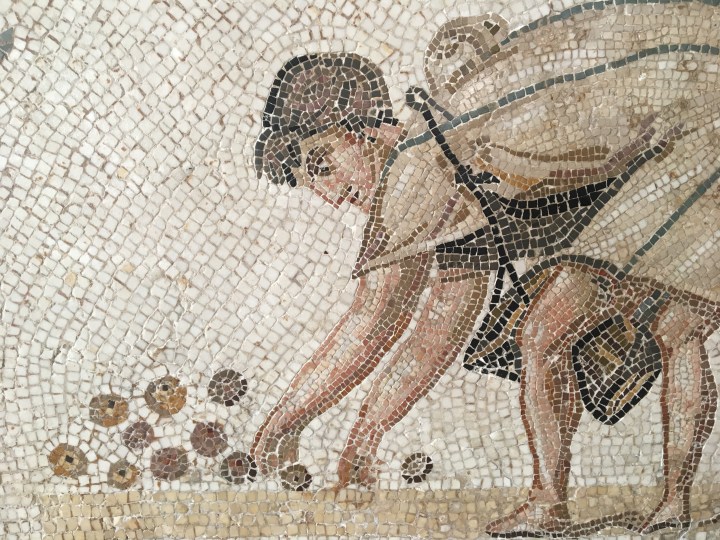
Below. Another close-up shows how the artist has used many different shapes, sizes and colors of tile to create patterns, shadowing, and detail. Look at the eyeball, for example. It is a clear, triangular-shaped tile, with stones around it providing shadowing and color. The triangular shaped eyeball directs the viewer’s eye to the task being accomplished—in this case, harvesting olives. The attention to detail is impressive.
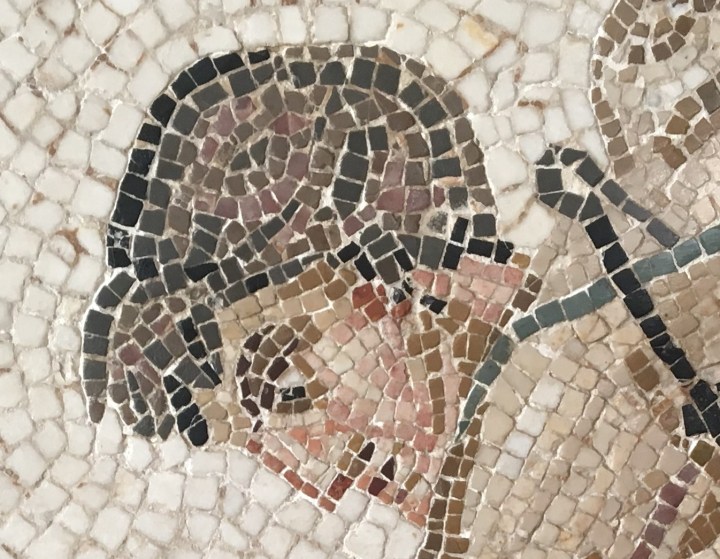
I was impressed by the craftsmanship and the artist’s use of color, shadowing, and detail. Look at the many different colors and shapes used in the face. None of the individual rocks are perfect, per se, but the overall scenes are exquisite. Most of these mosaics have were created 1,900 years ago, and many have been buried for well over 1,500 years. The Bardo Museum is full of fantastic mosaics—hundreds of them—collected from all over Carthage.
This got me thinking. Is our modeling work this good? Is our work timeless? Do all the individual pieces work together to tell a story of a time and a place? Do we take the time necessary to get the colors right?
With a new perspective, it’s time to talk modeling.
Freight Car Finishing
The model below is an ancient Sunshine Models box car, cast in the last century and finally built in 2015.
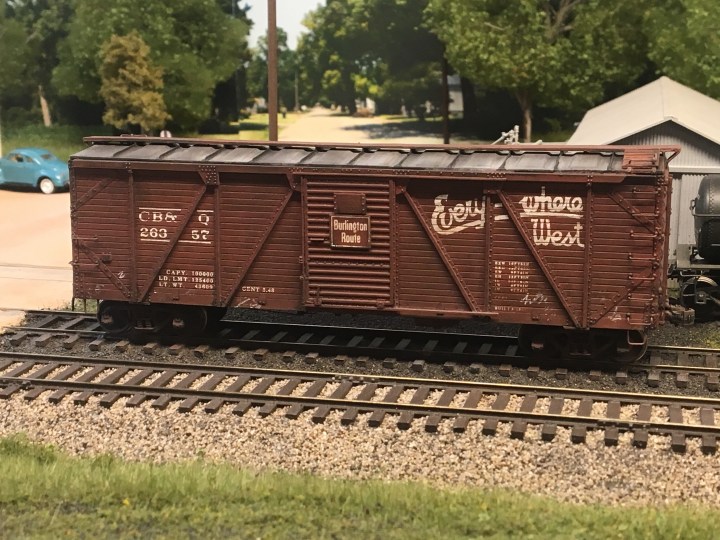
This is a Sunshine CB&Q XM-31 that I won on an eBay auction. I finished it in 2015 and painted it with Tru Color CB&Q Freight Car Brown, but it was only after I completed the model that I realized tht the prototype had a unpainted, galvanized steel roof with the seam caps painted car-cement black. Ugh!
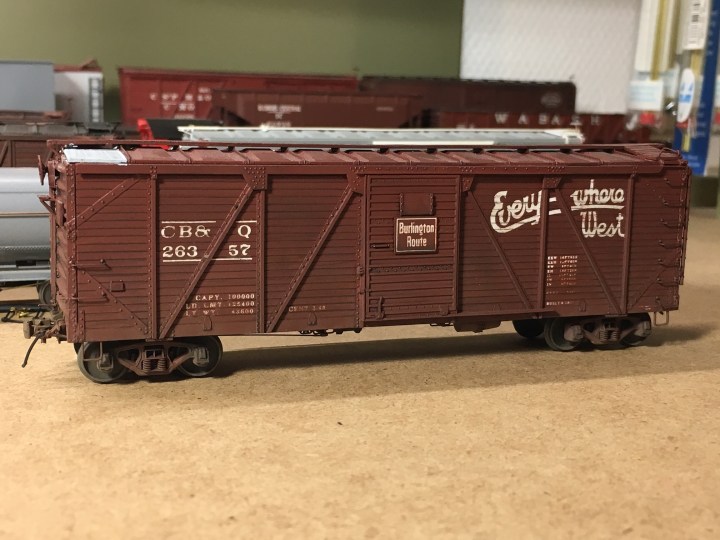
The photo below shows the completed car, and I have begun going back over the roof with grey paint to simulate the unpainted galvanized steel surface.
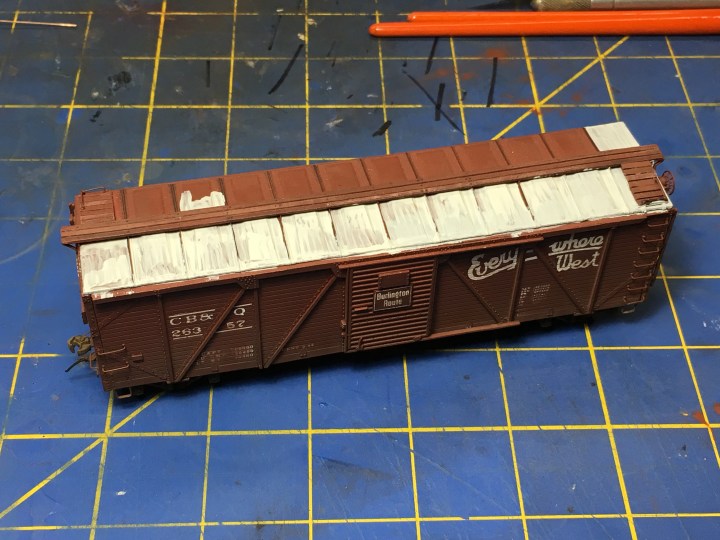
Below. With painting halfway through, the roof looks awful. It was touched up several times, then the seam caps were painted Tamiya flat black. I sealed the roof with a shot of Testors Dullcote and then weathered it with AIM weathering powders Soot Black.
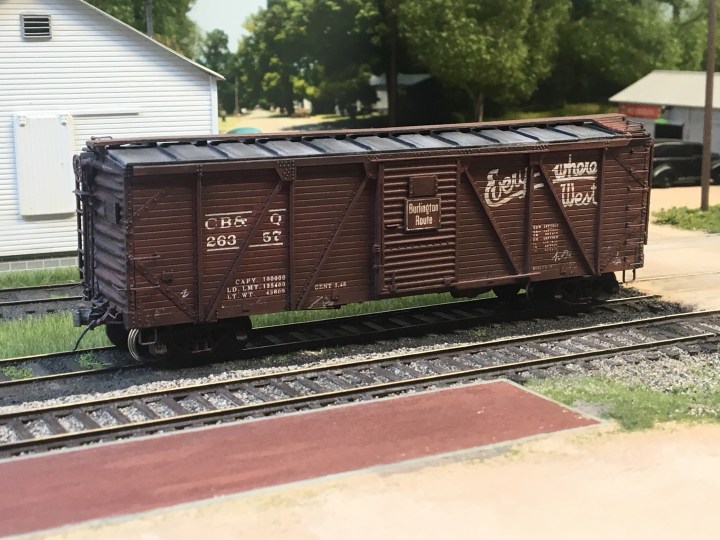
I touched up the paint on the running boards and the roof, added a few more chalk marks with a white artist’s pencil, and cleaned up the decals a bit, and overall the car looks better and more like the prototype.
N&W Low Side Gondola
Here’s another favorite that has been languishing in the “To-Do” box for a long while. This is an old Sunshine N&W 42-foot low-side gondola. The prototype cars were unique and stand-outs in any consist. I bought the model from a friend online and built and painted it long before moving to Germany in 2015.
The kit arrived without decals, so that stalled the finishing process. Finally, last September, I ordered a decal set from Westerfield—the decal set for the N&W H-1 Hopper Car, circa 1910-1952—and that did the trick.
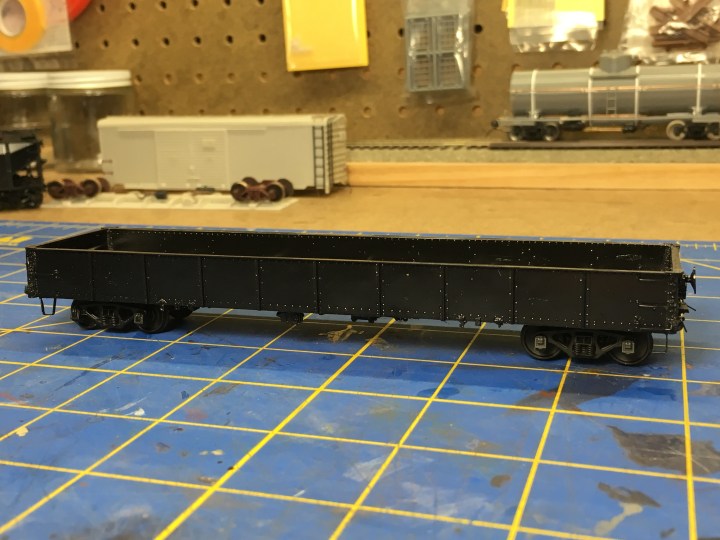
Decaling is underway and I’m happy to report that the Westerfield decals work very well. I am also using a few decal pieces from a Mount Vernon N&W H-2 Hopper decal set, like shope dates and repack numbers.

I owned a similar model about 20 years ago. Here’s a photo of that car that I took in 2001 when I lived in California. I bought an N&W kit but used a Champ decal set to finish it as a Virginian car. I sold the model sometime in the mid-2000s. This model was equipped with the old Walthers ARA sprung trucks with Kadee Code 110 wheels. I don’t have a single model so-equipped today.

NP War Emergency Single-Sheathed Box Car
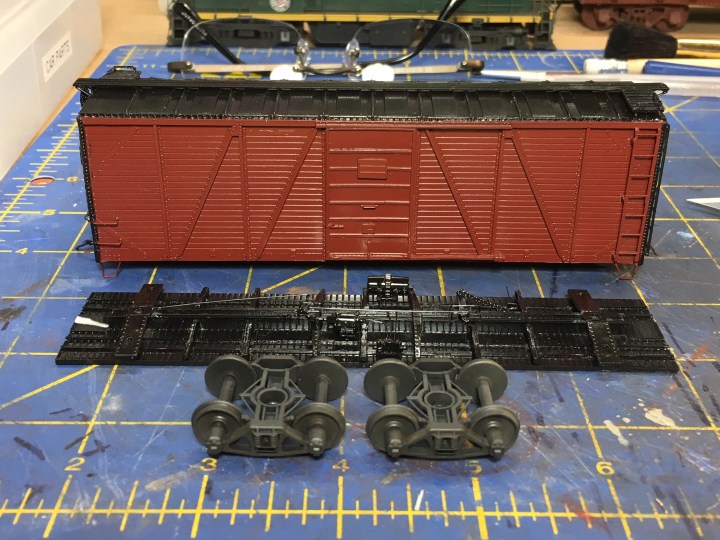
This is the beautiful NP Historical Society model that I was able to get at Lisle RPM in 2015. It is a beautiful-cast model and the build was fast and easy. I painted the roof, trucks and underframe with Testors Black and the superstructure with Tru Color TCP-193 Northern Pacific 1935-45 Freight Car Brown. Trucks are in the foreground; they are Tahoe Double Truss with Intermountain Code 88 wheelsets.
The kit came without decals and I hesitated to order them until last month. Here’s why: The decal set costs $19 and can complete nine cars. The car alone–without decals–is 50 bucks. I don’t see too many guys building up enough cars to justify the expense of the decals.

To make matters worse, while the decals set is outstanding and thoroughly researched, I am having a whole lot of difficulty getting the decals to settle down. After applying setting solution several of the decals have broken apart—yes, AFTER applying setting solution. To fix the problem I’ve had to use the old “double-decal” technique in several places (adding multiple layers of decals to fix color or other decal problems). So much for thin-film decals.
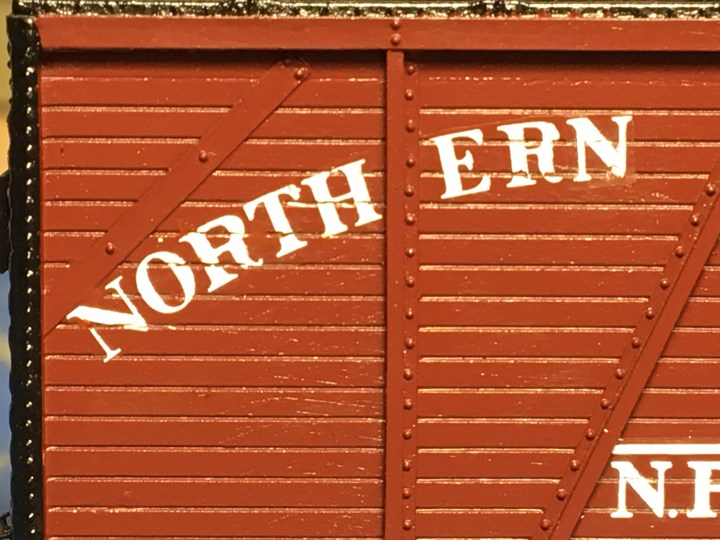
Lettering will take a lot of work on this model, but it’ll be worth it. This is a must-have car and I don’t mind taking the extra time to get it right.
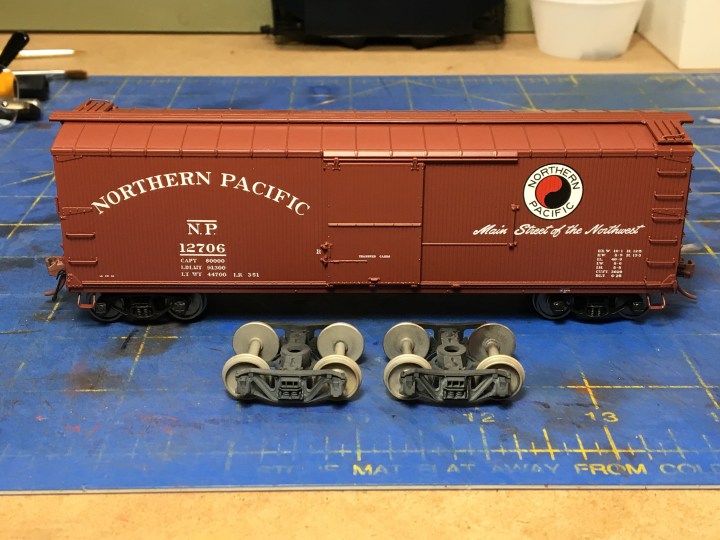
NP Single Sheathed Box Car
This has always been a favorite prototype. Rapido introduced this ready-to-run model earlier this year and I finally ordered it last month. Unfortunately, the chuckle-head eBay seller I bought it from sent me the wrong car. I asked for the 1945 version with the small monogram and car-cement roof, but I got the post-1951 version instead (pictured below).
It’ll be too much of a hassle to send it back to the U.S. for an exchange, so I’ll sandblast it and tweak the details a bit, and repaint it. Besides, I don’t think the color is rich enough.
This is a nice model; not quite the same prototype as the Yarmouth Scale Models car (Yarmouth offers an earlier dobule-sheathed car with a truss rod underframe). I don’t know if the trucks are appropriate but they are the NP-specific trucks from Tahoe Model Works. I’ve already sandblasted them and they’re ready for paint—hence the washed-out look.
More to follow as I blast and repaint this car for an earlier prototype.
NYC Auto Car
This is another old Sunshine kit that I picked up from Martin before his passing. I finally completed the build this calendar year, and sandblasted and painted it just this month. I have been busy decaling it this week. Here is the model, below, after the build was complete.

I painted the trucks and underframe with Testors Gloss Black and the superstructure with Tru-Color NYC Freight Car Color.
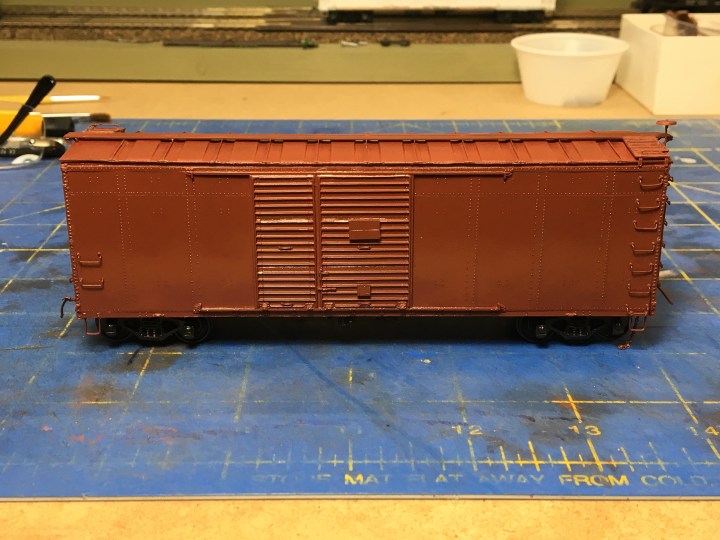
Decaling is underway and looks great. I’m using the original Sunshine kit decals, not Ted Culotta’s Speedwitch set that I have used with all my other NYC cars. These extended-height NYC cars have always been favorites and I can’t wait to get this one into service.
In Closing…
One more thing about ancient Carthage. Before the Romans took over the city it was occupied by the Punics (i.e. the Phoenicians). For over a thousand years the Punics practiced human sacrifice to their pagan gods (lower-case g). They burned their first-born sons to death and buried the remains in urns such as this. According to our tour guide, the ruins of Carthage are littered with these things. These examples in the Bardo Museum are over 3,000 years old.

In this week of Thanksgiving, we should give thanks to our Lord and Savior, Jesus Christ, for saving us from self-destructive, pagan rituals such as these. Christ offered us salvation, and offered us liberation from these futile things–at least for all who listen. Remember to give Him thanks this Thanksgiving weekend.
1 Chronicles 16:34 says Give thanks to the LORD, for He is good; His love endures forever.

Amen. Well said, John.
Barry
LikeLike