

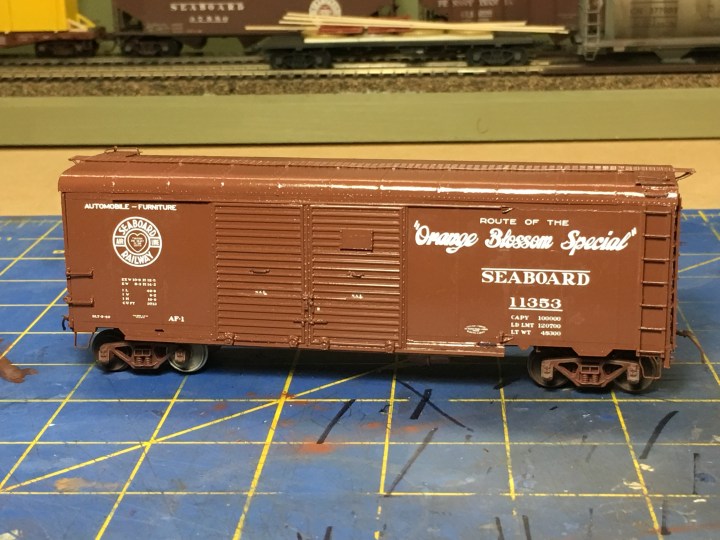
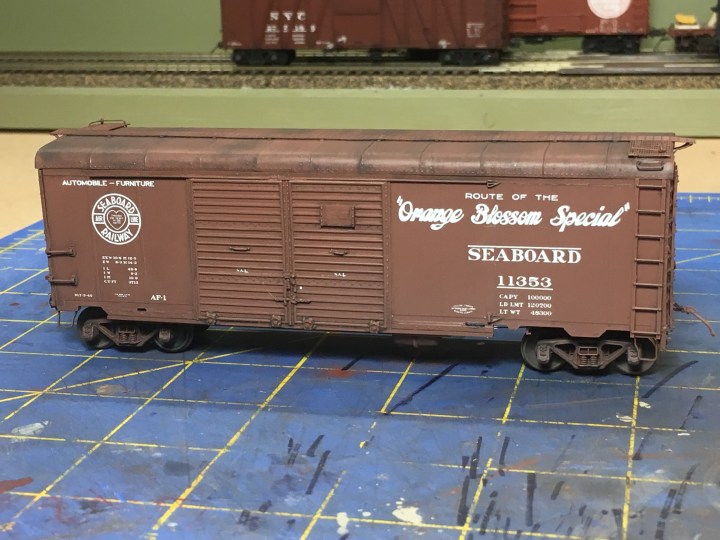
One of Seaboard Air Line’s most famous and most-recognizable freight cars was the AF-1 and AF-2 class “turtleback” auto car. Sunshine Models released an HO scale car kit in the early 2000s and I was fortunate to acquire one and finish it this year.

Above. Wilbur C. Whittaker photo, Dunsmuir, Cal, 05 August, 1951. Courtesy Richard Hendrickson.
The Prototype
SAL received a total of 1,200 turtleback auto cars in two series the 1940s. The first series of 700 cars were delivered from Pullman (Bessemer, Ala.) in March, 1940, PS-Lot #5617. The cars featured 10’ 6” IH, Pullman “Turtleback” roof, Apex running board and brake step, Youngstown doors (12’ 6” door opening), proprietary corrugated Pullman ends, AB brakes, Ajax handbrake, and AAR spring-plank type trucks. The cars were painted Dupont Tufcoat Metallic Brown (entire car, including trucks) and received white stencils with the train slogan Route of the Orange Blossom Special. Car numbers were 1100-11699 and were placed in SAL car class AF-1.
The second series, car numbers 11700-11999 and 22000-22199, came in 1942. These cars also came from P-S Bessemer, and were identical except for the use of Blaw-Knox running boards and brake steps on 22000-22199, and paint. These cars were placed in SAL car class AF-2 and were painted with Sherwin Williams Metallic Brown (entire car, including trucks), and as delivered featured the slogan Route of the Robert E. Lee on all cars.
The Model
Much has been written about SAL car classes and paint schemes so I won’t go into all the details again here. I wanted to model a car in original paint and lettering, circa 1949, so that is what will be described here.
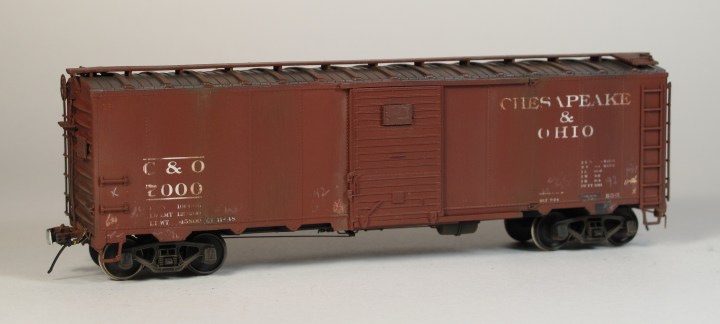
I got this AF-1 kit from my friend Gerry Fitzgerald in 2014. I reciprocated by sending Gerry a finished car as a way of saying thanks. I sent him a car I considered a “keeper”–a very-much rebuilt Atlas 1932 ARA box car, shown below. I milled the frame for Kadee #78 couplers, replaced the trucks with prototypically-correct coil-elliptical trucks from Tahoe Model Works, installed a new running board, and added a lot of decals and TLC to this model. I loved it, but Gerry sent me a one-of-a-kind kit and knowing he was a C&O fan I sent this car to him as a way of saying thanks.
A few weeks later Gerry told me he entered the model in a model contest at a local NMRA event near his home in Richmond, Virginia. That’s C&O country. It was a “sure winner” he told me…but it won second. We both had a good laugh!
Back to the AF-1
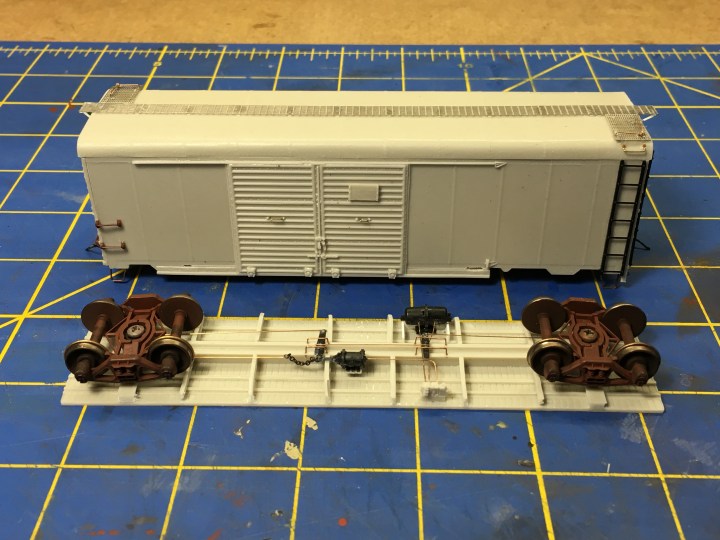
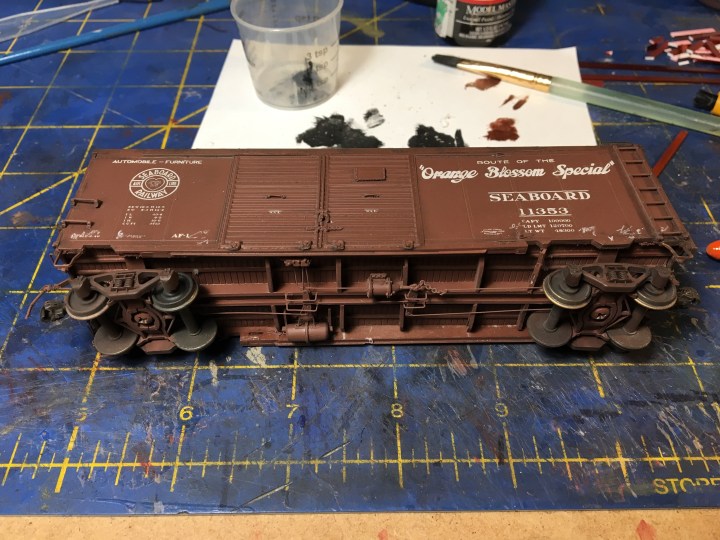
My new AF-1 model was built per the kit’s instructions. The kit includes typical resin box car kit parts—two sides, two ends, two doors, an underframe and a roof. Thankfully the roof casting was perfectly flat and square. I built up the basic carbody and added all the additional parts, like ladders, wire grab irons, and the Apex running board included with the kit. I secured the running board with canpoy glue. The finished build is seen above.
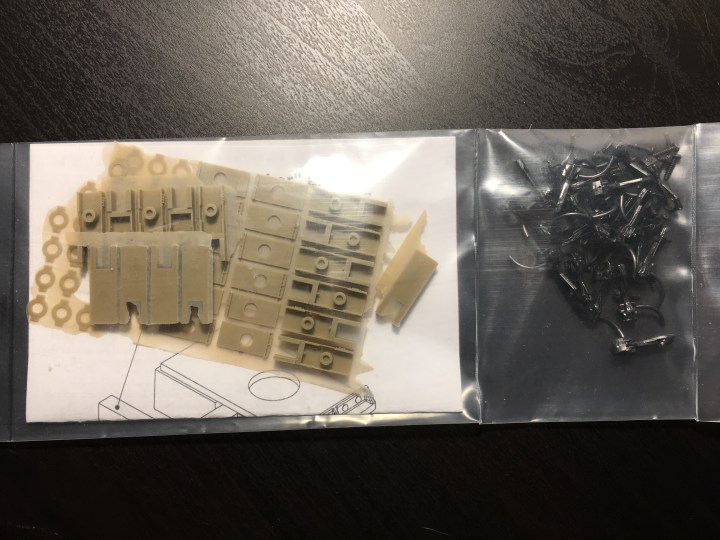
I added a number of aftermarket parts, such as a Cal Scale brake gear set, Smokey Valley coupler pockets with Kadee #78 “scale” couplers, Kadee ARA trucks with Kadee semi-scale wheelsets, and a Kadee Apex brake wheel, among other parts. When the build was complete I sandblasted the model to etch the surface and prepare it for painting.
Finishing
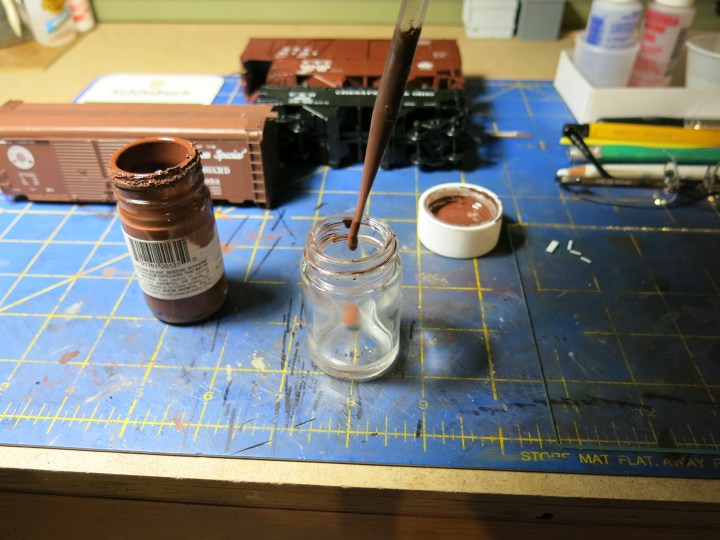
After sandblasting I painted the entire carbody, underframe and trucks with ScaleCoat 2 Box Car Red #1. I think this natural brown color best matches Seaboard’s freight car color circa 1949 or 1950. The shot below shows the painted car ready for decal application.
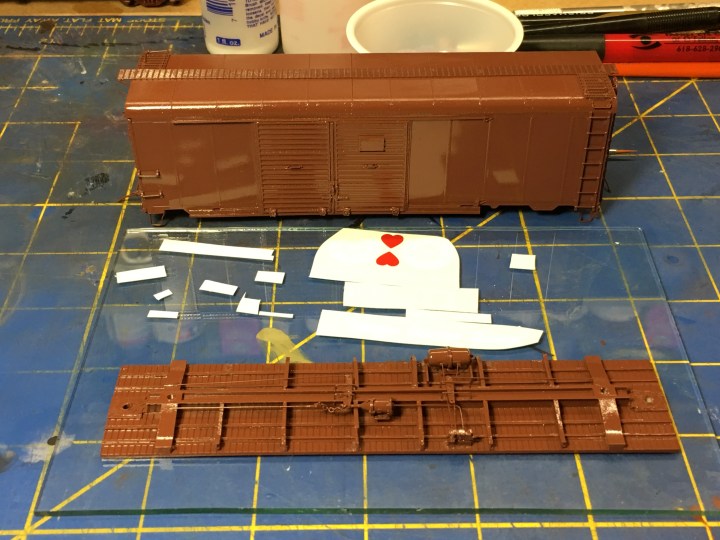
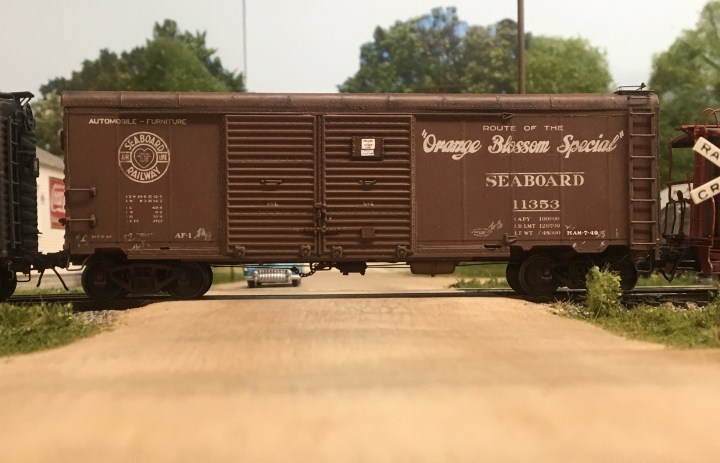
I used the outstanding Speedwitch SAL Box and Auto Cars decal set D103, SAL 40′ Steel Box & Auto Cars, found on the Speedwitch Media site at http://speedwitchmedia.com/. I applied them per the manufacturer’s instructions and used Microscale Decal Set to settle the decals down.
After the decals were dry I cleaned the car off with a soft, wet towel to get all the decal residue off the model, then I shot it with several light coats of Testors Dullcote. Testors Dullcote is my preferred dull coating solution, but I dilute it. I use about 40% Dullcote, 40% Glosscote, and 20% or more thinner. That keeps it thin, and not too flat.
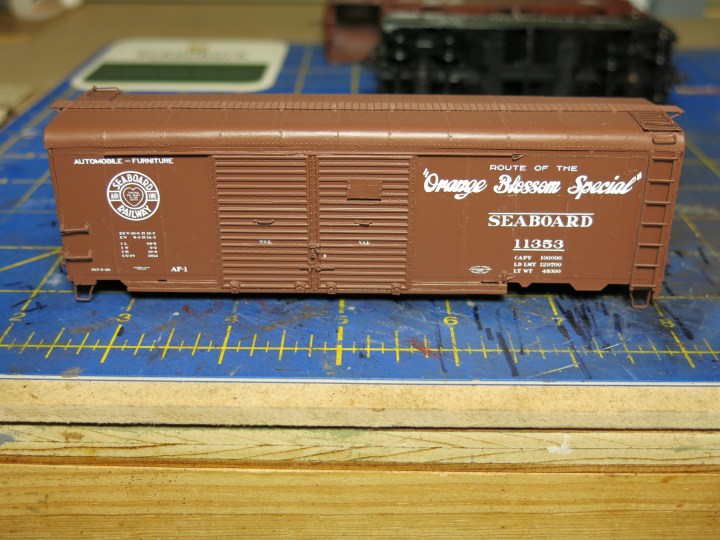
After a couple shots of Dullcote, I sprayed the car with a second Dullcote-Glosscote-Thinner mix with a few drops of the Scalecoat 2 Box Car Red added. This tends to kill any remaining decal gloss, hide decal ends, and blend all the car colors together nicely.
Below. Here’s the car after the last shot of Dullcote-Paint mix. Looks good.
I used Smokey Valley coupler pockets on this model. I fixed these to the underframe per the kit instructions. You can order these parts online at http://smokymountainmodelworks.com/HO_draft_gear+cplrs.html.
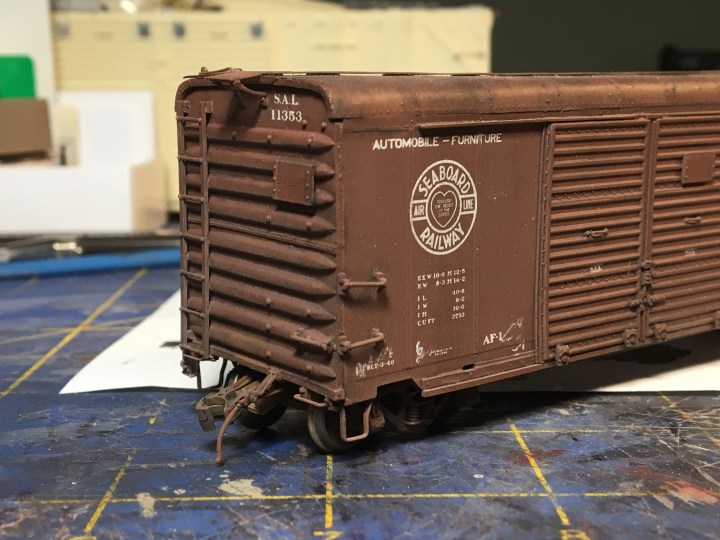
After applying the Dullcote I used a white artist’s pencil to apply a few chalk marks and scribblings, then sealed the finish again with another light shot of Dullcote. I also applied a little AIM Soot Black weathering powder to the roof, and sealed that again with another very light shot of Dullcote. Finally I sprayed the underframe, including the trucks and couplers, and the lower portion of the car sides and ends, with Testors Earth to simulate a little road grime.
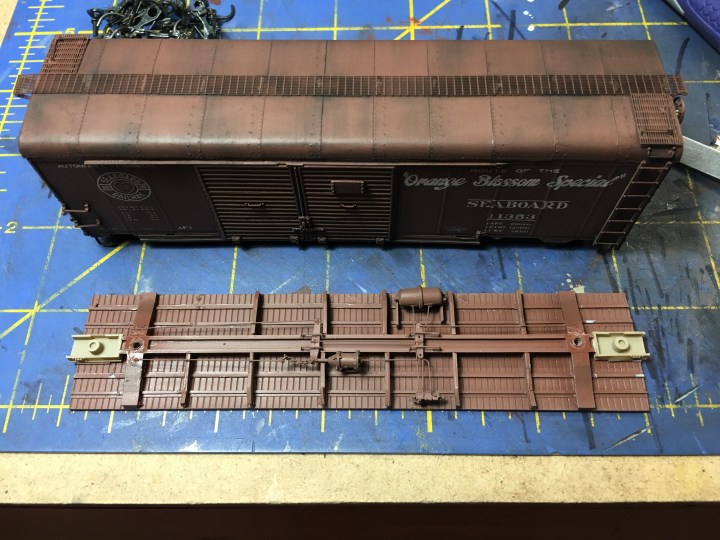
Below. Here’s one more view of the mostly-completed model before chalk marks and final lettering were added. Notice anything missing? I didn’t…
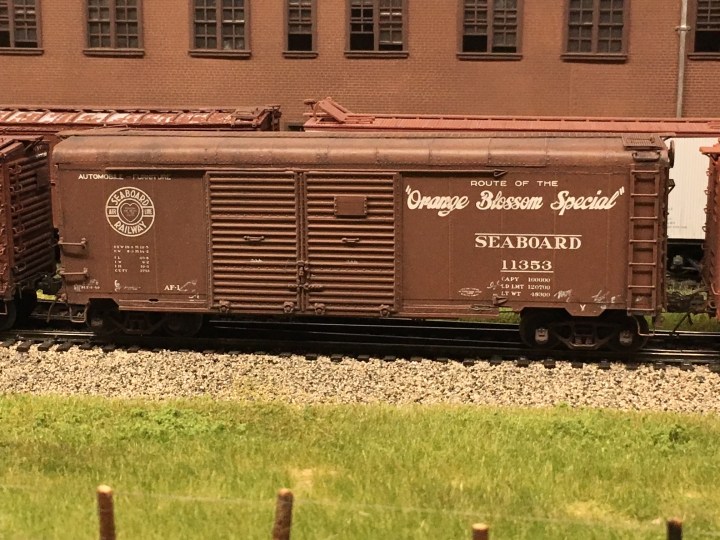
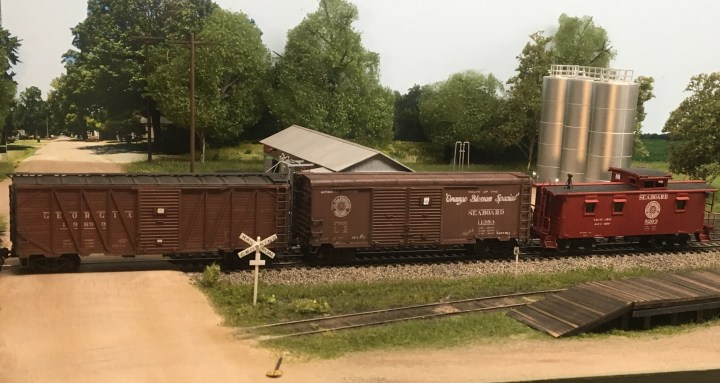
And finally, here’s an in-service photo that was taken back in June.
Smashed
I brought the model to display at the St. Louis RPM meet in July of this year. I wrapped up the model in foam sheet, like the stuff you get out of a computer box, and put that in a heavy cardboard box in my suitcase. The model made it to St. Louis in one piece, but on the trip back it got smashed. The ground crew on my jet must’ve previously worked for ACL. Anyway the underframe broke off and got smashed up inside the superstructure.
I was able to carefully pull the underframe back out of the car, clean up the edges of the underframe and interior edges of the superstructure, and then re-glue the floor into the car body. It took a couple of tries to get it perfectly placed. Also broken was one of the Smokey Valley draft gear boxes so I had to replace that too.
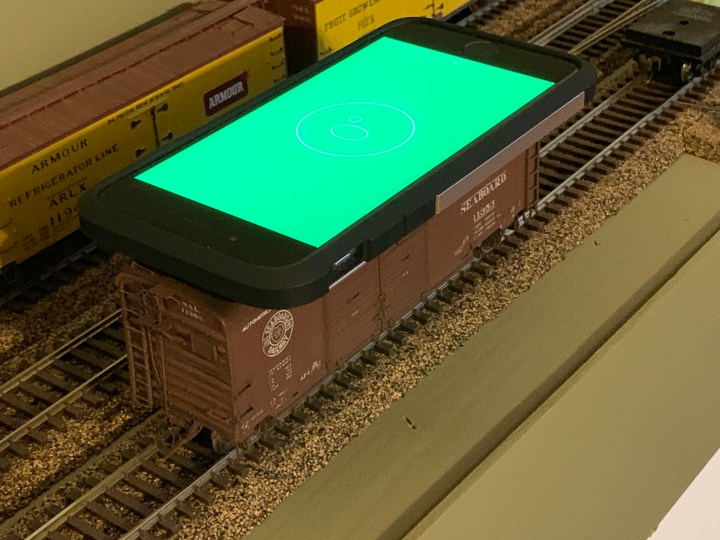
I tested the balance of the car in an unusual way. I used my iPhone “level” feature and placed it as flat as possible on top of the model. It’s not the most accurate way to check the side-to-side and front-to-back balancing, but it’s kinda fun.
I touched up all the new parts and cleaned up surfaces with the original paint, Scalecoat 2 Box Car Red #1, hit the newly-painted surfaces with a shot of Testors Dullcote, and then weathered them with AIM Weathering powders “Delta Dirt”. I reapplied the trucks and the model was ready for service.
The things I forgot to add in the original build were shop dates and a route card holder. I added those decals and parts, and added a few more chalk marks, and called it complete…again. Here are a few back-in-service photos with the Ackley layout dressed up in a southwest Georgia setting.
I hope you’re all enjoying a safe and wonderful December! – John G

Very nice John, very nice.
John
LikeLike
JOHN G! Any chance of utilizing a ‘37 AAR 10’ IH filing off the ends to replace with ends that were provided at the Chicagoland kit then utilize a turtle back roof from an X31… to make a copy of this. Also changing the sills and doors
LikeLike
What’s up, Roger! Yes, you can do that. The C&EI ends are pretty close and if they’re made to fit the 10-foot IH car you will be even closer. Use the roof from the Bowser non-inset model. The X31 roof is different but it’ll get you close. You might try making a one-piece body of this and having someone cast up a one-piece model for you. Are we talking HO or N??? John G
LikeLike