

I was looking at old photo sets the other day and went through a folder I shot on the CSX lines in western Illinois in 2004. The photo below was taken on the old B&O main track between Shattuc and Carlysle, about 30 miles east of where I lived in O’Fallon. I thought it was interesting because of the way the siding track was sunken into the ditch, and have always thought it would be interesting to model. The standing water, line poles and jointed rail add to the cool factor.

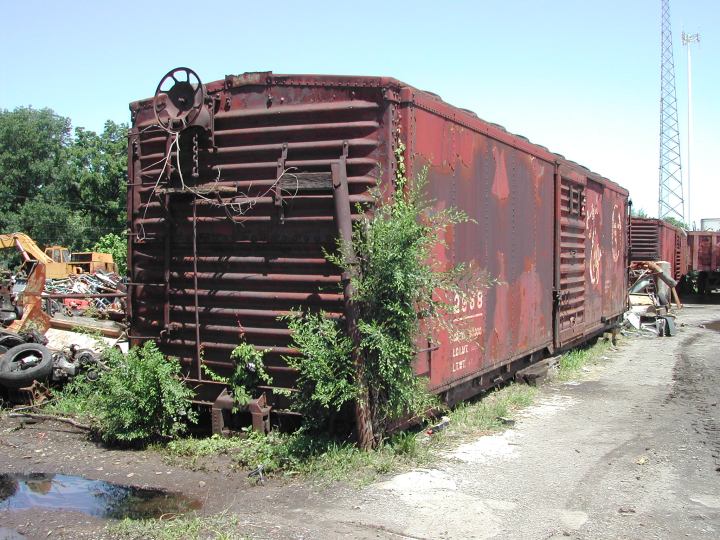
Nearby, in a junk yard in Centralia, there were a few grounded box cars that brought back memories of the old days.

These are former Missouri Pacific single-sheathed box cars, rebuilt in the early 1950s with steel sheathing and new doors and roofs. The car above still has the brake gear installed on the end. The car in the background below is similarly rebuilt, but has inverse ends. You never know what you’re going to find out there, so keep hunting!
Rebuilding the Bump Out
Last year, in Post #37, posted in March, 2017, I described adding something I called a “bump out” to provide a little extra room for industries in the aisle. That post can be found at https://wordpress.com/post/railroadprototypemodeler.wordpress.com/3171. I got the idea from Warner Clark’s Proto48 Nickel Plate layout.
Here’s where I started with the rebuilding project. This isn’t bad, but I wanted room for a second car spot (the real one had four or five spots) and therefore needed a deeper bump-out.

Below. Here’s the plan. Tighten the curve to 24-inch radius (that was the original plan anyway) and increase the depth of the bump-out another five or six inches to make room for another industry.

It took less than an hour to snip the rail, remove the supporting structure and then pop off the Styrodur sub-base. Cleaning up the mess took a lot longer.

Next, I soaked the track and roadbed in rubbing alcohol and removed it, along with a small portion of scenery on both sides of the track.

Below. After a lot of cleaning and shaping the subroadbed, I tested the new track alignment.
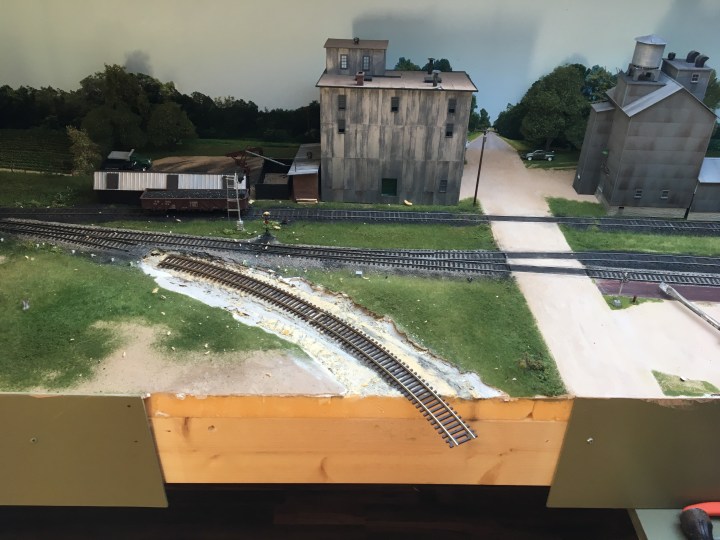
Below. I secured cork roadbed with a heavy, German glue that is close to adhesive caulk sold in the U.S. I used Micro Engineering Code 55 flex track. I cut all the ties apart from underneath and spread them out to better represent little-used spur track.

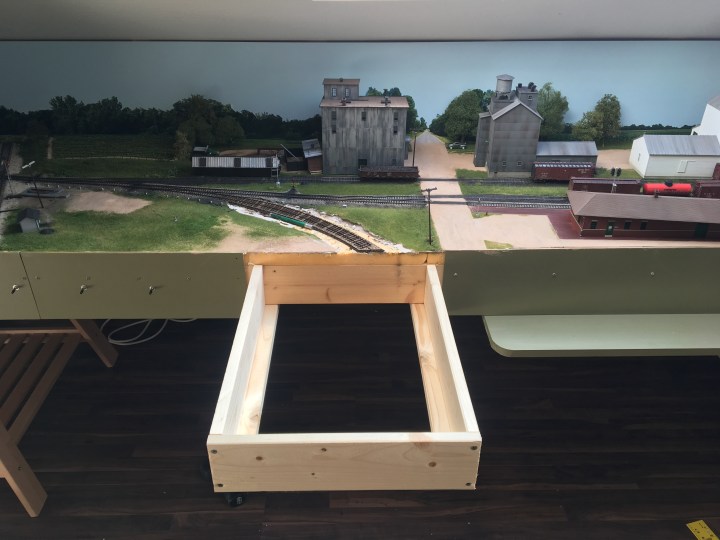
Once I had the roadbed and track alignment determined, I then built a frame for the new bump out. 1 x 4 pine boards were connected on the bottom of the layout and then a frame was built around those board at the front of the layout. All that is left to do now is install new Styrodur subroadbed, fascia, and then scenery material.
With the new piece of Styrodur in place, I can now finish laying the rest of the track. FInishing the fascia is a more time-consuming job—first I have to buy it, then cut it, then test-fit it, and then probably go get it cut again to get it exactly right. I use a wood shop that’s away from home to do all my heavy and/or precision cutting, and it takes time to go out there and get that work done. In the meantime I can finish laying the track and get the scenery going, which is a lot of fun.

Below. I glued the roadbed in place and pinned it into position with my wife’s sewing stickpins. As always I test-fit everything, and here the elevator is in position to check clearances. Yep, it’ll be tight, and I may have to install a small piece of plexiglass here to keep things from tumbling off the layout.

Below. With the track in place and painted, I laid down a thin coat of Hydrocal to form the scenery base.

I painted the scenery base…
…then wired the track, test-ran an engine on it, and then tested the building fit. I’m satisfied with everything so far.

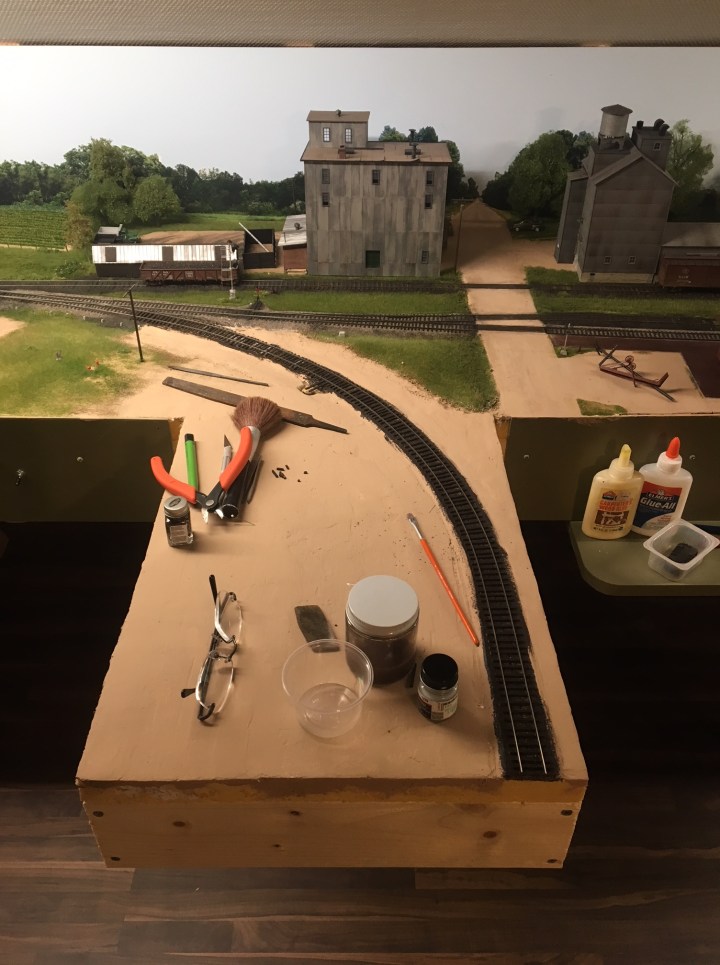
Next, below, I painted the ties with a variety of grays, tans and browns, mixed together on a palette and applied with lacquer thinner.

Then, below, I applied my special ballast made of screened dirt and cinders I collected from PRR roundhouse site in Richmond, Indiana. I laid it down and then soaked it with rubbing alcohol to knock off the surface tension, then secured the ballast with a mixture of 60% water, 25% rubbing alcohol, 15% Elmer’s white glue, and a few drops of dishwashing soap…give or take a few percents on each ingredient.

Finally, with the ballast dry, I put a building and a few cars down and ran a train by, and everything’s looking real nice. The new bump out fits two cars easily, and I can still easily reach around it. All this work was done in about 20-30 minutes every other day over about ten days.

Next up, scenery for the bump out. Well…maybe sometime in January, after I finish a few new freight cars.
Below…one more photo of the B&O lines, this one looking east somewhere in southern Indiana. How I miss you, B&O Lines! – John G

