

Remember slide film cameras?
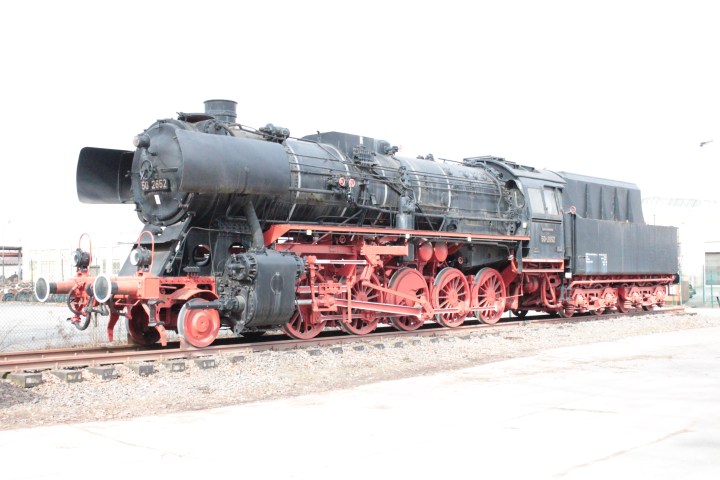
Last Saturday morning I drove over to Kaiserslautern to photograph a German 2-10-0 on display at the Kaiserslautern freight railroad shops. I have had a lot of trouble finding the right time of day to photograph the engine because it never seems to be lit properly. On Saturday the light was exceptional. I spent 20 minutes cleaning up all the garbage in front of the engine and then shot about 25 photos.
I used my new Canon digital SLR and tried shooting through the viewfinder for a change. I never bothered to check the settings on the camera. Turns out I had the camera set to manual for layout photography. The result: Everything I shot on that beautiful day is washed out. The experience reminded me of all the times I got back a box of slides that were poorly exposed. Had I been lazy and used the screen like a regular, lazy American–or Ami as they call us here–I would’ve caught the error right away. But no. Anyway here is the result:
Next to the locomotive are two “Winkelturm”, one of which is seen below. Again, this photo is washed out thanks to the incompetence of your photographer. Winkelturm are bomb shelters built by the Germans before and during WWII. The design is brilliant and virtually bomb-proof. A quick Google search will provide interesting history and details. Winkelturn were built around the country at key factory and railroad sites to protect workers, including shop workers here at Kaiserslautern. The freight yards here were attacked at least three times by 8th Air Force. This one is now being used as a rock-climbing wall–you can see the hand/foot-holds on the left side of the structure.

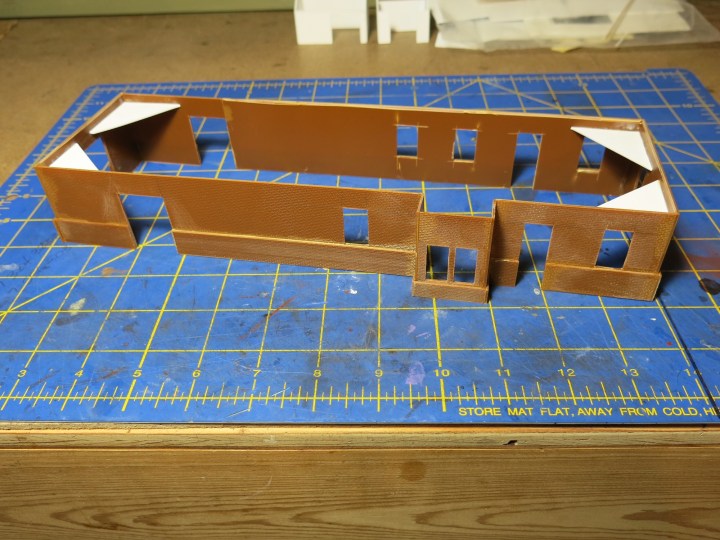
And now on to the Ackley Depot. Last we saw it looked like this:
The next step to construction was building the roof. A postcard view of the depot is below. The gigantic sign was not part of the real depot, or course. This view gives a good view of the type and pitch of the roof for modeling purposes.

Below. Here’s the first view of roof construction. I used the TLAR Method (That Looks About Right) to build a roof base, consulting photos all the way to try and get the right overhang dimensions. I used an average of three feet of overhang all the way around the structure and cut a piece of Evergreen .060 freight car siding .060 styrene to match. The freight car siding was placed down to simulate the wood-lined soffit (the finished underside of the eaves). Next I determined height of the ridge, which is the horizontal top line of the roof. I used six feet as my dimension. Then I determined the angle of the roof slopes on the end by TLAR-ing them as best I could using the photos. I then cut a piece of six-foot tall plastic to serve as foundation for the ridge, and then cut triangular slopes to meet the ridge. It sounds more complicated than it was, but I think I got pretty close to the prototype dimensions.


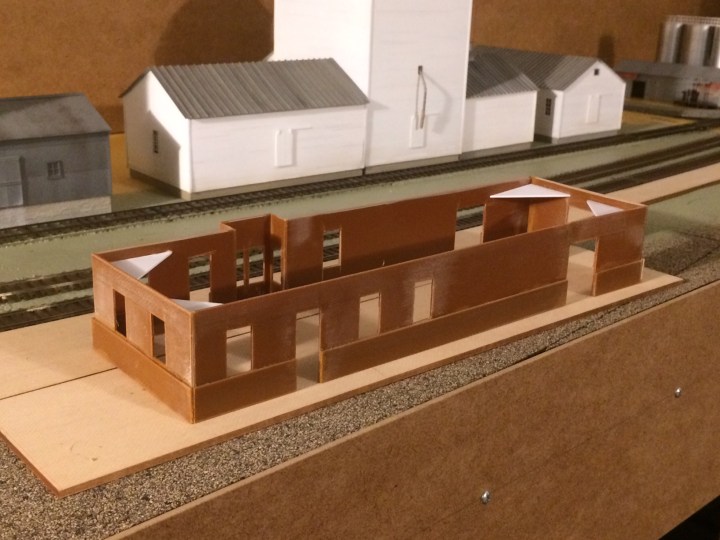
The above process was time-consuming and probably took three hours to get it right. Then, I covered up the sides of the roof with .060 plastic and cleaned up the joint as best I could. See below. This part went pretty fast.
And now, to test the roof on the structure. Not bad.
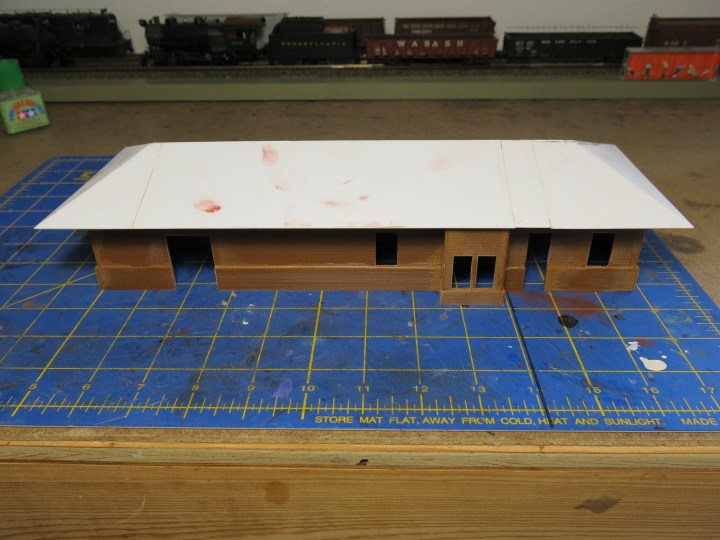
I ran out of plastic when completing the sides, which forced me to use numerous pieces of plastic for the roof instead of one continuous piece. Between the patches of plastic there were a few gaps that I felt might cause trouble later on. In the photo above, you might be able to see some of the gaps on the right side of the roof. Since styrene sheet is not readily available here, I covered the roof sides with a sheet of Evergreen .015 sheet that I had leftover from another project. That gave me a clean, uninterrupted surface upon which I can lay paper shingles. Here’s how it looked when I was done (apologies for the fuzziness):

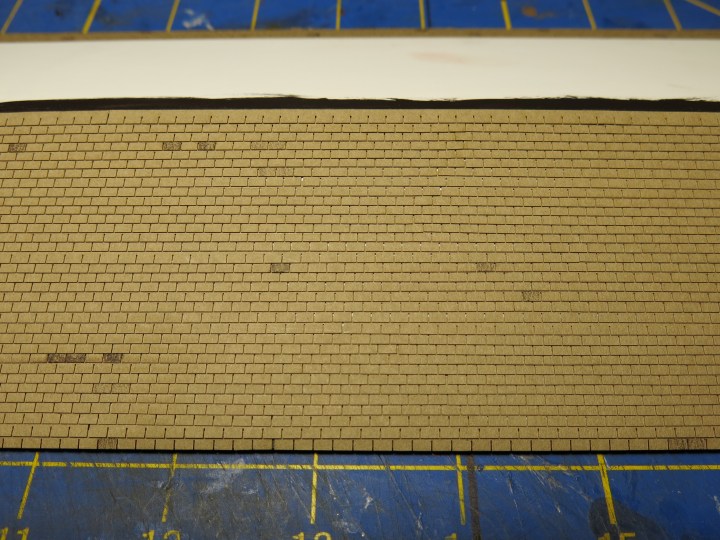
Next I laid down paper shingles. I used Asphalt shingles by Minuteman Scale Models. It’s an excellent product but I thought it was very expensive–about $12 US for each package (and I used three).

I have a little bit of experience using peel-and-stick these shingles from previous projects. In the Seaboard-Coast Line Modeler, issues 11 and 12, I scratchbuilt a Seaboard No. 2 Depot and used peel-and-stick shingles for that project. The roof was a little easier to shingle, except for the angles over the bay window.

For the Ackley depot I laid down the shingles in strips, one strip at a time, starting at the bottom of the sides. I drew lines on the roof in pencil to make sure I laid the shingles straight as I went up the roof. This is a long, tedious process and it took me about 45 minutes a night for about ten days to get it all done. I did the two sides of the roof first. The photo below shows the first side done. I tried coloring a few shingles here and there but I didn’t like the result. I used PrismaColor pencils to color the shingles–it just didn’t look right. Eventually I painted the shingles with Testors Russian Earth Brown and I thought that looked a little better.

Below. After one side was “done” I put the roof back on and checked the look.

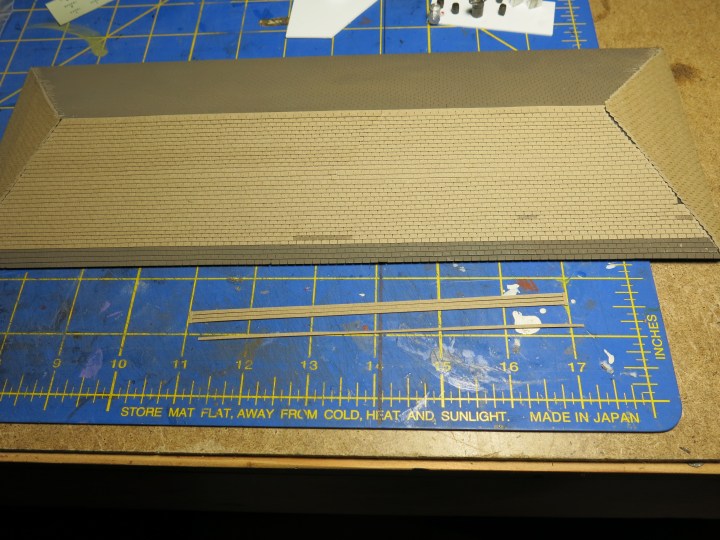
I got so excited during the shingling process that I forgot to take any in-progress photos. Below is a photo of both sides complete; I am adding the shingles on the end slopes. The slope on the right has been painted; the slope on the left has not.
Note that I laid the shingles right over the hips. When all the shingles were put down I just trimmed them off with a sharp single-edge razor. I painted the hips brown prior to shingling to make sure there was no white styrene showing through at the hip joint.

Finally, here is photo of the roof with the shingles complete and the hips trimmed in preparation for adding the flashing/covering along the hips.
Last, below, is installation of the ridge and hip seams. The Minuteman product does not include a good seam product, and I didn’t have any more peel-and-stick material available, so I took the advice of the Minuteman instructions and used .015 styrene for the job. I wish I didn’t. The styrene went on alright but if I screwed something up, there is no way to take it off. You can see the results below. The seams need to be filled and shaped to look “good”. I can do the job, but it is adding more time to the project.

Another in-progress photo below. The chimney is a Grandt Line product.
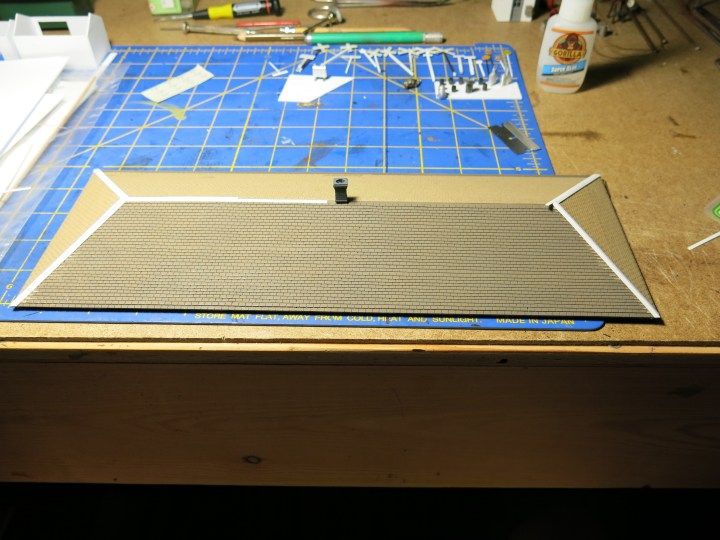
Here’s where I am today. The roof is done abut I need to work on the hip/ridge flashing. The flashing looks horrible and need a lot of work. I also need to install the chimney, and then paint the roof.

Hopefully once I paint the rest of the shingles and clean up and paint the flashing it’ll blend in a little more.

More to follow as I continue working next week. – John G

John,
Your depot looks great with the roof on it. One issue that I have run into in the past with large sheets of styrene is that they will sag if left unsupported. I have found that the styrene needs to be supported at least every inch if it is .040 thousandths or thicker and every 1/2 to 3/4 inch for thinner material. I provided a tutorial on how I construct these types of roofs in the Proto Layouts Yahoo Discussion Group under the files section. The folder is titled UIC Depots and there is a pdf file in the folder that describes the technic and shows how I run the support so I can use simple rectangular strips with no math involved. I have also used leftover scraps in place of full length strips. The key is to tie the vertical support to the roof and the base with no surface area larger than 1 square inch being left unsupported.
I would hate to see your roof start to sag. My suggestion would be to cut slots out of the underside of the base and then add vertical stiffeners. You could just cut a rectangular piece the length of the roof at the edge of the slot and glue it to the roof and the edge of the slot. You can then trim the bottom of the rectangular piece flush with the underside of the base. The slots can then be covered up with a sheet of styrene cut to fit the inside of the depot which will allow you to make the roof removable if you would like to.
Again the depot looks great. I am excited to see the finished product.
Thanks,
Shay Stark
LikeLike
That DB 2-10-0 was probably one of the few that was operating around “K-town” when I was stationed in Landstuhl in 72-74. Surprised that the 2 Winkelturm are still standing at this late a date.
Good work on the depot at Ackley. I believe I will finally get started on a couple depot projects, and will try the Minuteman shingles on both of them.
LikeLike