

Work on the railroad continues as the family is traveling in the U.S. for two weeks.
One of the industries I built this week for my Hermitage Road switching layout as a “grocery warehouse”. In the area of Richmond, Virginia, where my layout is set, there were quite a few grocery warehouses, and I wanted to include one on the layout so I could use refrigerator cars. There are no known photographs of the grocery warehouses in the Hermitage Yard area so I was forced to proto-freelance something.
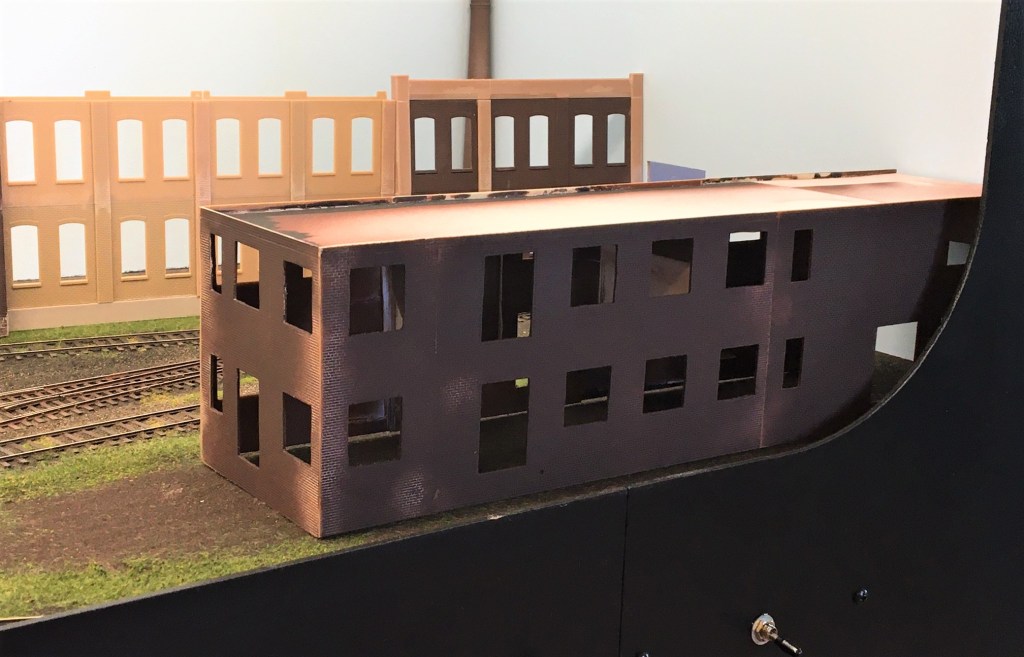
On my old Ackley, Iowa layout I built a large cannery as seen in the photo below. This week I took the building out of storage and took it apart, cleaned and repainted everything, and then reconfigured the walls into a much smaller building that fits in the corner of the new layout.
Below. A view of the Marshall Canning on my Ackley Layout. The building was 36-inches long.

Below. The new grocery warehouse on the Hermitage Road layout. On the right side of the layout, the track runs behind the building; I intend to build a loading dock that extends past the end of the building on the left. The windows are ready to go–all I need is time to paint and weather the building.
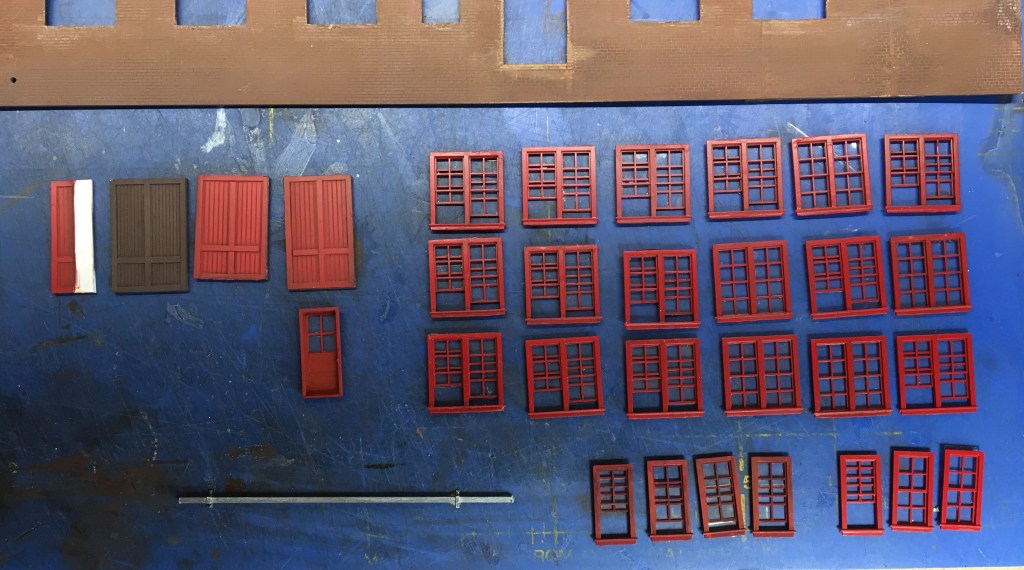
Here are the old doors and windows from Marshall Canning. The windows and personnel doors are from Tichy, and the loading dock doors are scratchbuilt using scribed styrene and strip styrene. I think the building will look nice with a medium-brown brick with red trim. The large Sitterding mill behind the grocery warehouse will have green trim to keep all the buildings from looking alike.
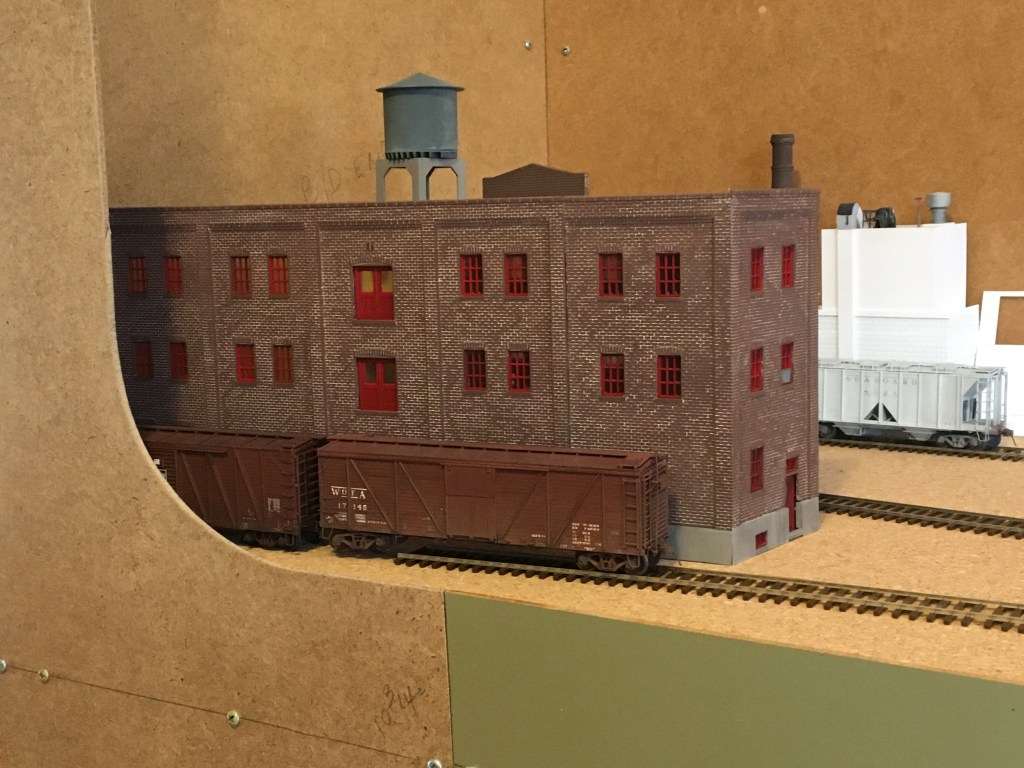
Below. Believe it or not, I have already built two grocery warehouse models for the Hermitage Road layout. Here’s the first one I built, using a Walthers Cornerstone building I had on hand. On this side of the layout, the track runs in front of the building to simulate that it continues to other industries. This structure was built to fit behind the track. With the track in front, I get to enjoy seeing my freight cars a little more.
I used Robert’s Brick Mortar on the building and I think it came out really nice. Alas, I thought this building was too tall, and took over the scene, so it has been removed and is stored away. The Southern Fuel and Oil Co. will go in this spot instead.
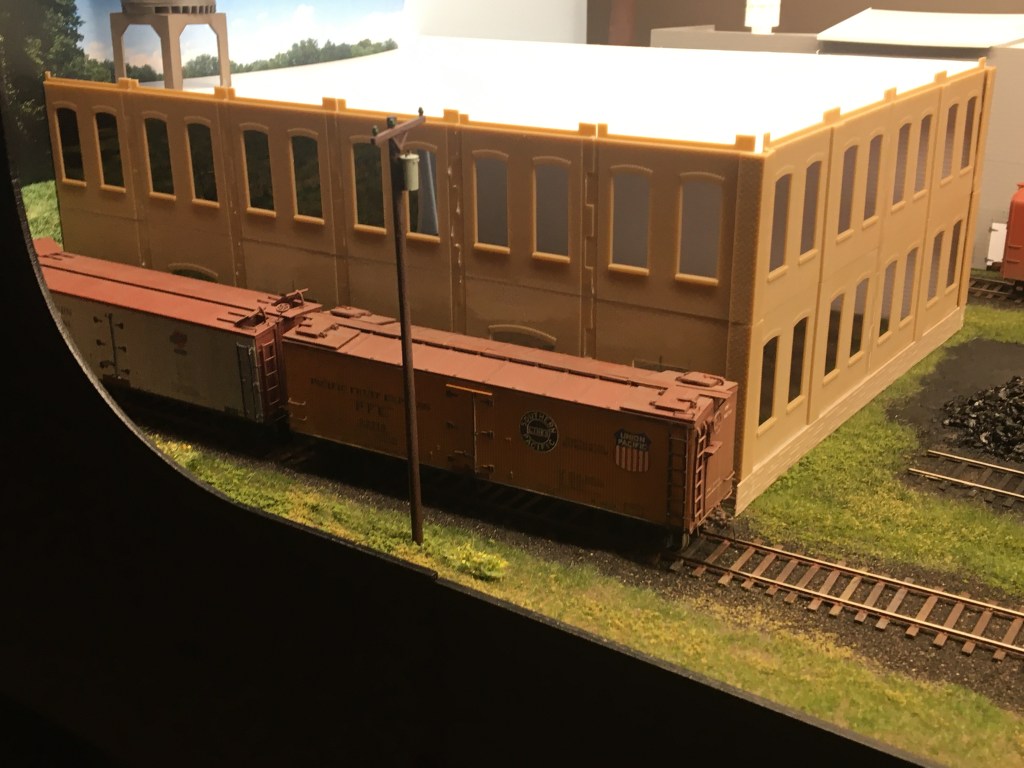
This spring I built a second grocery warehouse using Walthers Modulars. This version was only two stories tall so it was less imposing, but after I completed it, I felt it was too big and too deep. It just didn’t scratch the itch. I wanted to use Walthers Modulars for the Sitterding building, so I dismantled this one and have reassembled in into the current Sitterding building which was shown in the last post.
The Southern Fuel and Oil Co. will go in this spot instead.
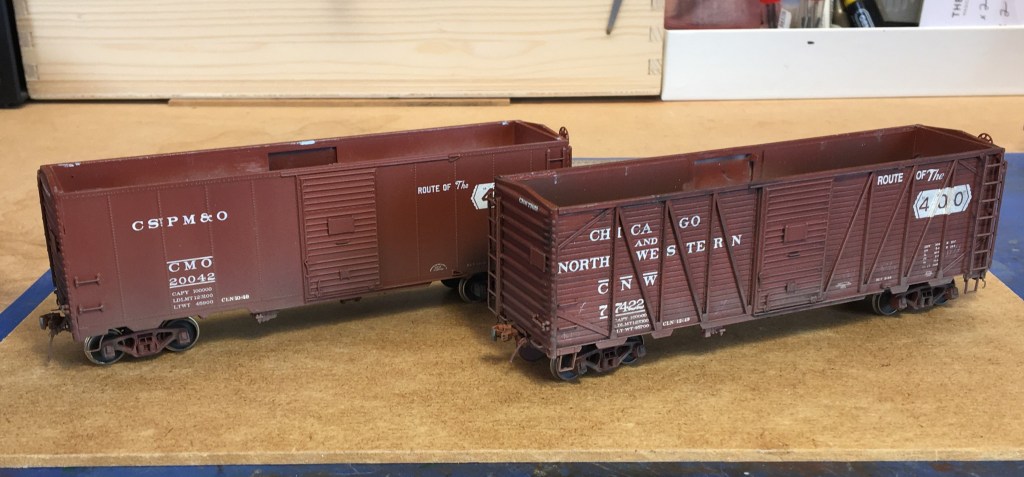
Meanwhile, work continues on freight cars. These are two favorites, below, but I haven’t used them on the layout yet because I was unhappy with my roof weathering efforts. The model on the left is an Intermountain 1937 Modified car, and the model on the right is an Intermountain “War Emergency” box car. Both these models were built and painted about 6-7 years ago.
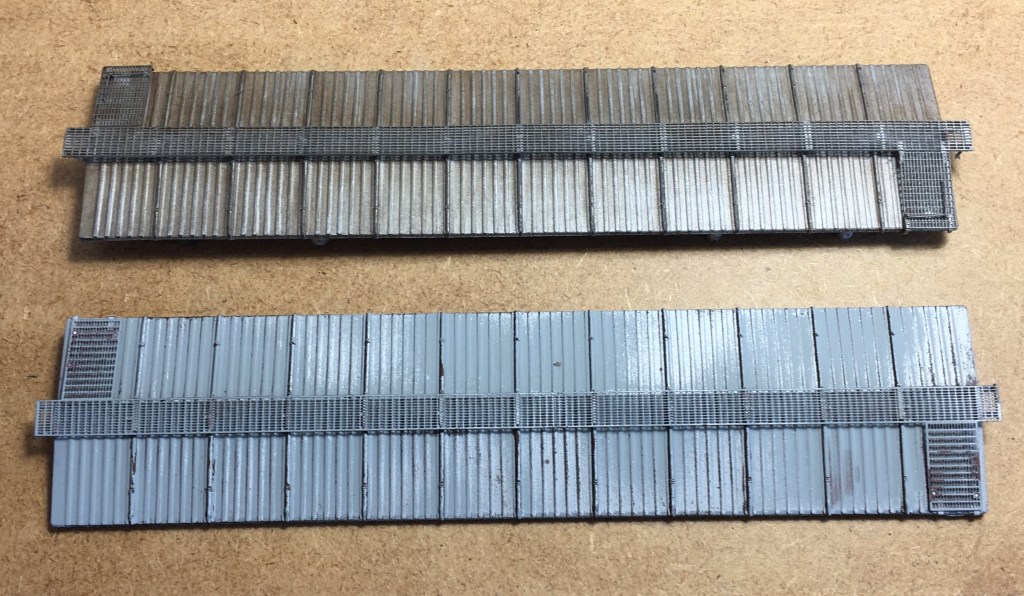
Below. Here are the roofs. When I built these models, my research indicated that Viking roofs on CMO and C&NW cars were galvanized with paint on the seams caps. I painted the roofs on both cars like the one on top; with silver, and black or red seam caps.
Why didn’t I like these roofs? In the first place, galvanized metal doesn’t really look silver. It’s more gray, so I wasn’t happy with the finish. In the second place, I recently talked to Ed Hawkins and he said that ACF documents indicate that roofs on both of these cars were painted the same color as the carbody. Below, I’ve sandblasted one of the roofs and will blast the other this weekend, and repaint them soon. The roof on top, incidentally, has a Kadee running board and the roof on bottom has a Plano metal running board.
Y’know…after sandblasting…the one of the bottom looks pretty good just like it is, doesn’t it?
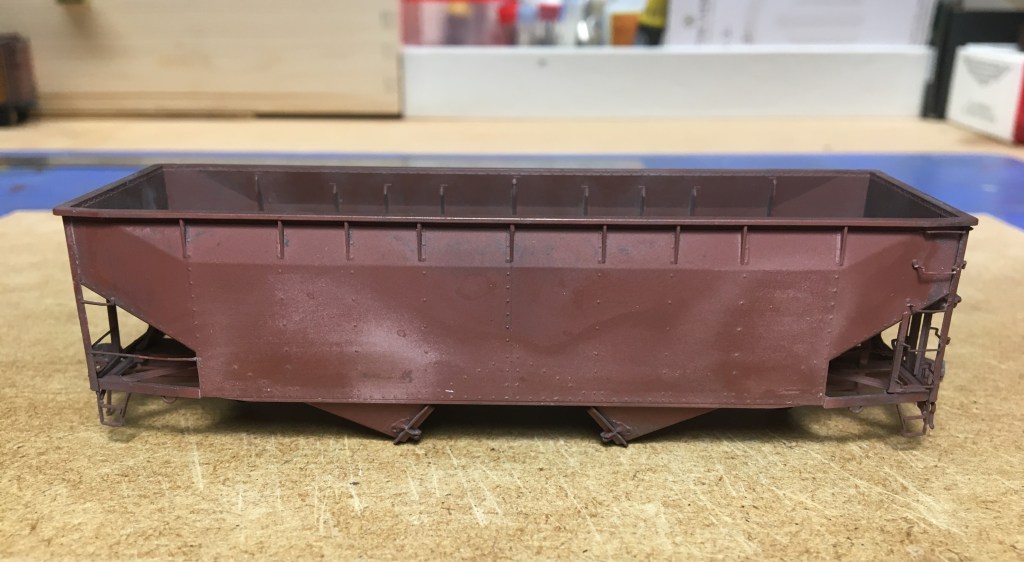
While I was sandblasting, I put an old Kadee hopper in the booth and blasted the paint off it as well. Earlier this week I ordered a Missouri Pacific detail set from Resin Car Works, and I’ll use that to rebuild and repaint this car. I will model one of the MoPac cars with the horizontal seam on the sides.
From the Resin Car Works site, below. The model I’m interested in is on the right:
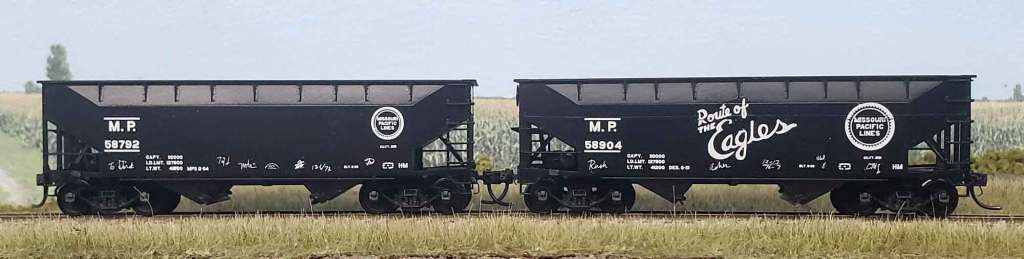
The link for the MoPac decal and detail set can be found at http://resincarworks.com/decals_parts.htm.
Also in progress is this new build, a CB&Q 50-foot steel box car using the Proto 2000 model. I got a couple of kits from my friend Greg Silva. I’m using a printout from a Ted Culotta presentation to help me get the details right.
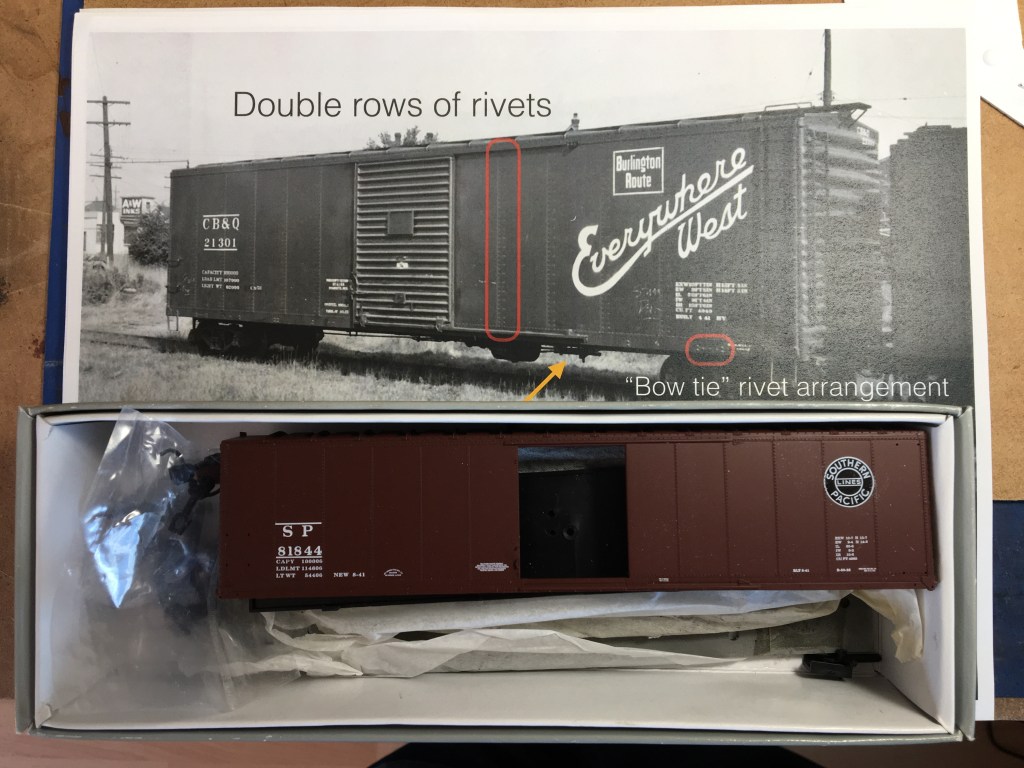
Car construction consumed a couple of evenings this week. One of the hardest jobs was installing Kadee bracket grab irons on the car sides. I used the template from Yarmouth Model Works. Getting the template in the right place isn’t easy. Once the template is in place, I drill the holes and then remove the template. Then I have to enlarge the holes to fit the mounting tabs on the back of the grabs. I use canopy glue to affix the parts, and when it’s dry I go over the whole area with Tamiya liquid cement to melt everything together. Then I sandblast it so the Kadee parts will accept paint. It’s a lot of work but the parts look great.

Here’s the workbench during construction of the new Q car. I cut out all the parts, and build the subassemblies, and then assemble the car when all the subcomponents are ready. There’s a whole lot of after-market parts on this table–from Yarmouth, Hi-Tech, Detail Associates, Cal Scale…the list goes on. No wonder I don’t have any money!
You can see another car there on the right. That’s an Intermountain 1937 Modified car kit that I’m finishing right behind the Q car. That’s Missouri Pacific 1937 Modified car and I’m using the awesome National Car Company mini-kit for that build. I’ll talk about it next time…

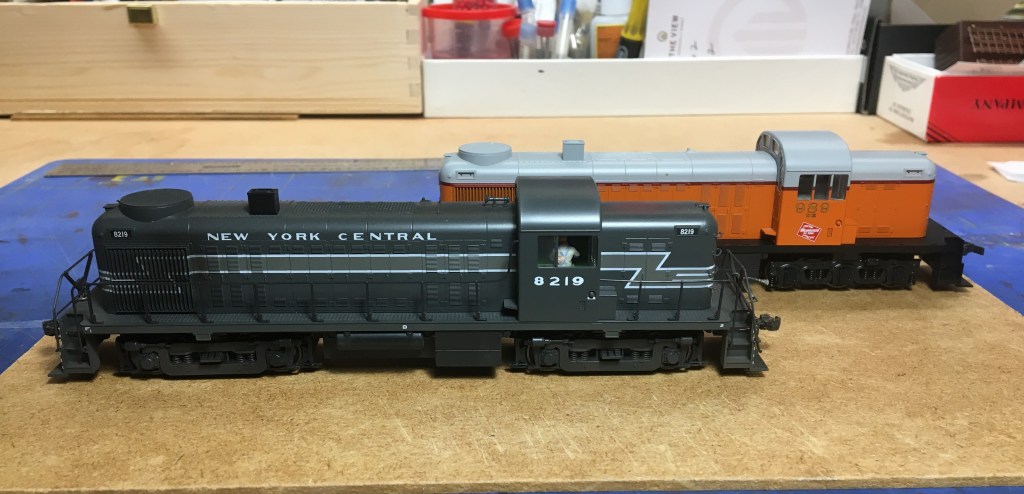
The last thing I did this week was swap components from two Kato engines to convert my Milwaukee Road DC RSC-2 to sound/DCC.
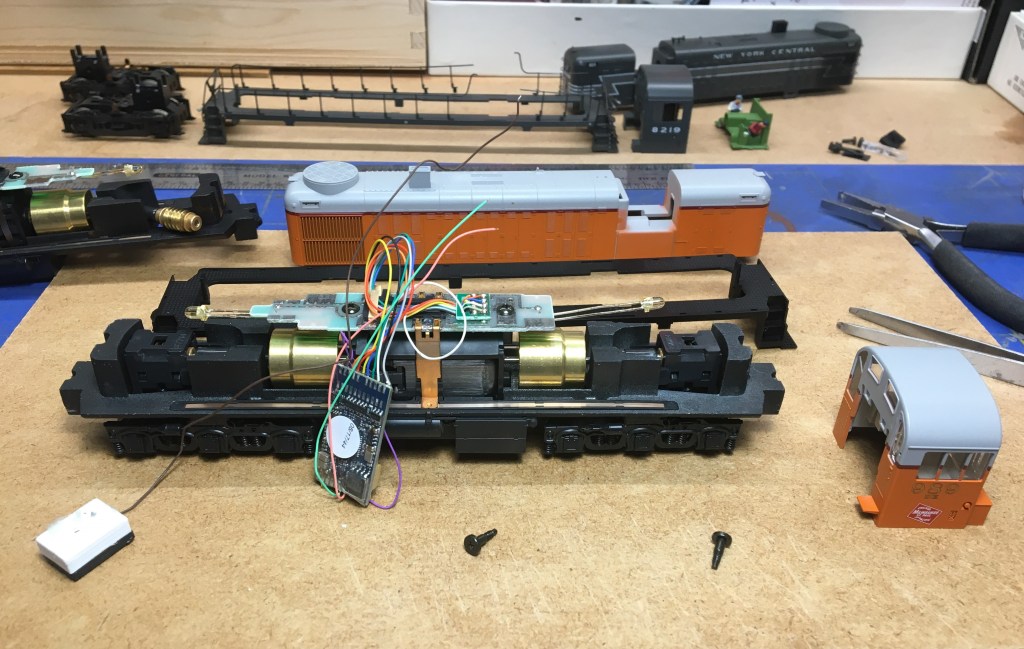
I took apart my NYC RS-2, equipped with a SoundTraxx sound/DCC setup, swapped the trucks, and married the sound/DCC underframe with the RSC-2. I felt kinda like Dr. Frankenstein doing this–taking an engine without a brain and swapping it for one with a brain.
Here are the victims in the lab. Body parts all over the place!
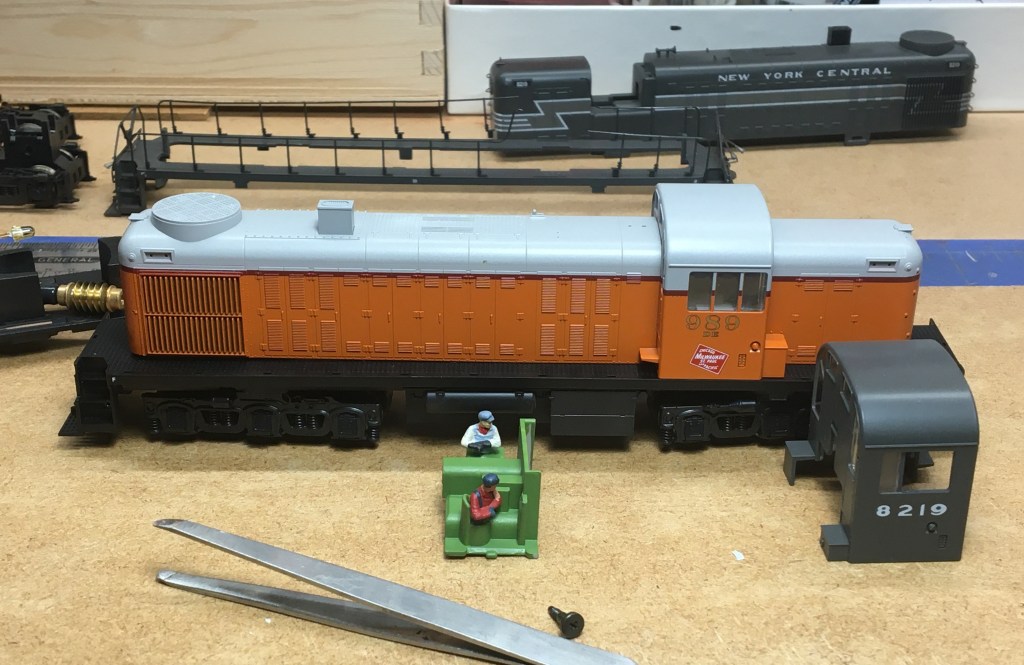
After an hours’ worth of work, I had a sound/DCC-equipped RSC-2. I still have some work to do on the cab–it needs a crew and open windows, and I also need to replace a few grabs and lift rings.
The next night I put the NYC RS-2 back together and sold it on eBay for cheap. No need to keep too much stuff around the house.
Work continues this weekend, as I paint freight cars, finish the traverse table, and continue structure work. Only 36 hours are left…gotta work hard tonight! – John G

Great modeling, John. I can hardly wait until you retire and move somewhere where you can build a larger layout. It will be spectacular!
LikeLike