

Work continues while the family is away!
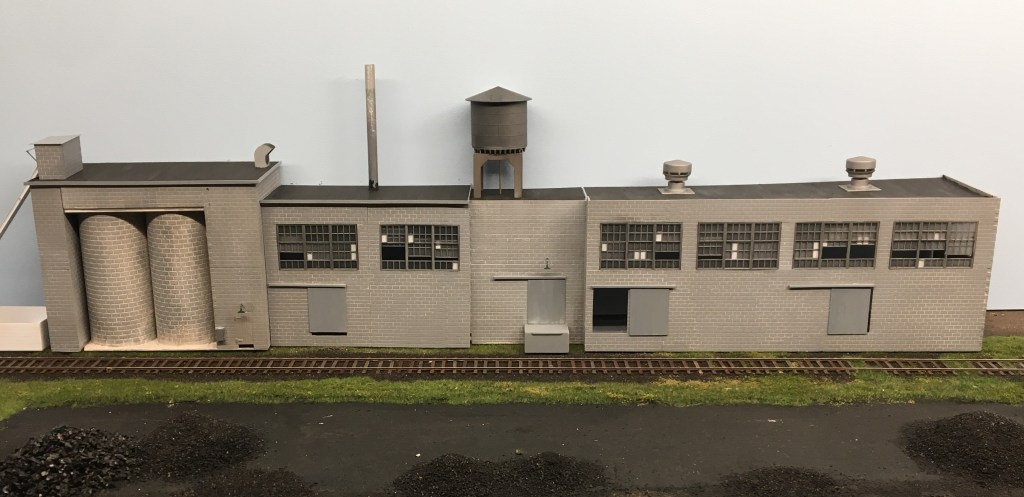
When I last showed the Richmond Cinder Block Company, it needed windows. The windows I used, seen below, are from Tichy. I painted them with a Tamiya Metal Gray and then added clear styrene sheet windows and fixed them with canopy glue. Once the glue was dry I then sprayed the whole assembly front and back with full strength Dullcote. I painted in a few window panes white to simulate broken glass repair.
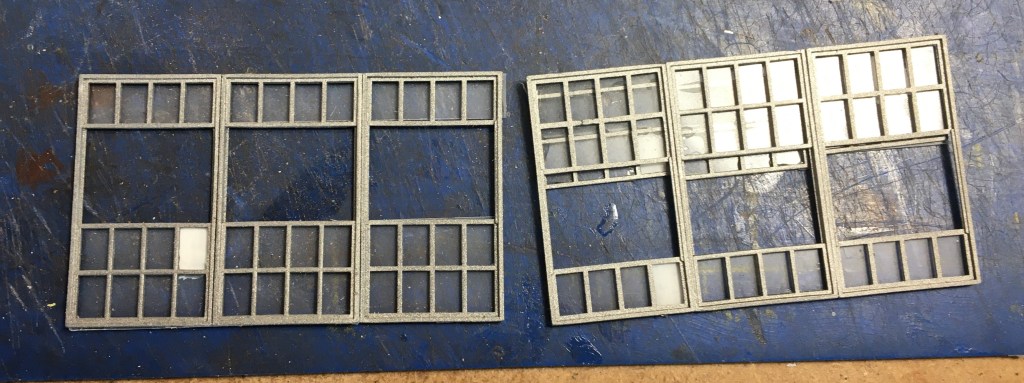
Next I added the windows to the structure, gluing them in place from behind with Tamiya extra thick liquid solvent. I randomly left a few windows open and closed to add a little interest. Next: Paint the sand bin and the mechanical buildings, paint the stack, and add some detail to the conveyor. I also bought a few packages of Funaro & Camerlengo cinder blocks and will put them around the open doors. I guess I’ll need to weather the track appropriately too.
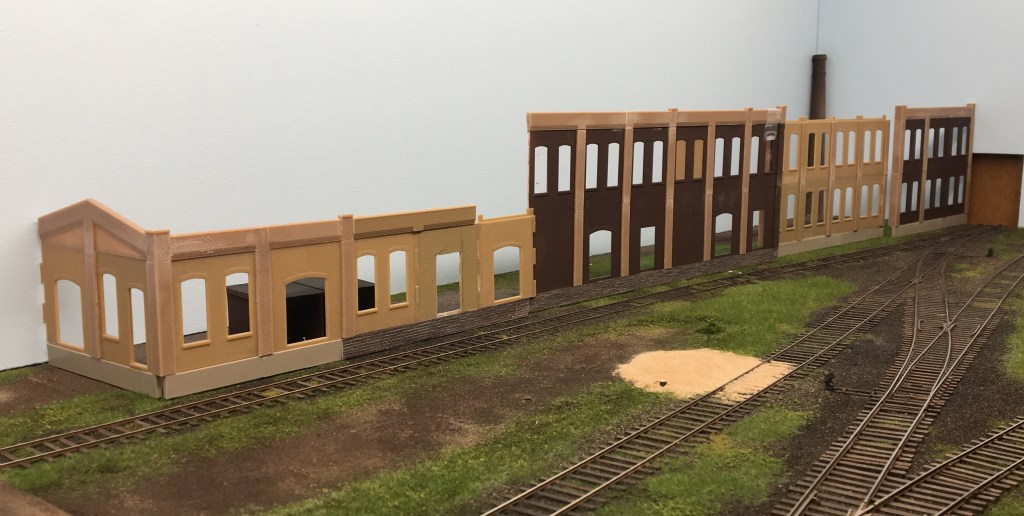
To the right of the cinder block plant is the large Sitterding-Carneal-Davis Construction Company mill. I’m using Walthers Modulars for my building; the real one didn’t look much like this as far as I know. I’ll write much more on Sitterding this week as I get going full-speed on construction.
Speaking of new tools…
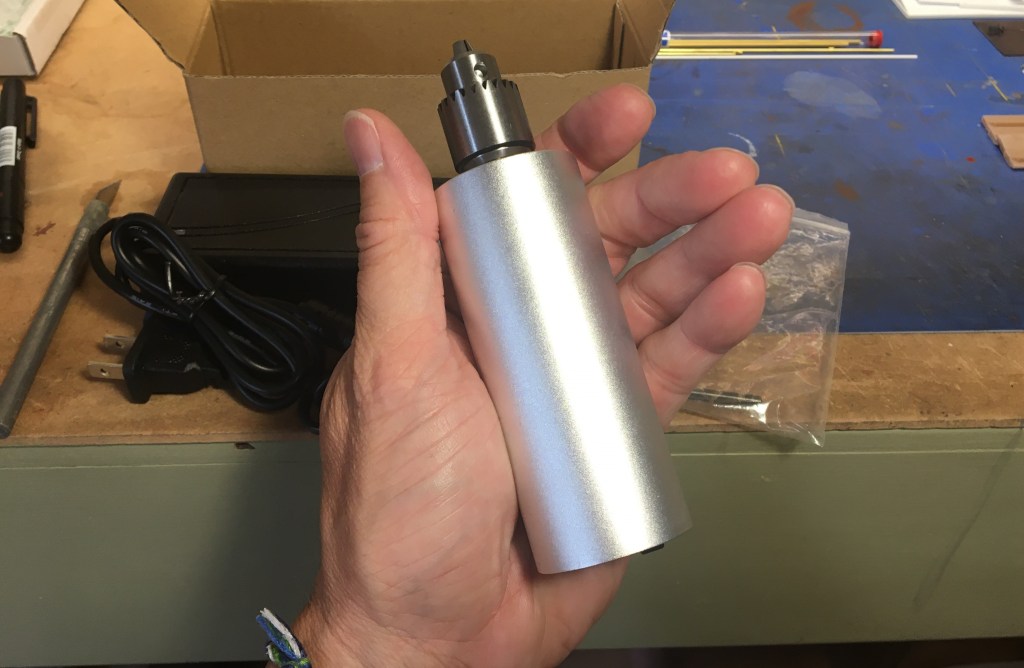
I’ve been using a small, battery-operated Dremel tool for precision drilling for over ten years. The problem is it spins too fast—5,000 rpm minimum—and that’s too fast for drilling plastic and resin. It never spun quite true either. I’ve been looking at cheap Chinese drills on Amazon for a long while, and back in June I just bought one. Here’s the one I got:

This drill was imported by ____. It has a U.S. plug and runs on 110 volts, and includes a little speed adjustment rheostat. The whole outfit was 35 bucks. The drill is big, and heavier than I expected, but it’s solid. I’ve been using it all week and it’s working great. The rheostat works great and I can dial the rpm to match the material. It is super-quiet too. Most importantly, the thing spins true-to-center—NO wobble. It works great with .078 bits. I highly recommend it. If you buy one, tell China I sent you.
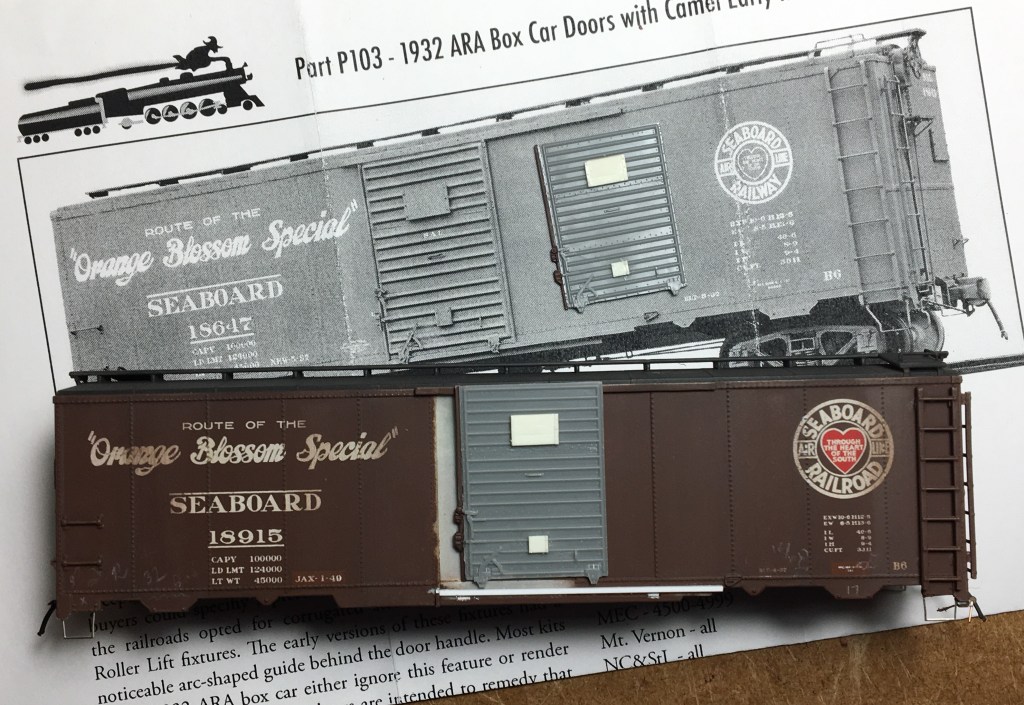
Below. Back to freight cars. Here’s a project I’ve been putting off for years. Around 2009 I built and painted this Atlas 1932 ARA car for an SCL Modeler article. In the original article I assessed the model as excellent, but I wrote that the doors were “horrible”.
Not long after that article was published online, Ted Culotta at Speedwitch introduced a beautiful set of doors to upgrade the Atlas model. I bought a set in 2014 but never took the time to install them…until now.

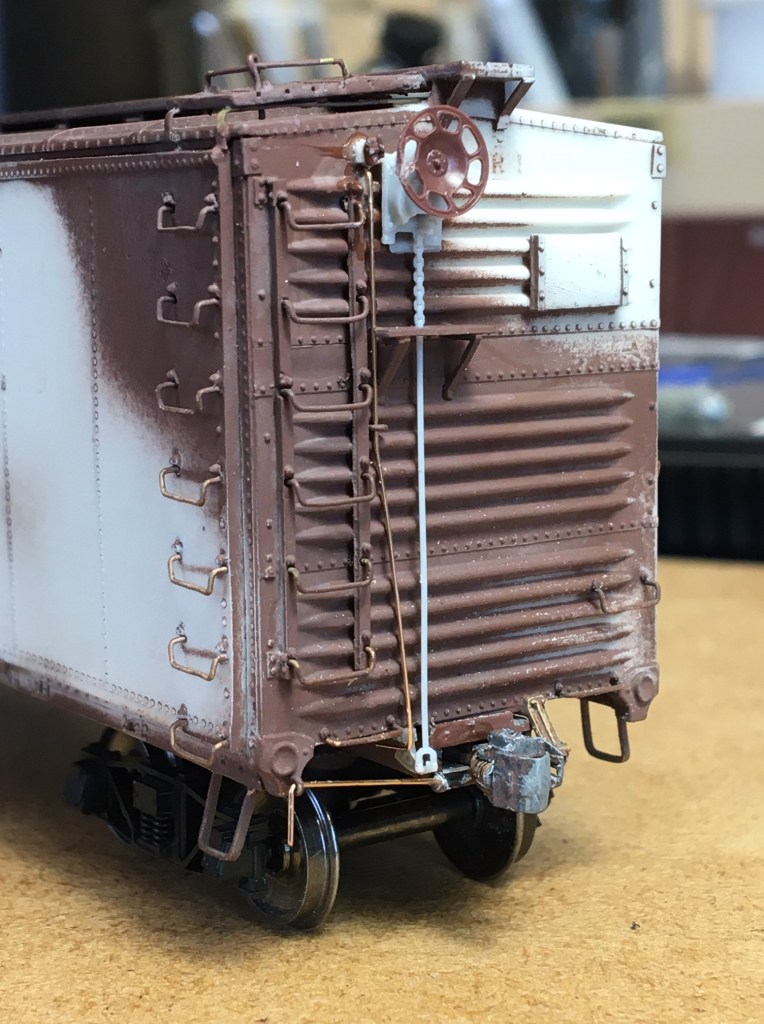
I began the upgrade by removing the Atlas doors, which was a lot more complicated than I expected. I had to pry the original doors off in pieces and then trim down the press-fit tabs on the car sides so the new doors would fit. Worse, the Atlas door includes door-opening hardware that would be normally be attached to the car side. So I had to trim the door-opening hardware off the Atlas door and secure it to the Speedwitch door to retain all the appropriate detail.
See the photo below–the door on the left came straight off the car. The door at the center has had the detail strip removed off the left side of the door. The Speedwitch replacement door is at the right, with the detail strip added.

Below. A close-up view. I carefully removed the door-opening strip from the Atlas door and then glued it to the Speedwitch door using Tamiya liquid cement. After everything was dry I sanded around completed door casting to make sure everything was square.

To make things even more fun…the Speedwitch door is shorter in height than the Atlas door. That meant I had to adjust the position of the bottom door track to make the door fit. I removed the original bottom door track and replaced it with a piece of Evergreen styrene, filled the attachment holes for the original door track, and then hand-painted all the new parts on the car. The doors will be airbrushed later this week.
I added a few more parts to the SAL car, like new uncoupling devices (Tichy .0125 brass wire), new stirrups (from Yarmouth), and tack boards from National Scale Car Co. I used Atlas ARA truck previously, but I ordered a pair of Tahoe Model Works Buckeye as they are close to the prototype and the level of detail is much better than the Atlas trucks.
I may have mentioned that I traded Tangent Scale Models 40 bucks for a bunch of spare parts. Here are the parts bags I got. They’re quite nice and everything is easy-to-glue plastic, not the slippery, impossible-to-glue acetyl stuff that Kadee uses.

Here’s one of the new brake wheel housings, added to that Sunshine Rock Island single-sheathed box car I mentioned last time. Looks good!
And finally, I finished and sent Eric Reinert’s last car to him. This was a pretty standard build, only I took the time to add rivets on the side panels per the prototype. I used Archer rivets and they practically disappeared after paint and lettering and weathering. In this view, before Dullcote and weathering, the added row of rivets can be seen on the right side of the car.
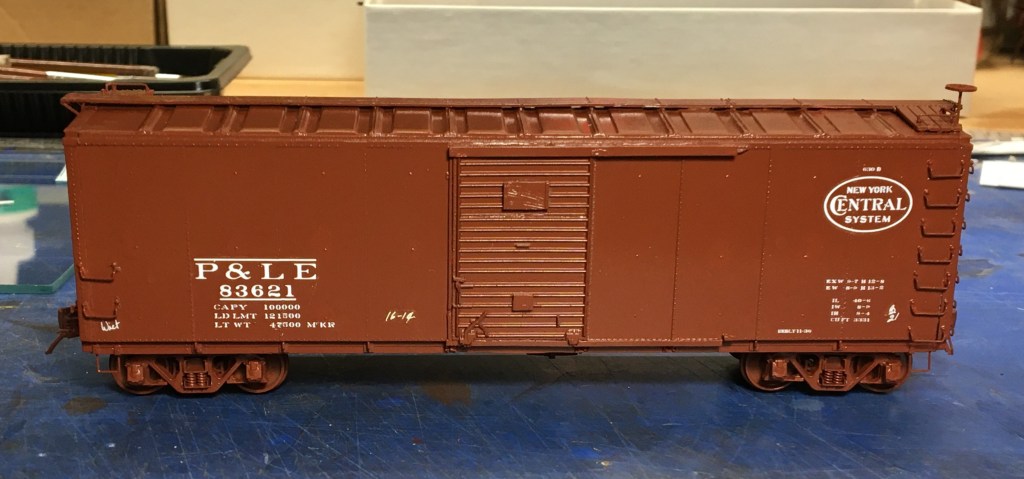
After Dullcote and a month’s-worth of weathering, here’s the final version I sent to Eric. I think I over-did it and I wasn’t happy with the final product, but Eric e-mailed and said he was delighted. I added just about all the modern features to this car–Yarmouth sill steps, Tahoe trucks with semi-scale wheelsets, Hi-Tech air hoses (which are getting awfully hard to find) and plenty of wire details all around. I used the Speedwitch detail set of course. Roof weathering was done with AIM powders.

Tonight I got to work on two new builds–a CB&Q 50-foot steel box car (Proto 2000)–inspired by a Ted Culotta lecture–and a MoPac 1937 Modified box car using the National Scale Car parts. More to follow next time.
John G

Great looking industry John.
LikeLike