

At the beginning of August, my family traveled away and left me at home alone for a while. After a very busy and very social summer, and a summer full of travel, I have the first 16 days of August to myself to catch up on some modeling work. This is the first of hopefully several posts on what’s happening during these 16 days.
Below. Last week I took my son to Radovljica, near Lake Bled, and spent three days with him hiking and swimming. We hiked to this mountain hut at the foot of Mt. Triglev, which is seen in the background. Triglev is only 9,300 feet but the climb is very difficult with a lot of Via Ferrata near the top. He and some friends will climb Triglev later this week.

Before I get to this week’s modeling work I’d like to commend Lonnie Bathurst, Jeff Kuebler and the St. Louis RPM team for a fantastic meet in Collinsville, Illinois last weekend. 750 modelers and historians attended, breaking all of our previous attendance records. I helped, spending five or six months soliciting vendors and historical societies, gathering and organizing clinicians, and laying out the room arrangement. Lonnie and Jeff in particular did the lion’s share of the work organizing and making sure everything went great on “Game Day” as we call it. The meet went well and I think the record attendance was partly because we went to great lengths to host a live event and didn’t let anybody’s covid fears wreck the party.
Here’s a photo of last week’s fun from Ron Christensen.

I wasn’t there to take photos but hopefully Lonnie and the team will post photos soon. Our official Flickr photo site is at St. Louis Railroad Prototype Modelers’s albums | Flickr and you can find photos of all our other events there. Meanwhile, Eric Hansmann has started a thread on the Model Railroad Hobbyist forum to encourage sharing of images. A few have appeared and maybe more will post today. That site is at https://model-railroad-hobbyist.com/node/43187.
Meanwhile, here in Germany, the short list of work for “16 Days” includes finishing structures for the Hermitage Road layout, working on and finishing locomotives and freight cars, and finishing and fitting the traversing table so operations can resume.
Among the structures I’m working on this week is the Richmond Cinder Block Co., which was located behind the SAL’s Hermitage Yard in North Richmond. I don’t have any prototype photos of the plant, but I do have a Sanborn image as seen below. I wanted to model Richmond Cinder Block because of the variety of inbound loads a cinder block plant can generate, among them hoppers and gondolas with sand, covered hoppers with cement, and box cars for both inbound and outbound loads.
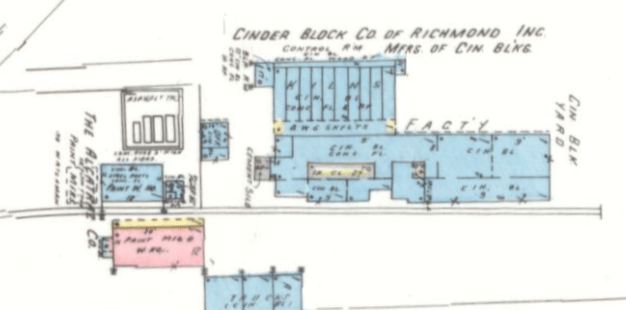
Sorry for the fuzzy image!
Here was my first rendition, below. I started building the model before the track was even put down on the layout. I used Pikestuff block for the bins at the left, but used Plastruct cinder block sheet, which is very thin, on the main building instead.
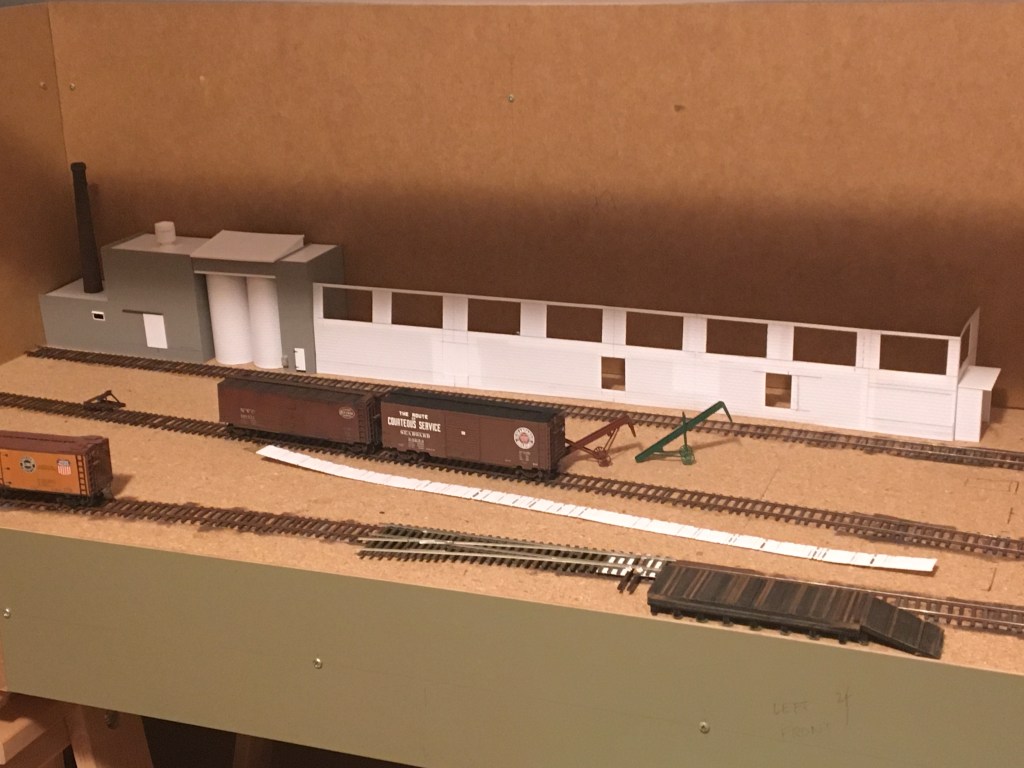
The building above just didn’t scratch the itch. First, the plastruct material was entirely too thin, and required a lot of styrene reinforcement. Second, I got to thinking that a cinder block company really doesn’t ship out too many loads of completed blocks. More research confirmed this–most cinder block manufacturers ship locally, so a plant like this wouldn’t necessarily generate a lot of outbound box car loads.

I cut up the remaining parts of the original plant and repositioned the parts in various configurations to see what “looked right”. Below, things are taking shape. The Hermitage Coal Co. is at the front.
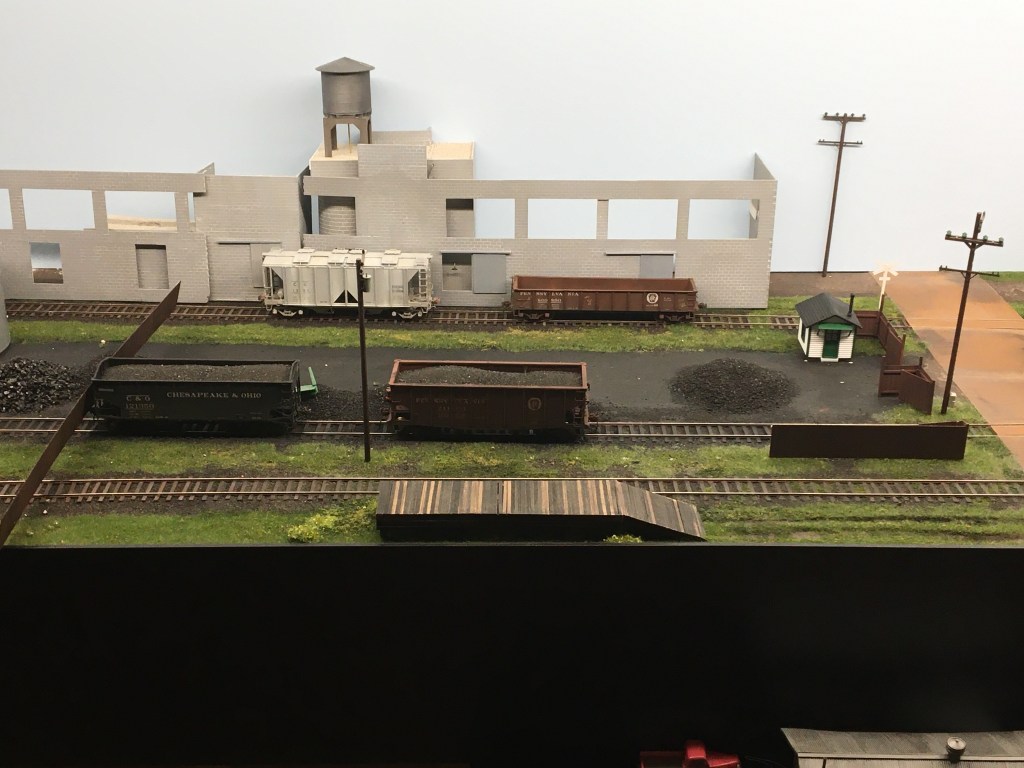
Here’s where we are at the end of this morning’s building rush. I added roofs (again, using different roof lines), windows, doors, and other details. Adding the roofs took a long time and consumed a whole lot of styrene sheet. I didn’t notice until I finished this morning’s building that I installed some of the windows upside down. What a dope!
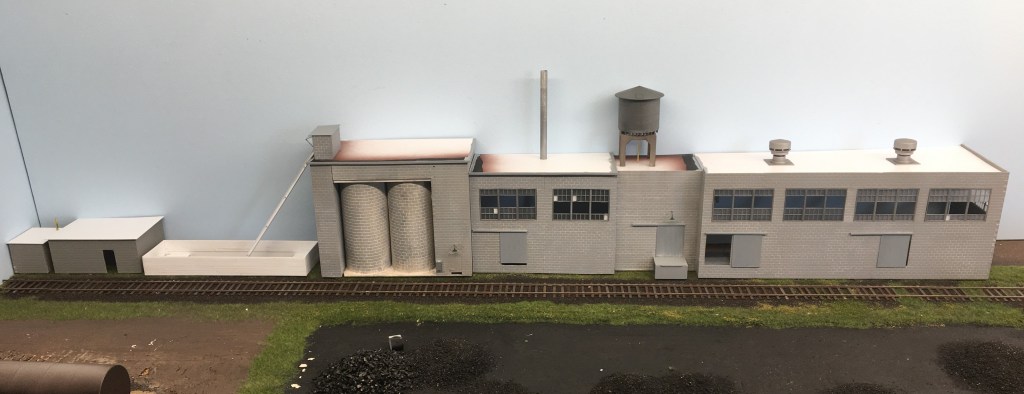
The thing on the left is a sand pit. No, the original drawing doesn’t include this, but I wanted to add something to hold additional sand or cinders–sort of an overflow facility like some coal docks used to have. I built a conveyor leading up to the two bins. The two buildings at the end are machine sheds or garages that face away from the track.
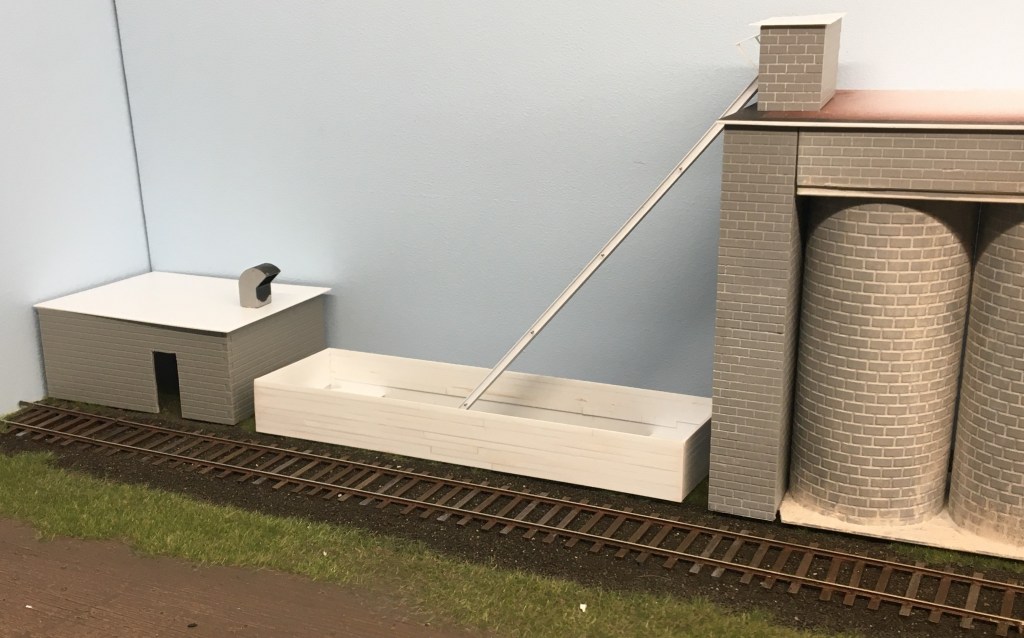
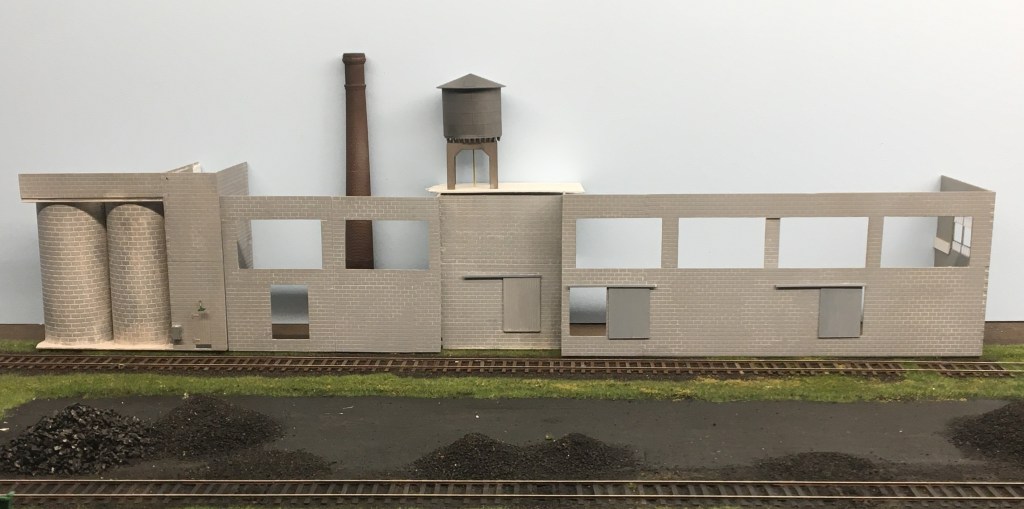
I built the bin using first by constructing a simple plastic box, then sheating it with HO scale 2×8 styrene shapes from Evergreen. That’ll give it a plank-by-plank look, and later I can accentuate the planks with a little contrasting paint.
You wouldn’t believe how much time this building has consumed in the last couple of days. Probably 12 to 15 hours…
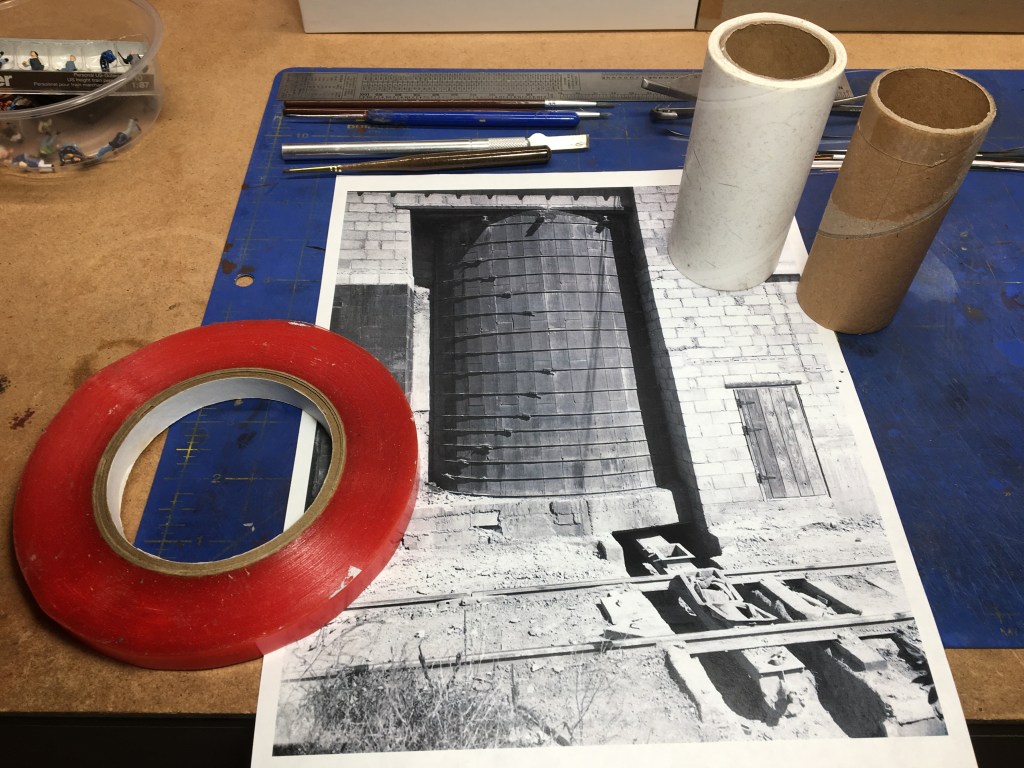
I made the silos by covering a cardboard tube with 3M heavy-duty double-sided tape, and then wrapping the thin Plastruct siding around it. My inspiration came from a photo of a ready-mix plant in Mason City, Iowa, sent to me by Clark Propst. Below you can see the photo, the cardboard tube–an empty tape roller–and the tape.
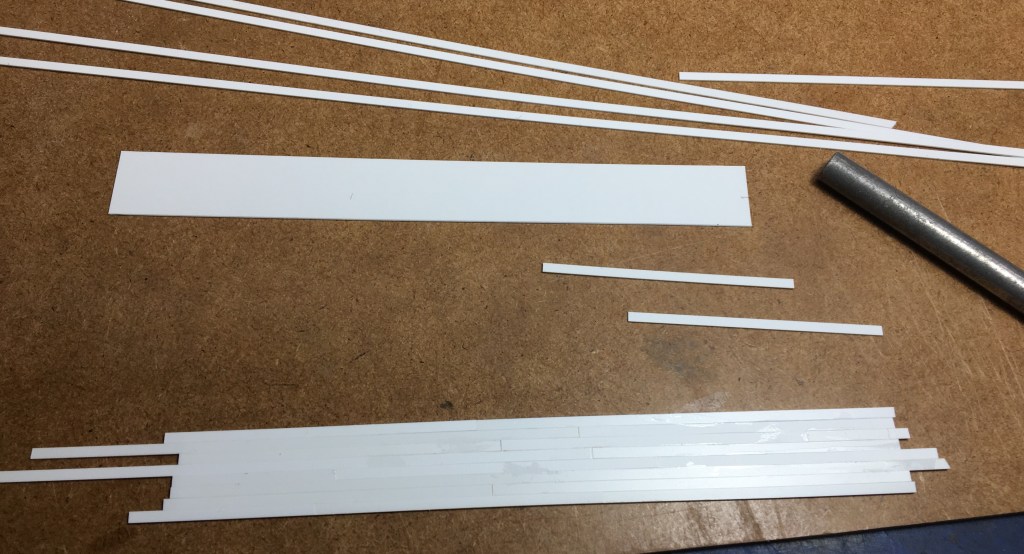
I wrapped the tube in the tape, then cut a piece of block sheet to fit…
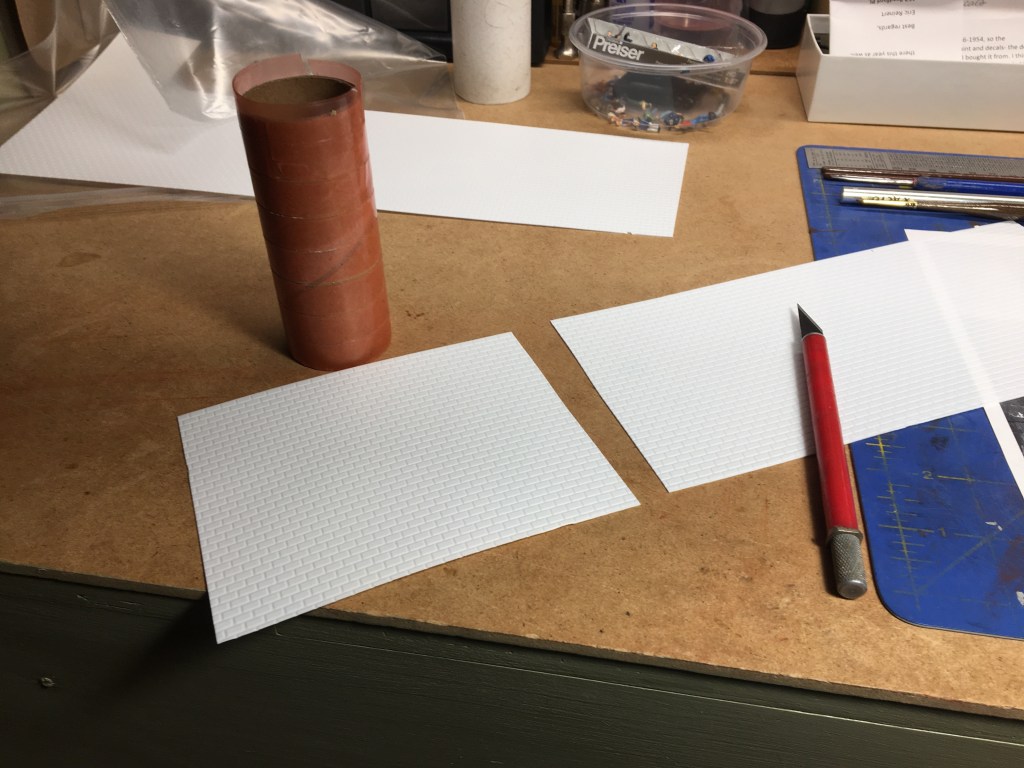
…and then carefully wrapped the plastic sheet around the tube. The process took about 20 minutes to complete both silos.

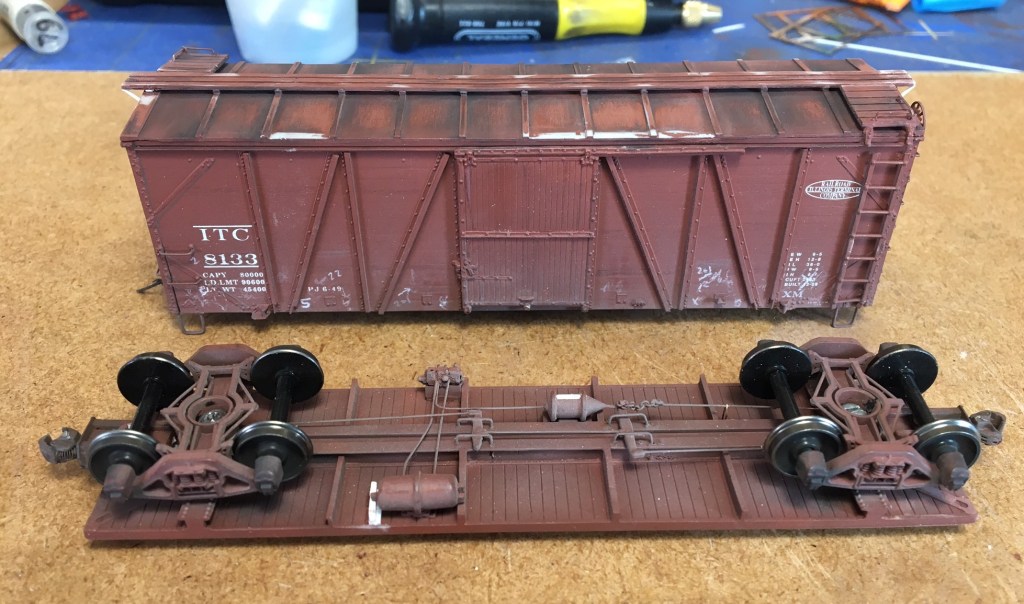
I’ll get more done on the cinder block plant this week, but now I want to concentrate on freight car work. Below is shown an old Sunshine Models Illinois Terminal box car that needs a repaint. I repaired some damage to the roof and rebuilt it with a few new parts (air hoses, changes to the brake gear, repairs to the running board and latitudinals, repairs to the brake platform and step on the B end, and a few other things). The major problem is I will need decals of the monogram and don’t think anyone makes them in HO. Still gotta do some research before I blast the paint off.
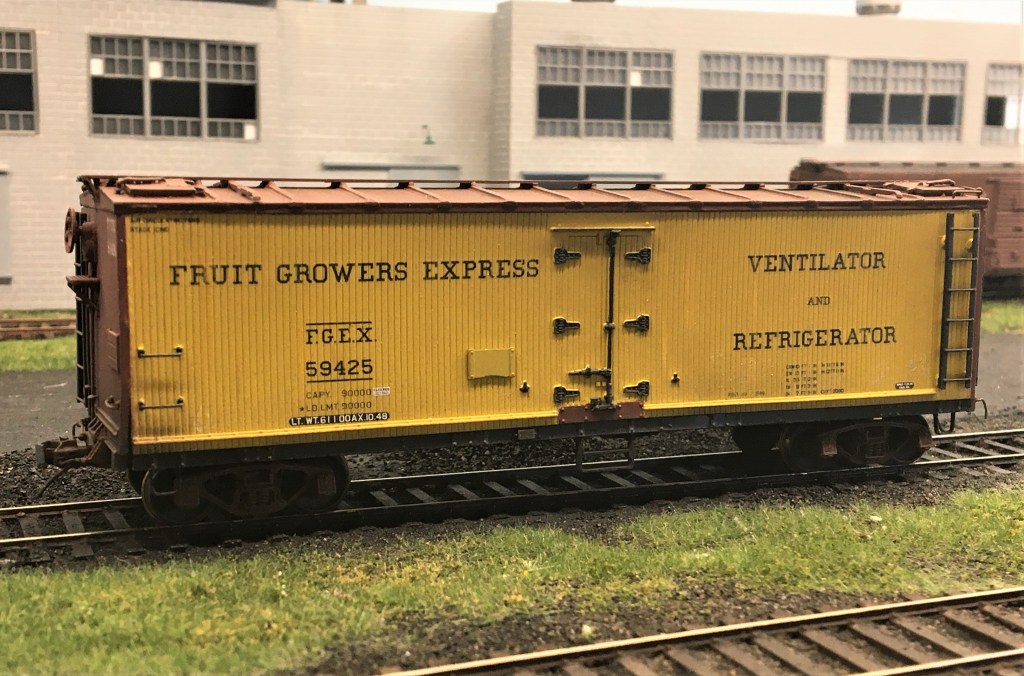
This old dog got some attention too. This is a Sunshine Models FGE car I’ve had around for 15-20 years. The light is poor but the car got new Tahoe Model Works trucks, some underframe upgrades, sill step repair, and Hi Tech air hoses. This Old Dog–a tip of the hat to Mac Demarco, one of my kid’s favorite “indie rock” singers. Mac’s got some good stuff!
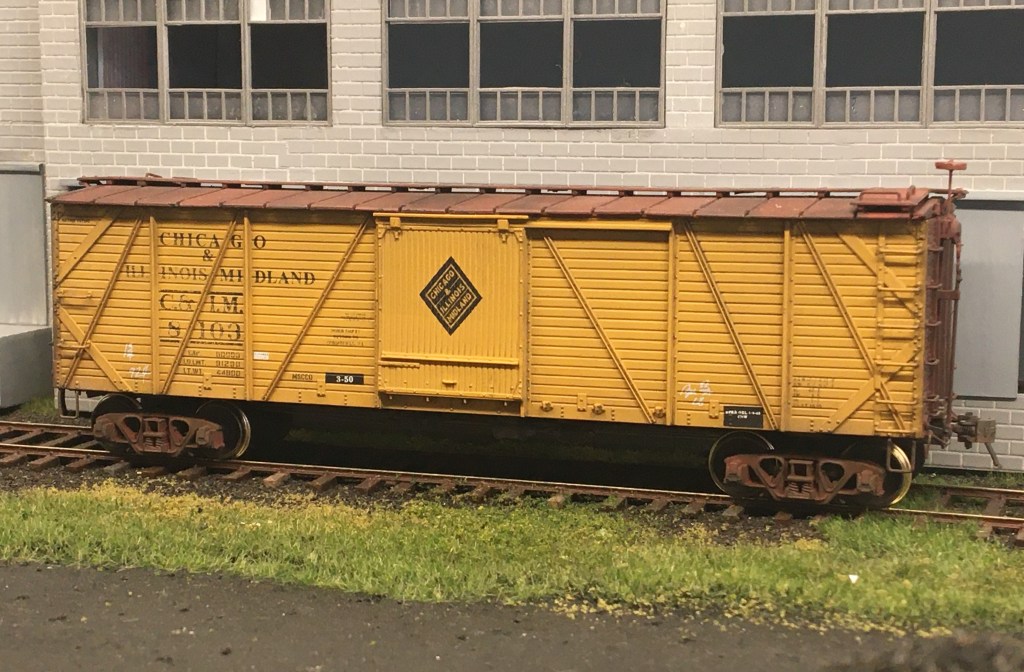
Below. Here’s another old dog that got some TLC last night. This is a Proto 2000 car that got Hi Tech air hoses, cleaned-up wheel tread, weathering on the running boards, and…yeah, I think that’s all it got. I finished this car in the mid-2000s and at that time used my sandblaster to lightly blast off some lettering on the car side in an attempt to create a fading effect. This is a cool prototype and a favorite car, as it stands out nicely among all of it’s box car red bretheren.
Check out that new background. Did you notice that the windows are all fixed now?
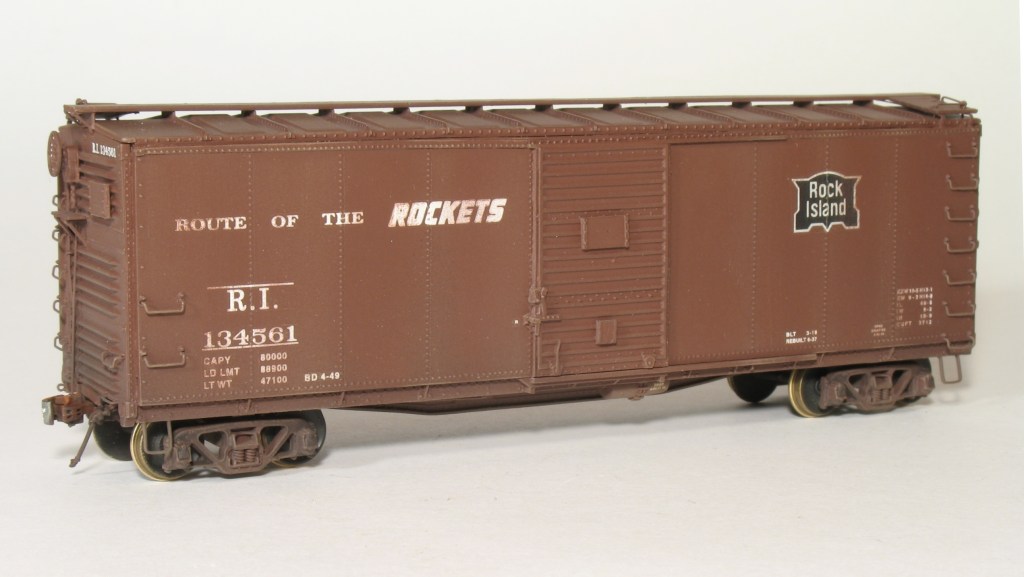
Also in progress this week is rebuilding/repainting of this Rock Island car. It is yet another Sunshine Models car–a rebuilt Rock Island USRA box car. When I originally finished it about 15 years ago I painted it a really dark brown. RI freight car color is more maroon than brown, so I bought new decals from K4 and will refinish this car as soon as I can check out all the detail parts and make sure everything’s ready for paint.

I love the prototype RI cars as shown above. Luckily for us, we can still get these kits even though Sunshine Models is gone. Chad Boas sells parts to built the RI and similar C&NW cars.
Below. Here’s a portrait I took of the same car in 2009:
Why the rush to repaint this car? I’m repainting this RI 1937 Modified car, below, so I thought I’d repaint them both at the same time. I painted the car below and used some faulty K4 decals (they somehow got a little wet in the mail, but I used them anyway). I got a new set from K4 a few months ago, so I blasted the decals off this one and will repaint and them at the same time.

That covers all the hard work in the first three of 16 days. Next, more HO and Proto48 freight car work, a whole lot of painting, and on the weekend if all goes well I’m going to get to work finishing up the travering table for the layout.
Hope you have a wonderful week! – John G
