

The 16 Days program ended last Monday when my wife and daughters returned from their U.S. trip.
In those 16 days I was able to complete major work on several structures for the layout, rebuild and repaint a dozen freight cars, complete construction on one new freight car, and paint the traverse table for the layout. I also sold five models on eBay and in other places, and I also spent a considerable amount of time writing on this blog.
I normally try to keep the layout and workbench very clean and organized, but during the 16 Days I allowed myself to leave everything a hot mess so I could go right upstairs and pick up where I left off.

I originally estimated that I could accomplish 73 hours of work during the 16 Days. I was only able to complete about 36 hours of hobby work, however. I underestimated the time needed for my day job, chores, yard work, daily exercise, a few parties/get-togethers, and other things that took away my time.
The significant layout project was finishing the traverse table. I was able to disassemble, paint, and reassemble the traverser but that was it. It was a hot day, and my house doesn’t have air conditioning, and the third floor train room got really hot. I didn’t get too much done that weekend. There’s a lot of work to be done still.

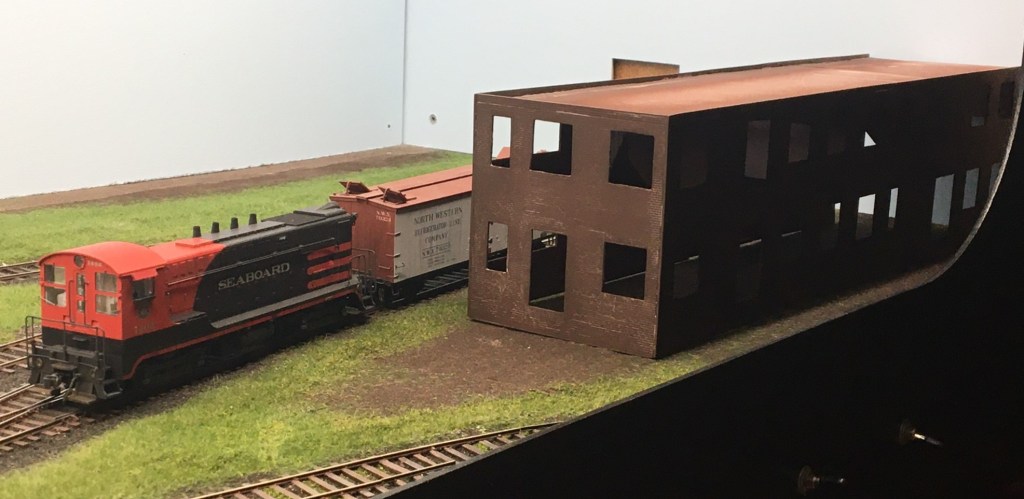
On the layout, among the projects I wanted to complete while the family was away was painting the fencing for the Hermitage Coal Co. and building, painting and applying mortar to the grocery warehouse.
The fencing is made by Tichy and comes in six-inch sections. The fencing took a few hours to assemble and paint, then it was painted with Tamiya Medium Brown. Then I painted a few of the individual boards with various shades of tan, gray and dark brown. Next I applied a thinner-and-black-paint wash to get black paint into the crevices and the board detail. Finally, I gave it a light coat of Medium Brown again to blend everything together, then sprayed it one more time with Testors dullcote to finish the job.

Before installing the fence I need to do a little scenery repair, and also shorten the coal company track about four inches.
The grocery warehouse is coming along. Below, I have applied some Roberts Brick Mortar and am letting it dry. At this point, I’m not too happy with this model. It’s gonna need a lot of work…

Below. The grocery warehouse after mortar removal. I still don’t like it, but I’ll keep working on it and give it a chance.
Fortunately I was able to get some big freight car work done during the 16 Days. I was able to check a dozen models for operation (checking coupler height, cleaning wheels, minor repairs, etc.)–something that I don’t do very often.
Here’s one car, below, that got some much-needed attention. This is of course a Proto 2000 model, and my records indicate I’ve had it since 2003. I’ve upgraded the tracks and a few details since then, and I’m still very happy with the paint and weathering. It’s a keeper.

Below. I have been unhappy with this car for a long time. This is a Tichy rebuilt box car with a Sunshine mini-kit applied. I finished this car in 2008; the photo below dates from 2013. I have never been happy with the color, and the Wabash lettering on the right side of the car “silvered” for some reason–on both sides too.

Last week I sandblasted the decals and weathering off and then fixed a few original construction problems, like the placement of the grabs on the corners, and I also replaced the door tracks.
Below, after sandblasting I added a replacement door track and also the missing sill brackets.
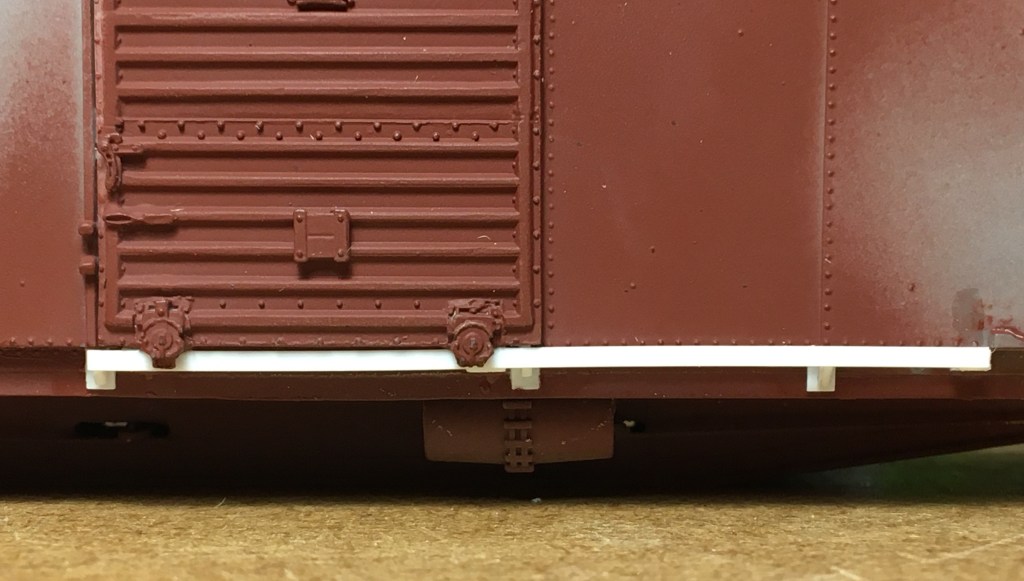
I also removed and replaced the grabs on each corner to line them up prototypically. I’ve repainted the car with Tru Color #191 Wabash Freight Car Red and have new K4 Decals ready to go. That coupler pocket is ghastly!

Another car I was unhappy with was my Sunshine Models Illinois Terminal single-sheathed box car. This is a cool car, and at 37 feet long it stands out in a crowd. But, I just wasn’t happy with the color and weathering. Here’s a photo of that car I took on my old Ackley layout:

I sandblasted the lettering and paint off the car, replaced a few details, and repainted it last week. Here’s how it looks today. I’ll be using Resin Car Works decals to re-letter the car.

Here are a few more cars that I rebuilt and repainted.
I sold my Tichy B&O USRA SS Box Car online last week and am preparing a replacement, below.
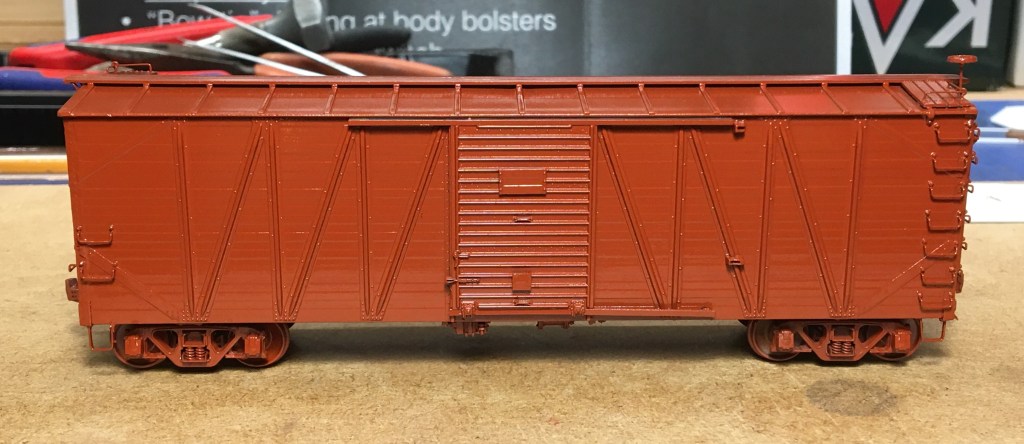
Why get rid of a good car and replace it with another? I spent the time to put the side grabs in the right place and install additional rivet detail using Archer rivets. The grabs line up properly, and are in the right place (the car kit suggests they should be further toward the center of the car; proto photos indicate otherwise) and I also added Archer rivets below the NBW castings. Unfortunately the Archer rivets have disappeared.

For some reason, I didn’t use the awesome Tichy running board. I replaced it with styrene strip. I think the styrene strip running board looke=s great, as seen below, but it is missing the great Tichy bolt detail.

I’ll be using Speedwitch/National Scale Car decals for the car above. The car below is a Sunshine Rock Island rebuilt USRA double-sheathed car that also was rebuilt and repainted. Apparently I forgot to paint the trucks at the same time…

A shout out to my buddy Jim Dufour, who finished a similar car recently and sent a photo to a chat group I participate in. C&NW had prototype conversions similar to the Rock Island cars, and Chad Boas makes kits for both of them. Jim used the Chad Boas kit for his model, below, and did a superb job with it. The weathering is perfect. Love that Viking roof too!
Yet another Rock Island car is below. This is a 50-foot rebuilt flat car, another Sunshine Models kit, with Tahoe Model Works Dalman trucks. It’s hard to see but this is the car with the big splice panels on the side. Unfortunately the kit didn’t come with decals, but Clark Propst showed me a Hubert Mask set that should work.

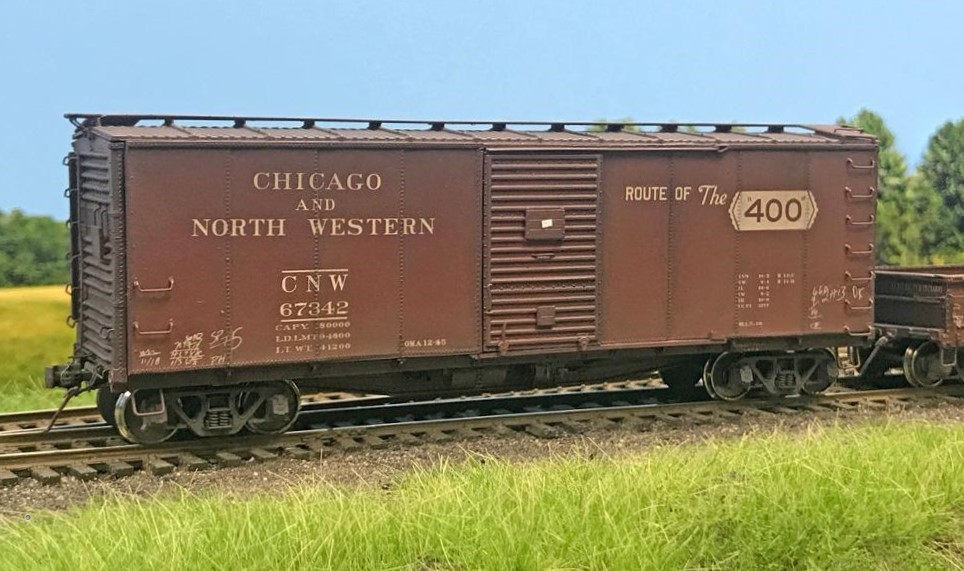
Below. Here’s the new build I finished during the 16 Days. This is a CB&Q 50-foot Box Car from the Proto 2000 kit. Next: Sandblasting (again), then a coat of paint, then a lot of extra rivets, then a final shot of paint before decals. I’ll be using the awesome Speedwitch/National Scale Car decal set for this car too.

The CB&Q XM-28 is alas another Sunshine kit that got new paint and decals a few months ago. Last week I weathered it, applied some chalk marks with a white Prismacolor pencil, cleaned up the wheel treads, and got it ready for service. The car look alright and is ready for the layout.

So that’s it–the 16 Days came and went. I got a lot done but still have a long way to go. Priorities for the rest of the calendar year are finishing the layout, and finishing all these cars, and getting another engine or two detailed up.
See ya next time! – John G

Time well-spent, John. Thanks for the inspiration.
Owen Thorne
LikeLike