My wife and I went to Andermatt, Switzerland in May for a short hiking weekend. I ran into an old friend there in Andermatt–the Matterhorn-Gotthard Railway, a 90-mile, one-meter gauge, electric line that runs around and through the Swiss Alps.
I wrote about this railway a little bit back in 2021 when I visited Zermatt with the family. That post can be found at https://railroadprototypemodeler.com/2021/08/02/no-164-1230-to-zermatt/.
We had a nice visit and seeing the railroad made it all the more worth it. On our second day we hiked east from Andermatt, along the little railroad, to a small town called Realp. It wasn’t much of a hike but we saw a lot of trains and the scenery was lovely. We took this train seen at Realp, below, back to Andermatt. It was a smooth, fast, comfortable ride.
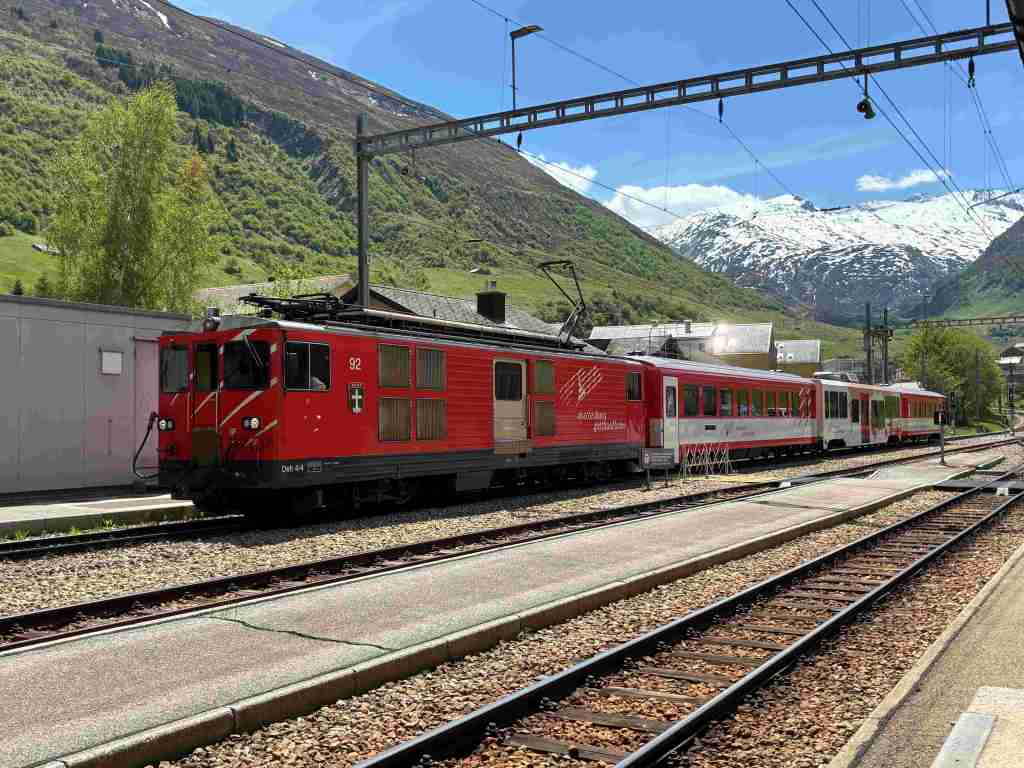
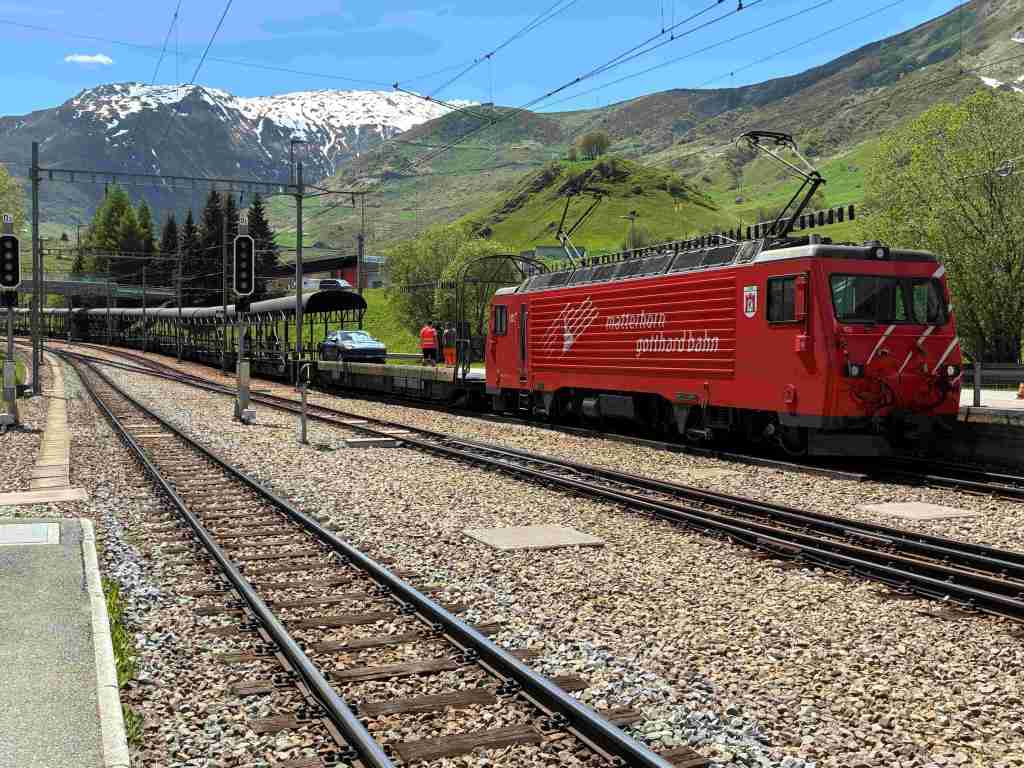
Realp is the northern terminus of the Matterhorn-Gotthard Railway’s Furka–Oberalp line, an east–west railway connecting the cantons of Valais and Uri. Realp is also the northern terminus of the Gotthard Bahn auto-train that takes you and your car under the Furka Pass to Italy. You drive your car on the train, relax for 20 minutes or so, and before you know it you’re driving off in Italy. The auto train runs every 30 minutes and the process is very fast and efficient.
Please tell me why we don’t do this in the U.S.?
Below: Here’s a pic of the auto-train unloading in Realp. There are no frills, but it’s cheap and efficient, and you don’t suffocate in the 9.3-mile long tunnel because it’s all electric.
The little Alpine town of Andermatt, incidentally, is right above the north portal of the 57-kilometer Gotthard Base Tunnel–the longest standard-gauge railway tunnel in the world. I meant to get down there and take a few pictures but couldn’t break away from the hiking. Next time.
More reading on the Matterhorn-Gotthard Railway can be found at https://www.matterhorngotthardbahn.ch/en/. It is definitely worth a visit.
Rock Island Brass
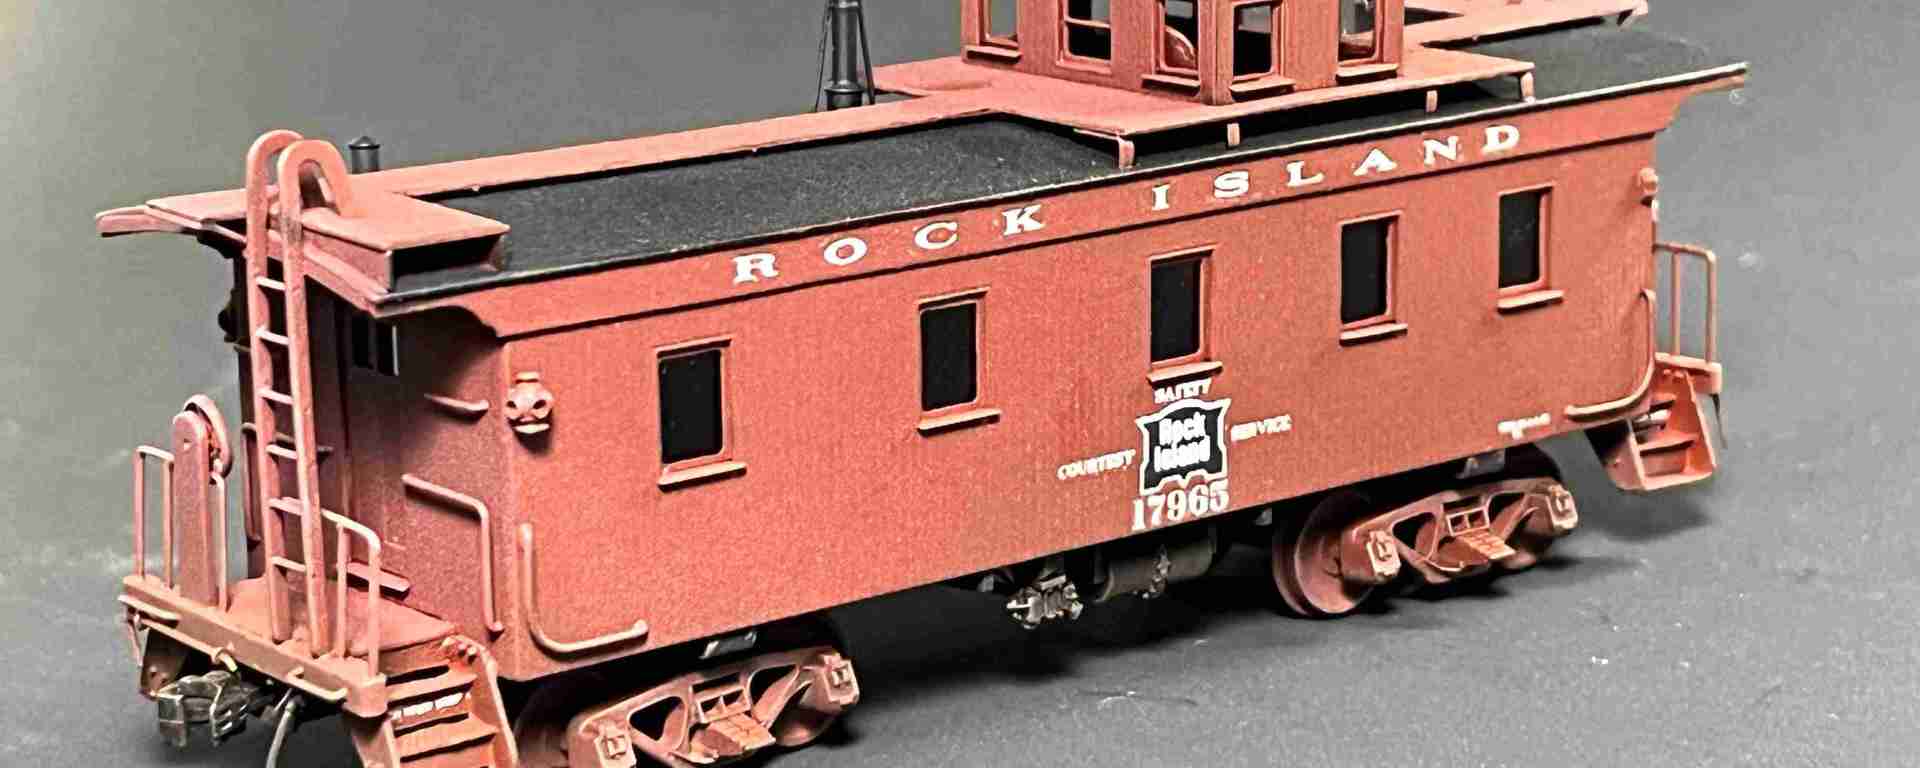
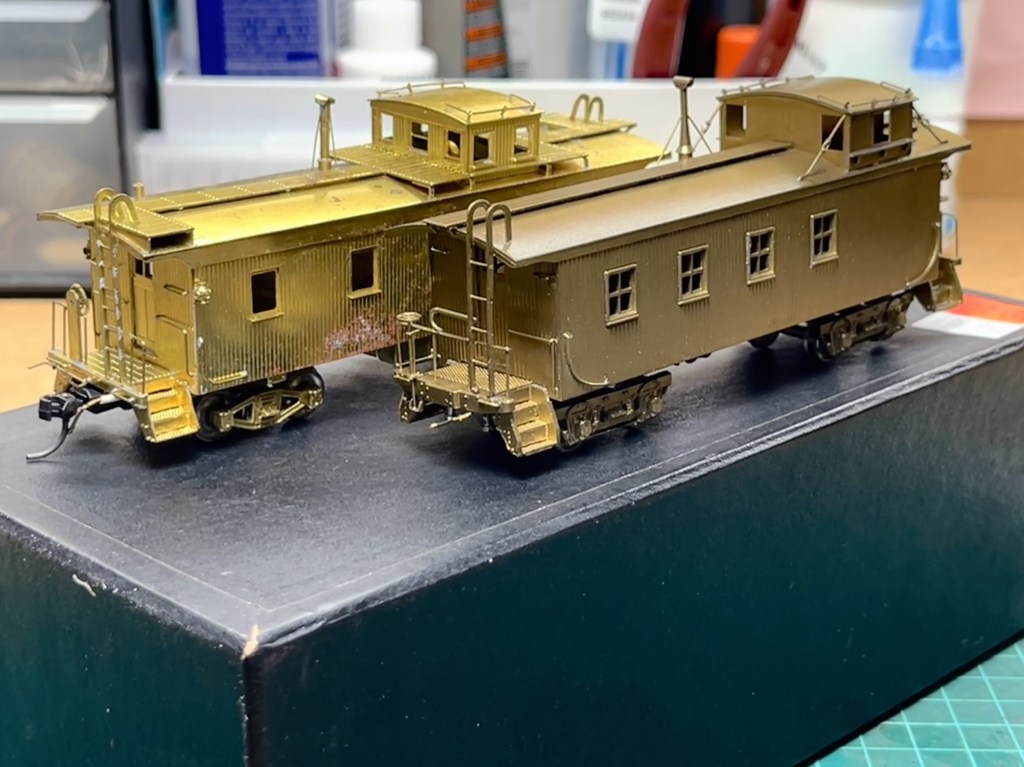
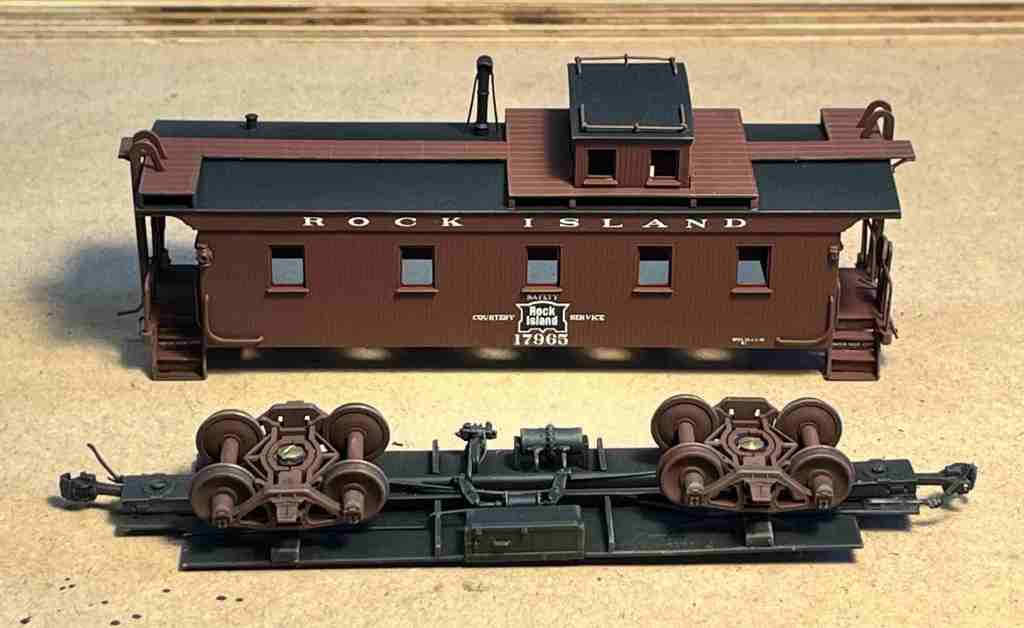
Horsing around on Swiss railways is fun, but I enjoy model building more. Last year I bought two brass cabooses for cheap and I finished one of them this July. Here are the two cars below. At left is a Hallmark Rock Island double-sheathed wood caboose, at right is an Oriental CB&Q wood-sheathed caboose.
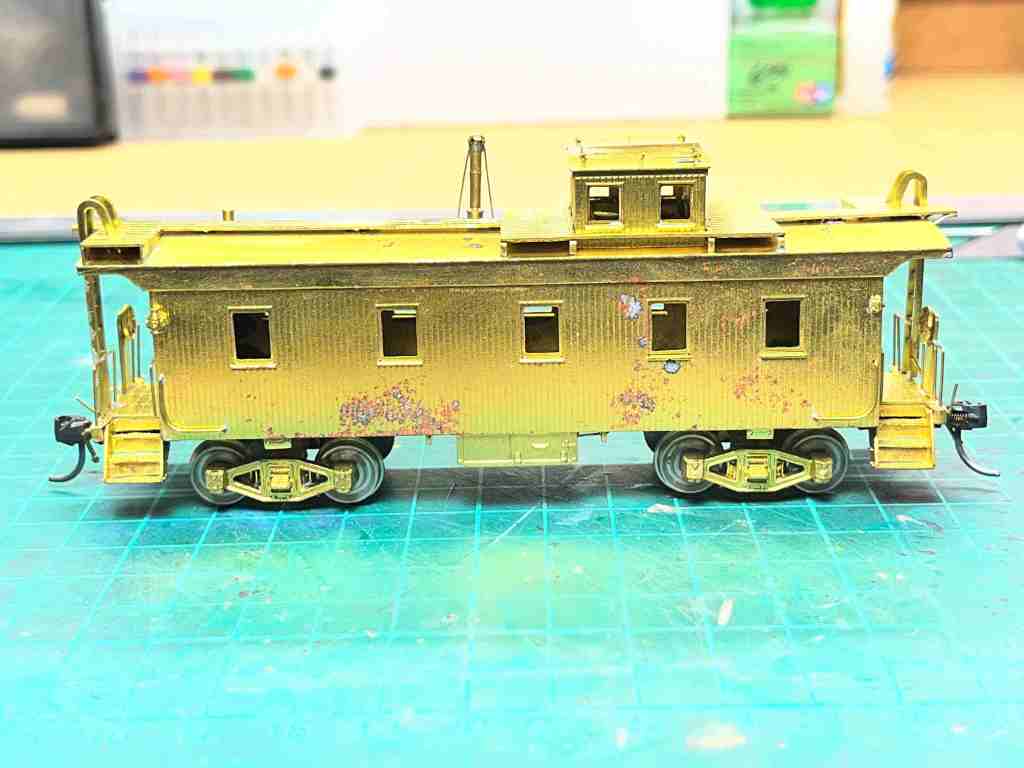
I got the Rock Island caboose for cheap because it had “tarnish damage”. See the photo below. I figured I could remove most of the tarnish with my sandblaster and return it to like-new condition. It took some work but I was right.
Below. I took this picture at the Museum of Transportation in St. Louis in 2003 and used it as a painting guide.
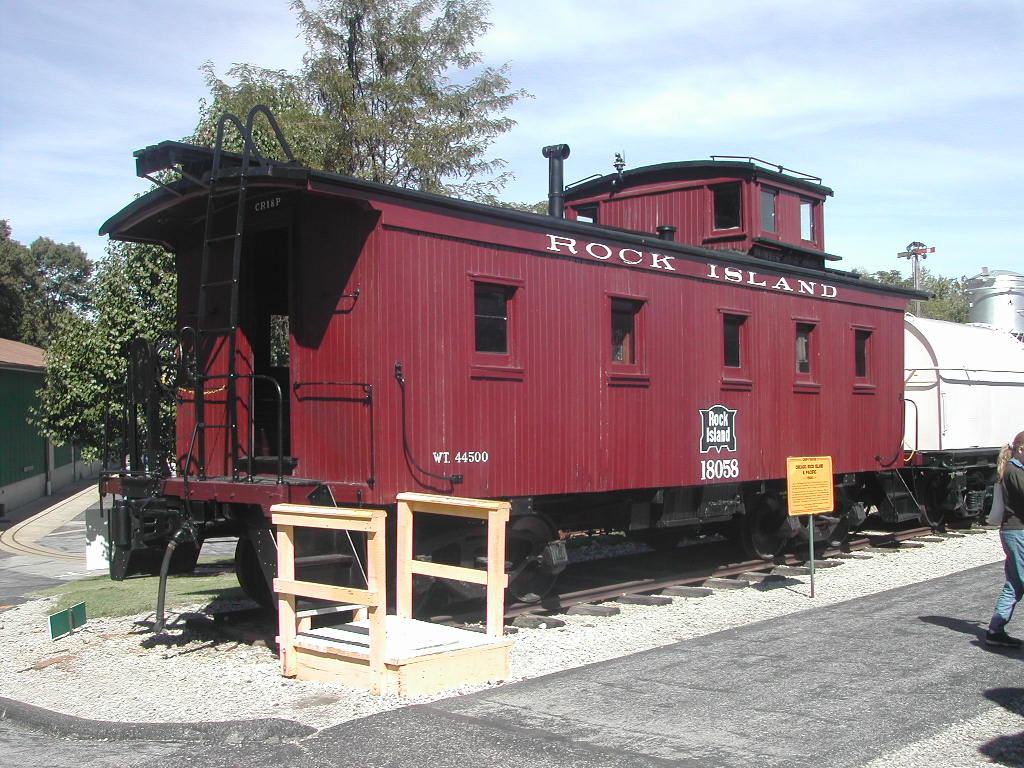
I also used the picture below, from Jay Williams at Mainline Photos (used by permission) as a painting guide. This photo is circa 1951.
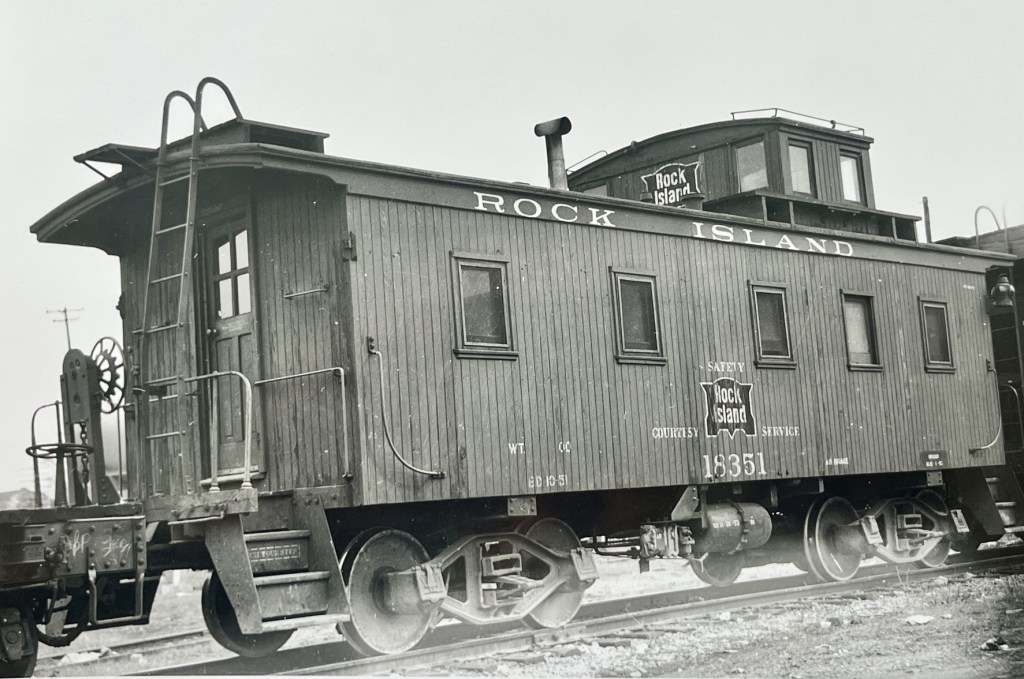
My first move was to completely disassemble the caboose and give the carbody and underframe a long bath in lacquer thinner. That took off the factory-applied varnish and also softened up the tarnish.
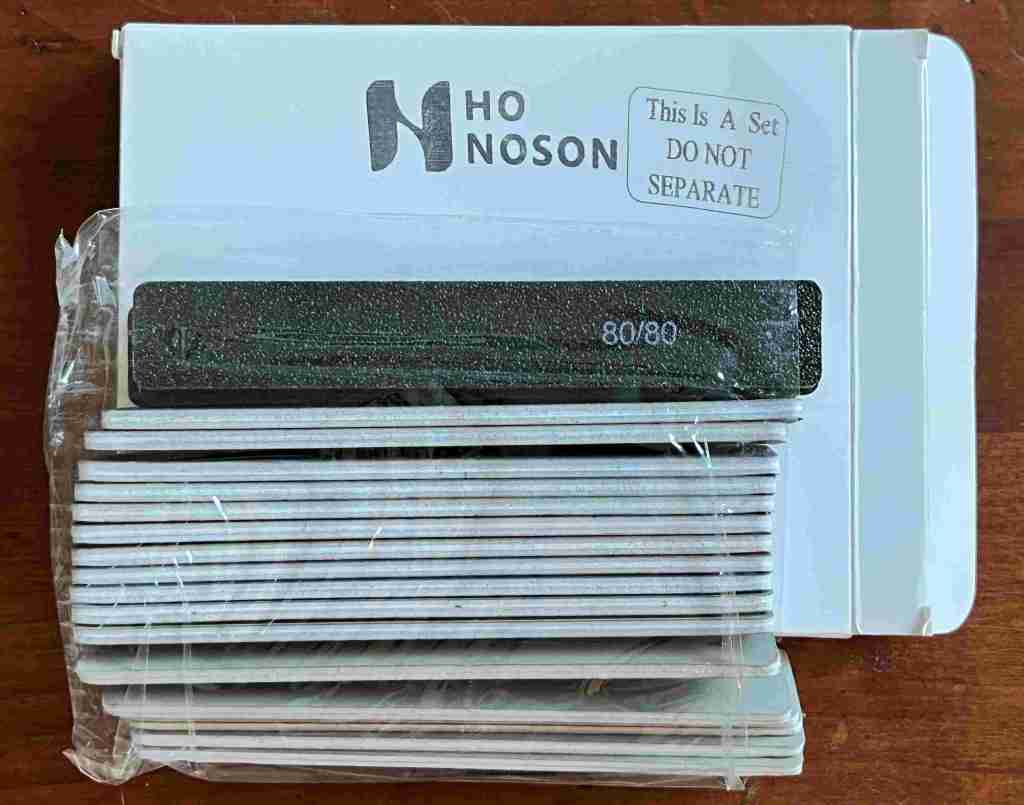
When the car was dry I used sanding sticks to scrape off most of the tarnish. I used sanding sticks I got on Amazon, seen below. This set was ten bucks and included 20 sticks of various grits. I sanded the sides vertically, along the grain so to speak, with a 1000-grit stick, and the lossened tarnish came off easily. I followed up with a 3000-grit stick to smooth the finish. Between the lacquer thinner and sanding sticks I was able to safely remove 95% of the tarnish. I used 0000 steel wool to take off the rest.
Next I sandblasted the carbody and underframe in my North Coast sandblast booth, at 75 psi using fine aluminum oxide grit. Then I washed it in warm water and set it aside for a day to dry completely.
When the model was dry I painted it with Scalecoat I Box Car Red. I let that dry for a week, then painted the the entire carbody, underframe and trucks with a final coat of Tru Color Rock Island Maroon. I let that dry for a solid week. When that was dry I immediately began masking everything except the roof so I could paint the roof black.
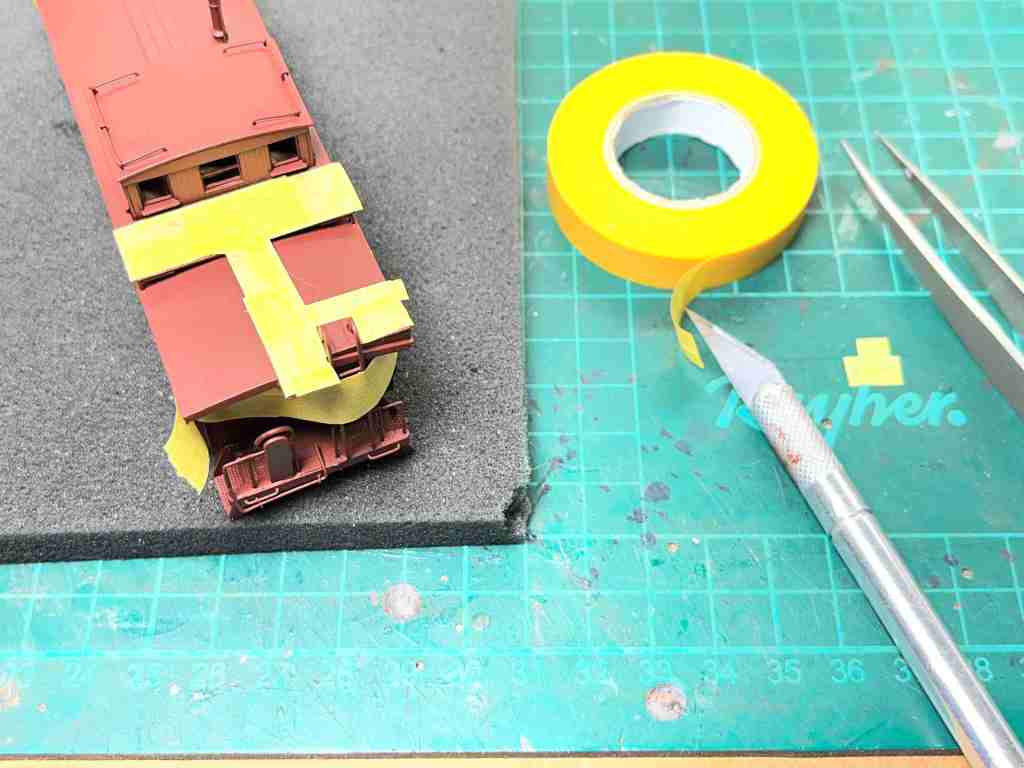
I used Tamiya masking tape for the masking work. Using a new X-Acto #11 blade, I cut tape on a piece of glass and covered all the caboose parts that needed to stay brown. I probably cut a hundred pieces of tape, maybe more, to cover everything except the roof and the cupola roof. I placed the smaller pieces using the pointed tweezers seen at right.
Below: Getting started…
…and here’s the carbody completely masked and ready for painting. I used Scotch tape to mask off the larger areas. I spent an hour and fifteen minutes on this task and strangely, I enjoyed it.
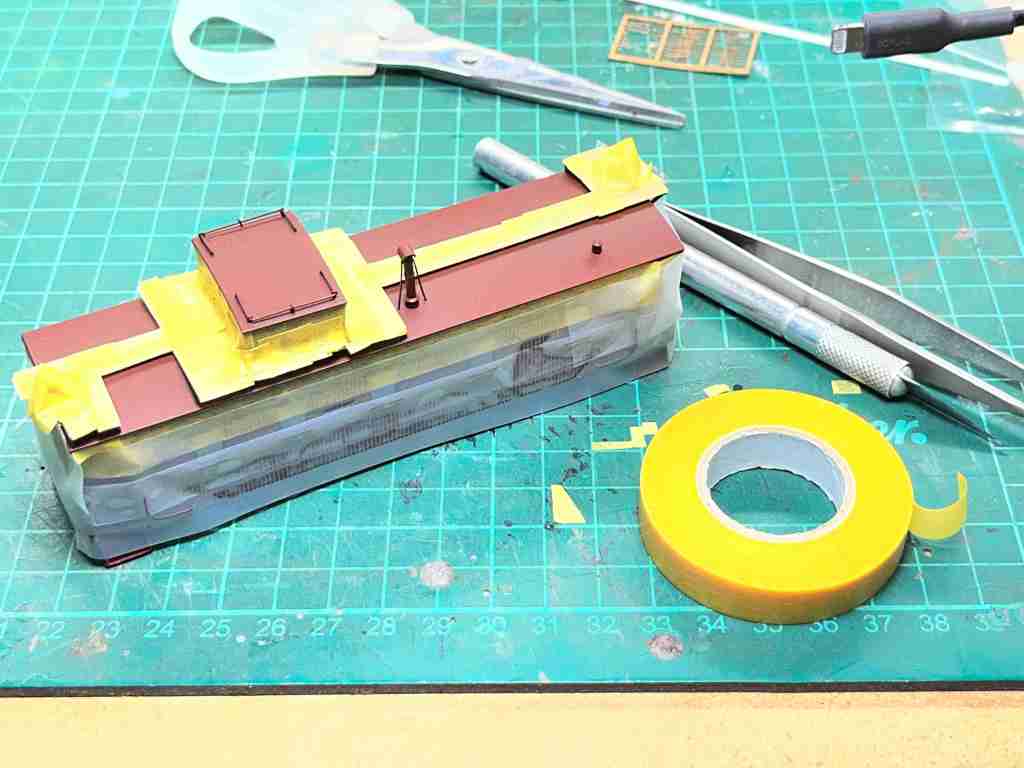
I painted the roof with Testors semi-glass black, and painted the underframe as well (but not the trucks). The Testors paint went on well. Testors paint tends to be a little softer when dry so I let the model dry for another week.
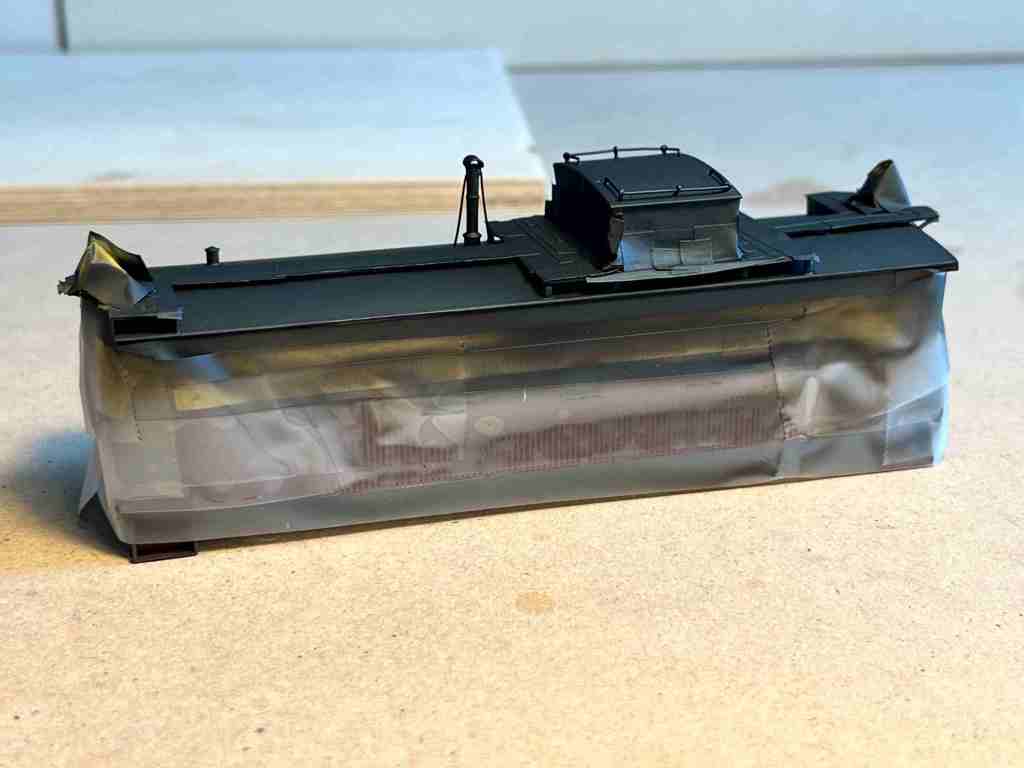
After a week I peeled the tape off. Peeling masking tape off always produces an anxious moment but the results were good. See below. I touched up the grabs and a few other spots to get the model ready for decals.
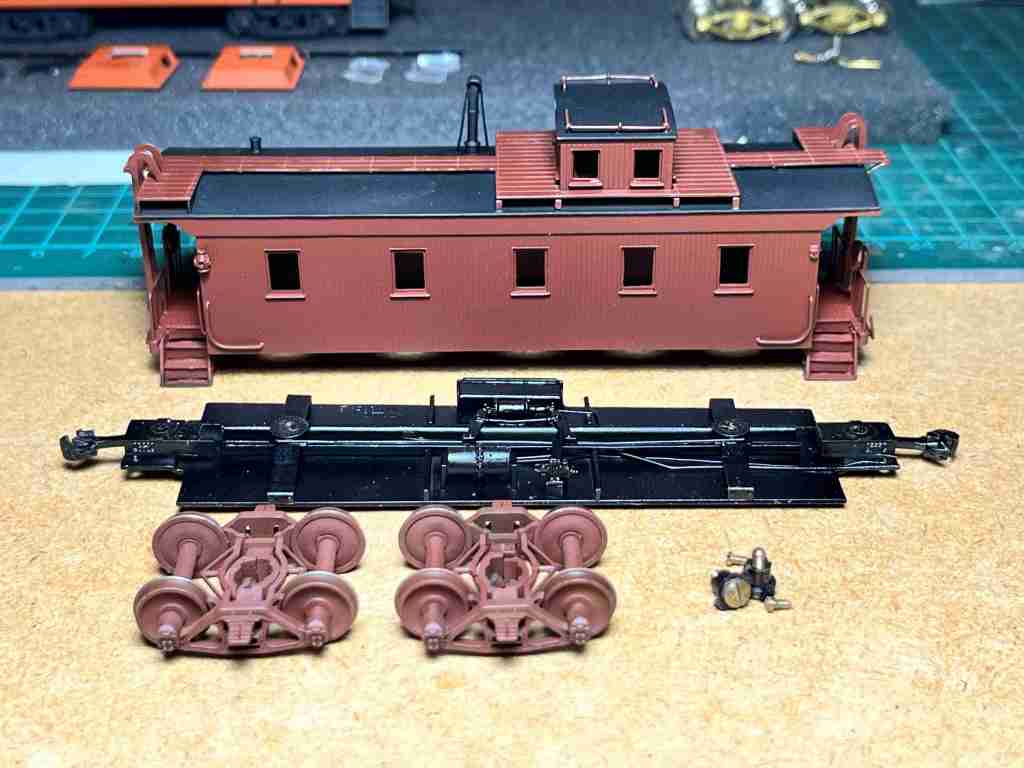
I failed to mention earlier that I used Smokey Mountain Model Works semi-scale coupler boxes for this model. They can be seen above. I originally installed Kadee long-shank couplers but they turned out to be too long. I replaced them with #78s later when I finished the car.
I also replaced the original brass trucks with Kadee #1580 Bettendorf AAR Caboose trucks. I installed some old Reboxx double-insulated, Code 88 brass wheelsets on the trucks. I don’t believe Reboxx are available any longer but Kadee semi-scale wheelsets are a suitable alternative.
Below. I used the beautiful Microscale 87-1229 Rock Island Caboose decal set for this car.
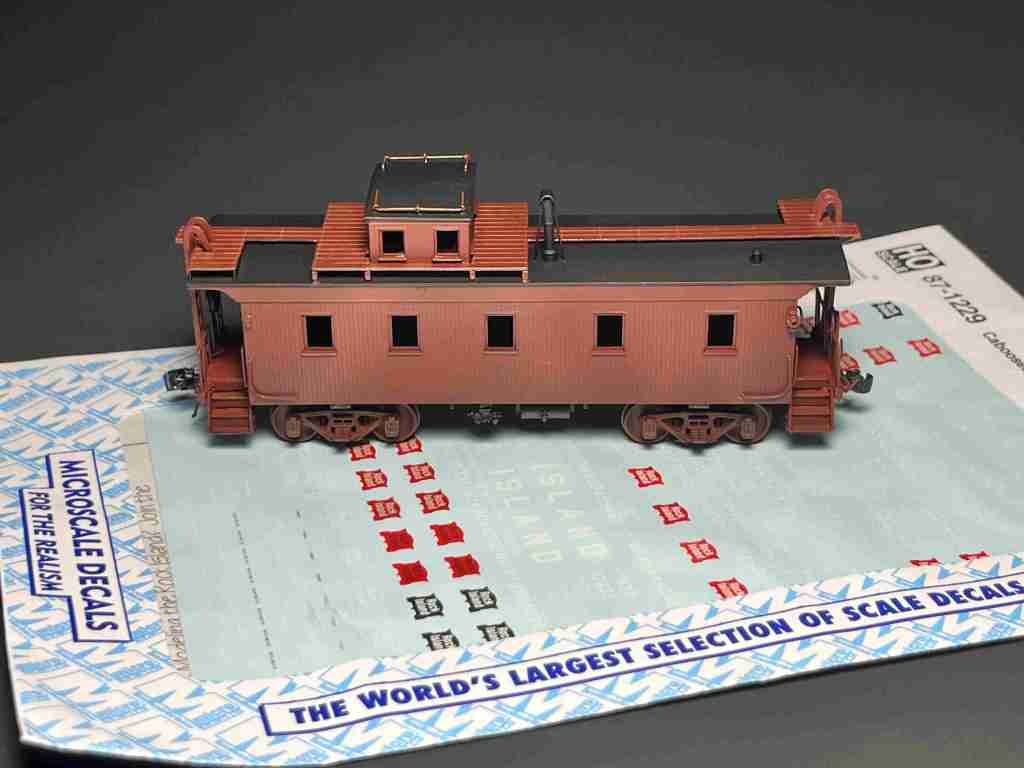
Here we are, below, with decaling in progress. I cut decals out on a clean sheet of glass with a new X-Acto #11 blade. I apply distilled water to the decals on the glass, then lift the decals off the paper when they’re ready. The decals fit well except for the Rock Island lettering on the top fascia. I had to cut apart each letter and space each letter individually.
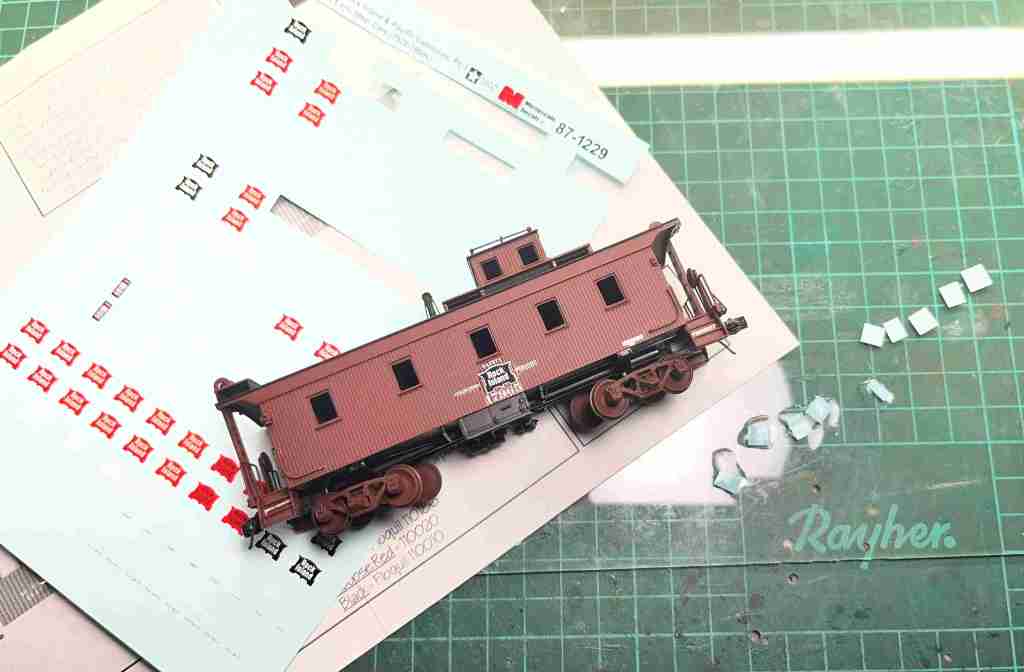
The decals were settled with Walthers decal set. When that was dry I cleaned the model in warm water, and once that was dry I airbrushed the model with Pactra Matt clear finish. The results were excellent.
Finally it was time for the finishing steps. First, I lightly airbrushed the underframe and lower side sills and ends with Testors Flat Tan. I also put a slight amount of the same color on a flat brush and highlighted the model all around. Second, I weathered the ends with a light amount of AIM Delta Dirt weathering powder, focusing on the inside of the stairs and the ends and underneath the couplers. Third, I added windows cut from Evergreen .010 clear styrene, applying them from inside the model with canopy glue. I applied them on all the windows except for the side cupola windows, which I left open for the crew. Fourth, I added marker jewels to the markers–some red and some clear. And last I polished the wheelsets by spinning them gently using a wire brush in a motor tool on a low speed setting.
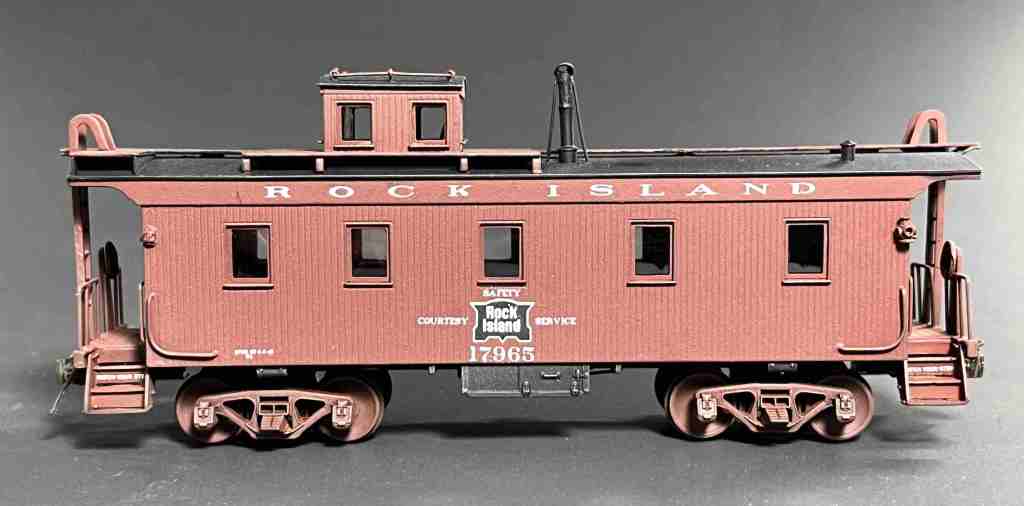
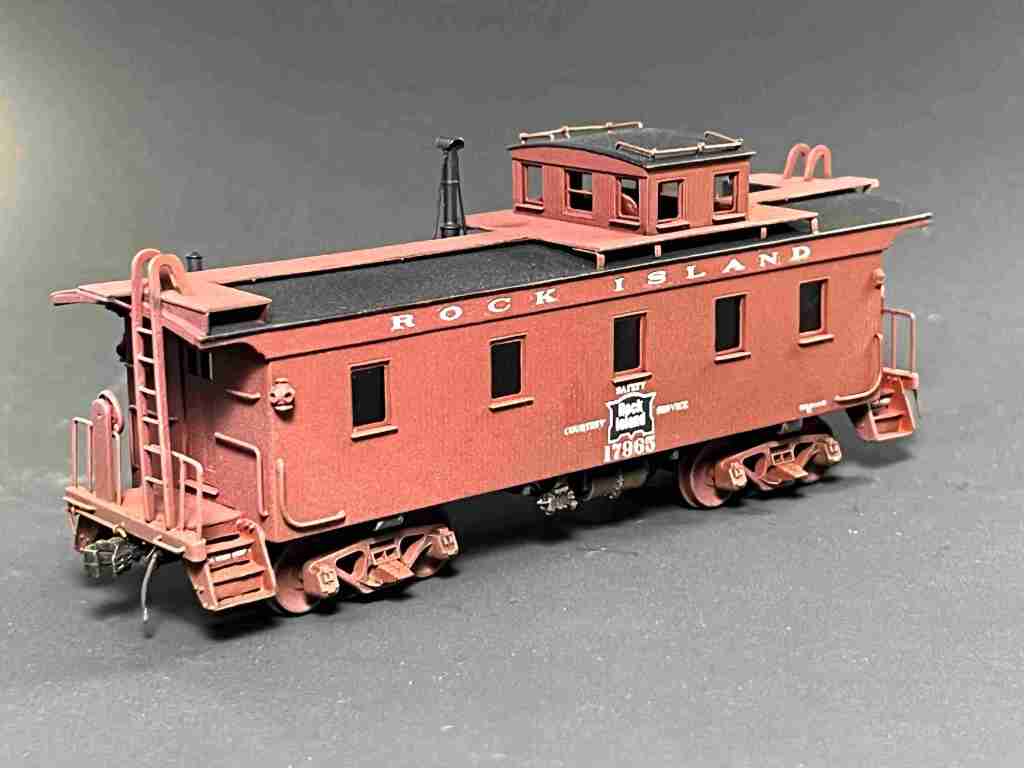
Cleaning and finishing this model was easy, but it required a lot of small, time-consuming steps. It was well my my time and ninety bucks.
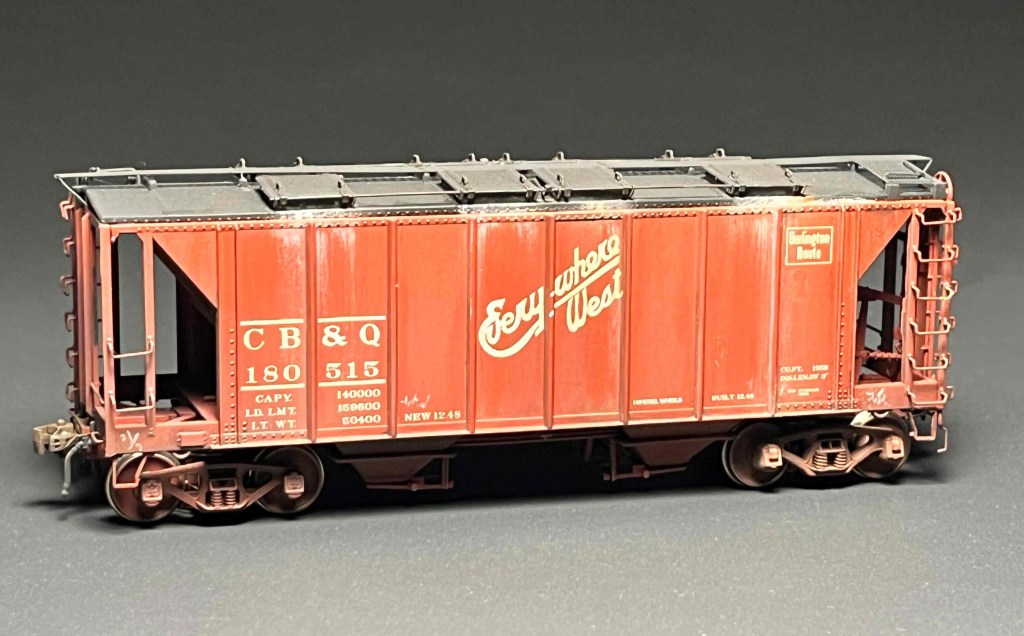
I finished a few other models in August. In July I sold 25 models and bought a few new cars with the money I made back. This car, below–CB&Q 180515–was one of them. Intermountain did a smashing job on these cars. I tried to go really easy on the weathering by adding cement spill streaks using white artist’s oil paint and some airbrushed Testors light tan on the bottom.
I replaced the trucks with Tahoe Model Works Double-Truss trucks with semi-scale wheelsets. They were painted with Tru Color CB&Q freight car color, and weathered with AIM Delta Dirt weathering powder.
After I weathered the model I gave it another shot of Testors Dullcote and then blended all the weathering with a very light brushing of AIM White weathering powder.
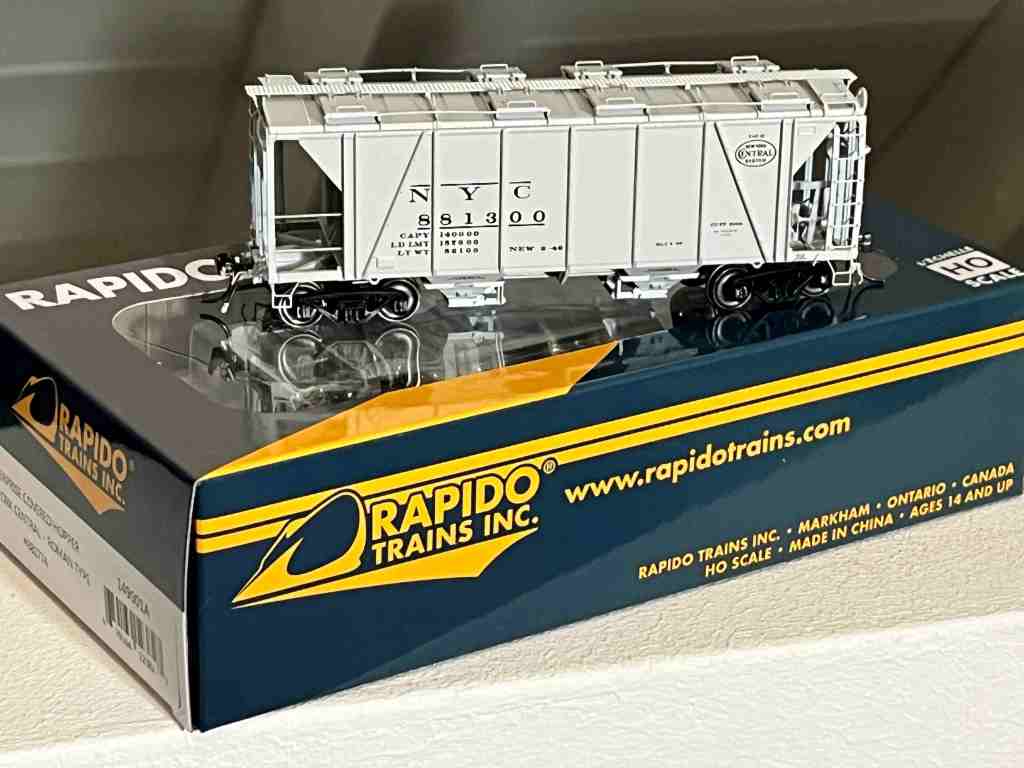
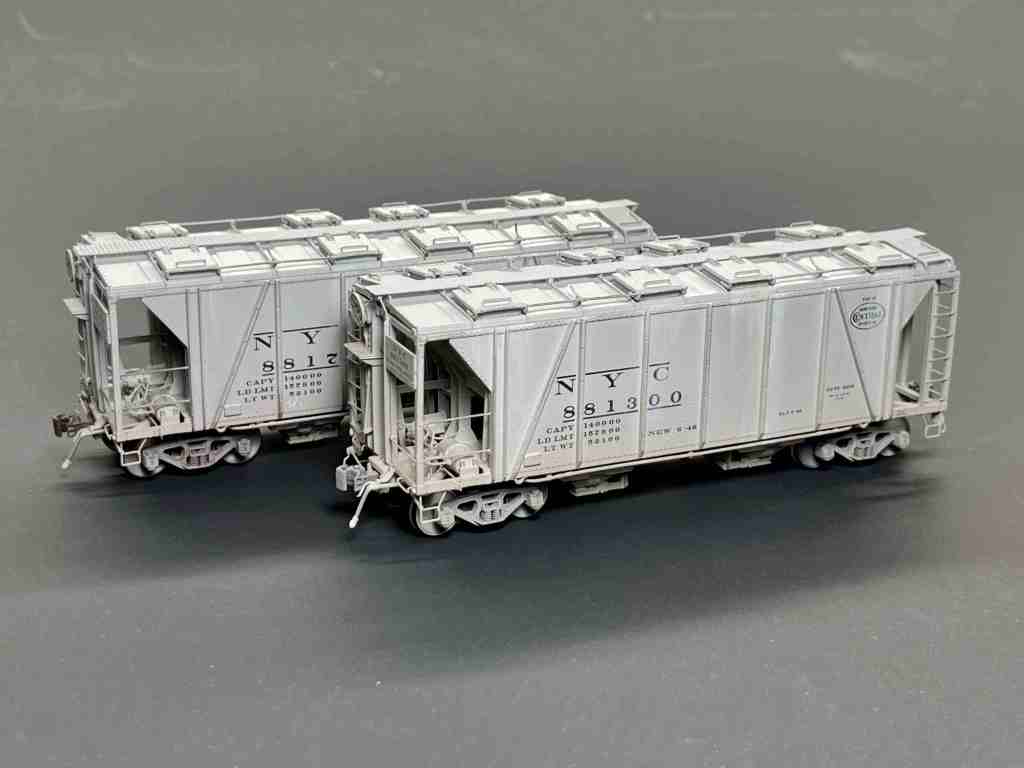
Above. In the era I model, 1950, covered hoppers generally didn’t run too far from home. I don’t model the New York Central but when Rapido released these Enterprise covered hoppers earlier in this year I had to have one. I got two to be on the safe side.
They’re beautiful models and I left them as-is with the exception of replacing the wheelsets with Intermountain semi-scale wheelsets. I weathered my cars lightly by starting with a shot of Testors Dullcote, then adding simulated cement streaks using white artist’s oil paint. I weathered the ends and lower side sills very lightly with Testors light tan. I used a little AIM White weathering powder to blend everything in, then sealed it one more time with Dullcote. I painted the trucks light grey and weathered them up with the same weathering mix.
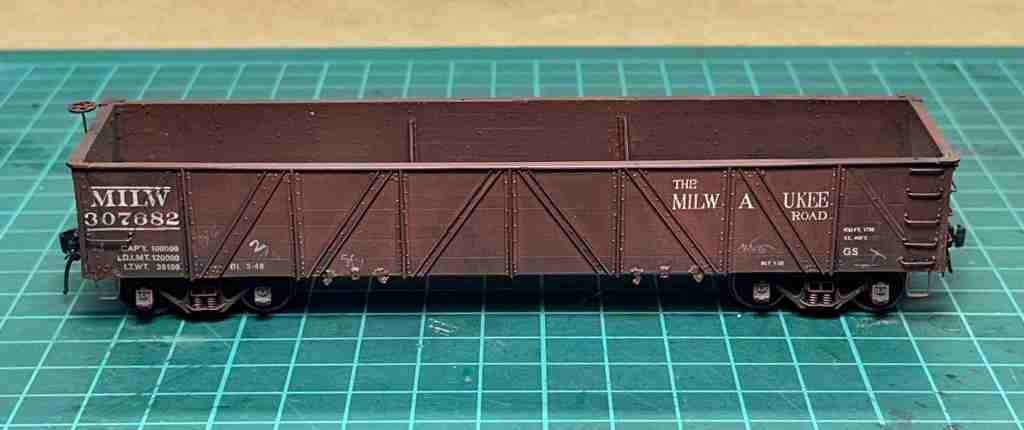
Now that Westerfield is gone, those hard-to-get steam-era models are going to be even more hard-to-get. I finished this Westerfield Milwaukee Road gondola in 2010 and got another one from an estate in 2024, which I finally finished earlier this year. Here’s my original car:
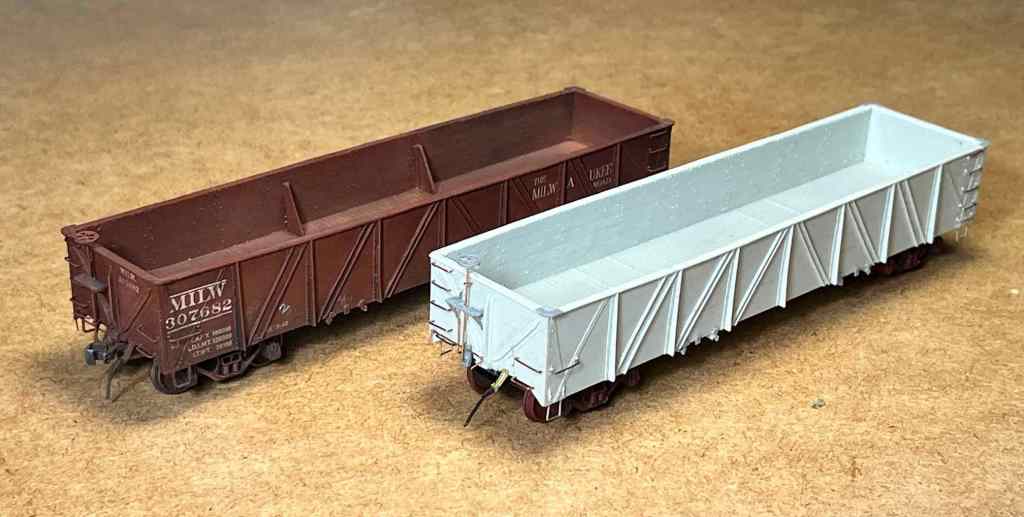
Below. Here’s the original car with the new build. These are one-piece models and go together so fast and easy–just three hours or so.
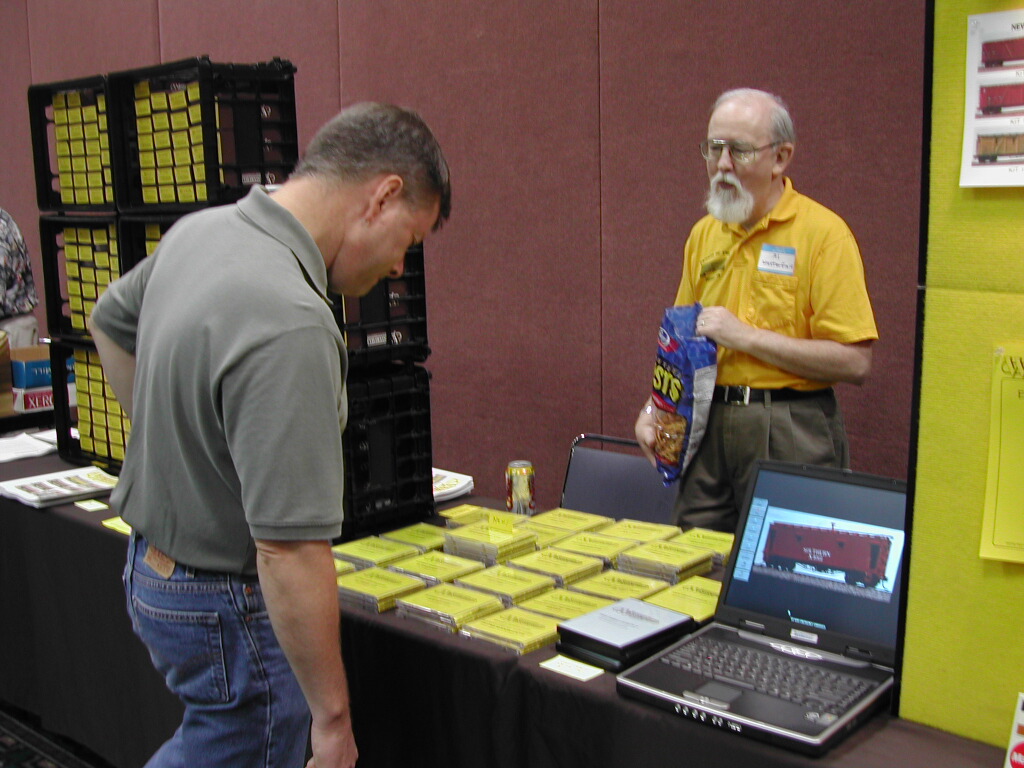
Speaking of Westerfield, I met Al at Naperville in 2001 and invited him to St Louis RPM in 2005. He showed up, sold models, and gave a clinic, but later told me he didn’t sell enough to justify coming back. Here’s Al, below, working the sale. He had a terrific display way back then.
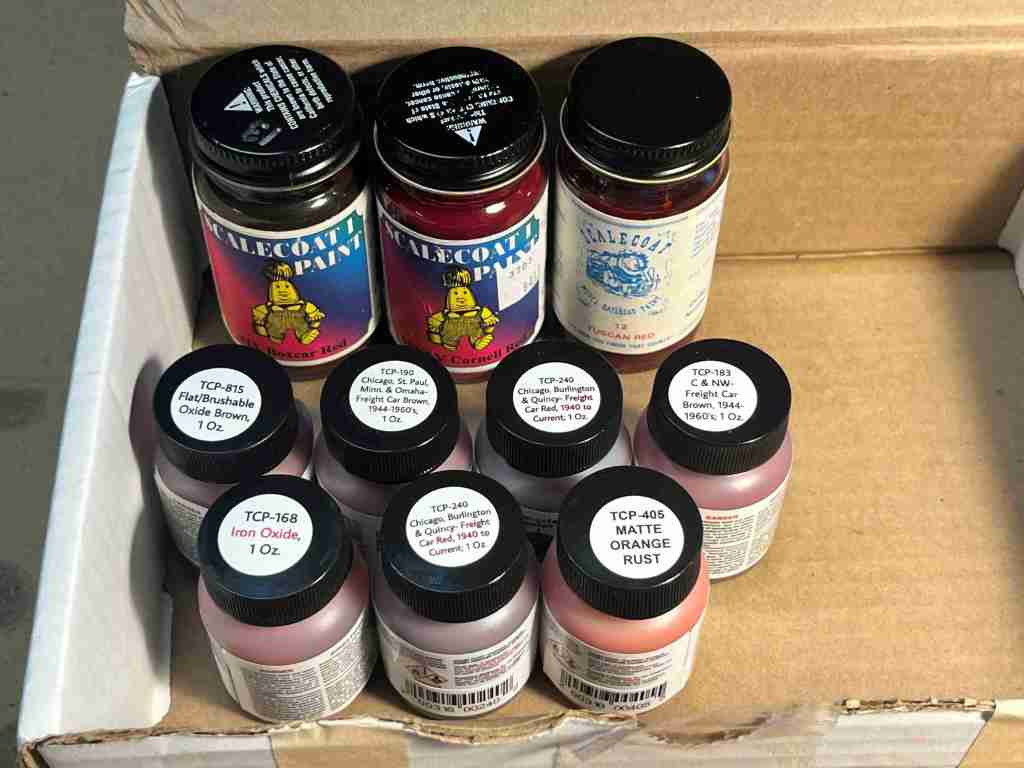
Finishing models is tough when you don’t have paint. My son just visited and brought me a selection of paint. The Scalecoat is primer for a few brass models and the rest is for the rest. I have about 45 unfinished models and now I can get ’em done. Happy Day!
I hope you all have a wonderful weekend. – John

