
: O Scale Wabash War Emergency Box Car")
Many of you are aware that our friend Tony Koester is building an O scale “Tribute Layout” to the Wabash High Line–a long-abandoned branchline in Western Illinois–in an upstairs room in his home. I’ve built four or five O scale freight cars for The High Line in the last year, and back in December Tony asked me if I could build another one. Here’s the report.
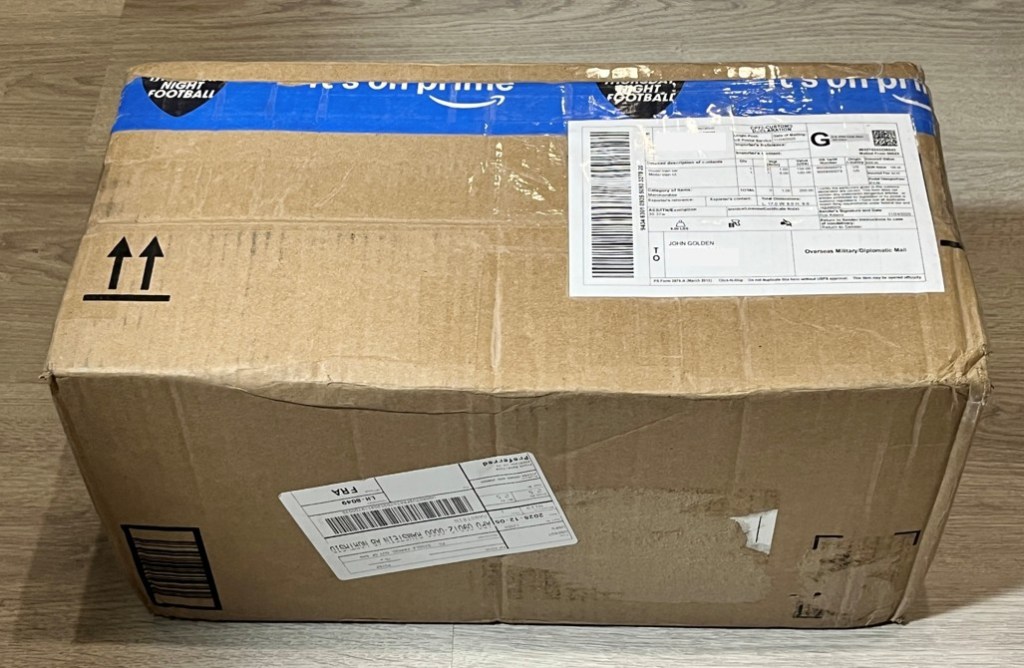
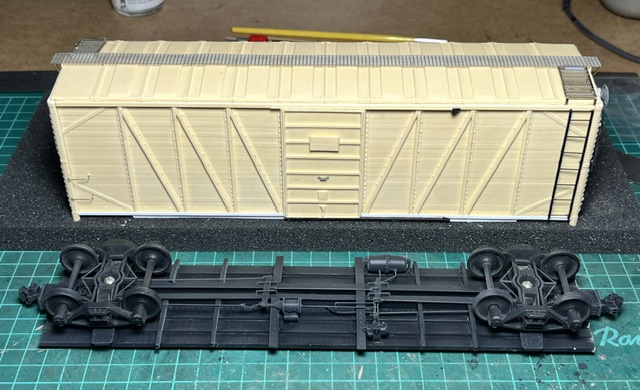
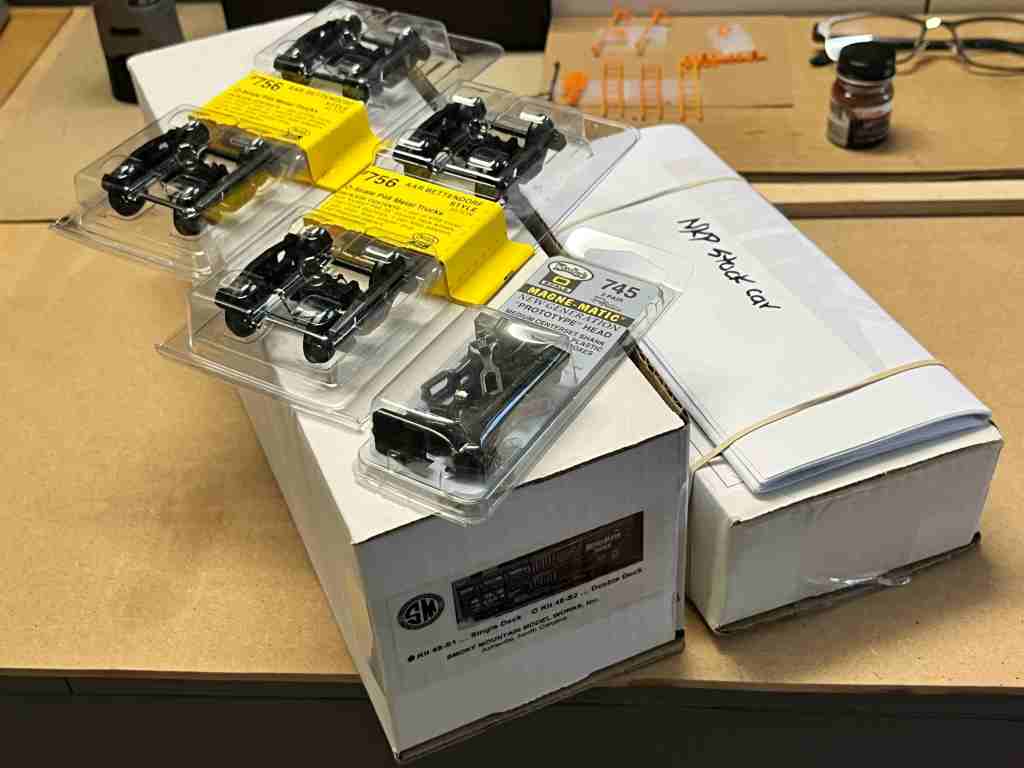
Below. December 2025: The box arrives at Ramstein.
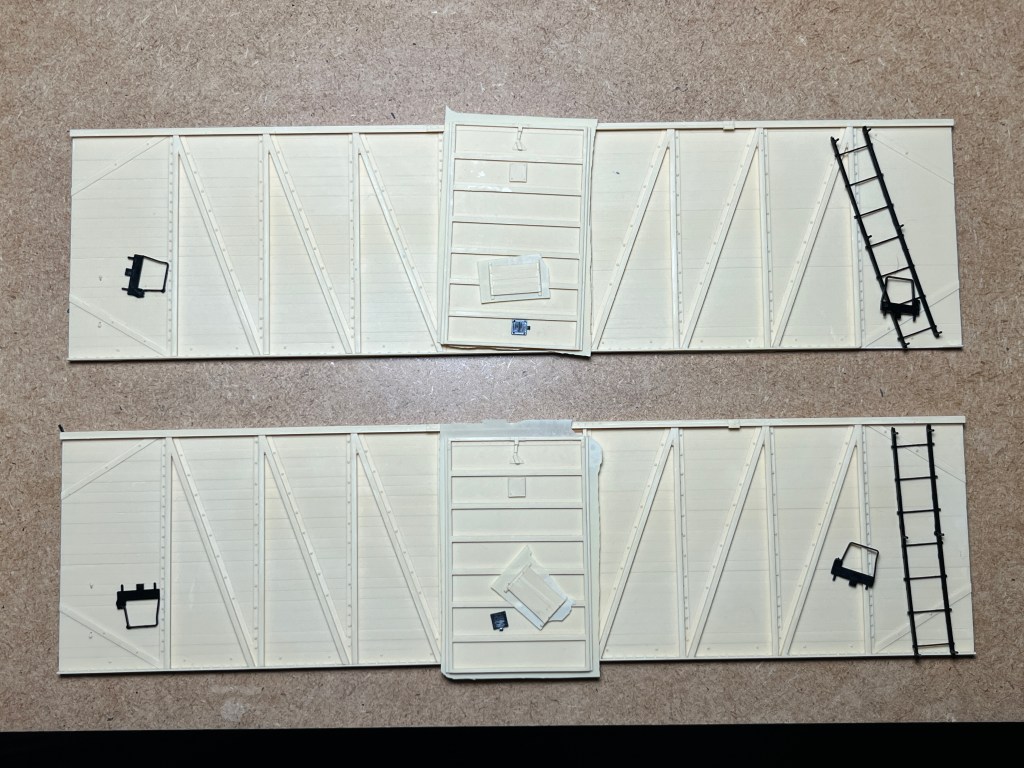
I got the box from Tony just before Christmas 2025. Inside was a new-in-the-box Chooch Ultra Scale II Nickel Plate Road War Emergency box car kit. These models are about 30 years old now. They have exquisitely-cast resin components, custom-made Delrin ladders and detail parts, and a lot of very useful extras plus decals. They’re like an HO scale Sunshine Models or Westerfield flat kit–with two side and two end castings, a roof, and an underframe–only they’re A LOT bigger.
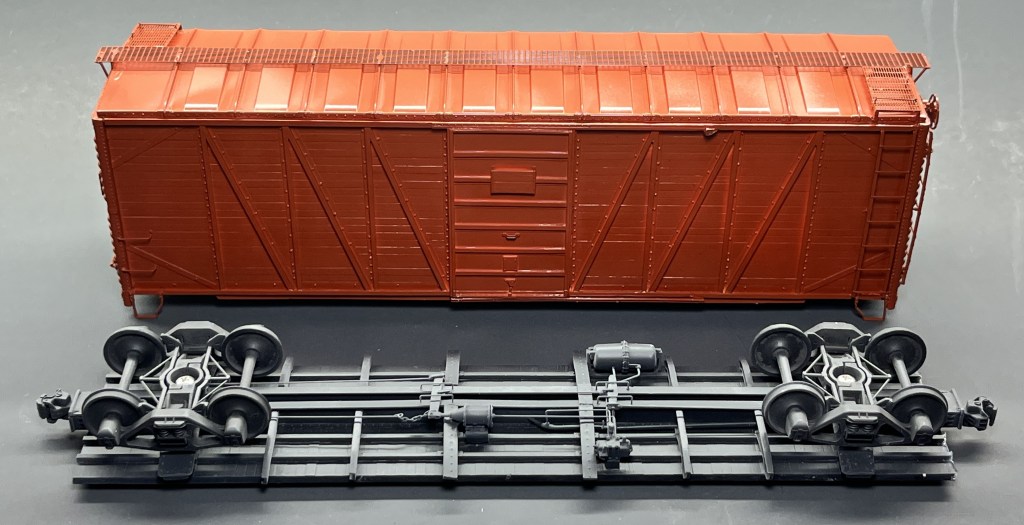
I forgot to take a picture of Tony’s kit as I received it. So you can get the idea, here’s a picture of a similar kit, below.

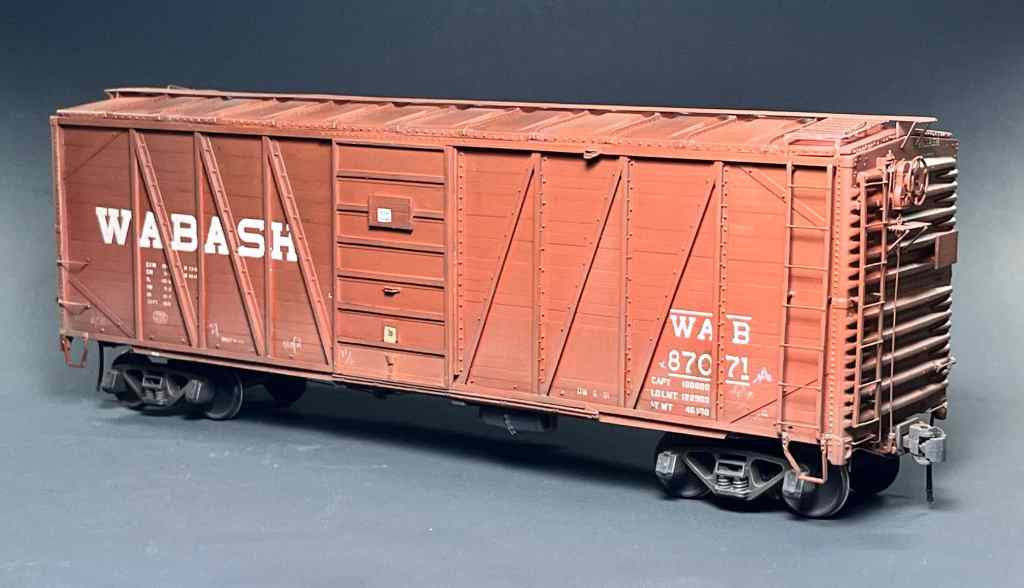
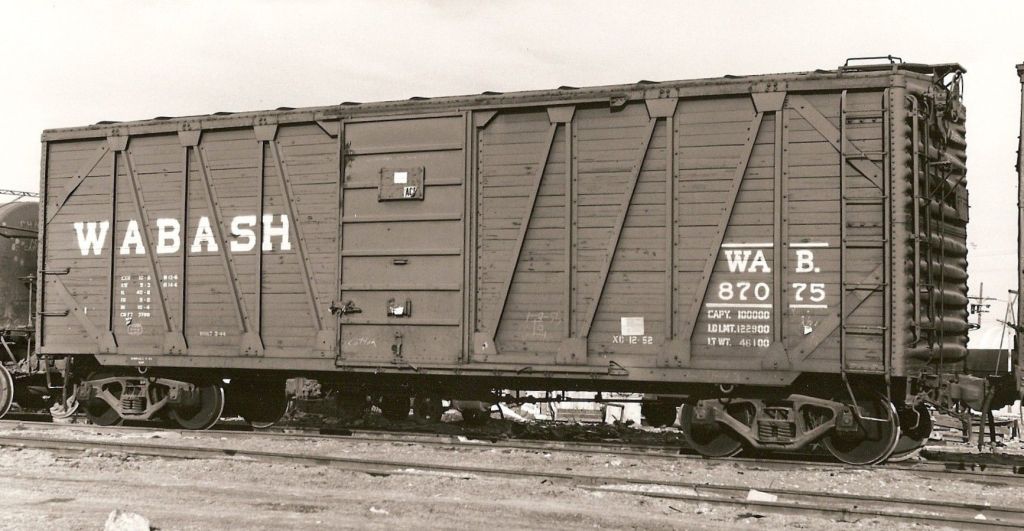
Per Railroad Prototype Cyclopedia, No. 19, Wabash built 125 wartime composite box cars in March and April, 1944 at their Decatur, Illinois car shops. The cars were equipped with seven-panel Superior doors, seven-rung side and end ladders, AAR trucks, Apex running boards and brake steps, and Miner power handbrakes. They were painted Wabash freight car color with black underframe and black trucks.
Below. One of the prototype cars, circa 1953. Photo by Col Chet McCoid, Calexico, CA, 15 Jan 1955. Photo courtesy Bob’s Photo.
While the kit was for a Nickel Plate car, Tony asked if I could paint it as a Wabash car for his railroad. Before agreeing, there were two Wabash-specific things I had to consider: The bottom side sill, and the side gussets.
I considered the bottom side sill first. The Chooch model represents a Nickel Plate car with a tabbed bottom side sill. The NKP prototypes looked like this, with tabs outside the bolster and stringers.

The Wabash car had a “straight” bottom side sill, and looked like this. This sill covered up the bolster, stringers and everything else. Adding this feature would be easy using styrene strip.

The second consideration is the addition of gussets on the top and bottom of the outside side bracing. My old friend and Wabash freight car expert Rob Adams and I went back on forth on these gussets. Rob wrote On the reinforcement gussets, before 1950 the Wabash shops had begun modifying the 87000-87124 cars with reinforcement gussets at the joints between the vertical and diagonal truss members. The RP Cyc article, however, said something about the modification beginning in the early 1950s. Adding them would’ve been easy but I chose to omit them, believing there may have been some cars still running without them in 1953. Personally I think the car looks cleaner without them.
Building the model took seven months because I had a lot of difficulty getting parts. I had to separately order trucks, draft gear, stirrups, running boards, brake gear and a few other thing because I either broke parts or replaced them for one reason or another. I ran out of paint and Dullcote. Nevertheless, I started in February with what I had on hand, and got the underframe done first.
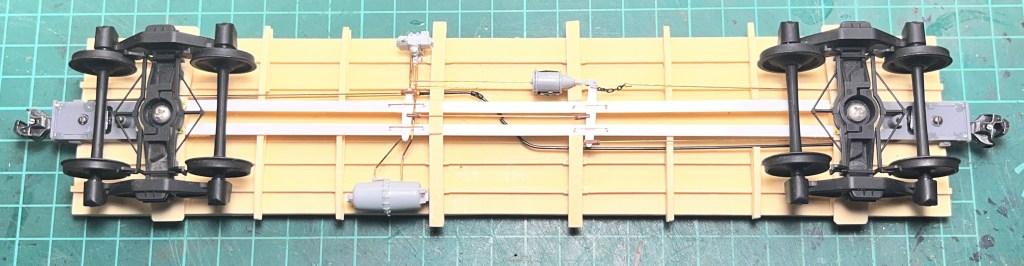
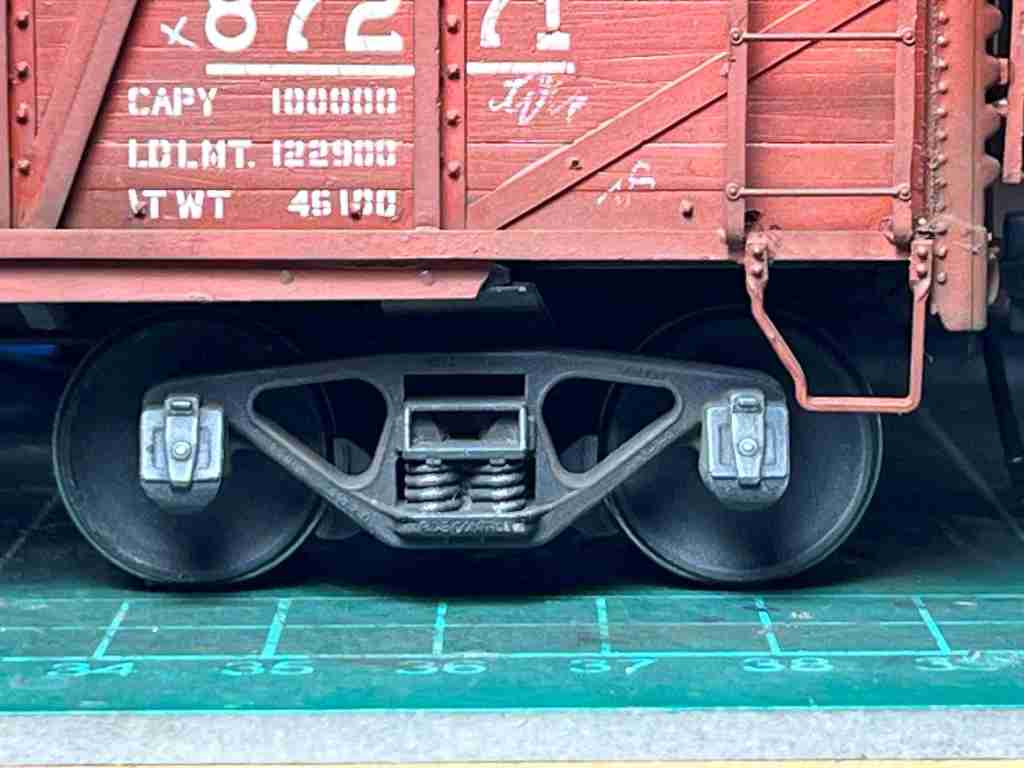
Below. A photo of the completed underframe. I added long caps made of styrene strip over the centersill, all the stringers and the air brakes and brake piping. The trucks are Kadee ARA, and the draft gear boxes are the new Kadee-compatible products from Smoky Mountain Model Works.
Next I built up the sides. I added all the detail parts seen below, plus grabs. To approximate the Wabash-style side sill, I added a long strip of Evergreen .020 styrene across the face of the bottom side sill, then cut and fixed a long, angled brace below the side sill. I fixed both of these parts with Tamiya Styrene Cement.
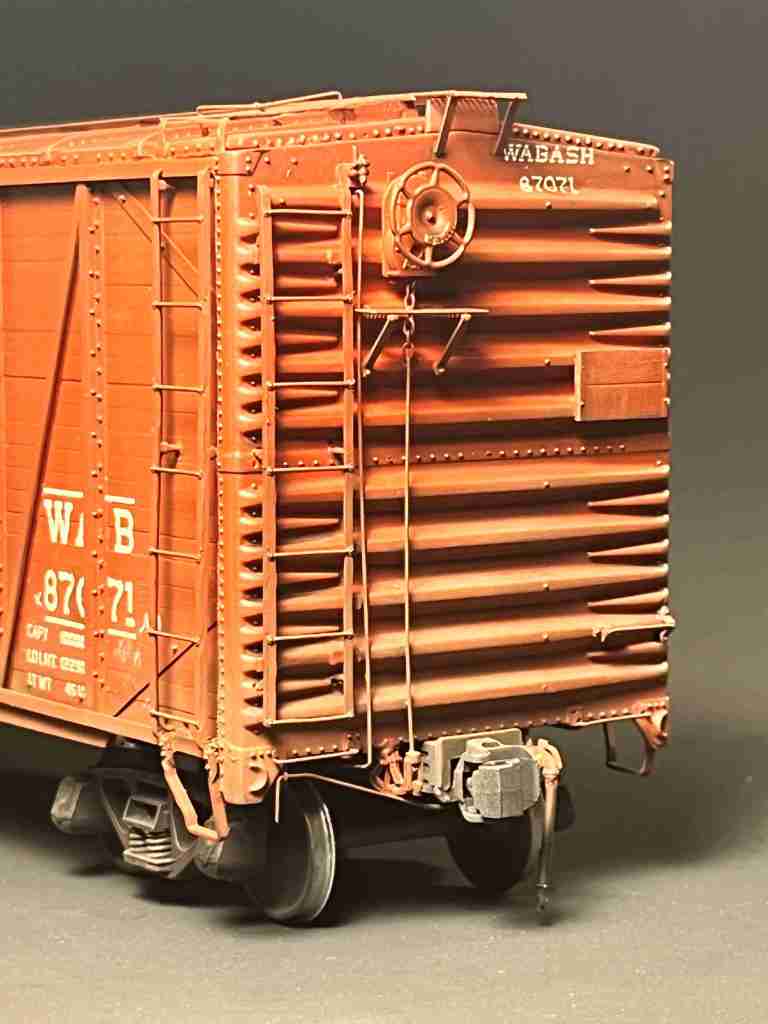
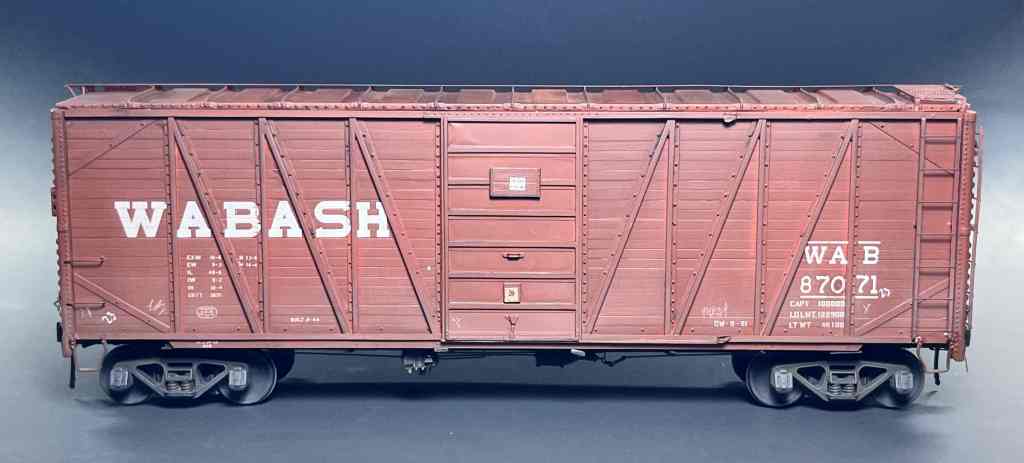
I forgot to take a detailed photo of the modified side sill during construction, but here is a view cropped from a picture of the finished car. The addition of the styrene strip across the face of the side sill can be seen above the truck. The ladder and step are attached to it. The reinforcing strip below the sill can be seen with the angle cut in. Rivet detail was added during painting.
I built up the car ends one at a time, carefully ensuring the ladder rungs were even across the sides and ends. Here’s a photo of the brake end on the finished model.
I finished the roof last then assembled the carbody. Apologies for the washed out picture. Just about everything is done here and we’re ready for sandblasting and painting. The running board came from our friend Gene Deimling and it is a perfect fit. I installed it with canopy glue.
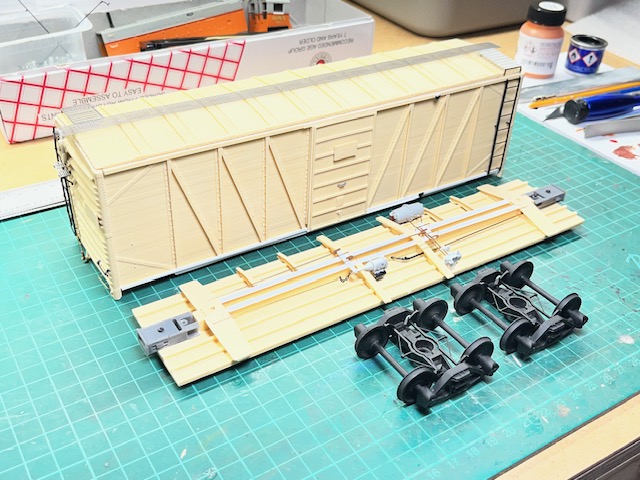
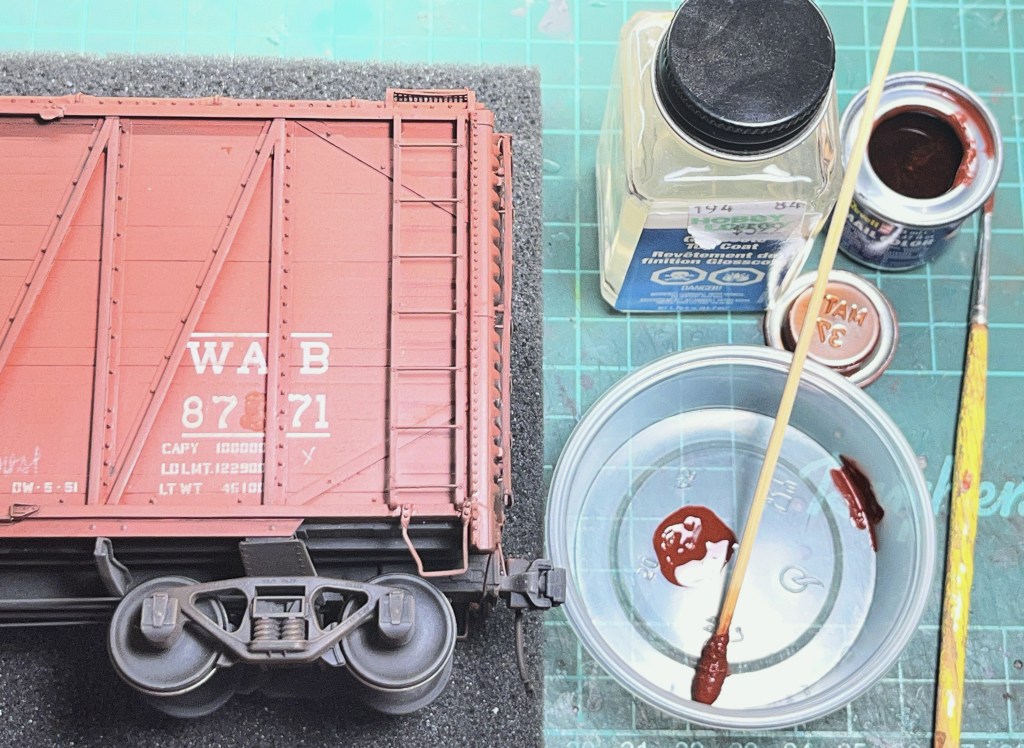
Below. We are downstairs at the paint desk. Grab irons and corner grabs are installed (I use Tichy.015 wire). Almost everything is in place except the stirrups which will be added last. I’ve already hit the underframe with an initial coat of black paint.
I sandblasted the model in my North Coast sandblasting booth to prep it for paint. Sandblasting is important because this is a multimedia kit with resin, plastic, metal and Delrin parts, and blasting preps all the parts to accept paint. I painted the model with a mix of approximately 75% Tru Color TCP-191 Wabash 1944-60s Frt. Car Brown and Tru Color TCP-082 Rich Oxide Brown.
I had a choice of Wabash decals to use for the car and none of them were perfect. I ordered two different Protocraft sets and three different K4 sets and none of them quite fit. All the large Wabash letters were a little too big; the smallest ones I had in hand were from a Protocraft set so I used those. I had to cut the H in half and scrunch it a little to fit, then I noticed the ‘Bash had to do the same thing on the prototype cars. The rest of the data was cobbled together from the Protocraft and K4 sets.
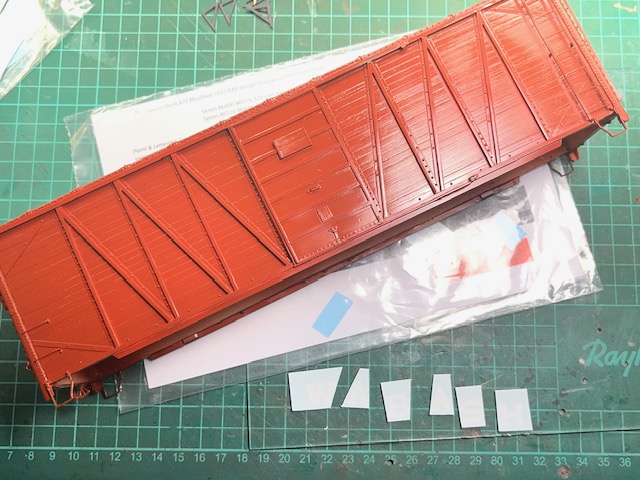
Decaling went quickly, and once the model was washed I shot it with Pactra clear matt finish (see below).
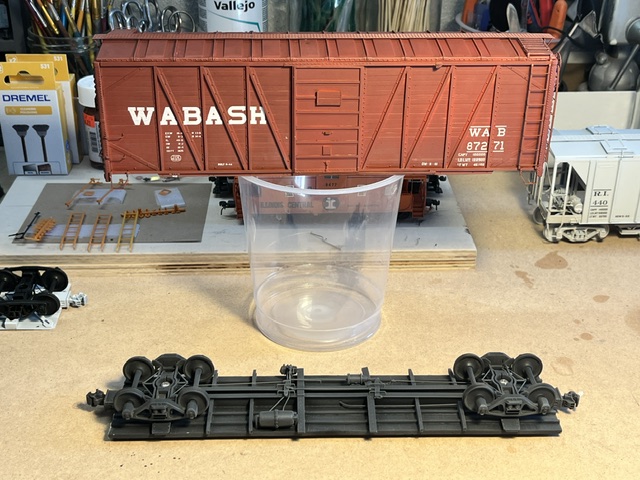
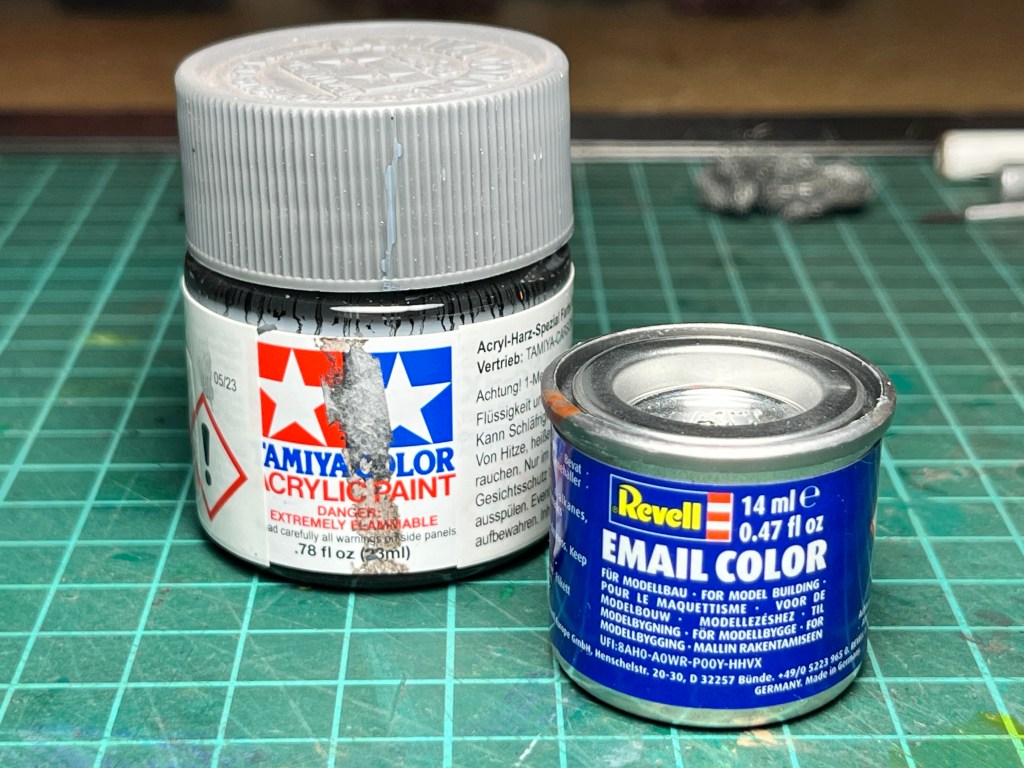
I mentioned in my last post that I can’t get my usual paint products here so I had to use an alternative. For this model I used Pactra Siedenmatt (semi-gloss) that I found at my local model train store, Diba Modellbahn in Kaiserslautern. After a whole lot of testing and thinning it worked great. I think the finish is better than Dullcote. Pactra paint comes in these tiny metal cans, as seen below. The larger Tamiya jar is in the picture for reference.
I added a little of the original color to the matt finish and sprayed it again to blend the finish and fade the decals a little. I weathered the model lightly with Testors Model Master Light Tan and AIM Delta Dirt and Soot Black weathering powders. The individual side boards are beautifully represented, and pop out with a little weathering.
Below. I took the picture below, and sent it to the Proto48 modeler’s group, then packed up the model for shipment. Then I noticed–Good Grief! I forgot to add air lines.
I unpacked the model and installed air lines–solid brass Protocraft parts with rubber air hoses–and painted and weathered them. I also added routing cards from a document I have on MS Word. Below: That’s better.
Finally I repacked the box and started writing this blog post. As I wrote up the construction history of the prototype cars I realized to my horror that I put the wrong car number on the car. Rookie mistake!
I changed the number from 87271 to 87071 to stay in compliance. Since I was out of the original paint, I carefully scraped off the 2 and mixed up a blend to try and match the original color.
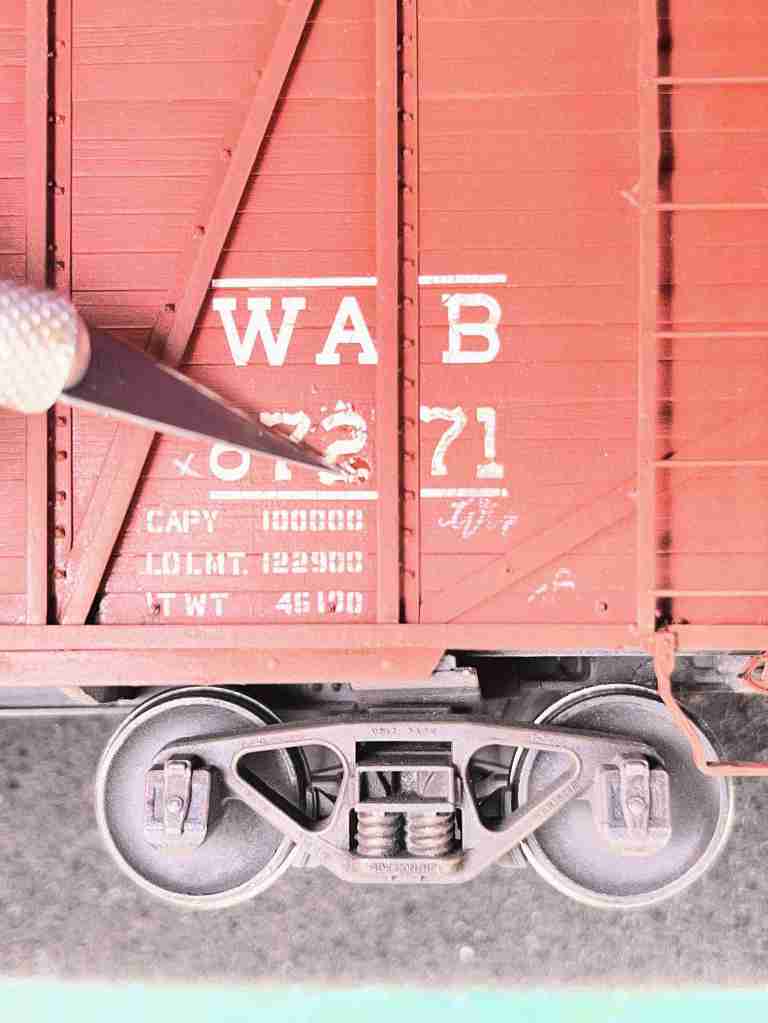
I dabbed on the new blend very lightly over the old decal location, and placed on the 0. Then I weathered to match. I got close, but if you look carefully you can see there is a little more weathering over the 0 than the other letters and numbers.
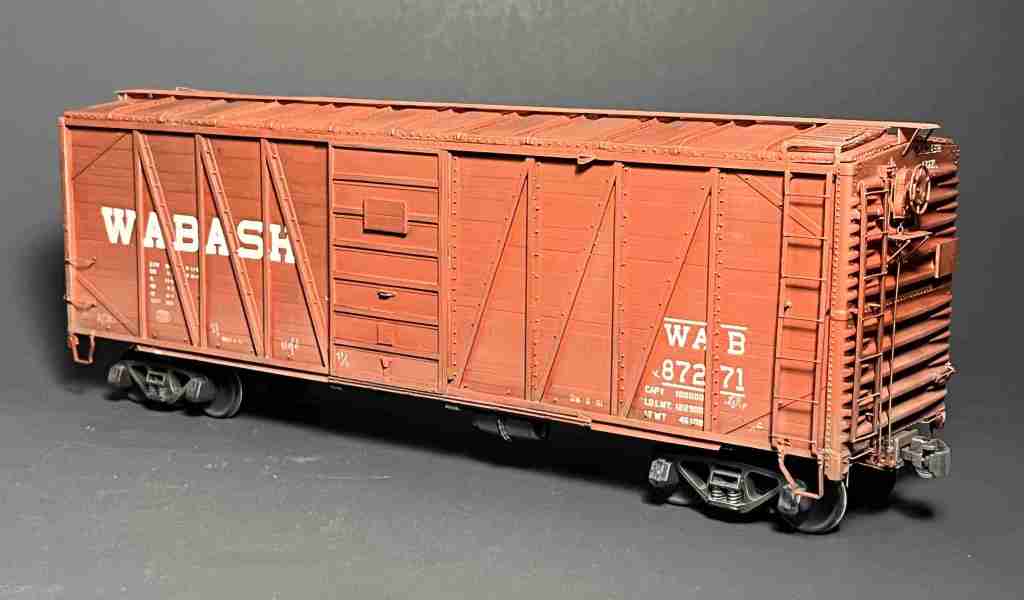
At last the model is complete. I can see some traces from changing the number, but I think the bottom side sill came out fine. I hope the car serves reliably on The High Line.
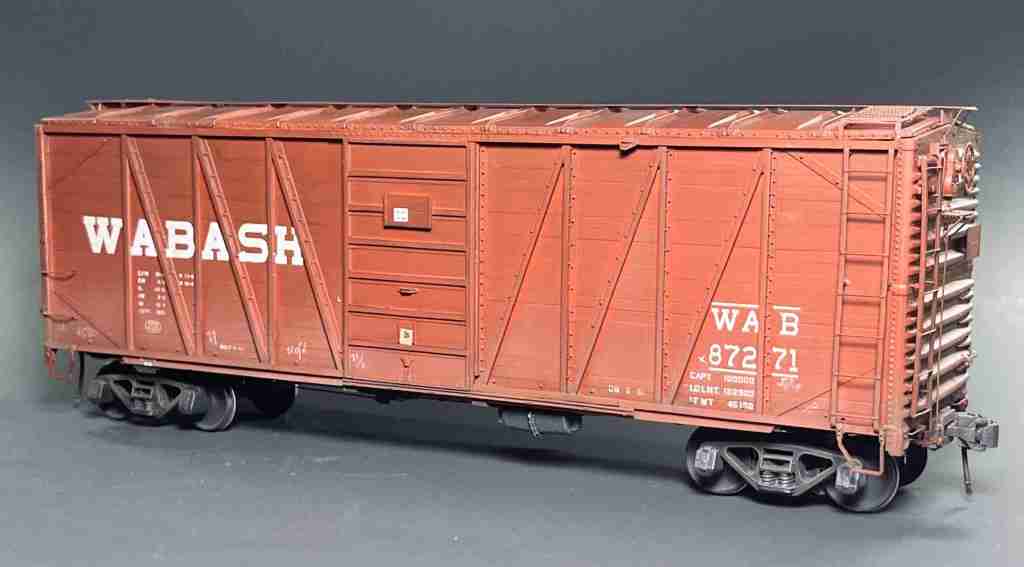
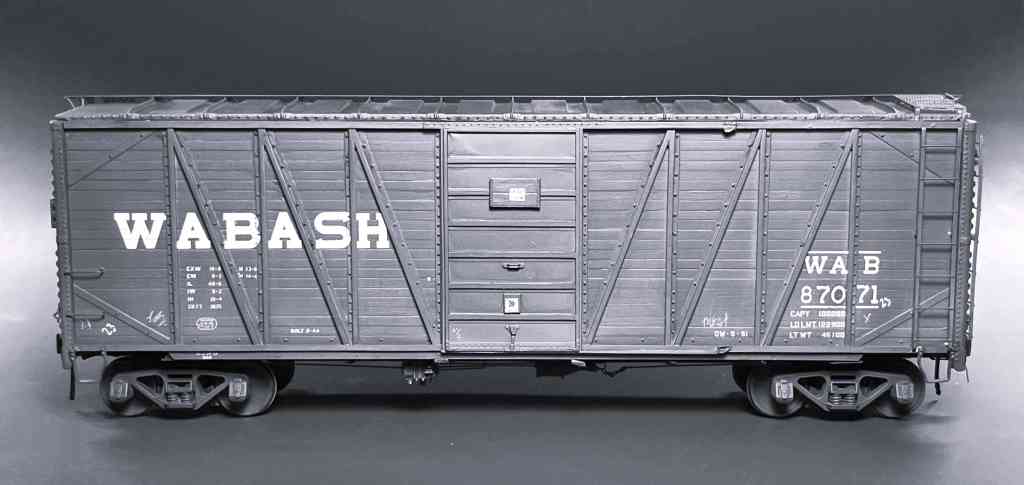
Here’s a black and white photo for fun.
Meanwhile…
Here at home we’re enduring a ghastly heat wave. June is usually light jacket weather here, but we’ve had dry and very hot for ten days straight with temps of ~100F or higher. My wife’s car registered 50 C yesterday–that’s 122 F. There’s no air conditioning here so you’ve gotta live with the heat. It was 90 F in my bedroom overnight last night. The bad news is I’m not going to my fourth floor train room anytime soon because it’s a million degree up there. The good news is I’m losing weight because I’m on an all-popsicle diet.
Nevertheless, downstairs at the first floor paint desk I’m preparing an O scale Wabash car for my own car fleet. I bought this one, below, from John Dunn. It’s an old Precision Scale brass import that was finished as a Lehigh Valley car. I cleaned it up, stripped the paint, and added Kadee-compatible draft gear from Smoky Valley and a few other details. I used K4 decals for all the lettering. The completed model will have San Juan Andrews trucks. This car and many others are being completed this month.
Delays notwithstanding, the Wabash box car is finally on it’s way to The High Line. And not a moment too soon, because the next box from New Jersey has already arrived…
I hope you all have a cool weekend! – John
