

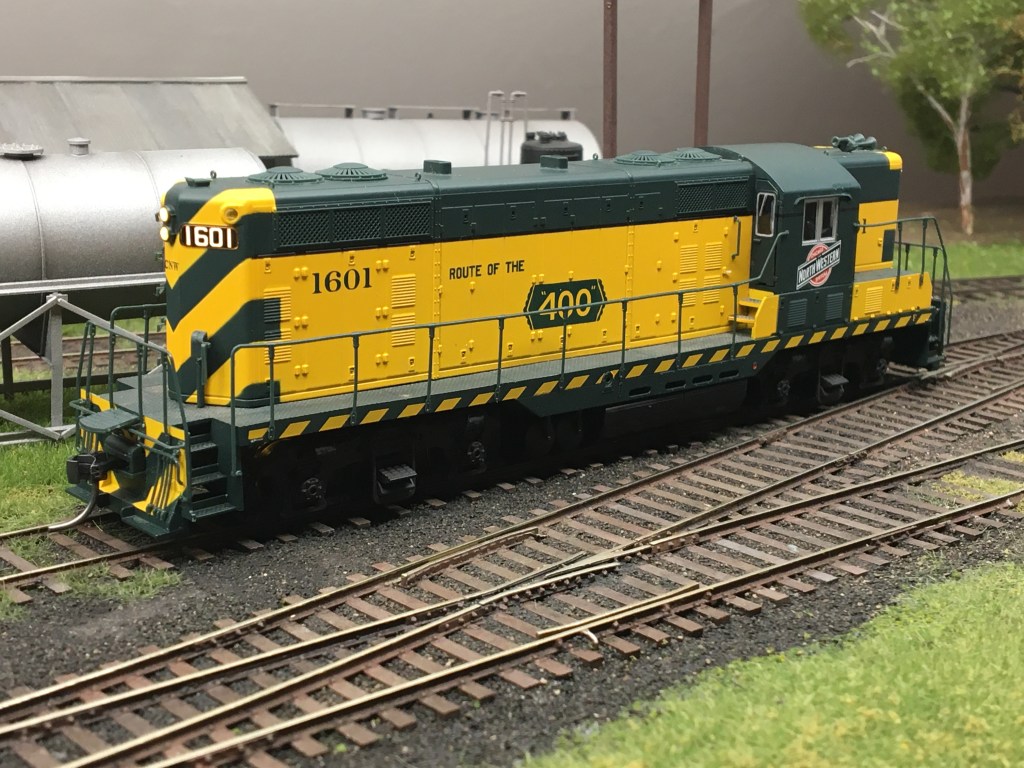
Last week I received a few locomotives I bought from my friend Jim Dick in Minneapolis. Here’s one of them: a second-run CNW GP-7 in as-delivered paint. I figure this model was run around 2003. That makes it–what, 18 years old? The paint still looks great.
As soon as I got the engine out of the box I removed the original DC underframe and replaced it with another one I had rebuilt with sound/DCC that I’ve been using on a PRR engine. The 1601 will get a few prototype-specific details as soon as I can find the time.
Earlier this week I sent the photo to a private online group we informally call Ron’s Train Club. Everybody came back and asked me about the track and track details. So here are a few comments on the track and detail parts I used on the new Hermitage Road layout.
There’s a whopping total of four turnouts on the Hermitage Road layout. Two are old Code 70 Shinohara wyes, and two are Micro Engineering Code 70 #6s. All the track is Micro Engineering Code 55 flex track.
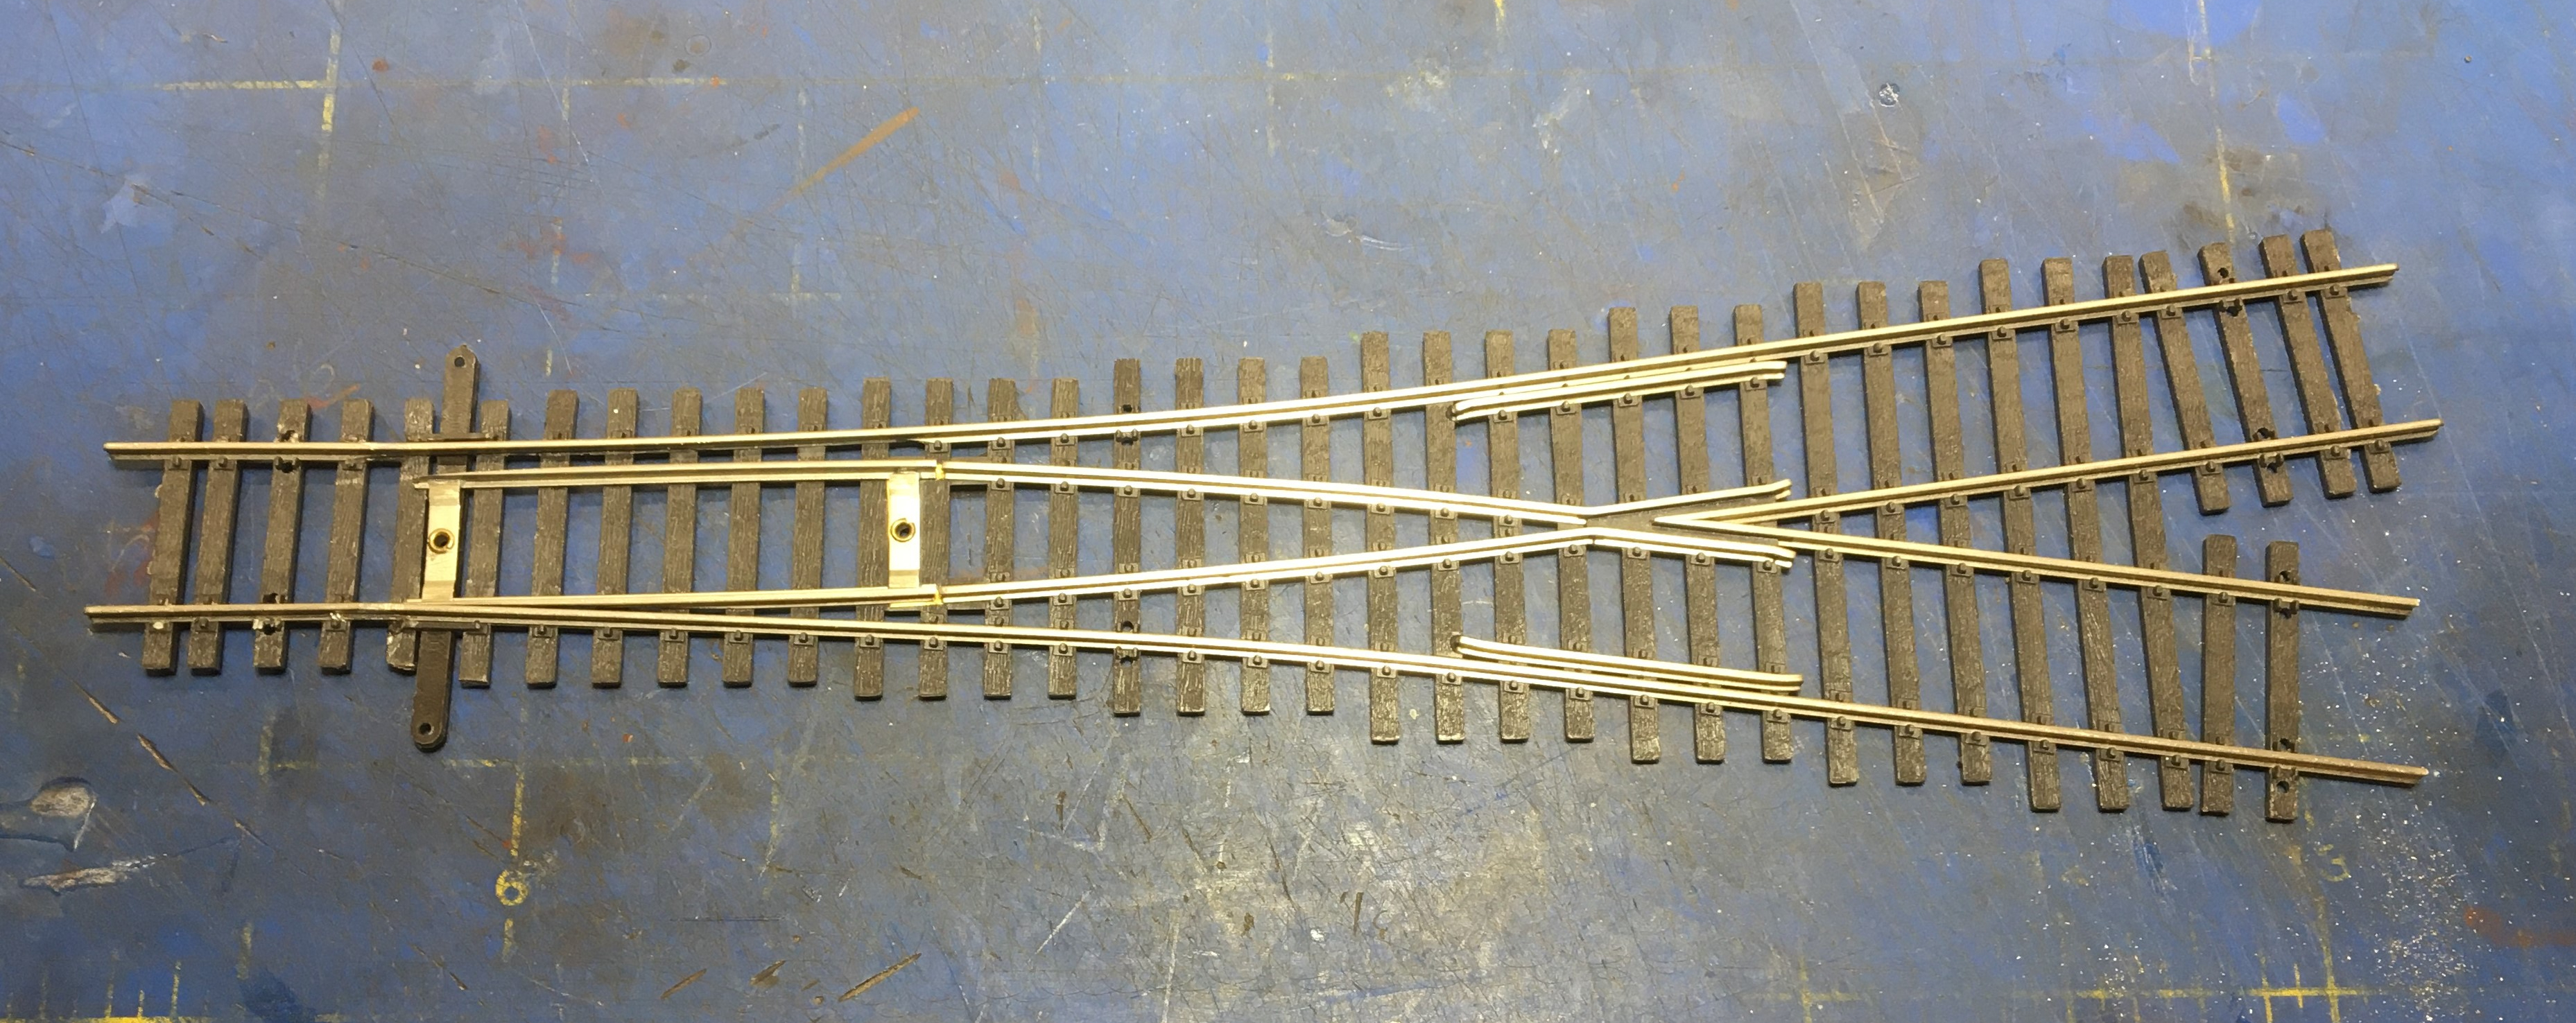
I extensively rebuilt all four turnouts at the workbench. I put a lot of work into the Shinohara wyes. First, to make them “DCC friendly” and improve electrical connectivity, and second to improve appearance. Here’s is a short photo essay that explains what was done to the Shinohara turnouts. The photo below shows one of the two wyes right out of the box as I started the rebuilding.
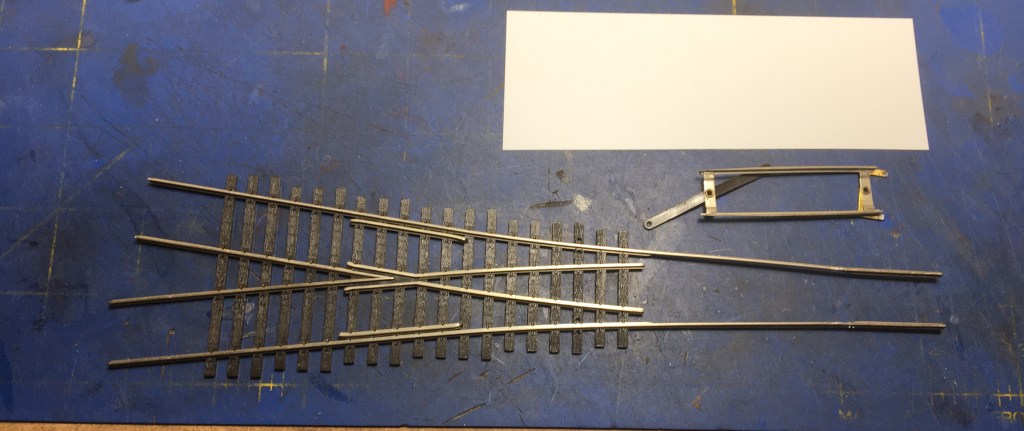
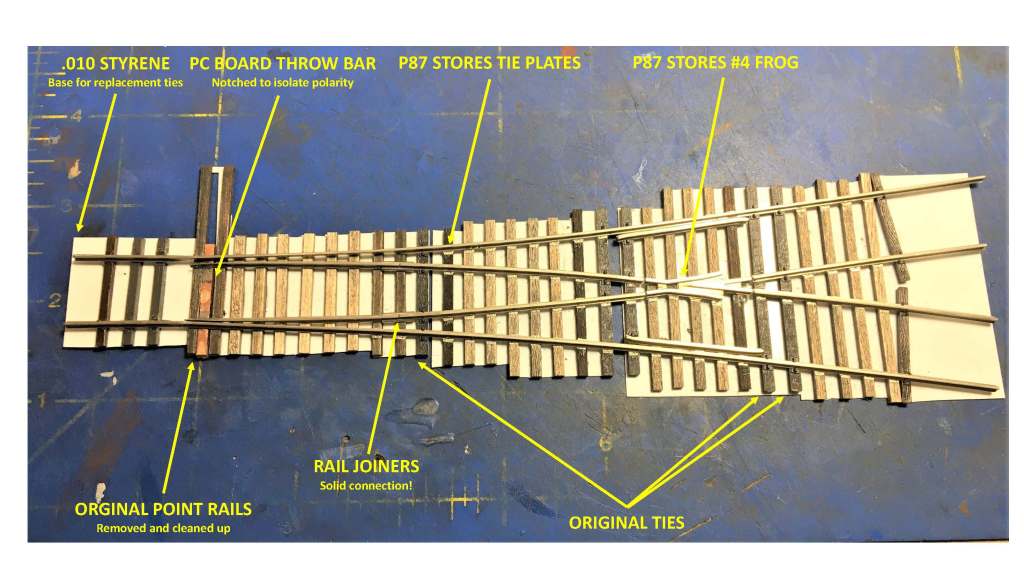
The first thing I did was remove all the ties around the points rails, and remove the point rails and the throw bar. I unsoldered the point rails for re-use, and discarded the plastic and metal throwbars parts, and all the plastic ties. The white thing at the top of the photo is a piece of .010 styrene, which will be used to align new ties to the model.
I made a new throw bar using PCB ties from Fast Tracks. I cleaned up the original point rails and re-used them. The photo below shows, after measuring the spacing for the point rails, how I taped everything into perfect alignment on the workbench, and then soldered the rails into position.

Next I re-attached the point rails using Code 70 joiners. Joiners provide a much more solid connection, and much better electrical connectivity. Then I glued the styrene to one of the remaining plastic ties on the turnout (the one on the far left). Then I glued a tie to the stock rails to the right of the points to keep everything in alignment. Then I slowly slid ties underneath the rails and glued them to the styrene. Once they were in place I trimmed the ends of the ties.
You can also see that I cut a notch in the throw bar to electrically isolate both sides of the point bar.

Below. After completing the tie replacement around the point rails, I cut off more of the original tie strip–about ten ties at a time–and replaced the ties one-by-one. I did this three or four times and worked my way from one end of the turnout to the other, replacing almost all the original ties. I retained about four of five of hte original ties to keep the track aligned properly. You can see them if you look close. They’re the ones with the big spikes and wood grain detail.
I secured the rail to the ties, and the ties to the styrene sheet, with simple ACC. Once the turnout is put in place I spike the rails down to keep everything in place.
You can also see that I replaced the original Shinohara frog with a #4 frog from Proto87 Stores. The rails are physically isolated on each side of the frog.

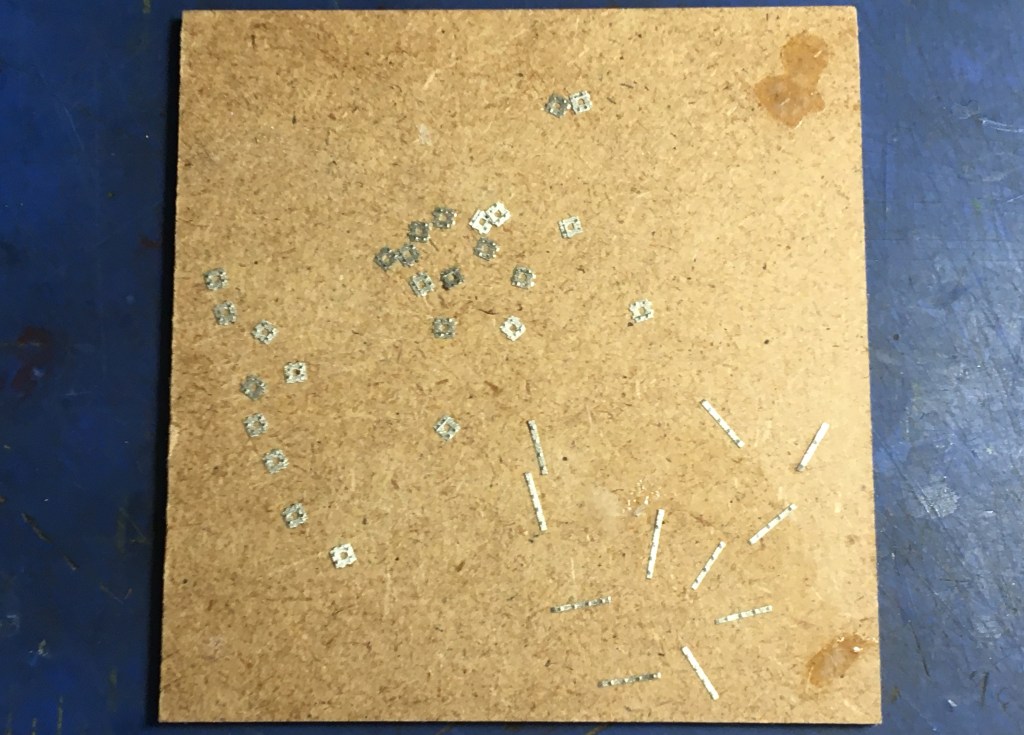
Here are a few of the parts I used to decorate, or detail, the turnout. These Code 70 joint bars and tie plates are all fromProto87 Stores. I cut them out a bunch of these at a time and fix them to the turnouts in the right places with ACC.
Below. A closeup of the replacement frog and tie plates. Can you pick out the remaining original Shinohara ties?

Here’s a photo that describes some of the detail parts used.
Here is one of the two wyes installed on the layout. I just had to glue it down with Elmer’s Glue and that was that. The holes seen at the diverging rails are where wires were soldered.
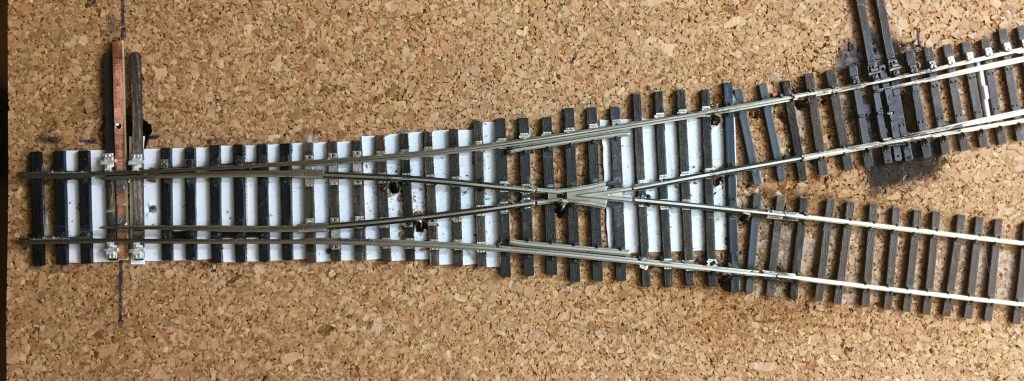
I lightly hand-painted the track and turnouts with Testor’s Rubber. Later I went back and painted almost every tie with slightly lighter shades of brown, tan and light gray.

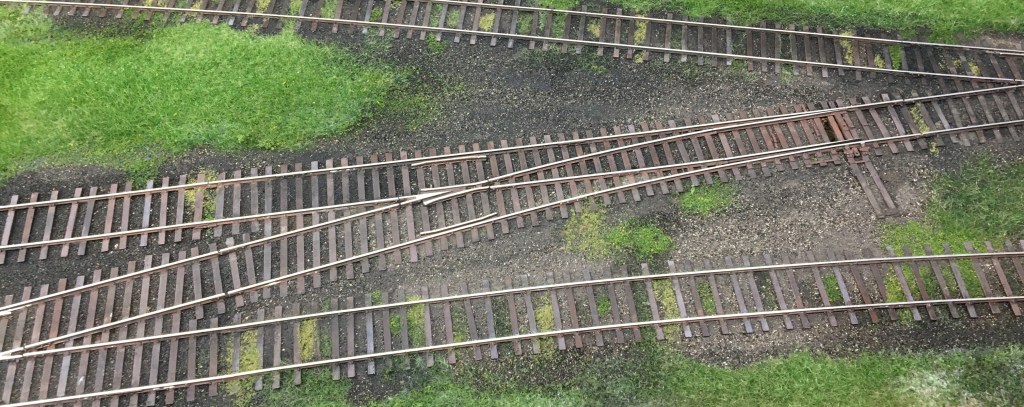
Finally, below, is one of the rebuild wyes after cleaning, wiring, ballasting and weathering. The weathered ties are subtle but you can see the differences in color. The grass is a combination of static grass and Woodland Scenics stuff. I take my time and try to never get any scenery material on the top of the rails or the ties. I’ll cover track scenery later.

Here’s a closeup of the switch block while applying ballast. I have added a few turnout rail braces from Details West at the point rails. The bars running across the rails are styrene rod simulating Gauge Rods, which used to keep track in gauge around hard-beaten areas. The joint bars are visible, as are some of the tie plates. Some spikes are visible showing where the track had to be spiked to maintain correct alignment. There are also straps made across some of the ties; those were occasionally used by the real railroads to keep the ties in proper horizontal alignment. I added them for fun.
The ballast is stuff I picked up from the old Pennsylvania Railroad roundhouse site in Richmond, Indiana back when I lived in the U.S. I sifted it down and baked it, and removed all the metal particles with a magnet. It makes a great cinder ballast–because it’s real cinder ballast. Trimming them also makes them look a little more rough-cut, which was common in the 1940s.

One of the two installed Micro Engineering switches is shown below. I didn’t modify these turnouts very much, other than replacing the frog with a part from Proto87 Stores and and adding detail treatment like was done with the wyes. I didn’t replace any ties.
Here, below, can be seen the difference between the frogs. The Proto87 Stores flog is much cleaner, and tighter, and improves the performance and the appearance of the switch.

In the lead photo of this article you can see one of the frog with a lot of bolt detail added. Here’s an under-construction view. On this frog, I simply added bolt heads to the side of the frog. I used Tichy nut-bolt-washer castings, sometimes called N-B-Ws. The few joint bars seen are from Grandt Line, and the fasteners for the guard rails are from Proto87 Stores. Many of these details disappear when the track is painted, but they show up again in photos.

And one last photo of one of the Micro Engineering turnouts in it’s natural habitat. Again, it’s easy to super-detail track and turnouts like this on a small layout, and even easier to do it at a layout like Hermitage Road that’s built at sit-down height.

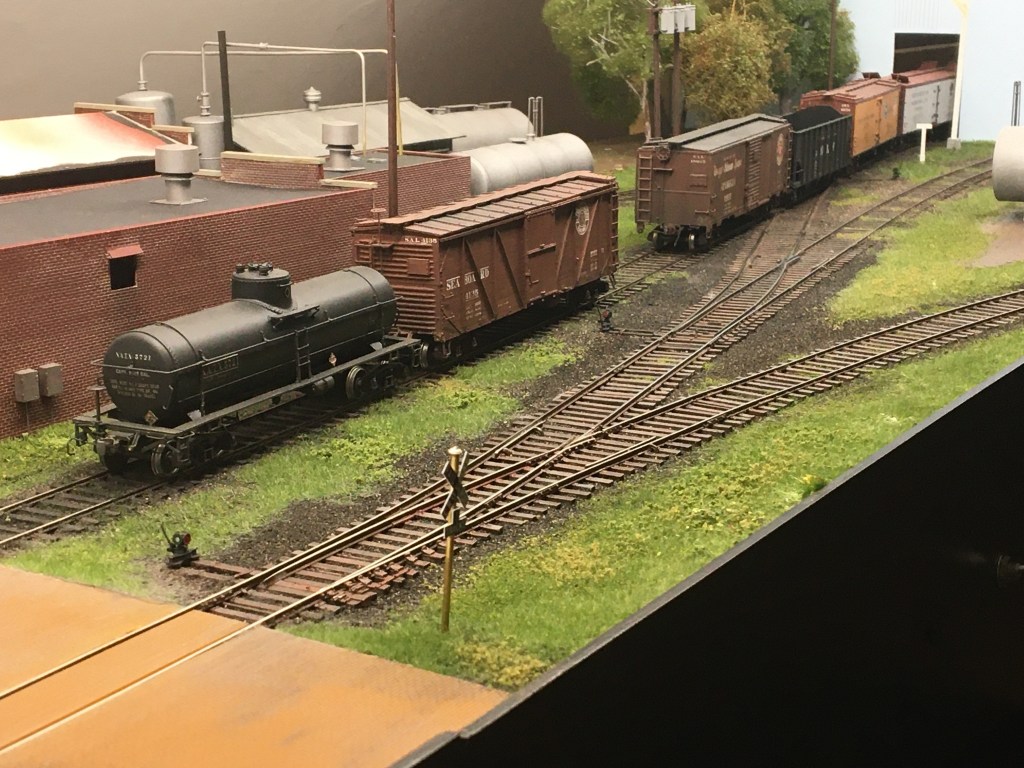
I hope you enjoyed this. Here’s a view of the layout from my first operating session last week. There’s a Seaboard VO-1000 working hard behind the backdrop. The industry in the left foreground is the Alcatraz Paint and Varnish Company, which is almost entirely scratchbuilt. I’ve already replaced it with a much larger industry, the Sitterding-Carneal-Davis Contracting Co. More on those changes another time.
Hope you all have a blessed week! Begone, Covid! – John G

Beautiful work, John. A modeler can be very happy with just a few turnouts and a smaller space. It provides time to detail stuff like track and buildings which sometimes get rushed to begin operation.
Barry
LikeLike
Thanks Barry! The trackwork and scenery was done in about 45 days. It went up so fast I barely took time for photos. There’s no runaround but it wasn’t built to be a big, complicated layout. Just something simple that I can switch cars around for a half an hour. I’m not a big-layout owner like you! John
LikeLike
John, thanks for posting. I just got some Proto 87 Stores turnouts….the first thing I thought when I saw the frogs was that Tichy NBEs would make them look so much better. You show that that theory is correct. Your track looks great.
LikeLike