

Progress on model construction has gone very well in the first two weeks of September thanks mostly to a work trip to Stuttgart. I spent four nights in Stuttgart last week and was able to get a few hours of work done every night.
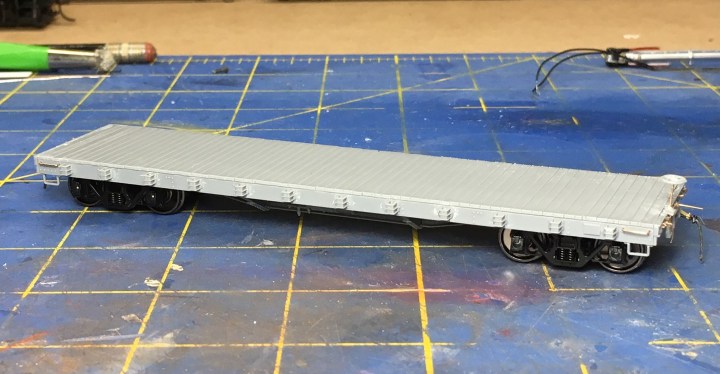
The first car I built up while away was an HO scale Tichy flat car from the Central of Georgia Historical Society. I bought it at the last St. Louis RPM directly from the society table there. The model is part of the society’s “Fix The Flat” program. Proceeds from the sale of the model are going to restore the society’s rescued TC&I-built Central 1925 flat car. You can read more about the car and the rebuild program at the Central’s website at http://www.cofga.org/flat-car-restoration-project/.
Aftermarket details added include Hi-Tech rubber air hoses with brass fittings and Tahoe Andrews trucks. Pre-1948 cars were painted black; post-1948 cars were painted freight car red. I still haven’t figured out which way to go, but I’ll probably model a red car to keep it from looking like an ACL P-11.
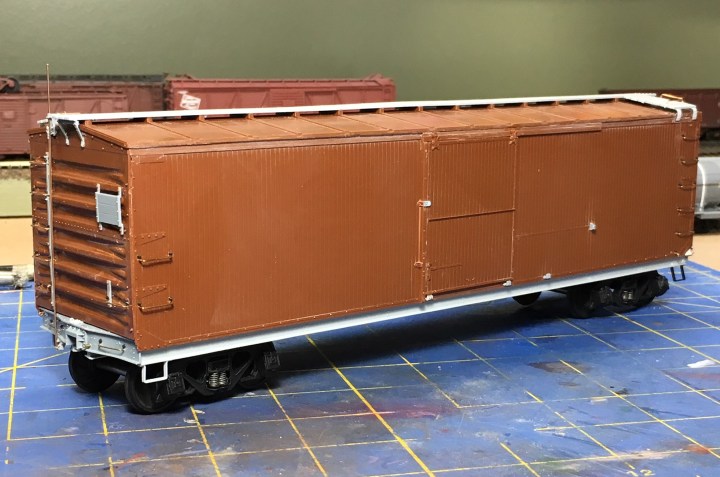
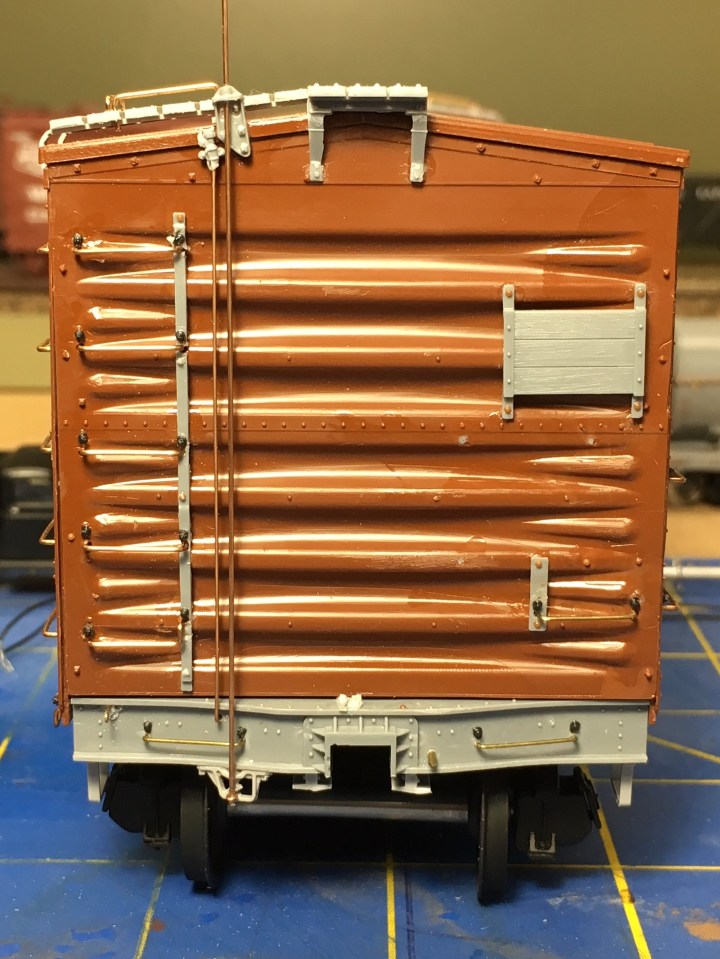
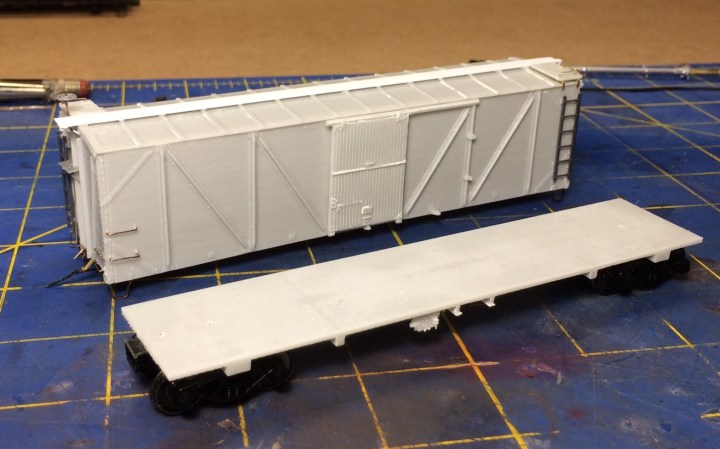
The second car I began building was a kit offered by the NP Historical Society in 2015. This is a magnificent model and was cast by Aaron Gjermundson. I don’t know who made the masters. The kit is fantastic and contains everything you need to get the job done. The only parts I had to add were Hi Tech air hoses and attachments and Kadee grabs on the car ends, and I used HO scale 2 x 6s for running boards.
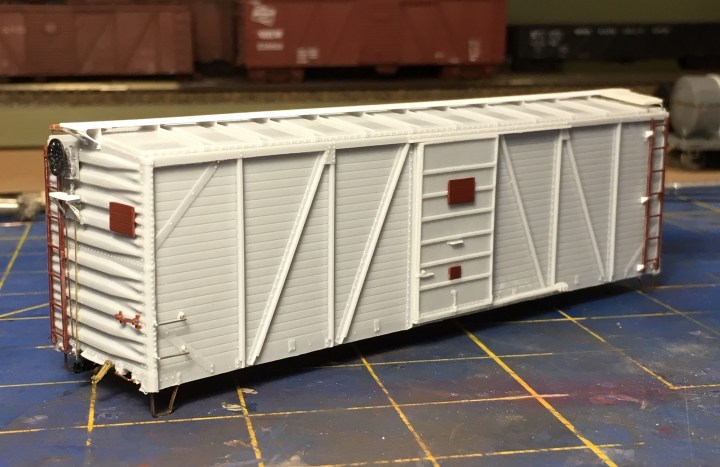
In building the NP car I was reminded of the shortcomings of building prototype railroad models in HO scale. Here is my short list of parts that are badly in need of a 21st century upgrade:
– Running Boards in a variety of sizes and flavors, including a correct running board for the Milwaukee ribside series which has never been offered by any manufacturer (see RP Cyc, boys)
– Latitudinal boards and grabs
– Framework and attachments for Latitudinals
– Coupler pockets–SCALE coupler pockets
– Ladders
– Trust Plates
I ordered a large selection of Pierre Oliver’s parts on Friday for new builds and to retrofit a few older models. Pierre is a friend and an outstanding modeler, and he offers a high quality line of parts through his company Yarmouth Model Works. The eyebolts alone are worth the money–60 for $3.00 (not $5-6 for a dozen as offered by DA). Some modelers have reported some difficulty constructing the Yarmouth ladders but I’ll reserve comment until I try them myself. I have discussed the subject of ladders with my German friend Peter Aue and he is sure I will be happy with Pierre’s ladders. I used plastic ladders from Branchline on the NP car and after 20-25 minutes of work on them with a soft file I think they will work nicely.
If you haven’t seem Pierre’s site, you can check out his complete line at http://www.yarmouthmodelworks.com. Pierre is another St. Louis RPM vendor and therefore he is a preferred customer. I am very much looking forward to his new ACL O-16!
Many previously-finished models are in need of repair and renewal. Here’s a few photos of models that were repaired and upgraded this week.
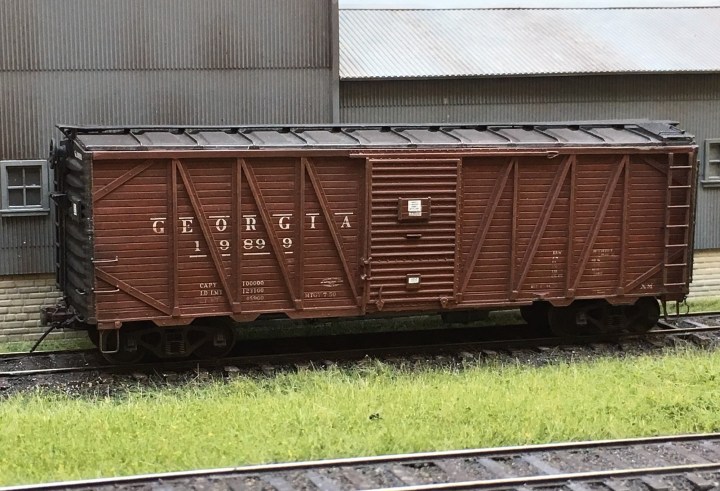
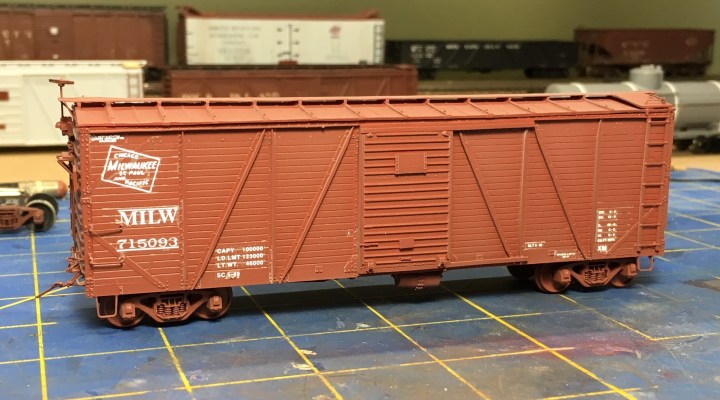
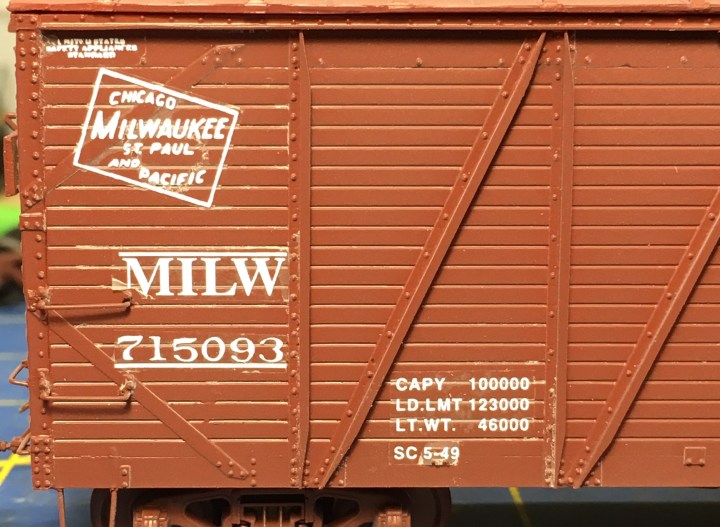
Georgia Railroad “War Emergency” Box Car
This is an all-time favorite model, and I wrote an article about it in an old issue of the Seaboard-Coast Line Modeler magazine. This is a Sunshine Models kit with an Intermountain roof and a Kadee running board attached. I replaced the Kadee trip pins with Hi Tech Details air hoses. A simple job. I like simple.
Rock Island Single Sheathed Box Car
Here’s another old Sunshine car that needed a little repair work and a new pair of Tahoe Dalman trucks. I don’t recall what color I used on the model but it is not very “RI Maroon”. Tru Color Illinois Central Box Car Red was used to get the new trucks close to the carbody color. A little weathering to blend everything in and it’ll be back on the rails.
If you haven’t figured it out by now I’m a big fan of single sheathed cars.

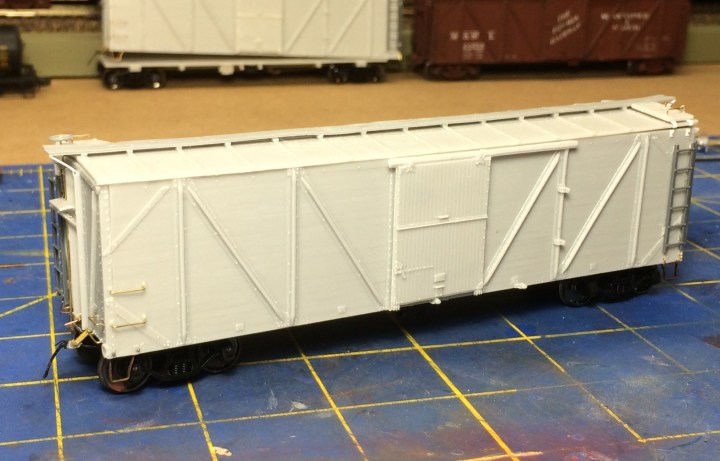
Sunshine Milwaukee Road Single Sheathed Box Car
This project went from great to bad in about a minute. I sprayed Dullcote on the car last weekend and quickly realized that I did not set the decals properly. The result: Bad Decals. I’m going to try and repair it but I have not had much success doing this in the past. If you guys know of a good replacement decal set please give me a shout.
Above. A nice model with decals gone bad. Below. A ghastly closeup. What a rookie mistake.
I AM NOT taking responsibility for that 5 being offset though. That’s frickin’ refrickulous. After seeing this closeup I think a new decal set is the only way to go. Maybe something from Westerfield?
San Juan Car Co. P48 WP Double Sheathed Box Car Build
You may recall I had a lot of difficulty with this build because the side grabs did not line up with the ends grabs, so I removed and replaced all those parts. I really beat up the model in the process, breaking off detail parts and in one case breaking the corner off one of the bottom side sills. I had to fill a whole lot of holes.
I was able to replace the corner with small piece of styrene and then I added new NBW castings all around, and a whole lot of Tichy .020 rivets. The rivets were added to places that were appropriate, such as simulating tack board attachments for example, and were also added in other places where the rivets were damaged during repair work.
This is a cool model but man, it is brittle. I haven’t even mentioned that I tore up the floor so bad that I had to have the manufacturer send me a new one. Hopefully a good sandblast will clean it up prior to primer.
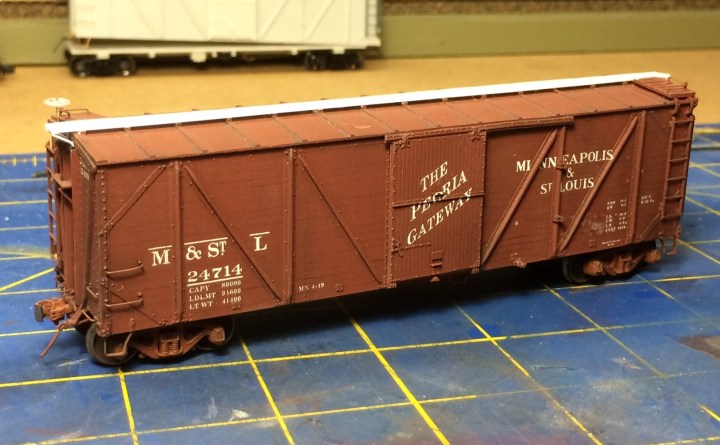
M&StL Single Sheathed Box Car
 Above. This is a Sunshine M&StL box car, one of three that will run on the railroad. The build on this model was started last November and it was completed tonight. I have two more of these models; one is complete and one is already built-up and is awaiting a trip into the sandblaster. The first car I built has some construction problems that were able to be corrected in the latter two cars.
Below is my original car, which I finished back around 2010. I replaced the running board and a few minor details this week. At bottom is another car that was built up last November.
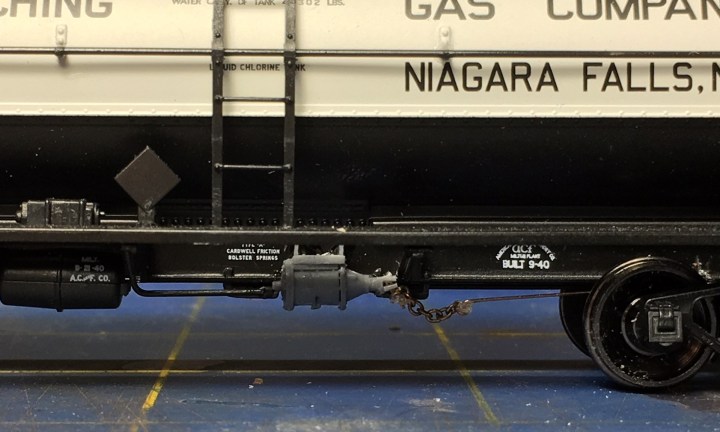
Broadway 6,000-gallon Insulated Tank Car
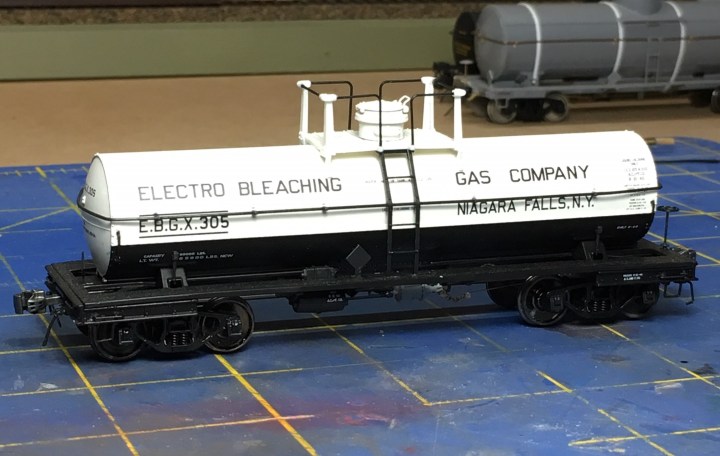
The Broadway 6,000-gal insulated tank car is a troublesome rebuild. Upon close inspection I did not replace any parts except the brake cylinder, and the trucks of course. I planned on replacing all kinds of parts with brass parts, including new handrails and handrail stanchions. I didn’t replace the handrail stanchions because I think that work will ruin the finish on the tank. The factory trucks had to go; they were replaced by Tahoe Model Works 40-ton trucks.
The rest of the factory detail parts…well, they look okay. I’m going to leave almost everything as is, and when something big breaks I’ll do the full rebuild then. The paint and lettering on this model is excellent.
Sunshine SAL “GF&A” Box Car
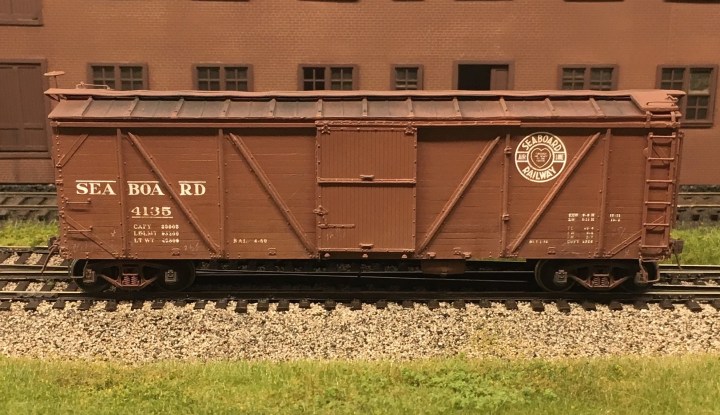
I repaired several cars, including this old Sunshine SAL “GF&A” car. The underframe fell off the car and I needed to re-attach it. Not a problem–it’s back in service today. At some point I will need to replace the running board on this car as well. When I built the car I used something like .010 for the running board and it has been damaged over the years. Should be an easy fix.
PORTAGE TOWER
No work on Portage Tower or the tool houses last week, and none this week. I’m putting a priority on finishing up the NP box car build and the P48 WP car build, and a few more minor car projects, and then I’m heading back to Portage.
See you guys next Saturday after another good week of production. – John G

Hi John:
I just spent the last several hours (retirement is great) reading through your wonderful blog. Clark, mentioned this on the proto group and I know you suggested it to me but I had no idea how comphrehensive it was/ is.
Thanks, for sharing your thoughts about family, life and layouts and those of others. This is just a great read and it helped me focus again on the layout I am building which is a lot like your Ackley and Clark’s Story City branch: a small simple operation modeled well and which can support operation for one or a couple of folks for an hour or so. Helping to re-gain my focus will allow me to quit worrying about whether I have enough industry or operations to be interesting and instead concentrate on building better scenery and equipment. I feel more relaxed already!
BTW, I figure that if a guy were to replace my code 83 track with hand laid code 70 on my portable, Monticello wye layout it could easily become one of many locations on a prototype, new layout, hint, hint. I seriously, could not think of a more deserving guy than you to do it. We’ll see when you get back to the states.
Take care and Bless you.
Barry
LikeLike