

I offered to build a model of Portage Tower for my friend Mike Moore, who is having a layout built for him in his home in Albert Lea, Minnesota. Clark Propst and Bob Gretillat are doing the heavy work. I’m just helping out with some of the fun part.
You may recall that Portage Tower was made popular some time ago by MR editor Jeff Wilson, who wrote an article on the junction and tower in the 1999 edition of Model Railroad Planning. So when I heard Clark mention that Mike wanted to model Portage Tower on his new layout, the tower and scene was already familiar.
Below is a screen shot of the 1999 MRP. So I probably can’t put a photo from the article on my blog without Kalmbach’s permission, but I think I can get away with using the cover…which conveniently has a photo of the portage Tower scene Mike wants to re-create.
![5566950a03fe601ef1280ba9930c0cc2[1]](https://railroadprototypemodeler.com/wp-content/uploads/2017/09/5566950a03fe601ef1280ba9930c0cc21.jpg?w=464&h=595)
The article didn’t really have any useable prototype photos of the area and I found nothing about the junction and no worthwhile photos on the Interwebs. So I went to my most reliable source–the Proto-Layouts list on Yahoo Groups–and asked for help. Man, I got a lot of replies. Pictures flowed in from everywhere. It was great. My thanks again to the boys on the list. They never fail.
Portage Interlocking Tower
With a few good pictures in hand I made some measurements that I thought would work. I also had a Walthers interlocking Tower kit on the shelf to compare and adjust dimensions. After some testing I decided to cut the long side of the tower 20 feet wide and the short side of the tower 15 feet wide.
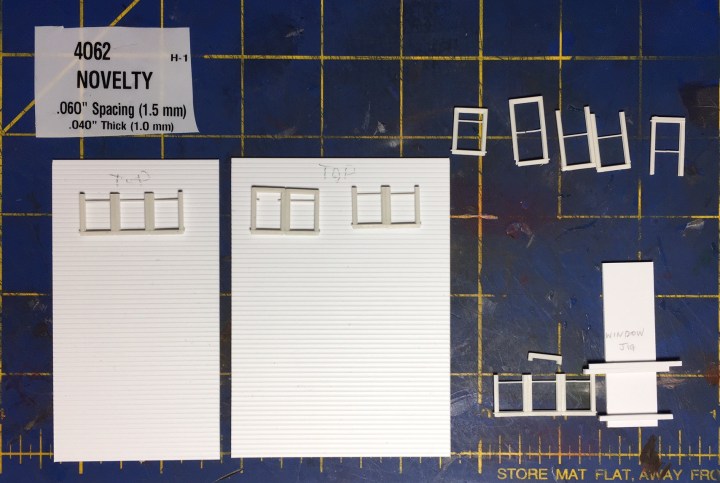
I used Novelty Siding, Evergreen #4062, although one photo seems to show the tower with something that looks like Clapboard siding. If I had enough Clapboard siding on hand I probably would’ve used that instead. Evergreen stuff is hard to get here in Germany and if I want it I usually have to order it…and then wait. I was lucky to have two packages of unopened 4062 on hand. That saved ten days of production time. I also had windows and enough detail parts like hinges and smoke jacks for all the buildings.
I have used Novelty Siding before and know the “gotcha” when using this stuff: When cutting, make sure the Novelty Siding is facing down. If you cut or glue siding upside down, it won’t look right. This is especially important when you can’t get this stuff down the street. You’ve gotta cut it right the first time.
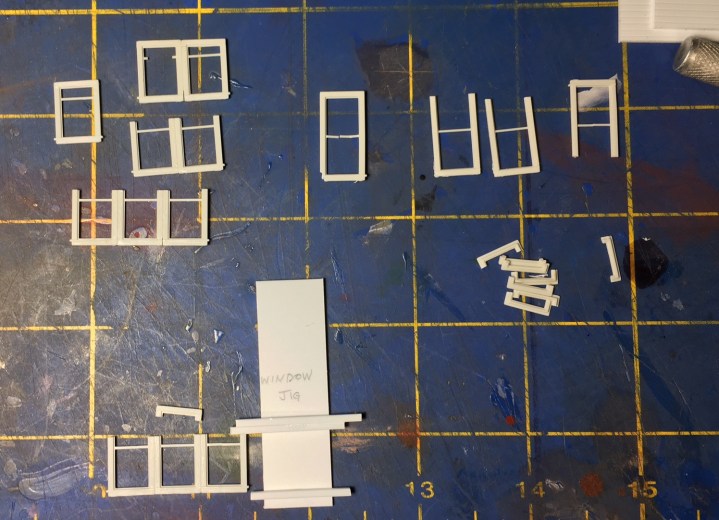
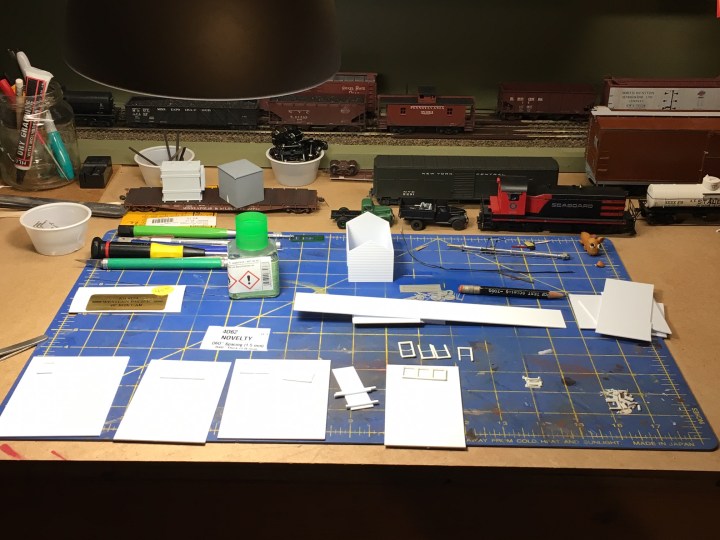
Above. For the windows, I had some ancient Micro Engineering windows in a parts bin that I thought would work. I originally thought these were Tichy windows, but no–they are old ME windows from a long-gone project I completed in the early 90s. I made some quick measurements and then cut and re-assembled a test window, and then used that window to make a jig so I could rebuild all the windows to the same dimension. I re-assembled all the windows with Tamiya plastic cement, sanded them clean, and then glued them together per the prototype photos.
Clark told me not to over-do it. He said “Just get close and it’ll be fine!” I think I’m getting close.
Illinois Central Tool Houses
I need three IC tool houses for my layout. One is listed as a tool house, one is listed as a signal maintainer shed–and it is unusually long–and one is a coal shed. New photos have emerged that show an additional tool house next to the tower. So while I was building Mike a few tool houses for his layout I decided to go ahead and build all my tool houses as well.
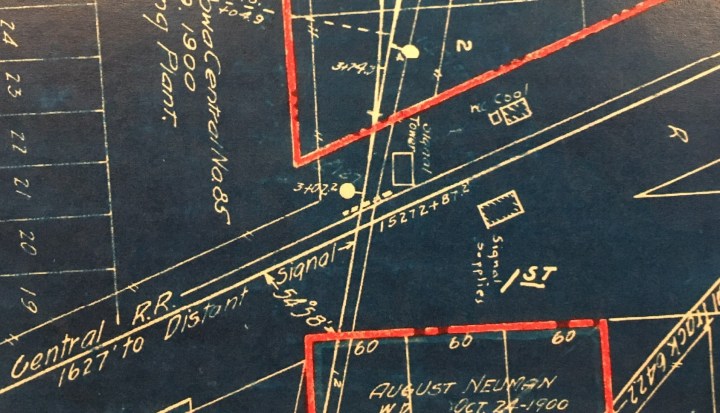
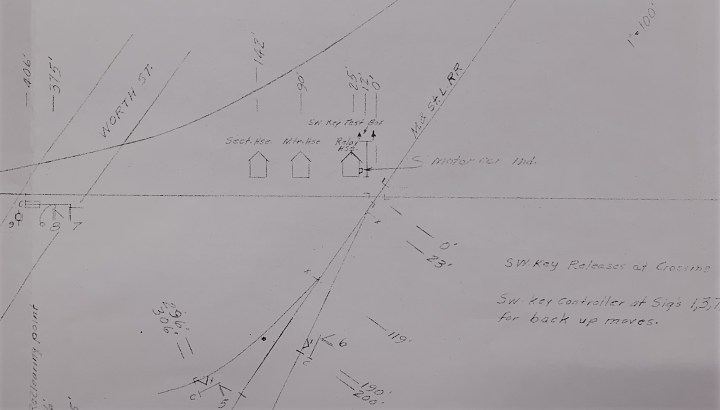
Below is an M&StL AFE (Authorization For Expenditure) that I got from Gene Green some years ago. Gene is currently living in SIBERIA…but that’s another story. This drawing shows the M&StL running from top to bottom; the interlocking tower and two of the sheds on the IC can be seen.
Below. This chart gives a little more detail about the tool houses. This chart arrived in the mail one day out of absolutely nowhere. It came from my buddy Ted Richardson. Ted and I have talked for hours about IC and M&StL stuff, and who knows what else, and one day he sent me this track chart that shows latter-day interlocking information at Ackley. This chart is probably from about 1970. What is pertinent here is that it shows the tool sheds and gives all kinds of vital information about the interlocking and signals and so forth. It is priceless.
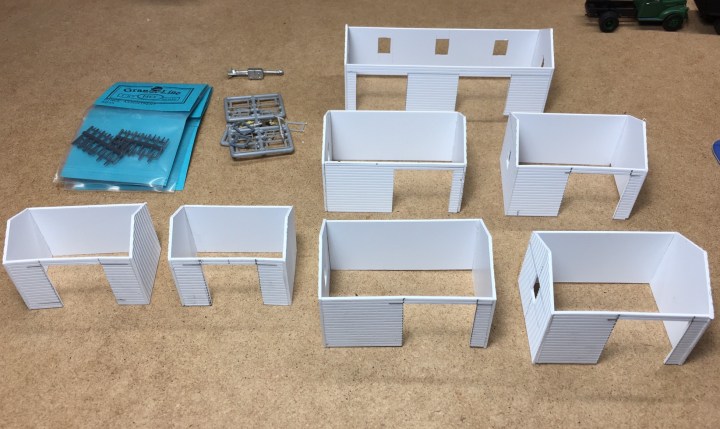
I used the same material I used for the tower, Evergreen Novelty Siding #4062, for the tool houses. I cut the small tool houses to a dimension of 15 x 11 feet and cut the coal houses to a dimension of 8-1/2 x 13. The coal houses are below.
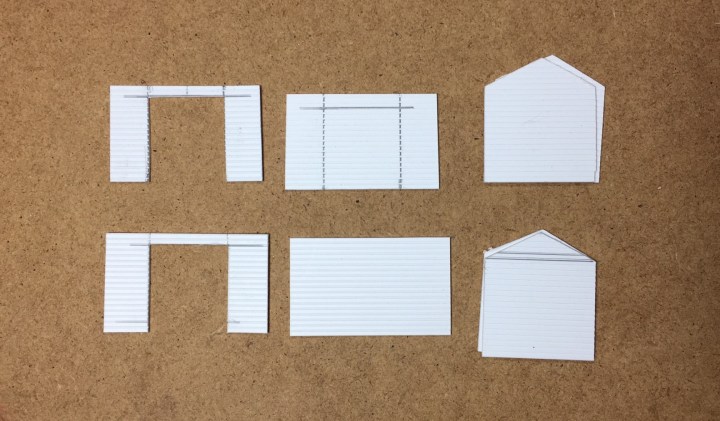
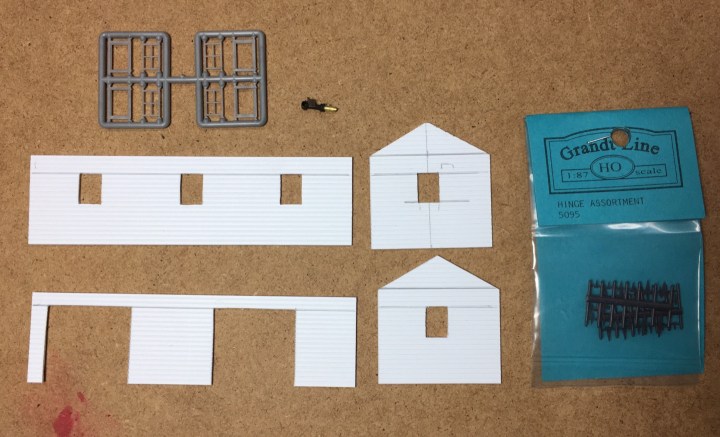
The long tool house for Ackley is annotated on the Illinois Central drawing as a motor car house. I guessed at dimensions of 11 x 30 for that structure. The sides and ends are seen below.
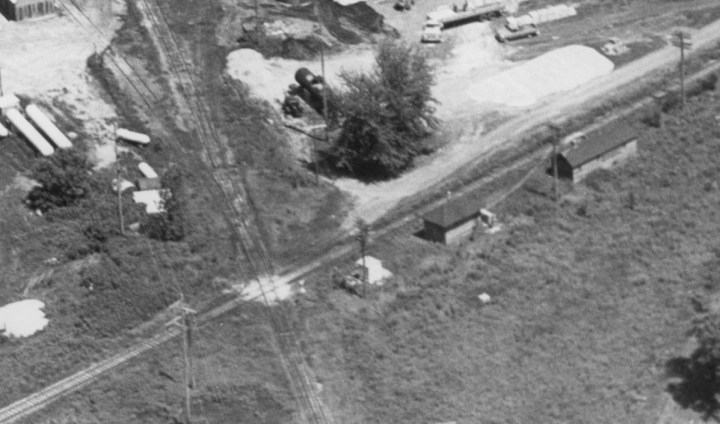
The real one can be seen below on the right. That’s the IC line through Ackley going left to right in a circa 1970 view. Looks like that big took house has three windows in the back and a few vents on top.
I cut out sides and ends until the material ran out. After cutting out all the basic pieces and cutting out spaces for windows and doors, I glued them all together with ACC.
I am planning on using peel-and-stick shingles for all the buildings. I did not have the correct shingles on hand so I called Shawn Cavallero at MinuteMan Models in New Hampshire and he’s sending some right away. Shawn is a St. Louis RPM vendor so naturally he’s my go-to guy. Shawn’s website is online at http://www.minutemanscalemodels.com/.
Below. Here are a few IC tool houses that are cropped from a photo on the Barriger National Railroad Library site on Flickr. As you know tool houses usually come in a wide variety of different shapes and sizes, even on the same railroad. Looks like there’s a coal bin on the side of one of the handcar houses; the small building is perhaps a latrine. Unlike most model railroads the piles of “junk” are nicely organized.

I saw in a few other photos that some IC tool sheds used rolled tarpaper and I may use some on a building or two to create some variety.
Painting won’t be hard. I plan on using Tamiya paint I can get at the nearby military modeling store, Panzerfux, which is in Rodenbach close to my house. I plan on painting everything in the steam era light gray/dark gray scheme.
This job couldn’t be easier and it is a good test of my modeling skills to build something different. It’s also done for a worthy cause. Mike, Clark and Bob are great guys and good friends. – John G
