
")
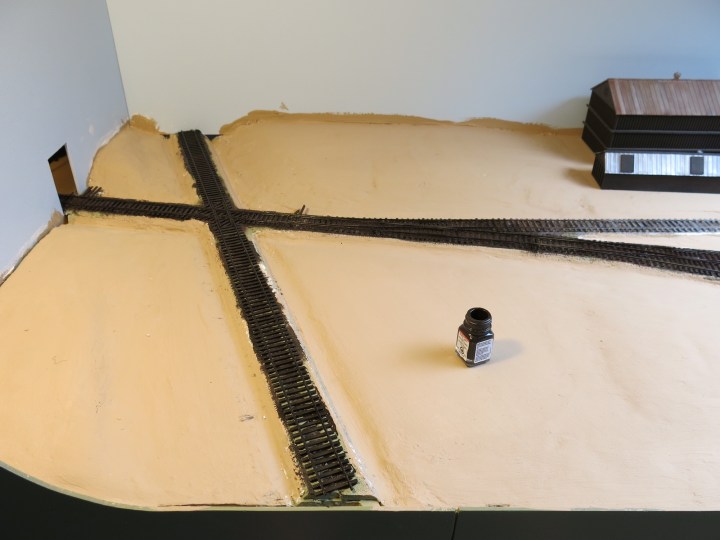
 Around the time I went to St. Louis last month for St. Louis RPM, I made a lot of progress on a bunch of small things. On the south side module I painted track and ties, did some ballasting, put down some dirt to prep for scenery, and finished the fascia behind the workbench. Here are a few progress photos.
Painting Track
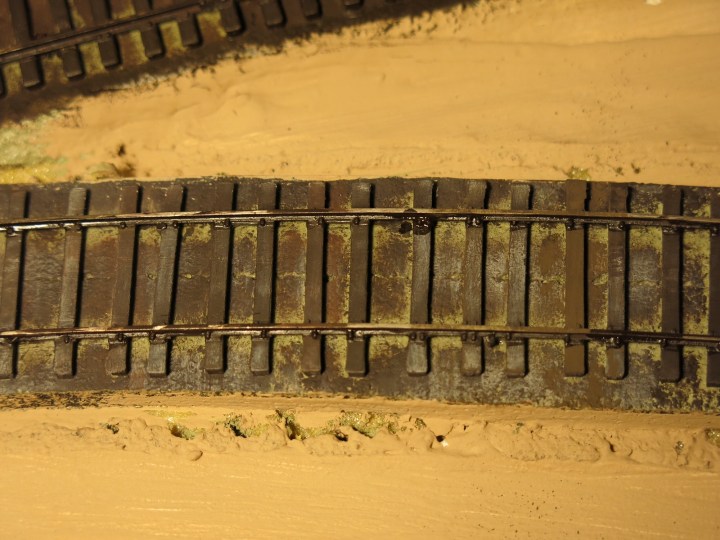
I had a lot of unpainted track on the end of the south-side module and I painted all the track and got it ready for ballasting. I used the same paint I always used for track–Testors Rubber. The kind that comes in the little tiny bottle. I think this is a great base color and I have used it on several layouts and dioramas. I painted all the remaining track on the visible portion of the layout as well as the IC track, mixing it with a little thinner and applying it with a big soft-bristle brush.

Then I went back over all the dark and painted most of the ties with various shades of light gray and light brown to try and simulate some age on the ties. I simply used the Testors Rubber as the base coat and then added various shades of light gray and white mixed up on a palette so change up the colors frequently.
Ballasting
Once the paint was dry, I ballasted all of the secondary tracks. I did not ballast the M&StL main track or the IC main track yet. I have to install the depot platform before I ballast the main track so I left that for later. Once again I used the same “ballast” I used for all my other secondary tracks, which is a mix of dirt and cinders that I collected and sifted from the old PRR roundhouse site at Richmond, Indiana. I brought two one-gallon jugs of this stuff with me and have only used a little bit of it on the layout. It is probably a little dark for the prorotype, but I really like it and it simulates cinder ballast well…because it is real cinders. I like the thought of using stuff that probably came out of the stack of a PRR Q-2 or a T-1.
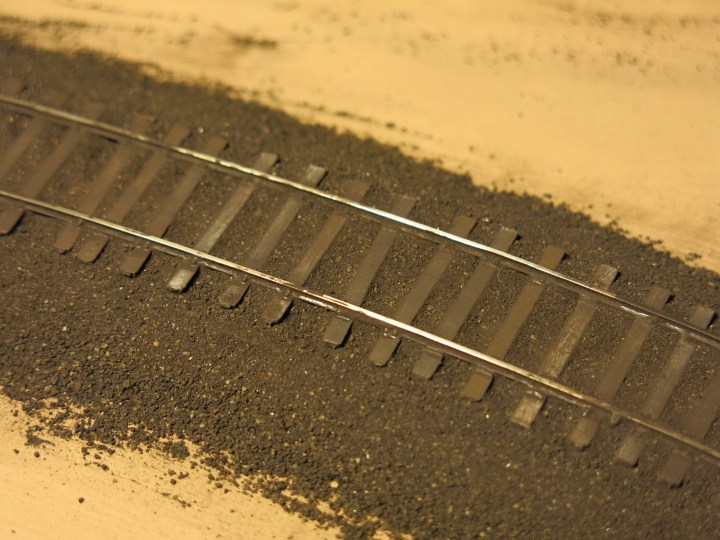
Above. Those real cinders look great when dry, but when they get wet they get a little darker. The dark color highlights those light gray ties very nicely. I spray it down with rubbing alcohol (below) and then apply a mix of about 35% Elmers glue (not school glue–the real stuff) about 10-15% alcohol, a drop or two of dish soap, and the rest water. The alcohol keeps the ballast in place and breaks any surface tension so the glue flows freely through the ballast.
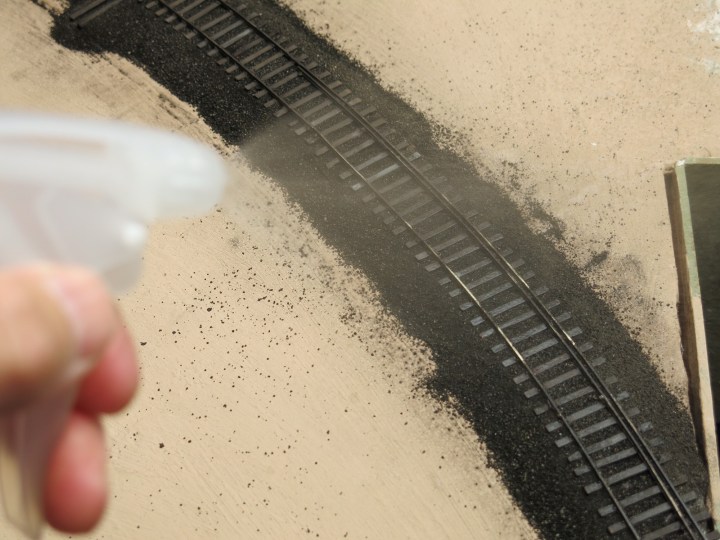
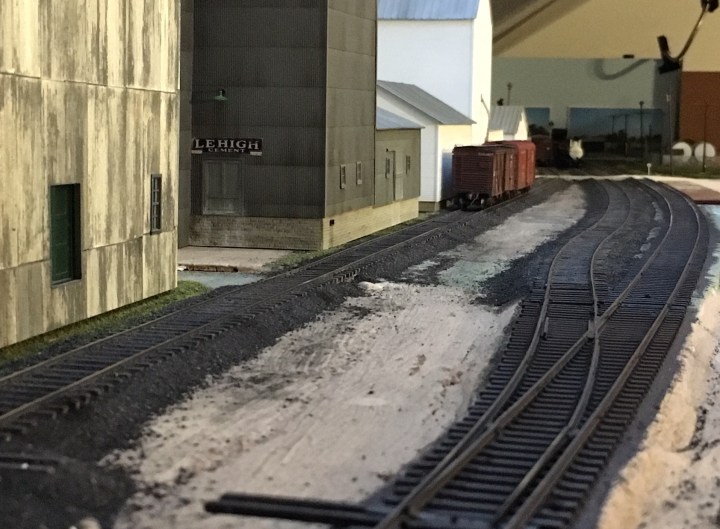
Above. This is the same photo that’s on top of this post. All the secondary tracks have been painted and ballasted. After I install the depot platform the main track will get the same “dirty ballast” I used for the main line on the north side module, which is a mix of Arizona Rock & Mineral NP Gray, some of the PRR cinders from Richmond, and some gray rock from Woodland Scenics. All the ballast I use is N scale.
Fascia Painting
Just before leaving for St. Louis I cut Masonite fascia and got it installed and painted to finish out the major constriction on the layout. The last installation was for the North Side Staging Yard, which was part of a much larger project to rebuilt my workbench around that yard. Below. Before the painting, and at bottom, a partial view of after painting…but I couldn’t complete everything until I completed a rebuild of my workbench, which I planned to integrate into the north side staging yard.

The paint I used for my fascia is RAL 6013 Green which I picked up at the local German hardware store. RAL is a term for standard paint codes that are used in Europe. Ideally, if you run out of paint in Germany, you can go to Slovenia and tell them “RAL 6013, Eggshell” and they can make you an exact paint match. I used a little, inexpensive roller to paint all my fascia to give them a nice smooth coat with no brush marks.
Rebuilding the Workbench
I built my workbench in 2001 when I was living at Travis Air Force Base. We had a little house on base with a carport and the carport had a little took shed built into it. I used half of that shed for a workshop and painting area and wedged a new five-foot wide workbench inside. I built a cabinet above it for storage. Over the years I got a lot of good work done out there.
Here’s the only photo I took of the workbench in that first tool shed. This was right about the time when digital cameras were coming out. Every one of the engines on that shelf has been long sold away.

I am still using the same workbench and it has traveled to four other houses since I built it (two moves to O’Fallon, Illinois, one move to Bloomington, Indiana, and our current move to Germany). It is sturdy and has held up great. Eventually I dismantled the cabinet above the workbench and used the wood for other projects. Below, the workbench in my old O’Fallon, Illinois home on Elisabeth Drive.
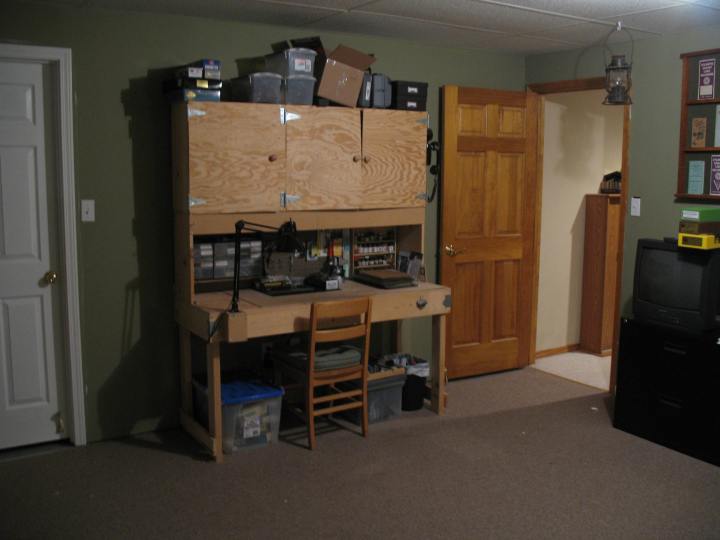
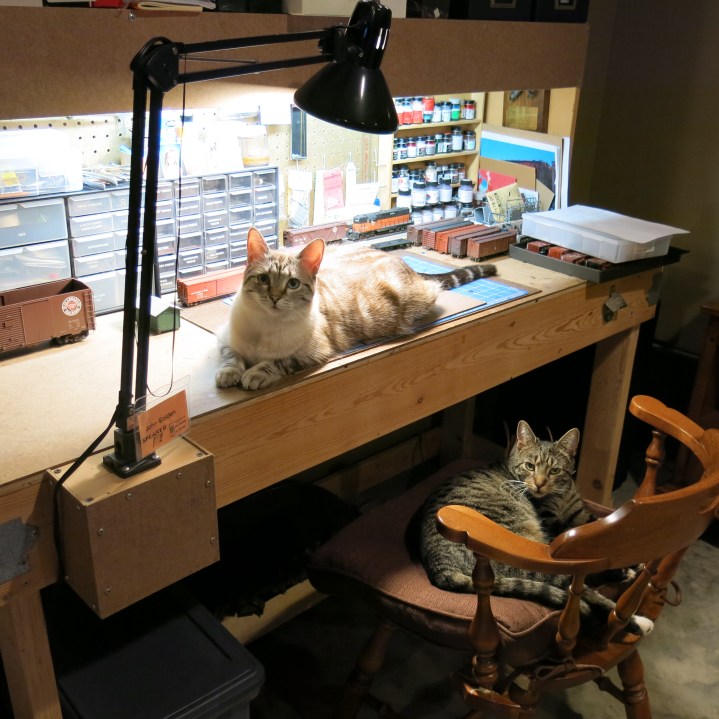
Below, the same workbench at our newer home in O’Fallon. One of our cat’s favorite sleeping spots was my workbench chair. One night in 2015 I went to the basement and found this…
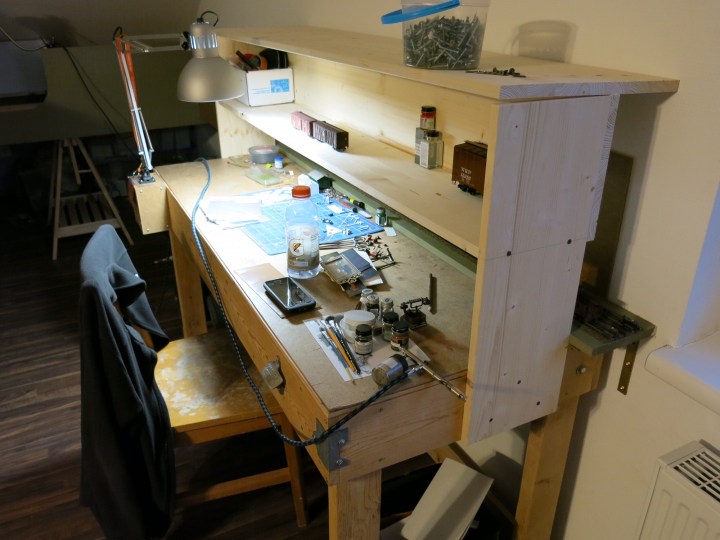
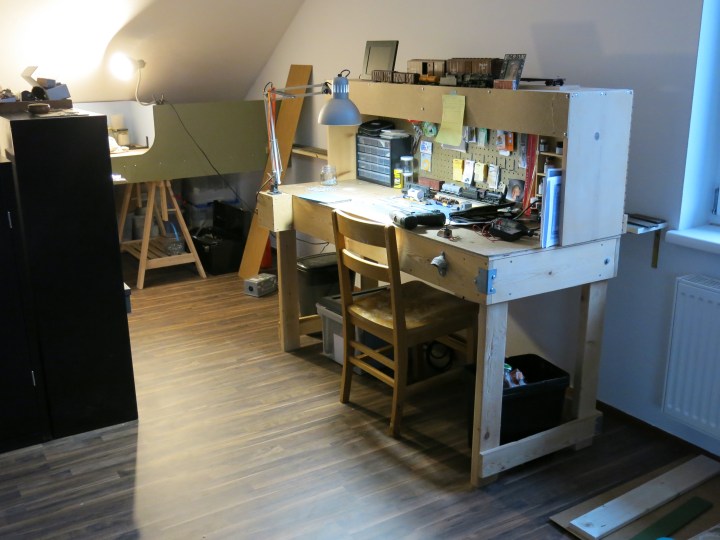
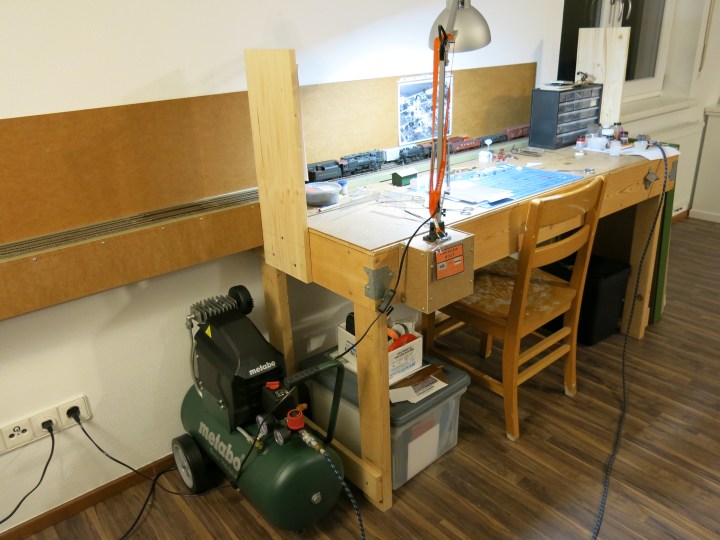
I have much less hobby space in my current home so I decided to incorporate the workbench into the layout by building a cantilevered top shelf unit that slides around the North Staging Yard. This arrangement allows trains in the staging yard to run across the back of the workbench. One of my requirements was that I need to be able to easily move the workbench out of the way for cleaning and maintenance so I couldn’t actually build the staging yard permanently into the workbench.
Here, below, you can see the old workbench and the north staging yard behind it.
The first version of my rebuilt workbench was a Fail. I built a cantilevered top shelf unit with a middle shelf and a top shelf. After a test fit it was obvious that built the middle shelf was too low. I liked having a middle shelf for additional storage but it wasn’t very useful and got in my way.
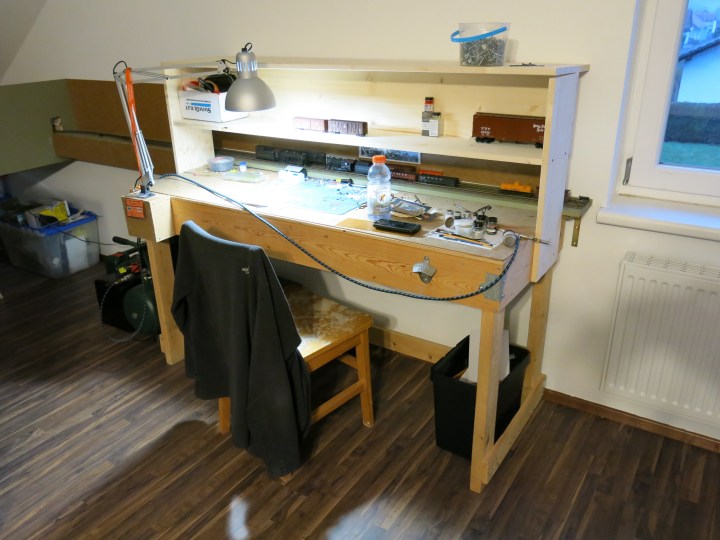
So I took it all apart again and just decided to build a shelf unit with a top shelf only. The back of the shelf unit would have the pegboard left over from the original shelf unit, plus a few racks for storing project models, paint, and other items. It works much better.
There is a big drawback to this design. The reason for running the staging yard running through the workbench was to provide a “live” portion of the layout on the workbench to test cars and locomotives. That works, but now my models are now sitting right on top of the workbench where there is a lot of paint, weathering powder, dust and metal shavings and all kinds of things flying around. I have already dropped more paint bottles on the staging yard more times than I care to count. I can reduce most of the problems by pulling the desk away from the staging yard a little bit, don’t know if I would do this again.
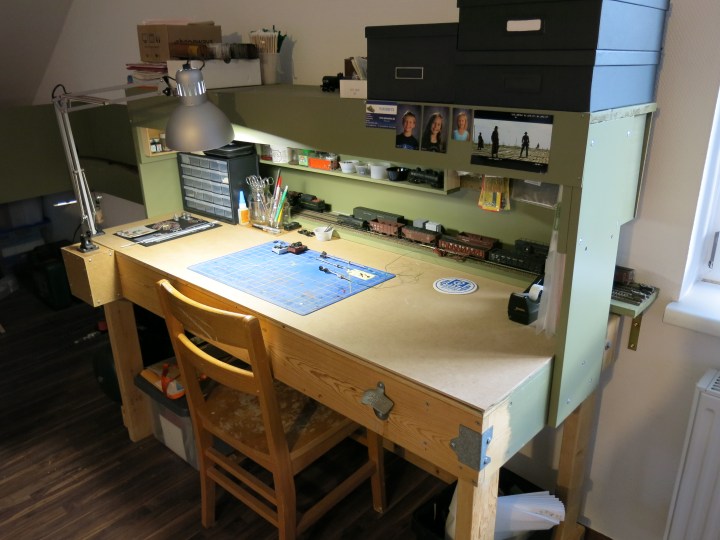
Here, above, is a view of the workbench today. The fascia and backdrop behind the staging yard is painted and you can see where the staging yard comes through the workbench on the right. I can pull the desk in and out if needed. I added a couple of racks for models under construction and paint and other things, and I have room on top for more boxes.
Now that my workbench is finished and organized, I can get more things done. For me, organization is the key to success.
Hope you enjoy a blessed day! – John G

I like that bottle opener on the front of the workbench. Nice feature! As for the downside of having finished models sitting in staging on the bench, how about making a removable foamcore panel or cover to shield them from dust and debris while you are working? Perhaps held in place with Velcro?
LikeLike