

The Deutsches Museum
While I was in Berlin in November I had a chance to visit the Deutsches Museum downtown along the River Spree.
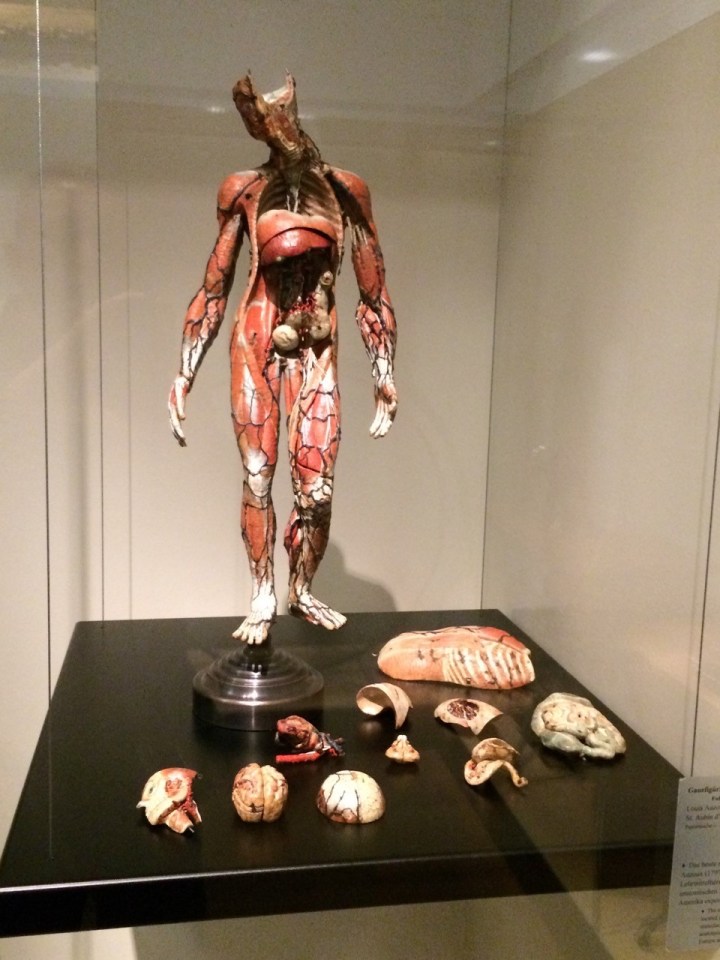
The museum is beautiful, clean, and well-lit and the exhibits are stunning. There are many models throughout the museum, of ships, trains, vehicles, and other things. There are paper models on display that are over 300 years old. There is a Dutch model ship on display that is about 250 years old.

Whenever I see models in a museum, I always wonder who built them. I wonder “Of all the models out there, why did the museum select this one for display?” Naturally the answer is “Because of all the models out there, this one is the best.” It is the best because it is the most accurate in scale, detail and color.
If there was ever an example for us to slow down and build better models, and better structures, and accurate scenes and settings, and embrace the RPM concept, it is this museum and others like it.
Color is a Model Too.
Painting track is a facet of model railroading that is often overlooked. Most guys tend to slap down flex track and paint it all a single color, then slop on some ballast and get it done. I take a slower approach.
After all the track was laid on the visible part of my Ackley, Iowa layout, and completely wired and tested, I began to “detail paint” the track. The base color I used on my rail and ties is Testors Rubber. I’ve used this color on several layouts and dioramas because it has a rich, dark brown color that looks good on both rails and ties. A lot of modelers have started using Rustoleum Camouflage; Loren Casey gave me some a few years ago to try out, but is seemed too green, or perhaps too yellow for my taste. I prefer a color that’s a little richer and I think Testors Rubber works well.
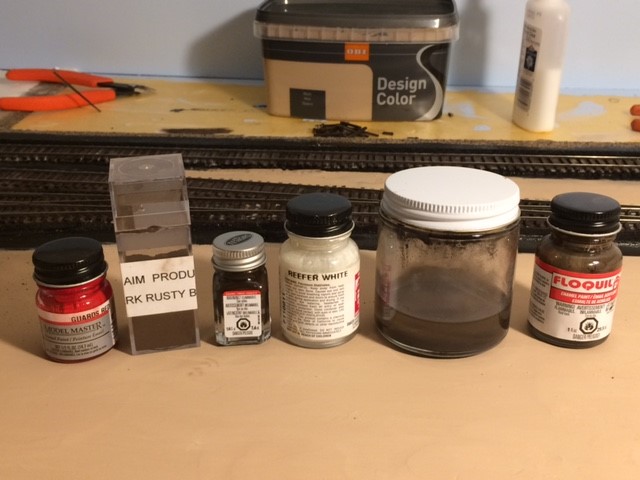
Below, left to right, are the colors I used. Red paint (to add a touch of brightness to the browns), AIM dark Rust powder (I mixed some of this into the brown paint for contrast), Testors Rubber–my base color–in the little jar, Floquil Reefer White, paint thinner, and Floquil Roof Brown. The large vat of paint in the back is my scenery base color.
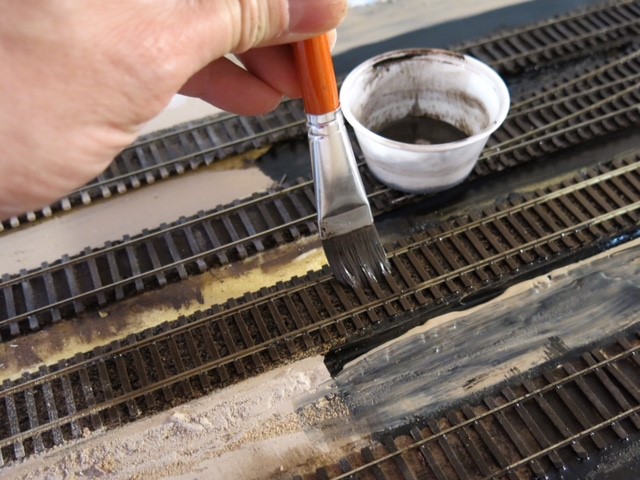
Since I do not have a compressor I painted all the rail and ties with a brush, mixed with a just a little bit of paint thinner—maybe about 10%. I used the Rubber paint right out the bottle on all the main track. The effect I am trying to achieve here is that of a well-maintained secondary main track with good brown ties. Many ties were replaced on M&StL’s main lines after WWII so I want to model that by painting the ties with a fairly uniform color. See below.
On the other tracks, such as the customer sidings, the passing siding and so forth, I painted the ties and rail using the Rubber color as a base coat and then went over every tie with various shades of brown, tan, light gray and white. The effect I want to achieve on the sidings is that of hard-used, industrial sidings with 35-50-year-old ties. Again, the Testors Rubber is a good color for rail although I can mix in a little bit more rust color for the industrial sidings if I want.

I painted the ties by getting just a little bit of paint on the brush and then dragging it along the tie longitudinally, taking a little extra time to make sure that the ends of the ties were also painted. In some cases I slopped the tie color over on the rails, so I went back later and painted the rail again with the base color, Testors Rubber. Generally I think the effect came out pretty good (see below). I removed a few ties and put in new real wood ties to provide even more contrast. On many photos of M&StL tracks in this era, ties can be seen without tie plates so I didn’t bother adding the additional details. Again, more contrast.
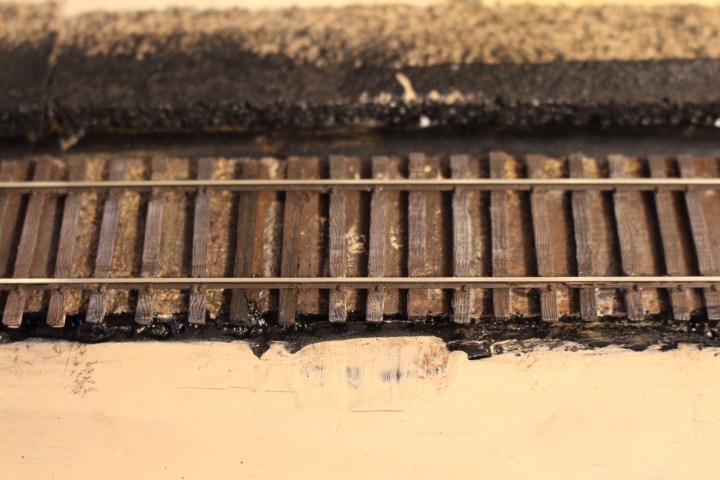
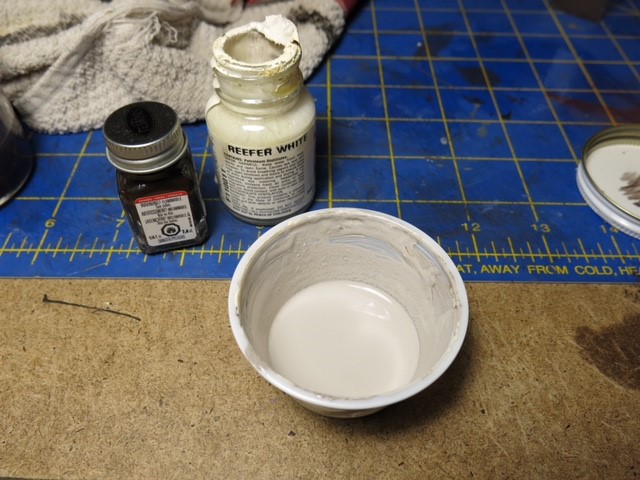
Above. I also mixed up a “near-white” solution to weather the ties once the weathered colors were dry, then “highlighted” some of the ties with the white weathering. Personally speaking, I see white in old ties. I don’t see brown, red, or yellow hues. I can see those hues in new ties, but most ties tend to weather towards light gray and/or white.
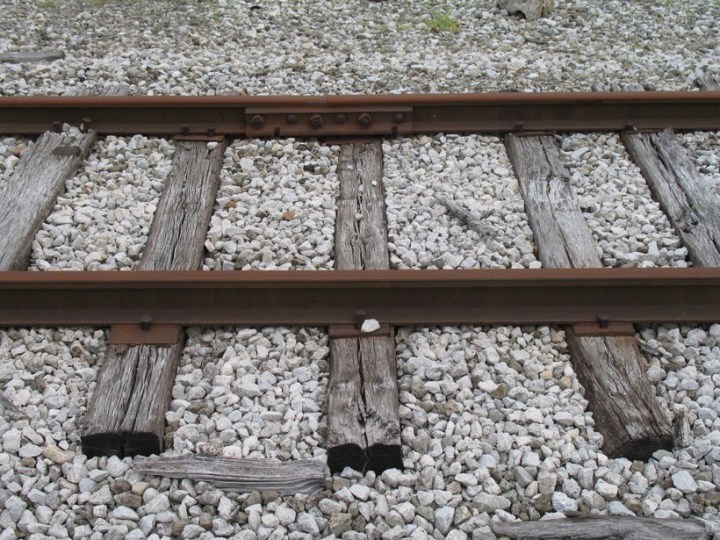
In the photo below, on CSX (former B&O) track in southern Indiana, the near-white ties can be seen in contrast to the slightly newer ties. Check out the photos below and let me know what you think.

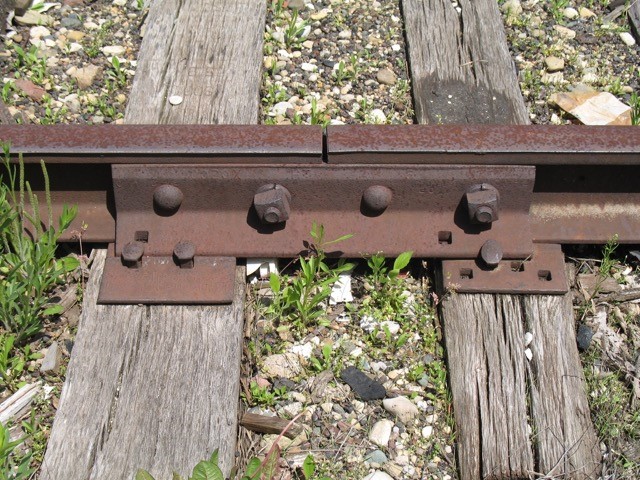
The track below–in contrast to the track above–on an industrial siding on the former Monon lines near Bedford, Indiana, shows narrow-cut ties and wide tie spacing. The slightly rusty rail and tie plates are in subtle contrast to the gray/near-white ties.
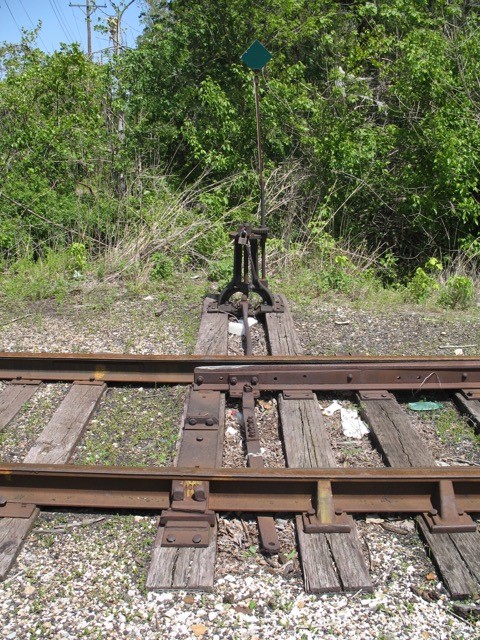
Below–a track view on the former Milwaukee Road lines in southern Indiana.
And finally, below, a view near the Big Four crossing of the Alton in central Illinois. Note the contrast between the mainline rail in the background to that of the interchange track in the foreground. The main track is brown with a yellow hue; the interchange is brown with a red, or perhaps orange hue.

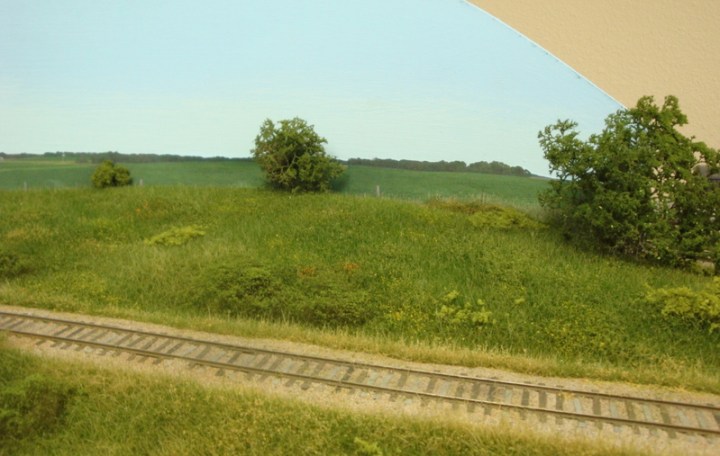
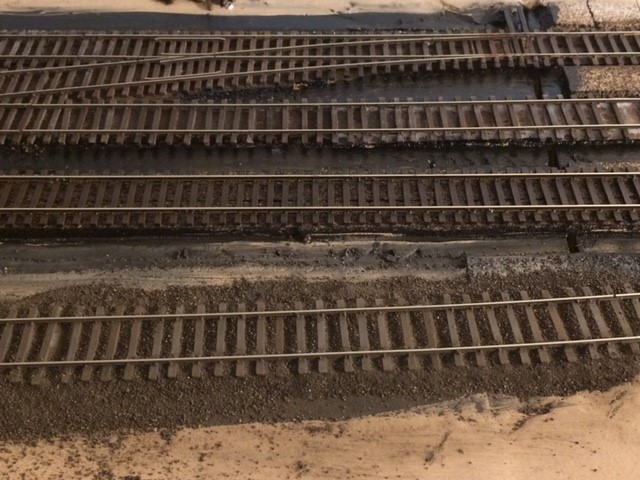
A view of the completed track is below. The top two tracks are sidings, the third track from the top is the main line, and the track at bottom is a siding. I have spread a little home-made ballast over the track at bottom to see how everything will look.
I used a variety of brushes to paint everything. Flat brushes to paint the ties, narrow brushes to touch up rail and areas that got missed the first time.
One of the principle features I’m trying to achieve by painting each tie is contrast. I want the ties to appear old, really old, somewhat new, and in some cases new. I removed the plastic ties and inserted real wood ties in a few places to provide additional contrast in color and texture. After the ties were individually painted and weathered I went back over some of them with a wash of Testors Rubber and paint thinner to blend them together. I want the contrast to be noticeable, but subltle. In the end, the extra attention to detail, color and texture does make a difference. I tried Tru Color Railroad Tie Brown and liked it, but under a little scrutiny I thought it was a little too yellow. I like Testors Rubber because it is brown. No doubt about it.
After I painted the track I was looking at photos online and saw some great work by my friend Jim Dufour, who maintains a beautiful B&M layout back in the U.S. Jim paints his ties uniformly but uses AIM powders to highlight his track. Jim wrote and told me Most of the rail on my layout was painted with Floquil Rail Brown. I’ve been known to use Roof Brown, also.
Check out this photo:
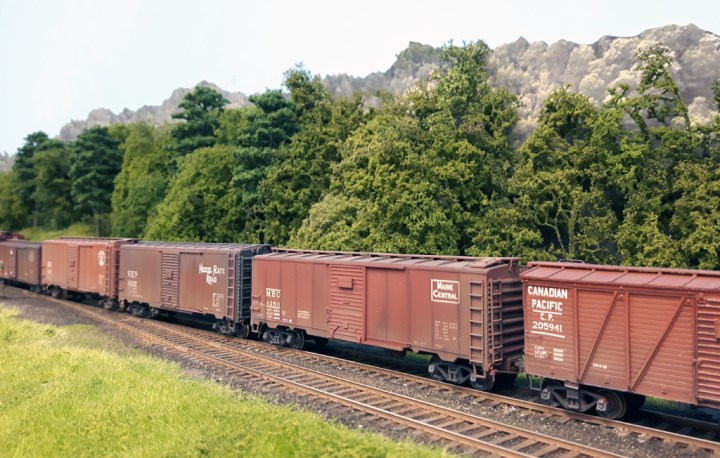
Jim also wrote, The key ingredient and technique, however, was passed along to me by Mike Confalone. Mike also demonstrates it in one of his MRH scenery videos, I believe. After painting the rail, a close-cropped, stiff-bristle brush is used to grind AIM Dark Earth weathering powder along the sides of the rail. AIM Medium Earth can be blended in or used alone as well. Excess “overspray” tends to deposit itself on the ties, which enhances the prototypical look. See below.
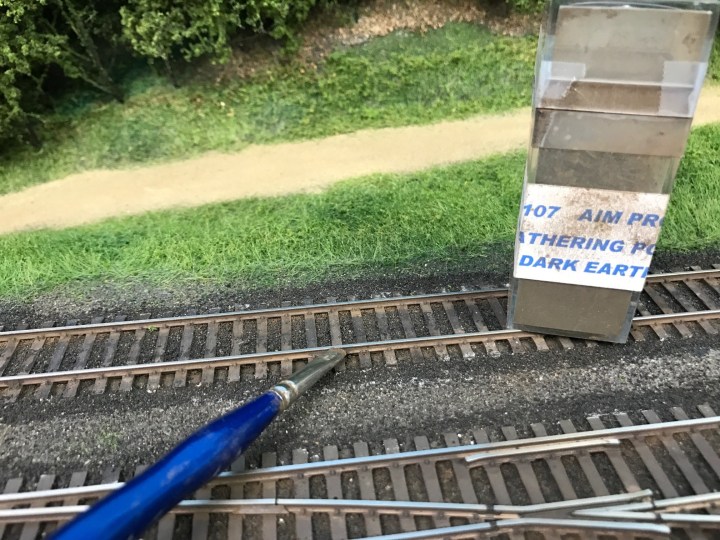
Jim’s got those colors nailed. I’m going to order some of those colors and give it a try on a few tracks and see how it goes.
I spent three or four hours painting about 30 feet of track total and I enjoyed every minute of it. Tony Koester once mentioned to me that if I spent more than 30 minutes painting track I’m wasting my time. Then again, I only have 16 feet of scenicked railroad total—he’s got 2,000 feet if not more. I can justify “detail-painting” my track because I have a lot less railroad to finish. That’s one of the advantages to having a smaller layout.
Thanks to Jason and Jim for the photos, and the inspiration.

I was told recently by an employee at Scale Model Supplies (St. Paul, MN) that Micro Engineering is no longer supplying HO standard gauge flex-track in code 55. A visit to their web site seems to confirm that. Is this believed to be the case? Do you know of anyone who has used Central Valley tie strip with code 55 rail? Is that the likely alternative? Mike Rahn, Brainerd, MN
LikeLike
Hi Mike, one of the boys on the Proto-Layouts list recently called ME. ME confirmed that Code 55 flex is still in production, but their site is out of date. They promised to fix the site asap! – John
LikeLike