

I got sick of work last week so I took Friday off and went up to Litchfield, Illinois to visit my buddy Lonnie Bathurst. Lonnie has a large HO scale layout in the back half of his office building and we spent the whole afternoon cleaning track and upgrading scenery.

Above. This is the Litchfield Train Group layout that was featured in RMC a few years ago. The layout needs some scenery work before their big annual open house during Christmas. Lonnie and I applied static grass and 40 to 50 feet of layout. We applied static grass to the whole area seen above and below.
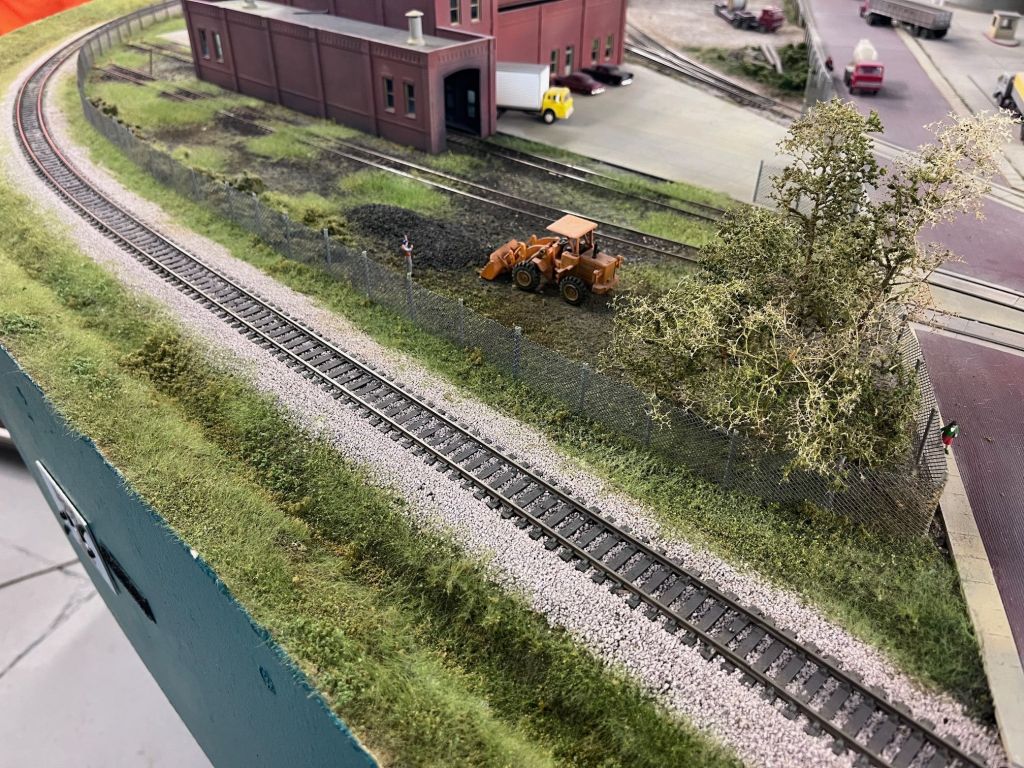
The static grass applied in the foreground was done in the standard manner. I dabbed Elmers Glue straight out of the bottle on the existing foam scenery using a stiff paint brush, then applied Silflor 4mm grass in a home-brew mix of spring (light green), mid-summer (dark green) and fall (light brown) colors. I waited an hour and then hit the area with hair spray and randomly added Woodland Scenics summer blend turf, and some leaf material from Scenic Express.
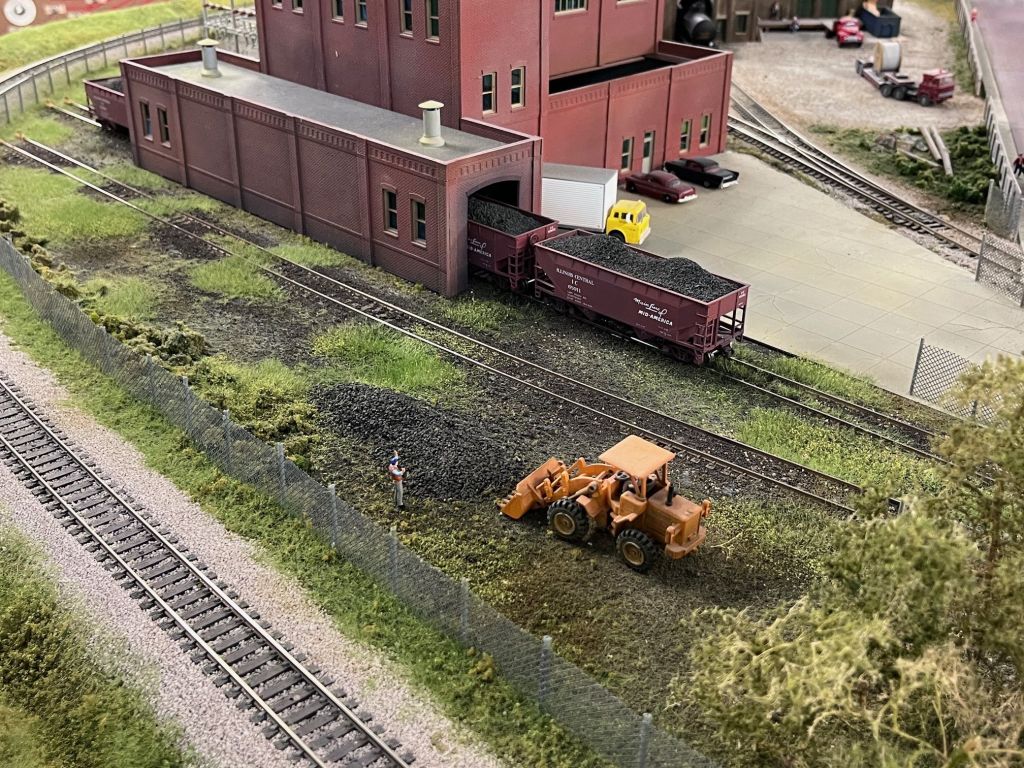
Below. Ten years ago Lonnie and I started applying static grass to this area below. The scenery material has kept it’s color and still looks good.

In addition to the large layout in his office, Lonnie is building another large layout in his basement at home. He’s modeling the IC and GM&O lines in Southern Illinois and is building the layout in a big way, and getting a lot of help from friends. Here’s the layout room below.

A few months ago he salvaged some turnouts from a friend’s layout and gave them to me for repair and cleanup. These turnouts will be used on his home layout.
Below: Here are five of the ten turnouts I rebuilt. They’re a mix of Atlas, Peco, and Walthers. They served on Don Morice’s layout for 20 or 25 years and were in pretty rough shape. I knew a little work could make them look and work as good as new.

First I gave the turnouts a bath in hot, soapy water to remove the ballast.

I brushed off as much ballast as I could with a toothbrush, then used a soft wire brush to remove the rest.
Next I desoldered the joints and rail joiners, and then I cut and filed all the rails to the same length. I filed off any remaining solder.
Finally I added replacement ties under the rail on the ends. I used Northeastern Scale Lumber, sized to match the original plastic ties (6″ x 8″) and cut them to fit. The ties are glued on a piece of .005 Evergreen styrene which I ACC’ed to the nearest plastic tie on the turnout. I fixed the ties on the styrene sheet, cut them to fit, then trimmed the styrene sheet. I also added new header ties. I didn’t repair the turnout on the bottom right because it needed an entire rail replaced, and Lon and I decided it wasn’t worth the two hours of work required. Maybe we’ll get to that one later.

Why rebuild turnouts? Because I’m cheap, and I can rebuild one for a fraction of the cost of a new turnout. Have you seen what Micro Engineering #6 turnouts are going for these days???
Stalled Projects

Like most of you I have a number of model projects that I consider “stalled”. In some cases I’ve lost my motivation, or am awaiting parts, or in a few cases I know there’s a mountain of work ahead to finish certain projects and I don’t want to allocate the time to do it.
Here’s one of those stalled projects, above. This is an Overland brass C&NW rebuilt hopper; a circa-1948 rebuilt car with blister sides. The prototype cars have always been a favorite. I bought it from Bob Liljestrand at the 2024 St. Louis RPM meet. I got the thing home and then discovered that nobody makes decals for it. Originally the cars were black with white lettering, but the rebuilds were painted freight car red with yellow lettering. I contacted a few decal manufacturers and they won’t touch it. My only option is to buy yellow lettering sets and go at it one letter and number at a time. This project has been sitting for six months.

Bruce Black photo, Denver, CO. 20 January 1974. Courtesy Dennis Eggert.
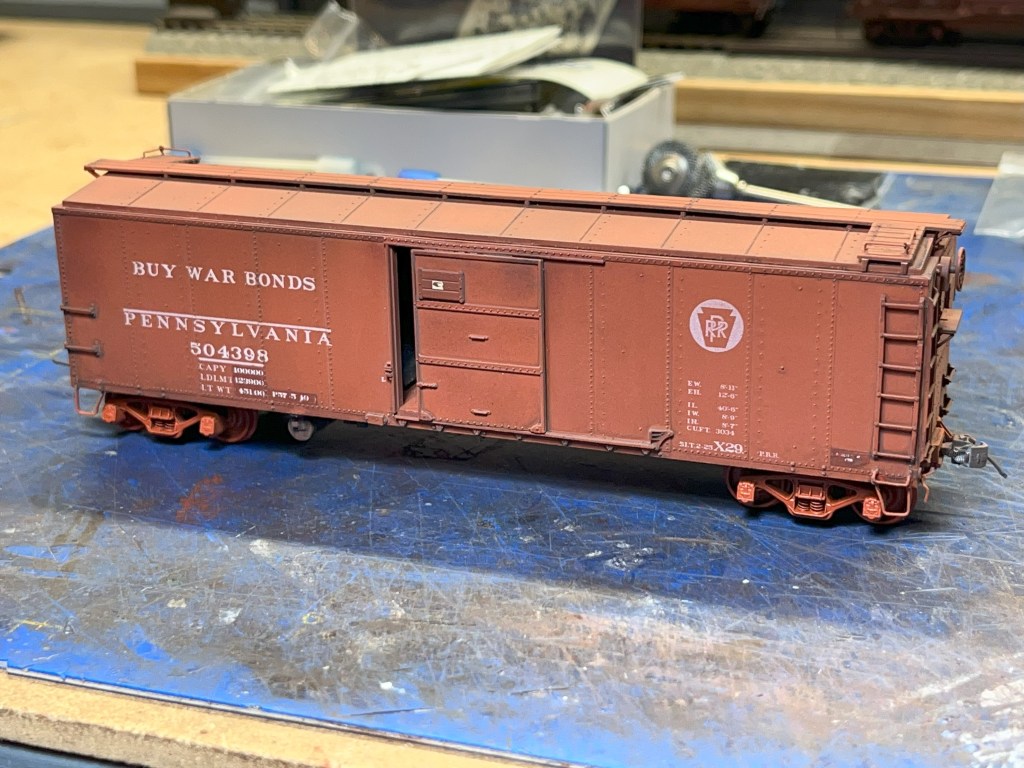
Below. Another stalled project is this cool 1921 ARA Box Car. This is a recent Westerfield release–a re-release of an old Sunshine Models kit–and I bought one a few seconds after it hit the website. I built it right away and painted it with Tru-Color CMO Freight Car Color.
Construction was straightforward. I added Yarmouth stirrups, Yarmouth latitudinal running board supports, wire details all around, Cal Scale brake gear, Hi-Tech air hoses with brass fixtures, and Tahoe 40-ton trucks with semi-scale wheelsets. It was a fast, easy build and I enjoyed it.

Once again the problem is the decals. The Westerfield decals are not what I would call 21st Century quality and let’s just leave it at that. Perhaps a good set of USRA single-sheathed box car decals would work, but I haven’t bothered to spend the time to look for anything yet.

Here’s an as-delivered prototype view, originally an ACF photo.

A third model languishing on the workbench is this Funaro & Camerlengo Seaboard P-9 phosphate car. Like the cars above, its awaiting decals that nobody makes.
I got this car in a trade in 2015. It came as a flat kit and I was intimidated. I motivated myself to build it this summer, with the goal of showing off the complete model at Naperville in October. It was a very tough build but the finished product is terrific.
Below. Here’s a Pullman-Standard builder’s photo of the car, this one courtesy Justin May. These cars were usually in captive service in the Bone Valley region of Florida, south of Sarasota. However, there is plenty of photographic evidence showing them roaming all over the US, presumably delivering phosphates for fertilizer.

I will probably have to decal this car letter-by-letter using the old Speedwitch SAL Box Car set. I only like to decal cars letter-by-letter when there’s no other choice. I had to do it last year when finishing this O scale NYC USRA hopper–one line, one letter and one number at a time. I even cut the weight data to match a prototype photo of NYC 837996.

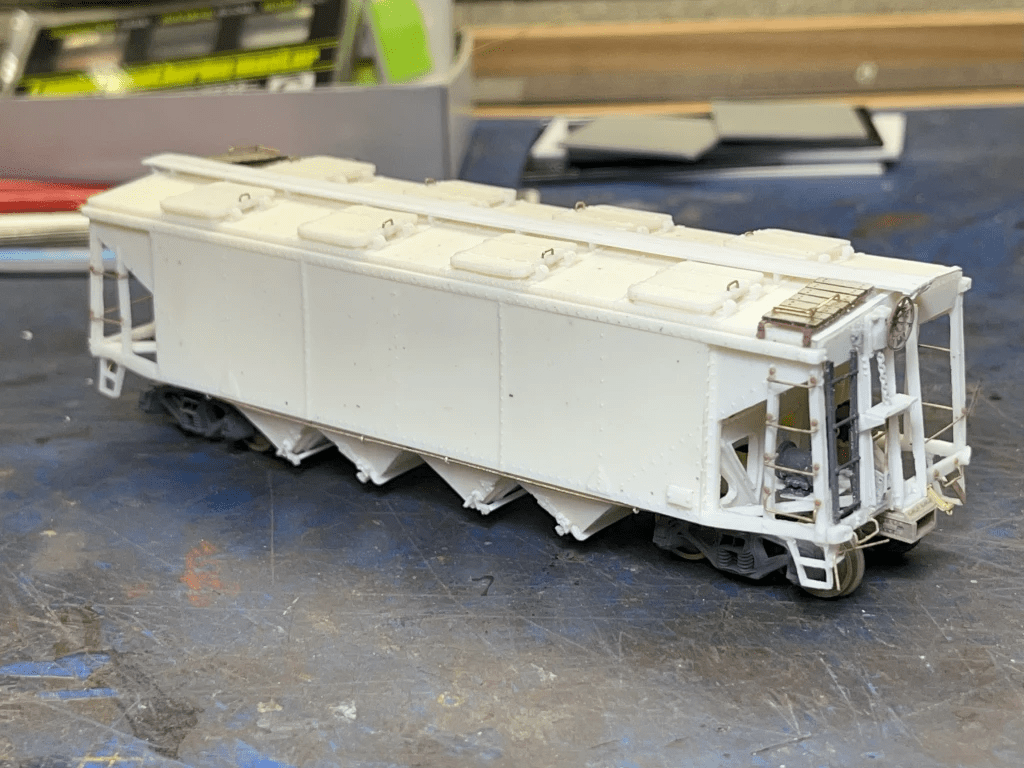
I also have a nice HO scale Sunshine Models Swift reefer totally stalled out–this one due to paint. I’ll tell you up front that I hate painting anything white or yellow, and to a lesser extent orange, because for one reason or another I can never seem to get it right.
Anyway here’s the car. I got it from Greg Davis. We “interchanged” a lot of cars last year.

Here’s the completed build, below. The build was fast and easy. I primed the whole car and painted the sides with Tru-Color WFE Yellow. So far, so good. When I painted the roof and ends with a nice freight car brown (I used Tru Color CMO Freight Car Red) I could not get the masking right and got a lot of spillover. I sandblasted it and painted it all over again. This time I pulled the yellow paint off with the masking tape. I blasted and painted the car a third time, but the yellow went on too thick. I blasted the sides for a fourth time today.
This project is really shaking my confidence, man!

Here’s a different stalled project. This is an ancient Red Caboose box car model that my wife bought me in 1998 when we were dating. Recently I wanted to weather the roof but managed to screw up the paint on the roof and one of the sides. I tried weathering it with a foam pad to get a mottled effect, but it looked all wrong.
This model sat unloved for about eight months. Finally, I sandblasted it in preparation for a rebuild. I did that, and collected all the parts. The problem is I can’t seem to motivate myself to finish the job. It’s only two or three hours of work, tops.

And finally…the Ultimate in Stalled Projects.
I’ve had this Bachmann Russian 2-10-0 since 1999. Hey, it’s only 25 years. What’s the hold up? Sound and DCC. I don’t want to finish the outside until the inside is ready for the 21st Century. Being cheap, it isn’t easy for me to send a model off for “chipping” as the Brits call it. I want to install DCC and sound myself but first I need to learn how.

Here’s the prototype I want to build. This is the 501, supposedly photographed in 1932 but personally I think it’s a much later photo–like 1949–because SAL didn’t use the heart monogram on steam engines in the early 1930s. Thanks to Warren Calloway for the photo.

Not all of my stalled projects are fails. Here’s a stalled project that recently turned into a success story. See below. I bought this Rapido Southern Pacific B-50 model last spring and then proceeded to ruin the finish by over-weathering it. I sandblasted it, painted it with TruColor SP Freight Car Red, bought replacement decals from Protocraft (who have an extensive, very-high-quality line of HO decals by the way, at https://www.protocraft.com/category.cfm?Categoryid=36) and I finally got it decaled and finished last month.
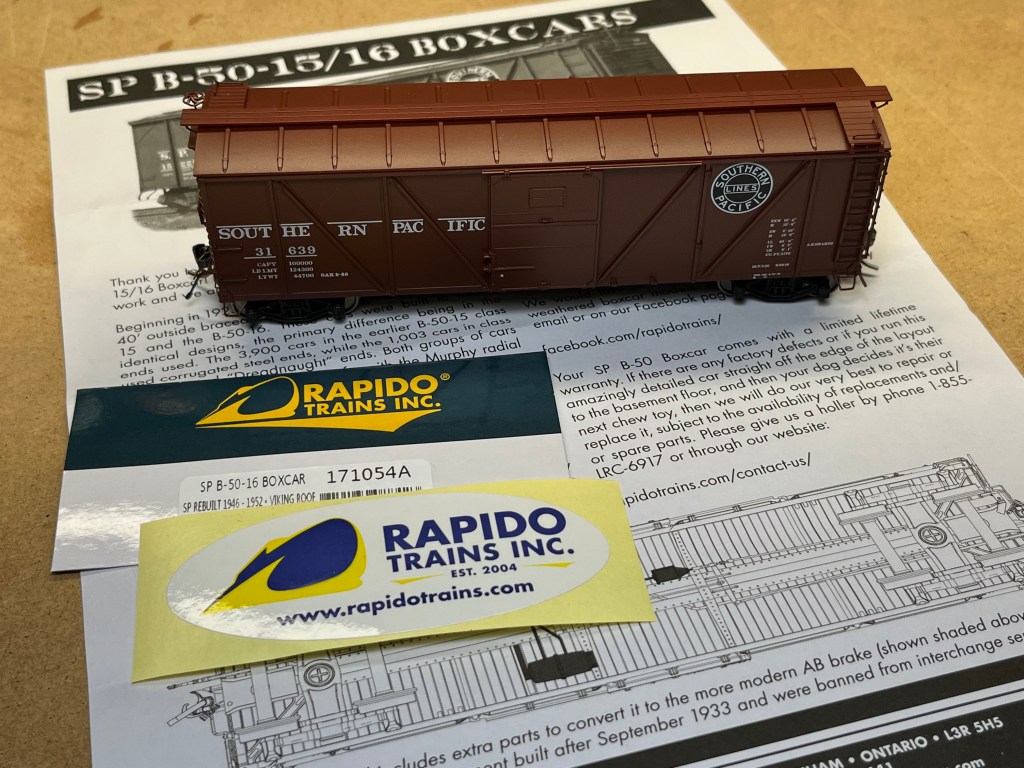
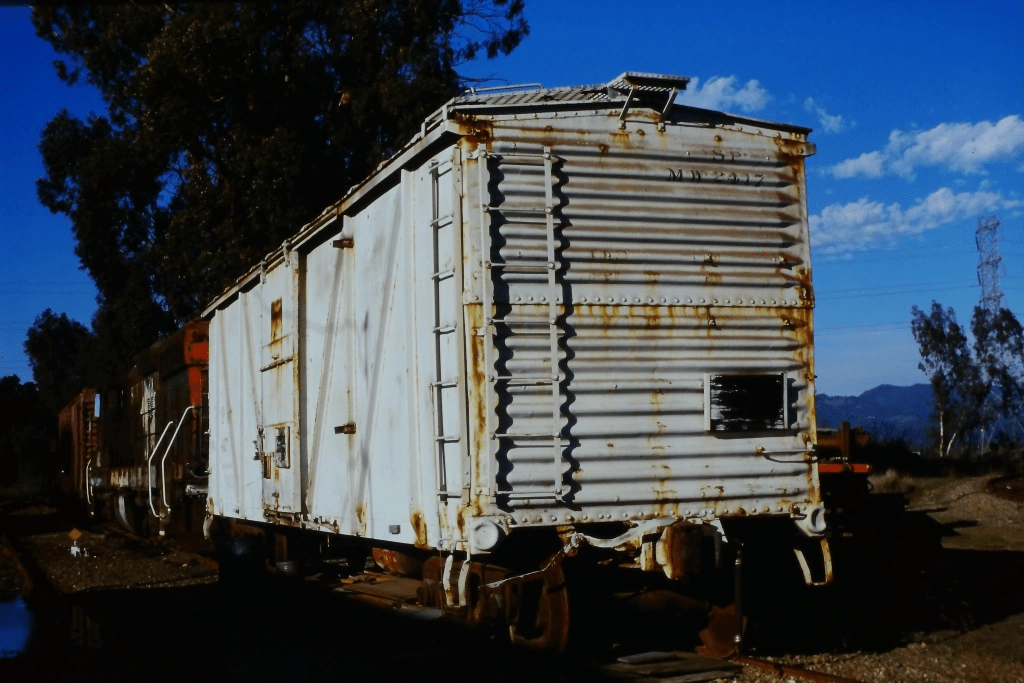
The prototypes have always been a favorite of mine. When I lived in California in the 1980s, I photographed a few retired B-50-15 cars in a field. I don’t remember exactly where they were, but I recall they were up in the Petaluma area north of San Francisco. Anyway they reminded me of the ancient ACL cars I used to see in Savannah, Georgia and I’ve fond of them ever since.
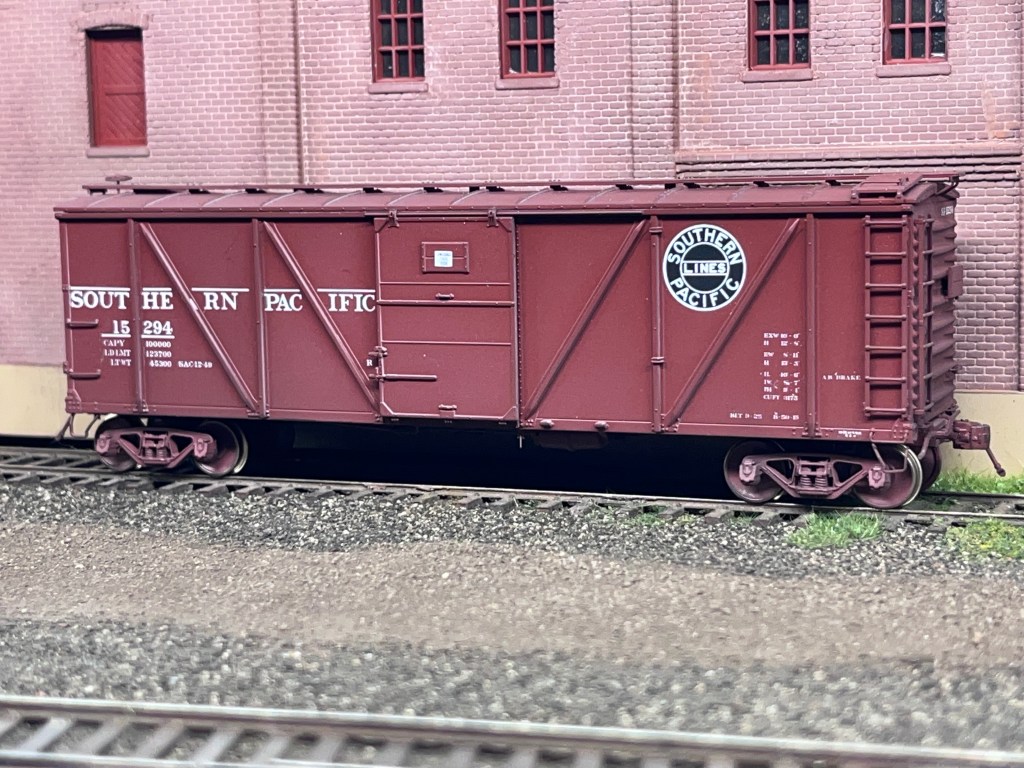
After a whole lot of unnecessary extra work, and a lot less weathering, here’s how my car turned out. I made sure the finish was clean and simple the second time around.
This is my longest post to date and I hope you got a little kick out of it. I pray you and your families have a blessed Thanksgiving celebration! – John G

What a great post! This is all good stuff and something I can definitely relate to – stalled projects. I think you’ll really enjoy that 2-10-0 once the DCC and sound is installed as it seems to bring these things to life. Thanks for posting and Happy Thanksgiving to you and your family.
LikeLike
Thanks for sharing your projects with us. As far as custom decals, I would recommend you check with Bill Brillinger at PDC.ca as he has done several runs of very fine quality decals for me.
Doug Forbes
LikeLike
John thank you for the inclusion in your great blog. And thanks again for spending the day in “Litchpatch”. We got a lot of scenery work accomplished that day. The LTG will be ready to greet the St. Louis ops crews in early December as well as the LTG Open House crowds when Santa’s parade comes to Litchfield on the afternoon of Saturday, December 21st.
LikeLike
A source of custom decals that might work for you is a guy in Canada, Bill Brillinger at https://pdc.ca
LikeLike
Thanks David. I’ve contacted Bill and he told me he didn’t have time for it. However, you’re right–he’s helped me and many others in the past. John
LikeLike