

I’ve had a busy few months of building. I’ve managed to finish building and painting five HO scale freight cars and completely finish three O scale cars, plus I got some good work done on a new building for the Hermitage Road layout.
Here’s the long story of a new Sunshine Models kit that I built in the fall of 2022 and finally completed here in March 2024. This is a Sunshine Models Frisco Auto Car, Kit No. 40.6.

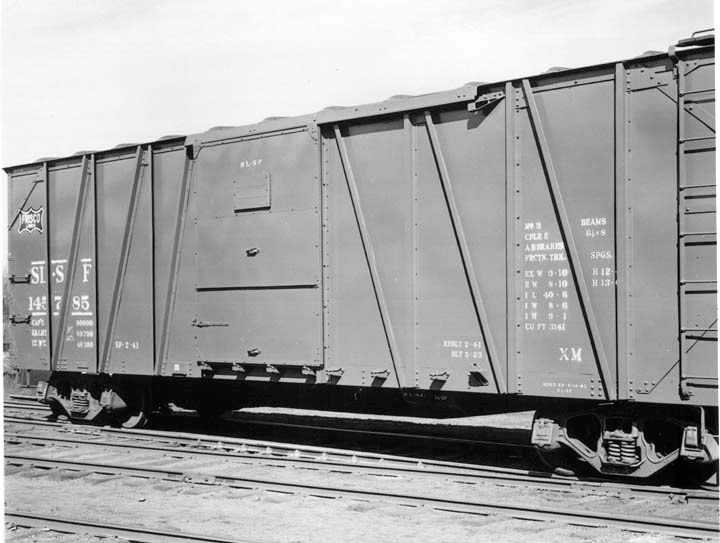
I built this model a short while after moving back to the U.S. from Germany in the fall of 2022. The prototype was originally a box car. Over time some of the cars were modified with raised roofs, auto loaders, steel sides and double doors of different sizes. Radial roofs were original equipment and lend to the quirky appearance. The Sunshine kit instructions didn’t include much on the prototype cars and I wasn’t able to find a prototype photo anywhere, even after contacting the SL-SF HS and many friends online. The closest I could get was a photo of a similar house car, SL-SF 145785 seen below–a rebuild with a seven-foot door and a Samson roof. Photo below courtesy Bob’s Photo.
Additionally, I had a photo of an original Sunshine Models car that I photographed forever ago at one of the Naperville meets on the Sunshine Models display rack. Again, it’s not the auto car but it’s close, and it demonstrates decal placement and a few important details common to the series.

Below. Here’s a drawing of the exact car, provided by the guys at the Frisco HS.

I bought the car off of Tim O’Connor back in March 2021 when I still lived overseas. I was eager to build it and finally got it built in the fall of 2022. I mentioned it in a previous post, No. 176, which can be seen at https://railroadprototypemodeler.com/2022/10/19/no-2-176-move-in-and-new-freight-car-work/.

I love opening those old Sunshine Models boxes! Tim kept everything in the box, exactly as shipped by the Loftin family all those years ago.

Above: Here are the major parts laid out.
Building the carbody “box” was straightforward. An important consideration is gently sanding both sides to the same length and height, and both ends to the same width and same height as the sides. That ensures a square box. I cleaned up the parts by sanding and taking off any resin anomalies or problems introduced in the casting process. All surfaces that will be glued are lightly sanded to better adhere with ACC. Cleaning up the parts took about an hour.
A note on building resin car kits. It is vitally important to take your time to build the model square. Many errors can creep into our builds that cause a model to go off-square, so to speak. Any anomaly in building the carbody square will show up later—such as the car sides being slightly different lengths. Installing the underframe off-center will negatively affect the box. Installing the trucks slightly off-center will negatively affect the box. Installing the running board out of perfect alignment will affect the appearance of the box. The result of being off center is we have built a box that is actually a parallelogram, or a trapezoid—in layman’s terms a box that is basically off-center. You won’t notice this until the model is built and it’s on the track. It will run down the track sideways like an old pickup truck with a net frame. It won’t couple correctly. Running boards won’t line up with the car ahead or behind. By the times it’s finished and we notice the problem it’s usually too late to fix. So taking a little extra time and building the carbody as square as possible makes a big difference in the long run.
I assembled the carbody box, checking dimensions all around, and then then test-fit the floor assembly—ensuring it fit dimensionally perfect.

Below. I built a Westerfield C&NW 1921 box car at the same time I built this Frisco car, and here below is a photo of them lined them up together. The height difference between the two cars is VERY noticeable.

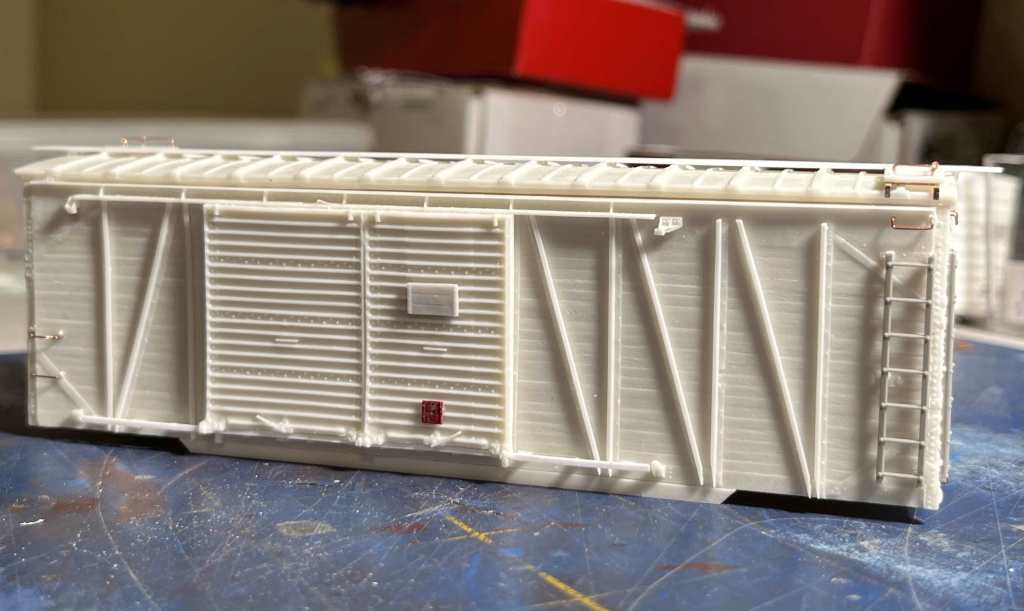
I began adding details starting with the roof, then added side and end details. Below is seen the longitudinal running board supports. They are an outstanding Yarmouth product. Ladders are by Details Associates. Grabs are Tichy 18-inch drop grabs.

Below. Here’s the completed carbody.
The underframe was a little more complicated built, with an additional clevis and a few extra details from the standard. With no proto photos I used the Sunshine models instruction sheet to finish this assembly. I neglected to take an in-progress shot but here’s a pic of the model after completion, below.

Once the build-up was complete I sandblasted the model and trucks to prepare it for painting. I painted it with Tru Color TCP-184, Frisco 1944-1960s Freight Car Brown with a little Tru Color TCP 012 Chinese Red added to get a more red tone. I thinned the paint with Lacquer Thinner and it sprayed beautifully. I painted the entire car—roof, sides, ends, underframe, and trucks—with this color.
Here’s where the long delay finishing the model came into play. I lost some of the decals during the move. The kit included a separate, very small Coonskin monogram decal with the word “Lines” included. Also, the “Automobile” lettering included in the kit disintegrated when I tried to apply it. I was able to find some close-enough alphabet decals to finish the Automobile lettering, but failed to find the right-size monogram. Finally, after many months of frustration, Ted Culotta kindly printed up a set of Coonskin monograms with the word Lines included for me and I was able to finish the model.

I dullcoted the model in the usual way; spraying on several light coats of clear dullcote, thinned 40% or so with paint thinner, using low airbrush pressure. After a few coats I added a few drops of the original car color to the dullcote to blend in the decals and provide a uniform flat finish over the entire model.
I weathered the car exclusively with AIM dry powders. I did not weather the roof. I weathered the underframe, trucks, and lower portion of the sides using AIM Brown, plus some AIM Delta Dirt on the couplers and ends. I sealed the powder with another light shot of clear dullcote. I quit weathering the model before I thought it was done because I did not want to overdo it.
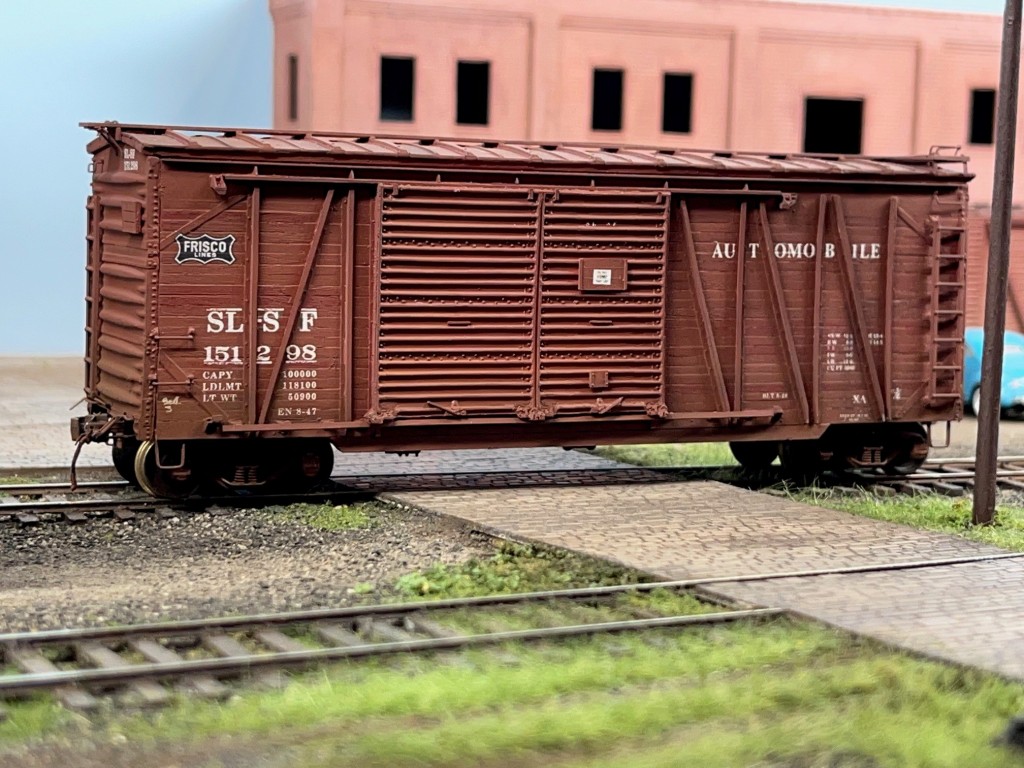
Above. Here’s the completed car out at Hermitage Road. Looks pretty good.
A note about these photos. I use low-resolution photos on the blog to conserve space. If you want high-res photos for anything, contact me offline at Golden1014@yahoo.com and I’ll be happy to send you the full-up version.
Losses
We lost two great leaders in the hobby in April. Sadly, Dennis Storzek, died of ALS in April. I corresponded with him A LOT over the years. He was always helpful and courteous; I never saw a frustrated or bitter word from him. When I was editor of the SCL Modeler Magazine he helped me many times with terminology and modeling. He was a giant in railway restoration and supported modeling through his own line of resin kits and later as the creator of Accurail. He understood railroading at many levels and passed his understanding to modelers for decades. I’ll miss you, friend.

Sadly, I also lost my old buddy Bob Harpe, who was my friend since 1981 and was also the great leader of Savannah RPM. I loved Bob. He was a good man—kind and generous, always willing to help, teach and learn new things. He was always happy to see you. Another giant lost to the hobby. I will miss him greatly. The photo above is a tribute to him set up at the recent Central Georgia RPM event, courtesy of my friend Fenton Wells.
Praise be to the God and Father of our Lord Jesus Christ! In his great mercy he has given us new birth into a living hope through the resurrection of Jesus Christ from the dead. 1 Peter 1:3

Nice post, had me until the end.
LikeLike
I have lost two close friends in the hobby and were my buddies on train adventures. Fortunately, my computer scrolls through all my photos and their images pop up from time to time. It is as if they never left. Ro 8:38,39. for I am convinced….that nothing shall be able to seperate us from the love of Christ
Blessings Andy
LikeLike
I’m sorry to hear about your loss, Andy. Thank you for your blessings! John
LikeLike
Great post about building a Frisco outside-braced auto-loading box car. Very detailed with great photos to accompany your instructions. I, too, am a great fan of the Frisco. Ship It on the Frisco! Great to find your blog about railroading.
LikeLike