

It has rained almost every day in southern Germany since about October 15th. Over 130 days of cold, wind, rain and darkness. It has made for good modeling weather, and a good ski trip in December and a good hiking trip in January, but not much else.
In the few month I finished two models–one an old classic, and another a “bespoke” single-sheathed car that I’ve been wanting to build for a long time.
The Mather Meat “Reefer”
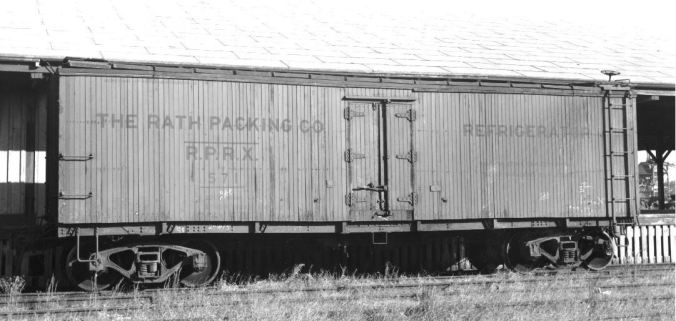
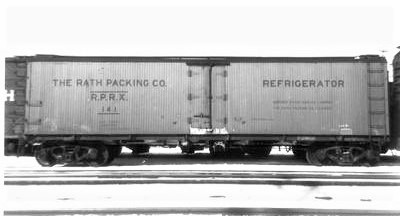
Here’s a prototype view of the classic car, below, courtesy Bob’s Photo. This is a Mather company meat refrigerator car
The Mather company built stock cars, refrigerator cars and box cars and leased them to the railroads. The Mather fleet even included a few tank cars. Mather leased cars to some big railroads and many short lines. The Mather cars were unique in that they used “off-the-shelf” steel components rather that complex, proprietary parts used in many other cars. In so doing, they standardized car building long before most other carriers did.
Red Caboose made an excellent model of the Mather reefer, and in the early 2010s I built a few sof these models for my freight car fleet. When Rapido introduced their beautiful GARX meat reefers, I sold off both the Mather cars…and I regretted it right away.
I built the model above using the basic Red Caboose kit and used custom decals to decorate the model. When I built this model, around 2011, I was still using Accurail trucks…
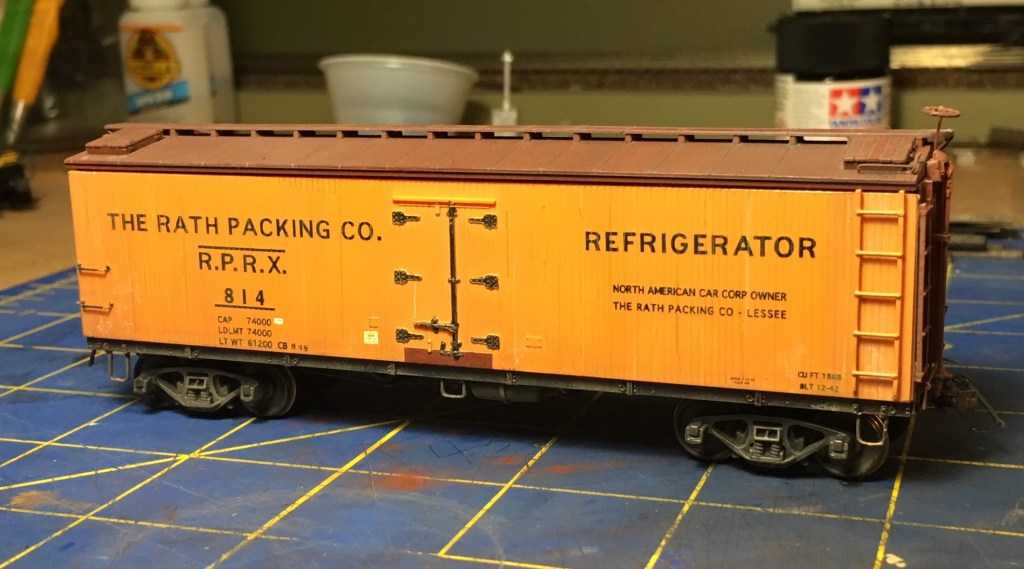
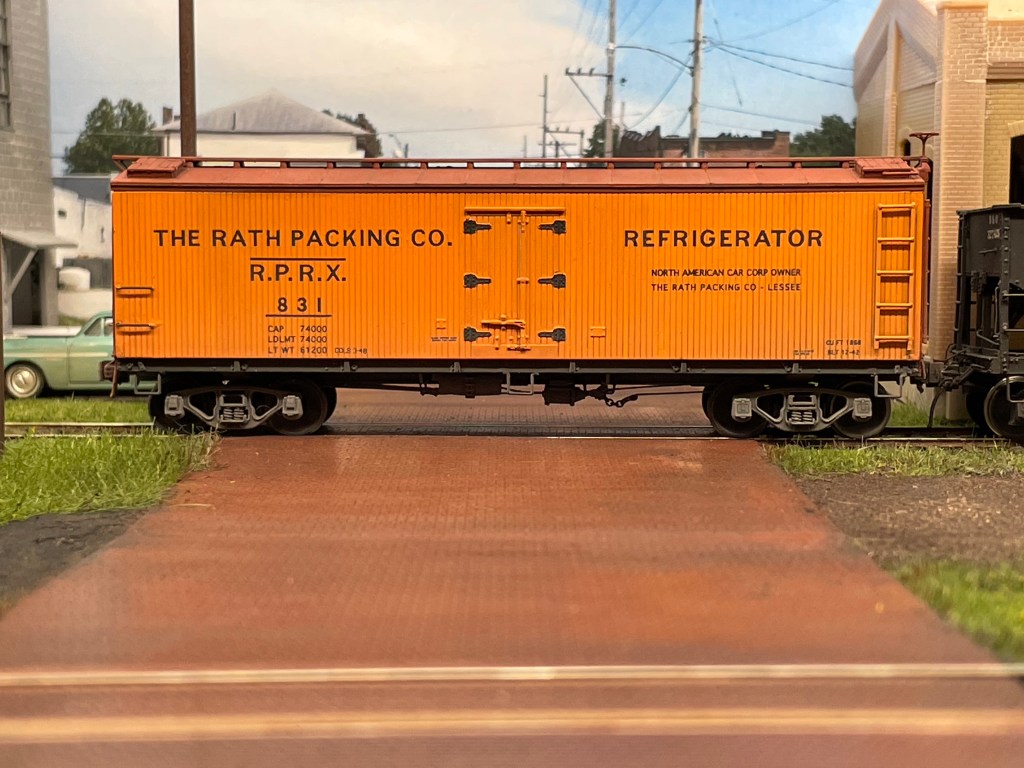
To overcome my sadness, I bought another Red Caboose meat reefer online last summer to replace the cars I sold. I assembled the model per the instructions and used a few prototype photos as a guide. I installed Cal Scale AB brakes (kit includes KC brakes) and Tahoe 40-ton trucks with semi-scale wheelsets. I also installed Yarmouth metal sill steps to replace the kit-supplied parts.

If it looks like the model in the photo above has had the factory paint removed, you’re right. This car came from eBay factory painted for the Rath Packing Co. I managed to screw up the factory paint during the weathering process and eventually had to repaint the model. I had applied a light coat of Testors Dullcote, and then applied a thin coat of black paint over the top to try and get the black paint between the wood sheathing on the car sides. It worked well on most of the car, but the black paint streaked on one side by the door and turned all the sheathing black. I couldn’t repair it.
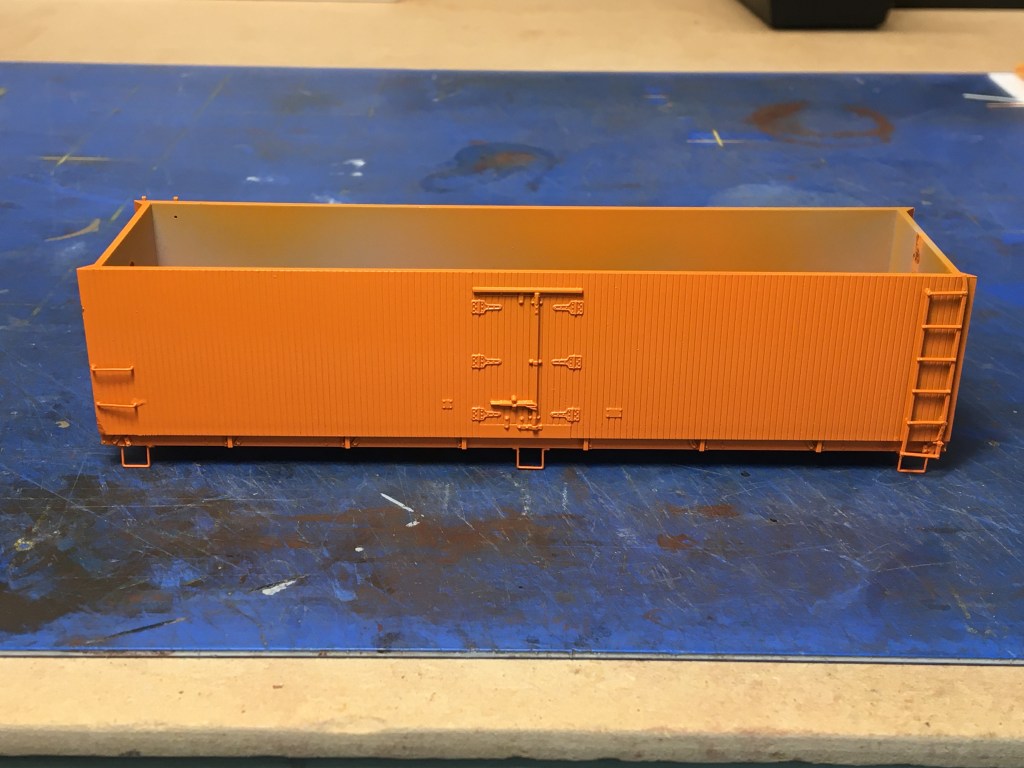
Eventually I ended up sandblasting the whole model and repainting the carbody. After sandblasting I shot the car with a light coat of Mr. Surfacer 1500, and when that was dry I shot it a second time with Tru Color Milwaukee Road orange. Spraying with a light gray primer coat is absolutely essential when painting a white, yellow or orange carbody.
I talked to my friend Ted Richardson when I was painting and finishing the model. Ted has done a lot of research on these cars. Ted–an Illinois Central modeler–told me, “Based on what the retired guys from the Iowa Division told me the paint without the Indian Head logo would be good for the early fifties. The Indian Head logo didn’t come into use until 1953 based on our conversations. I have color photos showing roof and ends as the Oxide color. The guys said the underbody, and trucks were always rusty looking from the brine.” Ted also mentioned Mather used their own reporting marks for short term leases (MRRX), and the leased cars were usually stenciled with the lessee’s name in black.

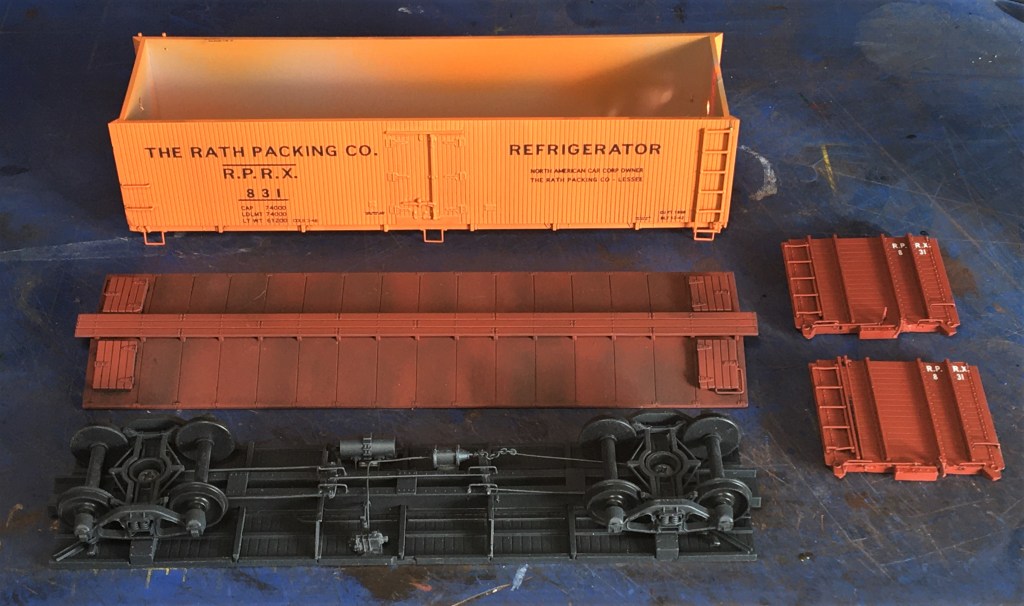
I had a few Rath decal sets on hand, provided by a friend, so I was able to repaint and decal the car back to it’s original Rath-ness. Meanwhile I painted the roof and ends Scalecoat Oxide Red and the underframe Testors Satin Black. Then I assembled the major carbody components and applied the decals. The decals were pretty thick, and it took several applications of Walthers Decal Set to get them to settle down properly. See above.
When the decals were done I hit the whole model with a coat or two of Dullcote. Next, I hand-painted the lower side sills and hinges per prototype photos. I weathered the bottom of the car, trucks and lower side sill with a custom-mixed dark dirt color (made from tan and black paint) and then brush-painted around the whole model with a light tan to set off the decals. I also applied a few chalk marks using a white Prismacolor pencil. I weathered the roof with AIM Weathering Powders—a variety of rust, brown and black mixes—and sealed the roof and everything else with one more light shot of Dullcote.
Below. The decals are on and set, and the carbody components are painted and ready for final assembly.
When decaling a model with siding, I usually apply heavy coats of Walther decal setting solution to get them to settle down. Often the decals will not settle into the recesses between the sheathing, so I use a sharp, new x-acto blade and cut them across the sheathing, then re-apply the setting solution. I used that technique on this car and it worked well to help the decals settle.
After the model was built I brush-painted the lower side sills and hinges black per prototype photos. I weathered the bottom of the car, trucks and lower side sill with a custom-mixed dark dirt-colored paint , mixed from tan and black paint, then brush-painted around the whole model with a lighter tan to set off the details. I also applied a few chalk marks using a white Prismacolor pencil. I weathered the roof with AIM Weathering Powders—a variety of rust, brown and black mixes—and sealed the roof and everything else with one more light shot of Dullcote.
The model turned out well, but I managed to break the bottom rung off of both ladders. I trimmed them both off and will hope that nobody notices all that much.
Above, Here’s the new addition on the Hermitage Road layout. This was a straightforward build, but it took longer since I tried to rush the initial weathering which forced me to repaint and reweather the whole thing.
This year I’d like to slowly increase my meat reefer fleet. Among the cars I’d like to model is this one, below–a somewhat rare 40-foot Mather reefer. I’ll have to kitbash it, and still haven’t found a suitable model to use as a starting point. I think I can use the ends from a Red Caboose kit, and cobble some sides and a roof together from two kits. Photo below courtesy Chuck Yungkurth.
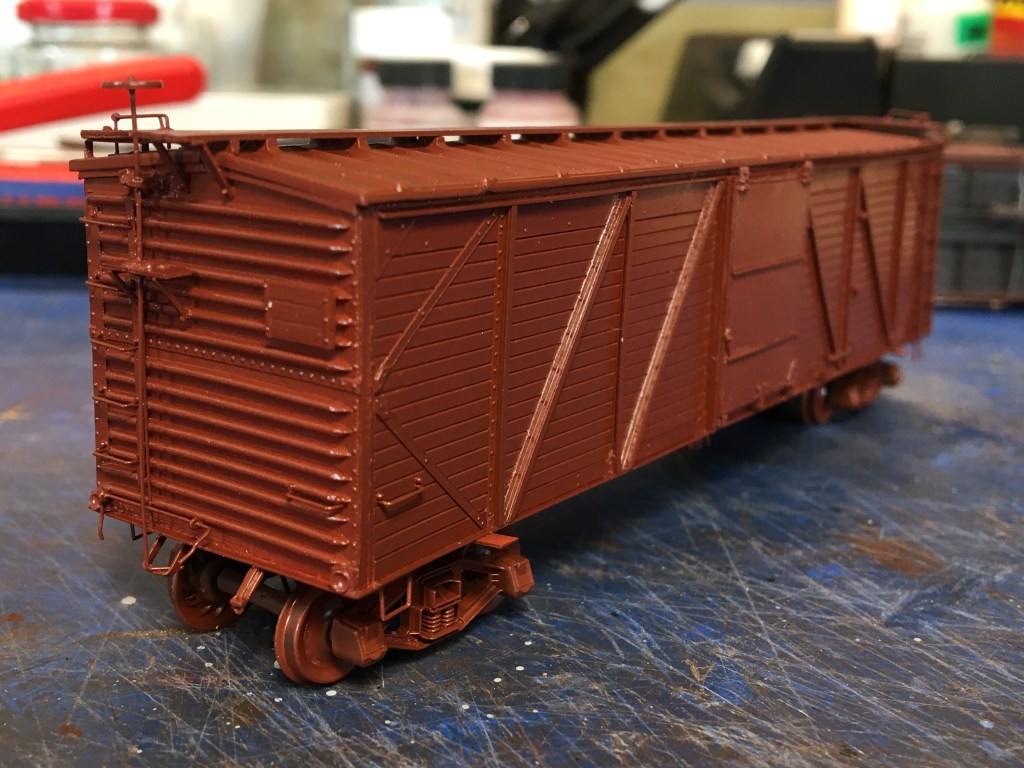
The Bespoke Rock Island Single-Sheathed Box Car
Living in Europe and watching a lot of British TV has made me familiar with a few common British terms. One of those terms I use frequently is the word bespoke, which means custom-made. In other words a custom-made model in American lingo would be a bespoke model, or just plain bespoke, in the King’s English.
I’m scheduled to write an in-depth article on this build for the Resin Car Works blog, so I’m not going to go into too many details here.
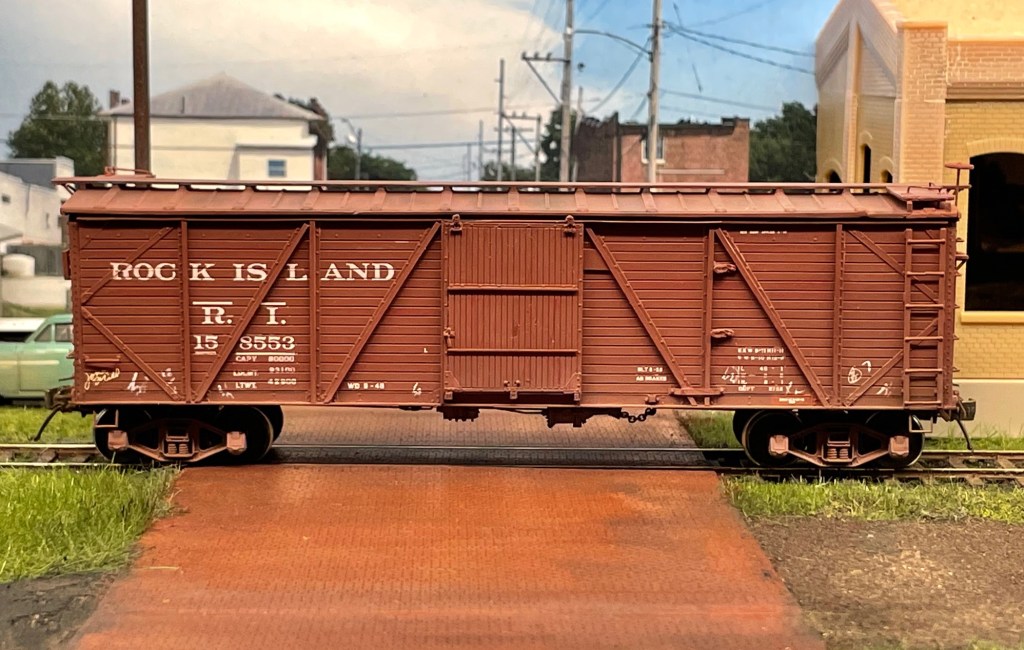
So what’s the big deal about this car? Westerfield makes a kit, but the Westerfield kit has as-delivered wood ends. This model represents a later car with Murphy ends. Oh, and it’s Not a Fowler car, by the way–which is also unlike the Westerfield model–even though Westerfield says it’s Fowler. I got a stern lecture from Steve Hile on this, and he should know being a Rock Island expert. Anyway, to make this Not-Fowler correct I used Murphy ends from a NYC kit. I’ll explain later in the RCW post.
While I was painting the 133000-series car I used the K4 set to also repaint this car below, which is an old Sunshine model. The 141000-series car looks a lot like the 133000-series car, but it’s taller. They have a nice family appearance–especially since I repainted them both with Tru Color TCP-197, Rock Island Freight Car Brown.

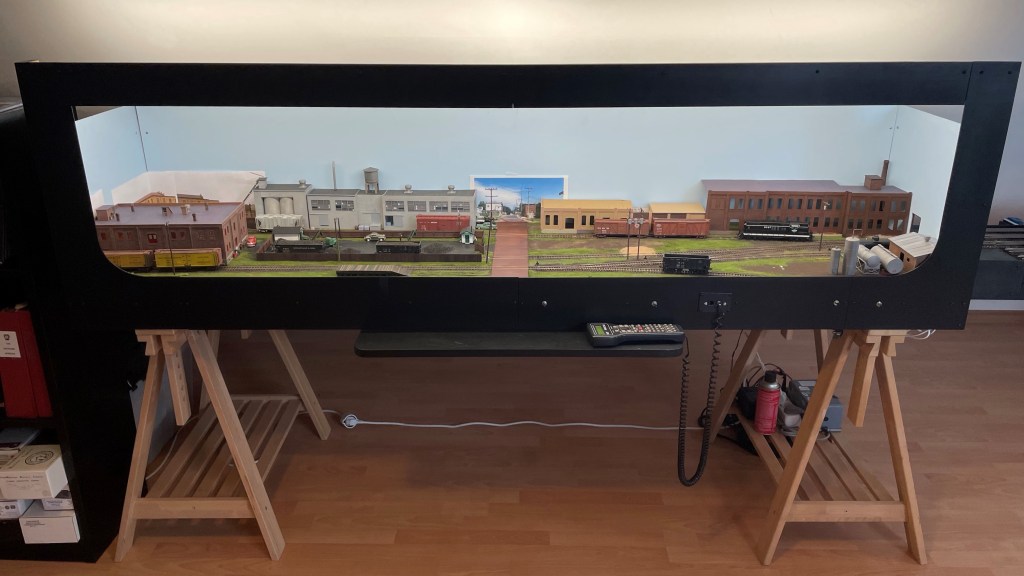
Meanwhile, the Hermitage Road layout continues to get a few upgrades. I lowered the top of the front fascia four inches to close in the scene a little more. I think it looks a lot better. It’s kinda hard to tell without a “before” picture, but I think this view sums it all up. I’ve just gotta finish that last darn building and the layout will be complete. Oh, and I still need to work on the backdrop a little bit more too…
Hope you’re all enjoying a wonderful spring. Slava Ukraini! – John G

John Thanks, for sharing these accomplishments. This is truly a fun hobby.
I hope you and your family are safe in light of the Ukraine situation. Maybe give me an off site evaluation of the base you work at?
Take care, Brother
Barry
On Sun, Mar 13, 2022 at 8:44 AM Railroad Prototype Modeler wrote:
> Golden1014 posted: ” It has rained almost every day in southern Germany > since about October 15th. Over 130 days of cold, wind, rain and darkness. > It has made for good modeling weather, and a good ski trip in December and > a good hiking trip in January, but not much else. ” >
LikeLike
Thanks as always, Barry. We’re quite safe and all is well. Still able to travel and the war hasn’t affected us personally, apart from what we’re doing at work. I work in the Airlift Division so we’re moving lots to things around the theater. Personally I expected cyber attacks and A LOT of interference, but we got nothing. We can’t figure out the Russian’s poor performance, and/or nearly complete lack of preparation. They’re paying dearly for it. Conversely, we are all very proud of the Ukrainians. It’s great to see a people send their women and children away so they can stand and fight. The Afghans left their women and children and bailed–all Muslim countries have done that. But the Ukrainians are standing strong and they make it look easy. It is so inspiring. They WILL win. John
LikeLike
Nice cars. I’ll have to redo the paint on my RC Rath reefer after reading your post. Where did you get the Rath decals? I haven’t been able to find a set online.
-Phil
LikeLike
I would like to see some close-up photos of the layout/diorama and industries on it; those look very nice also. The railroad cars are great modeling, nice work!
Thanks!
Rich Mahaney
President – NMRA NCR Region
hazmatrichm@aol.com
LikeLike
Hi Rich,
Sure, I can send you some pics. If you’d like a little article for the NCR Region website I’d be happy to put something together for you.
John Golden
LikeLike