

In August, during the “16 Days” work campaign, I began a project to rebuild and repaint a dozen or more freight car models.
Two of those models were Rock Island favorites. The first was an Intermountain 1937 Modified AAR car that needed to be stripped and repainted because I did a poor job of decaling and finishing the first time around. The second was a Sunshine Models USRA rebuild that I finished 15 years ago or so, which needed updating. I just finished those models last week Here’s the report, with a little history.
RI 146309
Rock Island rostered over 4,100 1937 AAR Modified box cars. They were delivered with a variety of different doors and features, and some were outfitted with Duryea underframes. Some cars were built as express cars and were delivered with Allied full-cushion trucks. Refer to Ed Hawkins’ car rosters for detail on each series.
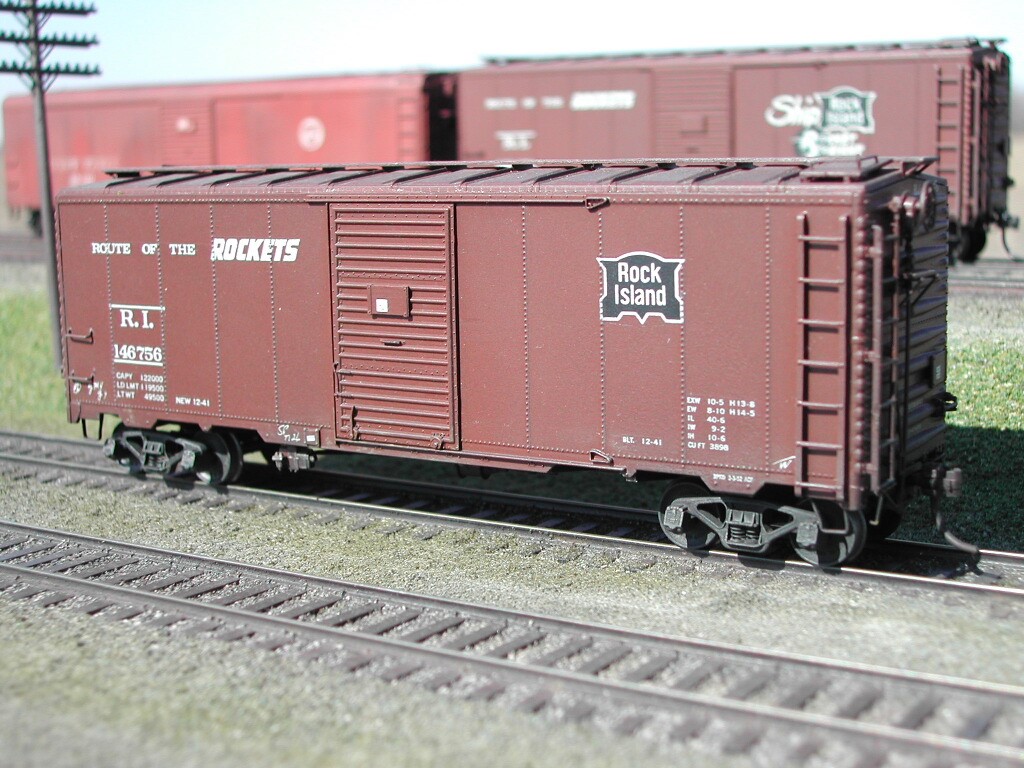
Below. I’ve built a number of models of these cars over the years. Here’s one of the first I built, photographed in 2001 in my back yard when I lived in California. There were fewer aftermarket parts back then, but still I installed the wrong type of grabs, and for some reasons painted those old fat-wheel Kadee trucks black. Those are Champion decals too.
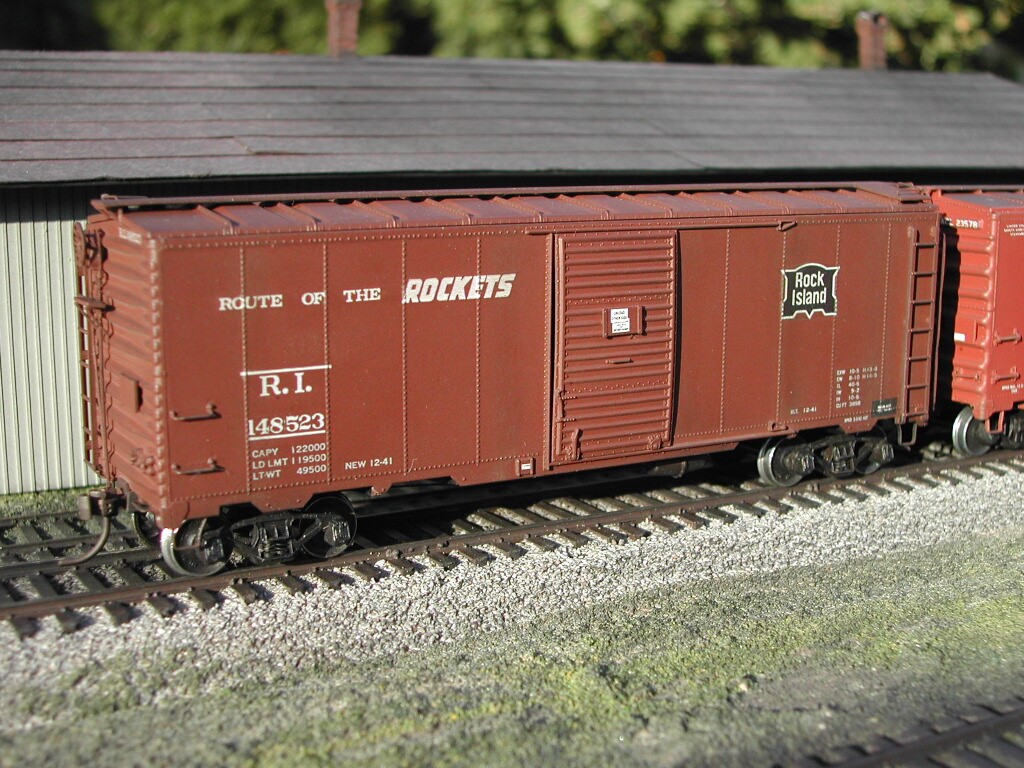
Below. I took this photo in 2004 after living in Illinois a year. RI 146756 was yet another car for the roster, but my technology had not improved. In the background is yet another Rock Island car.
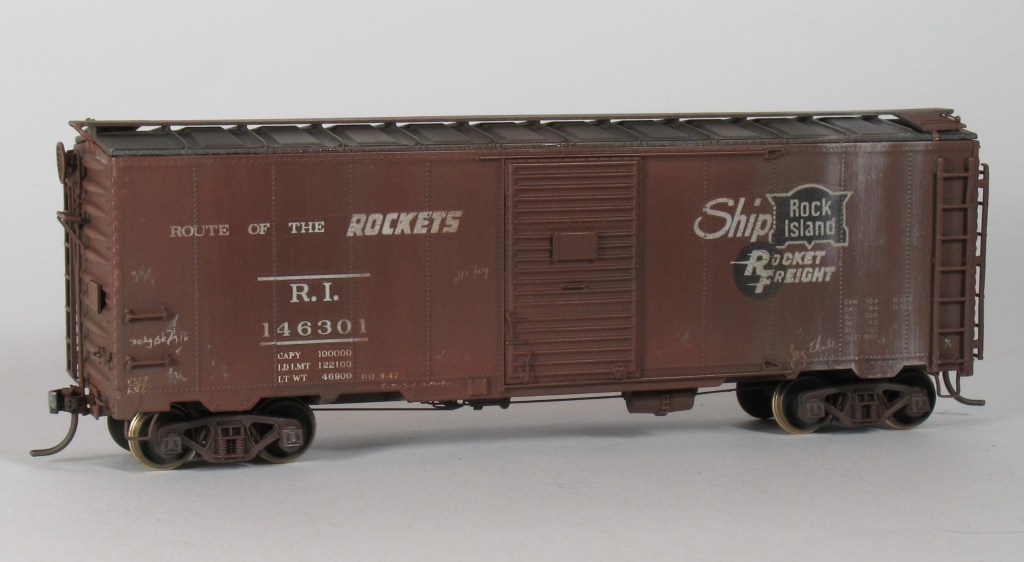
Below. I finished this car, RI 146301, in 2007. Better trucks and somewhat improved brake gear (as far as I can tell from here…), but I was still using Champ decals, and still no leap in finishing.
Below. RI 147313 shows some improvement. I finished this model around 2013. This model has Tahoe trucks and semi-scale wheelsets, better decals (a combination of Hubert Mask and Champ), and much-improved brake gear modeling. This was also the first model that I applied Kadee grabs to.

I covered the Salt Weathering technique in a previous post, which can be found at https://railroadprototypemodeler.wordpress.com/wp-admin/post.php?post=9909&action=edit.
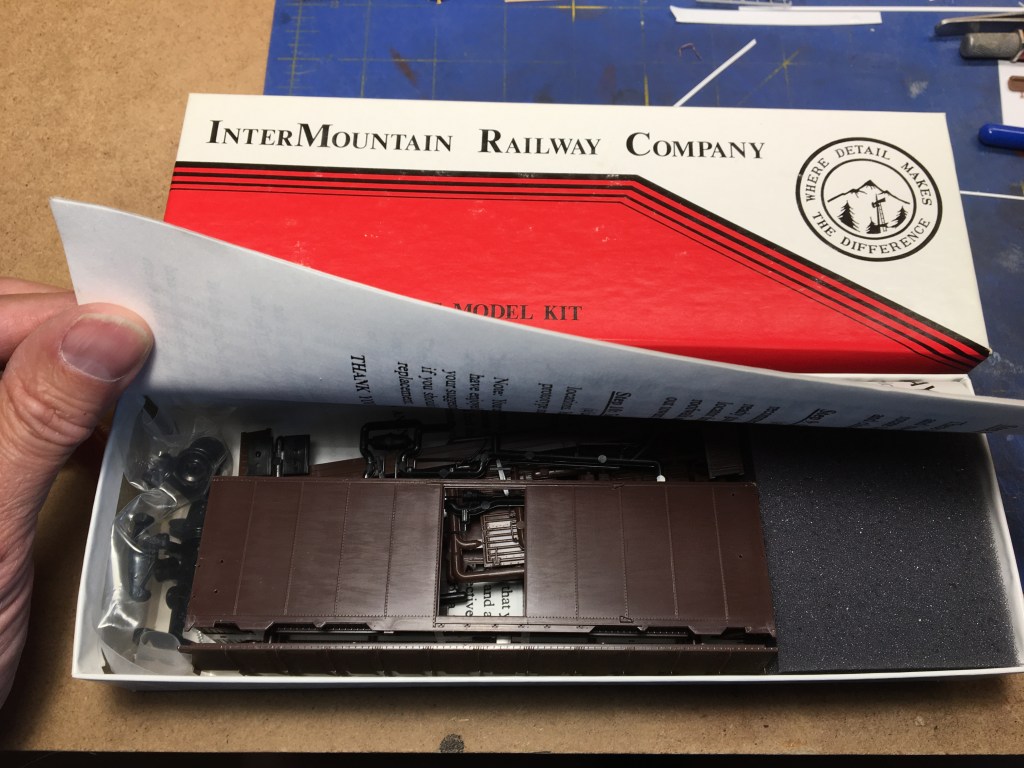
Turn the page six years. Let’s try again, this time with a now-hard-to-find undecorated Intermountain kit. I get rid of many of the parts–the trucks, running boards, grabs and the details and replace them all with better products. It’s about time for a 21st Century model of this car, isn’t it?
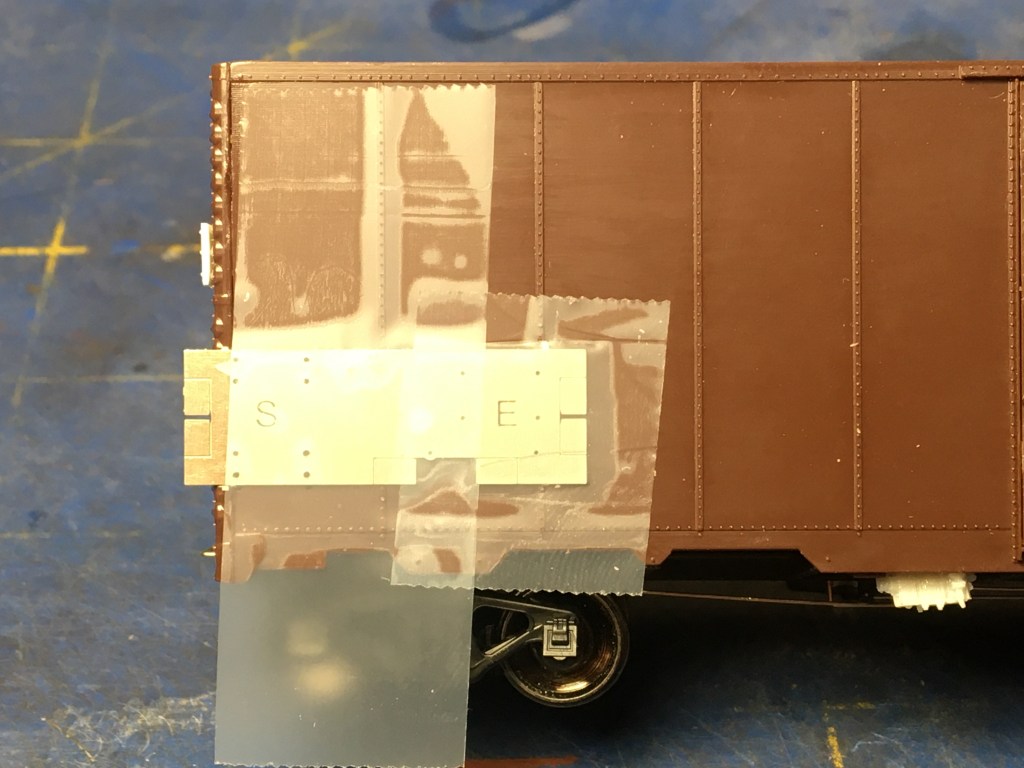
The latest model was assembled with Cal Scale brake gear and a ton of aftermarket parts all around. I installed the grabs using the Yarmouth Models template, taped to the car and then drilled through. I fixed the grabs with canopy glue. Getting the grabs on the ends lined up is NOT easy, but worth the time spent. I’ve run out of Jim King’s draft gear boxes and used Kadee #178 coupler boxes—not a bad compromise. So far, the build is pretty good and a trip through the sandblaster will clean up most of the mess and prep the slippery Kadee plastic for paint.
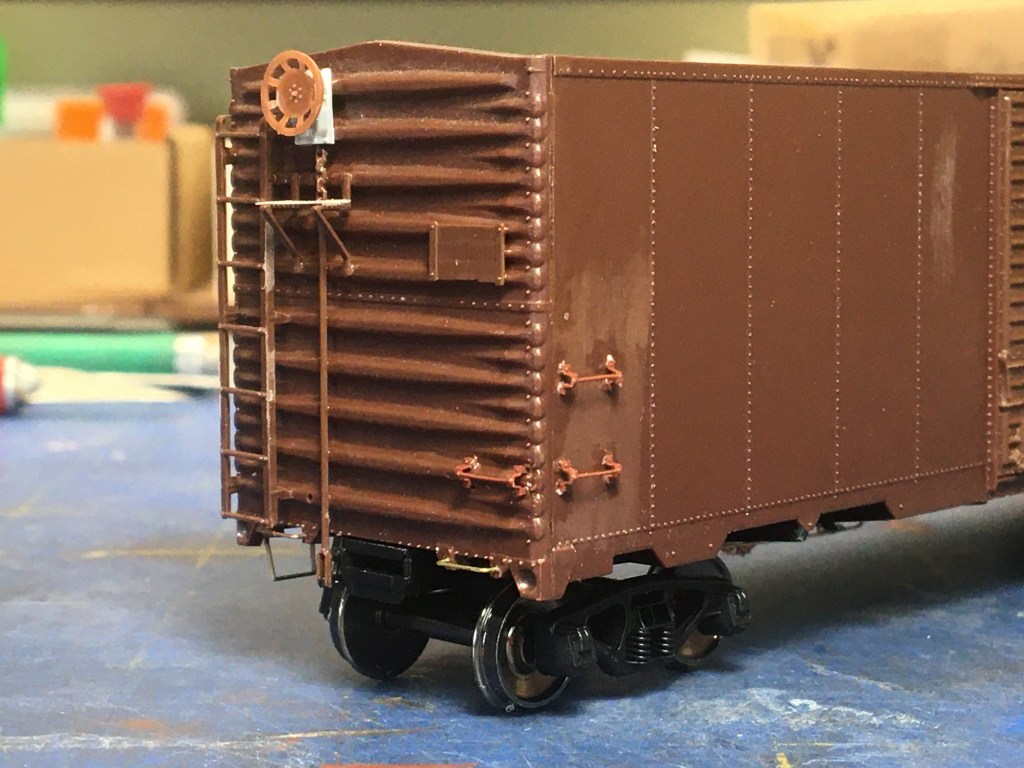
As I mentioned above, I finished the model about six months ago, but the paint and finish was poor so I immediately stripped it and repainted it. Here’s why: I used K4 decals for this model; when they arrived in the mail they were wet. I attempted to use them on this car and they did not go on well. I continued to finish the car and the results were not what I hoped for, so back in the sandblaster it went. Here’s the new model ready for paint…again…

And here we are after painting. I’m using Tru Color RI Freight Car Red, TCP-197 Rock Island 1930-60’s Freight Car Brown, thinned about 30% with Lacquer Thinner. Again, a technological leap over Scalecoat, in my opinion, with the added advantage that Tru Color is dry and ready for decals in 60 minutes.
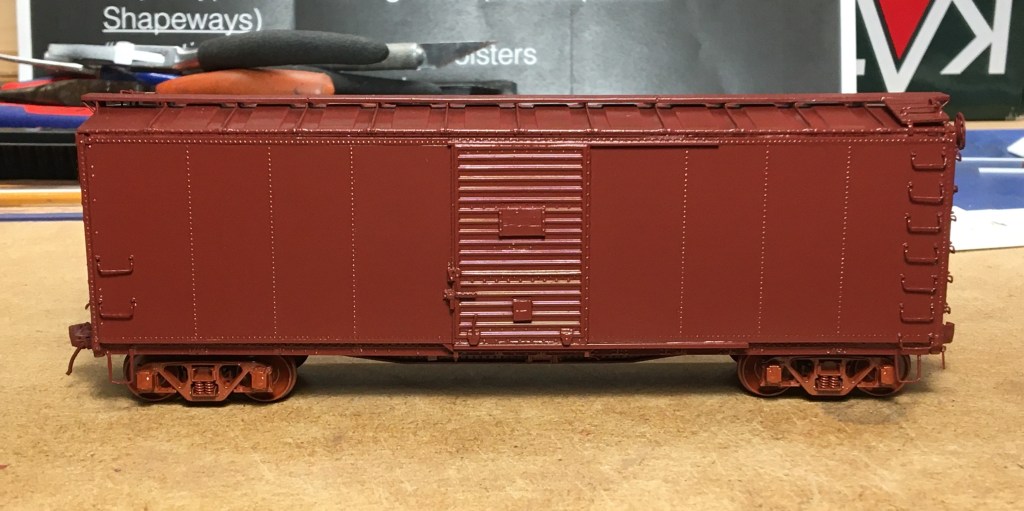
I made my own running boards for this car using plastic strip. I should’ve taken more care to leave some space between the boards on the latitudinal.
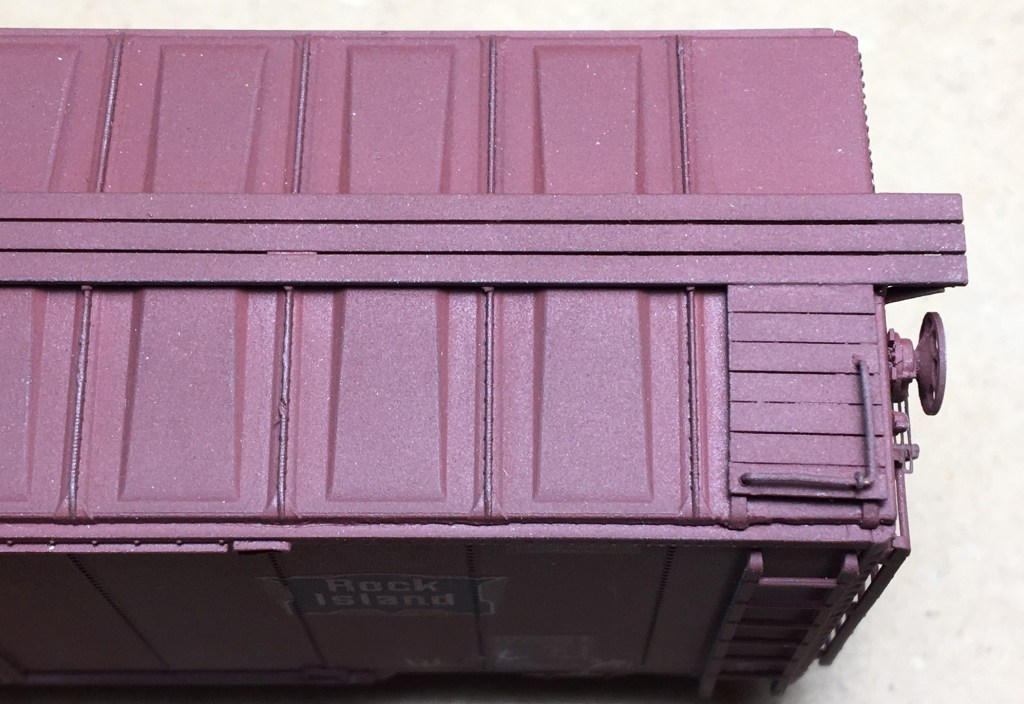
Mike at K4 Decals was kind enough to send me replacement decals without charge. He sent the decals in plastic sleeves, but the sleeves weren’t sealed shut and somewhere in the trip to Europe they collected a little moisture. The replacement decals came in a box with sealed plastic and were perfect.
I’ve found that K4 decals are somewhat thicker than Speedwitch or Microscale decals. Microscale Decal Set and Testors Decal set had little effect on them. I tried a stronger setting solution—Walters Decal Set—and that worked great to get the decals to settle around rivets and detail. It’s pretty strong stuff and usually worked well in just one application.
Ultimately I plan to model two of these cars. This one, from the 146000-series without a Duryea underframe, and a second car from the 148550-149049 series with a Duryea underframe. George Toman displayed some inspirational work on the Resin Car Works blog modeling one of the cars with the National Scale Car Duryea underframe set, and I want to copy his effort soon on the second car. George’s article can be found at http://blog.resincarworks.com/workbench-wednesday-26/#more-2733.
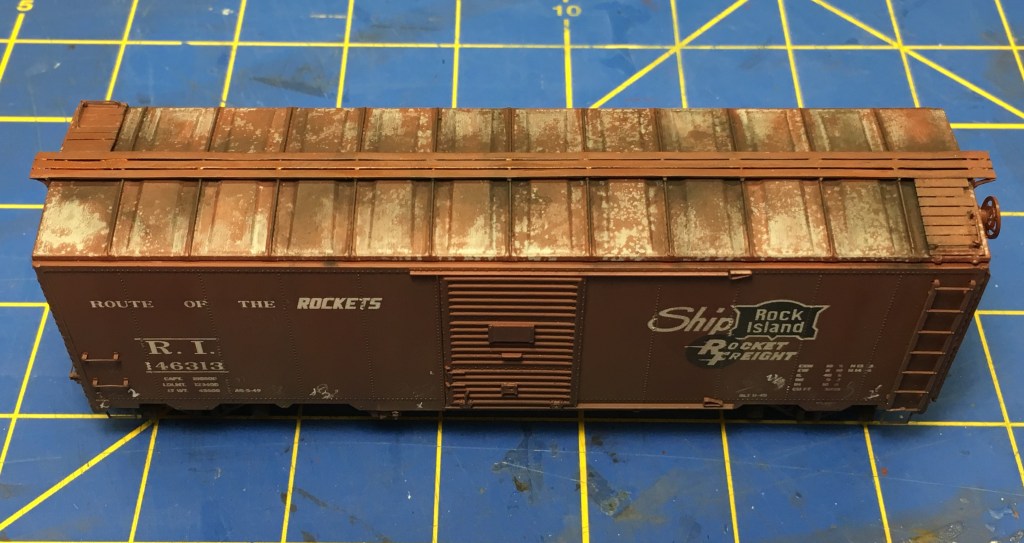
Here’s my car, about 99% finished:
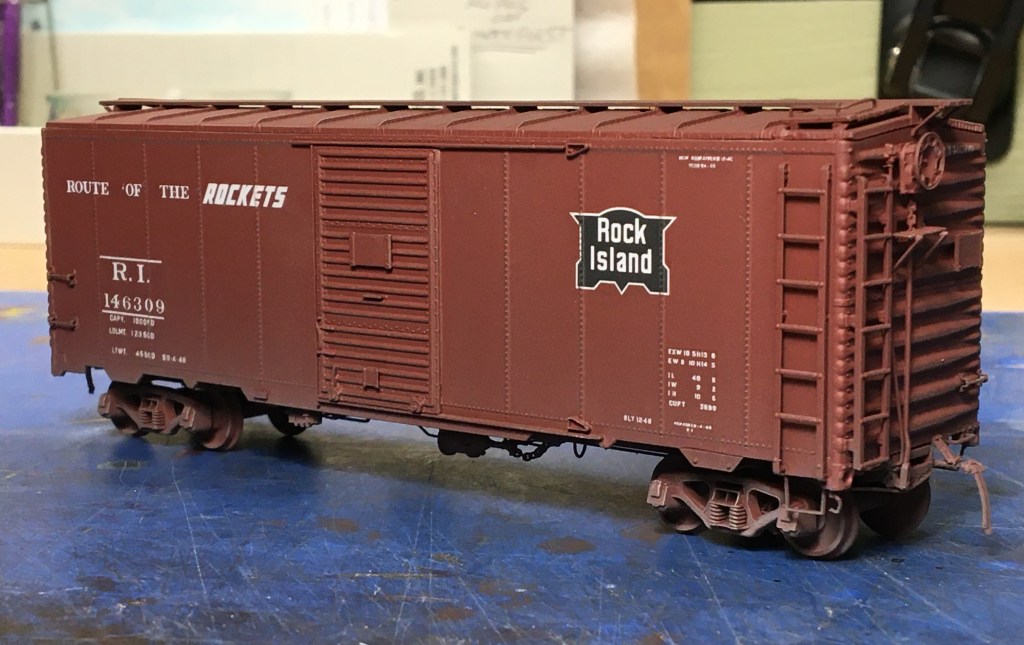
Back on the rails she goes!
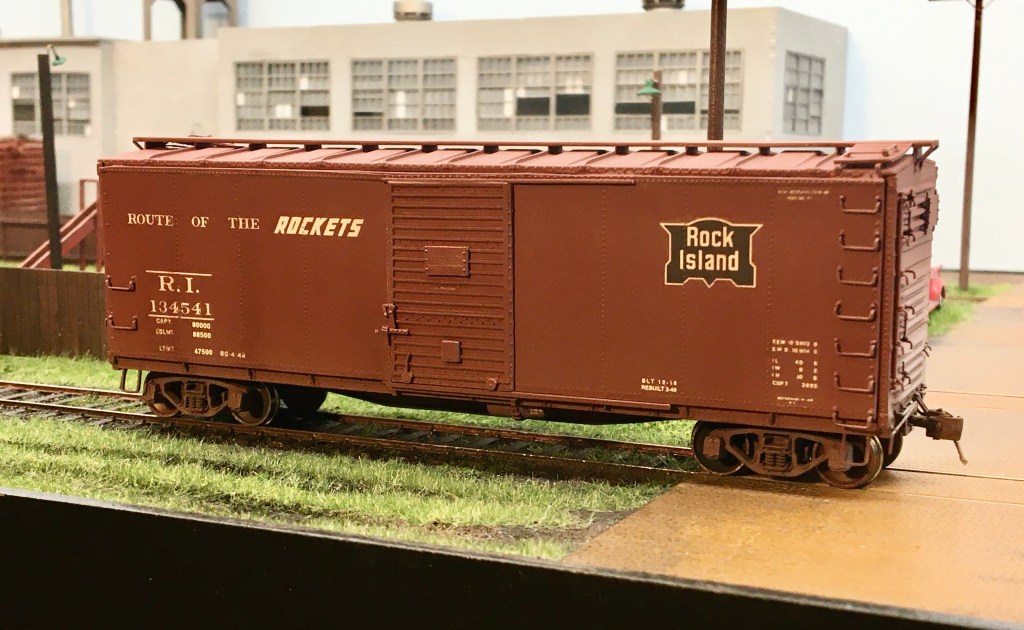
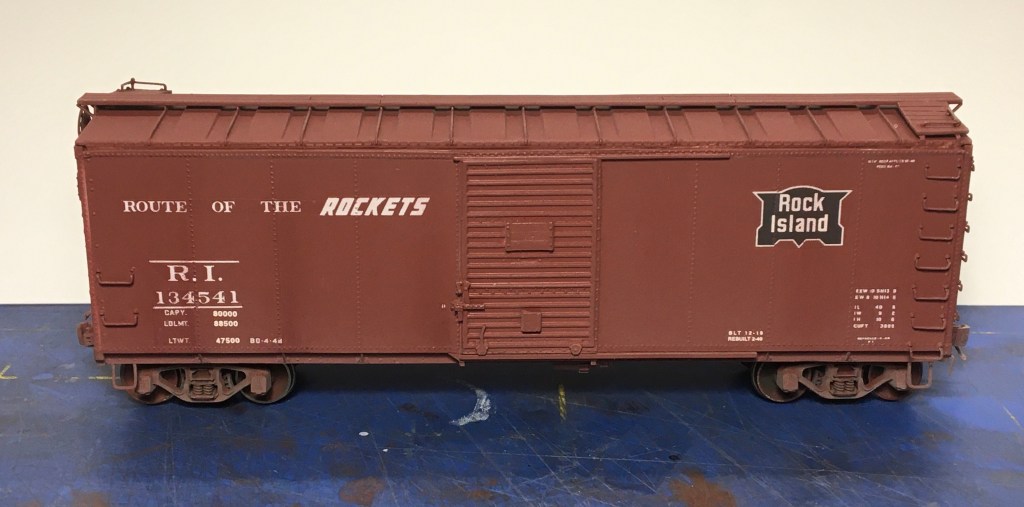
RI 134541
RI 134541 is the other car I recently rebuilt. This is an old Sunshine Models car I’ve had around for about 15 years. It’s a cool model of a cool prototype, and even though Sunshine Models is gone you can get a kit from Chad Boas and make your own.
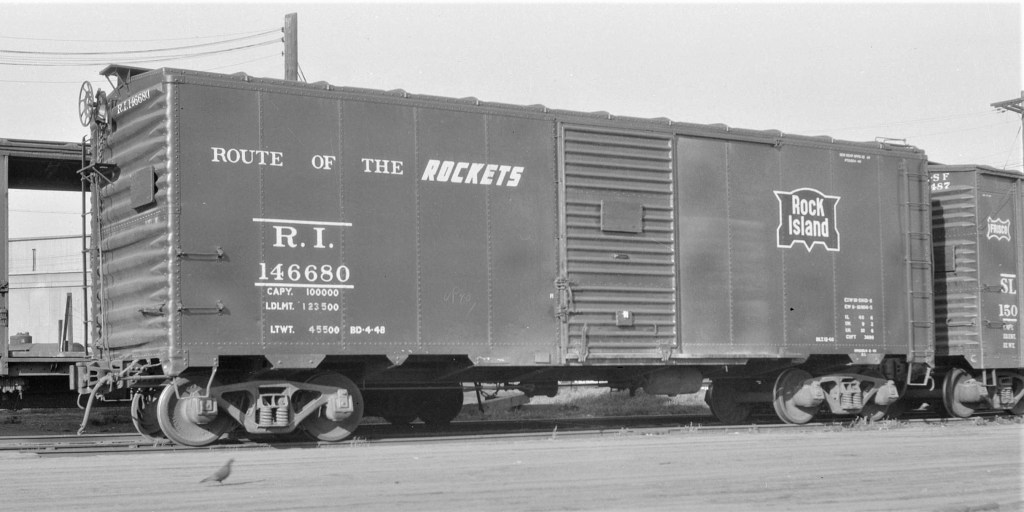
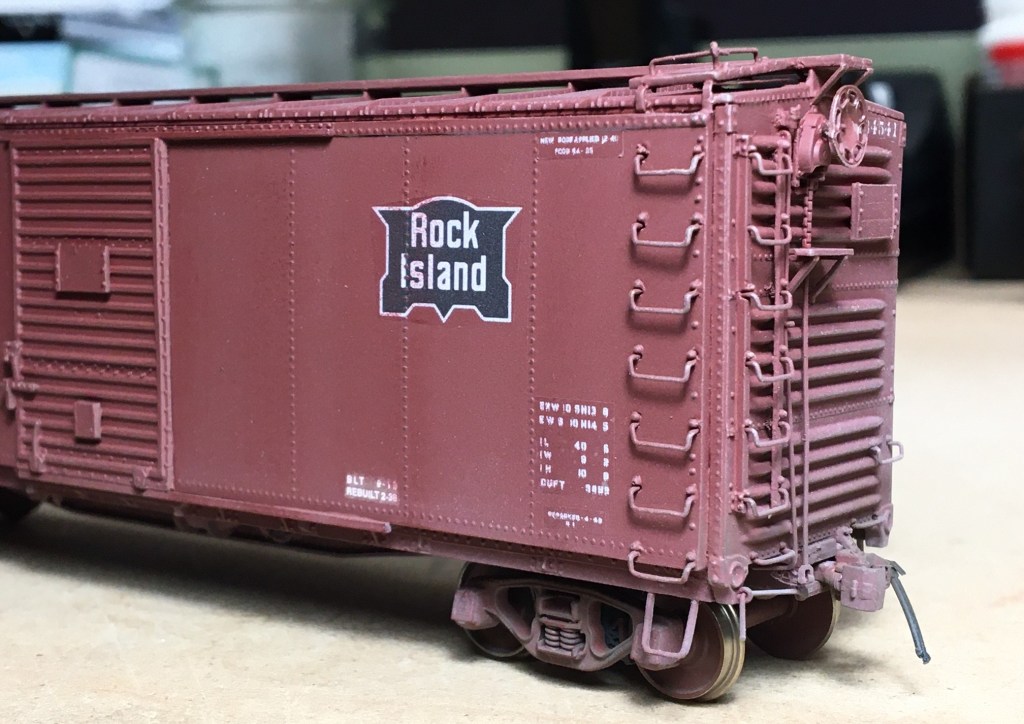
Rock Island rebuilt 800 USRA double-sheathed box cars to this configuration beginning in 1936. C&NW rebuilt over 1,200 of thier USRA double-sheathed cars similarly. A spotting feature of both car types is the original USRA 5-5-5 end with a blank panel added in the middle to increase the height of the end. There’s excellent coverage of these cars in RP Cyc #24.
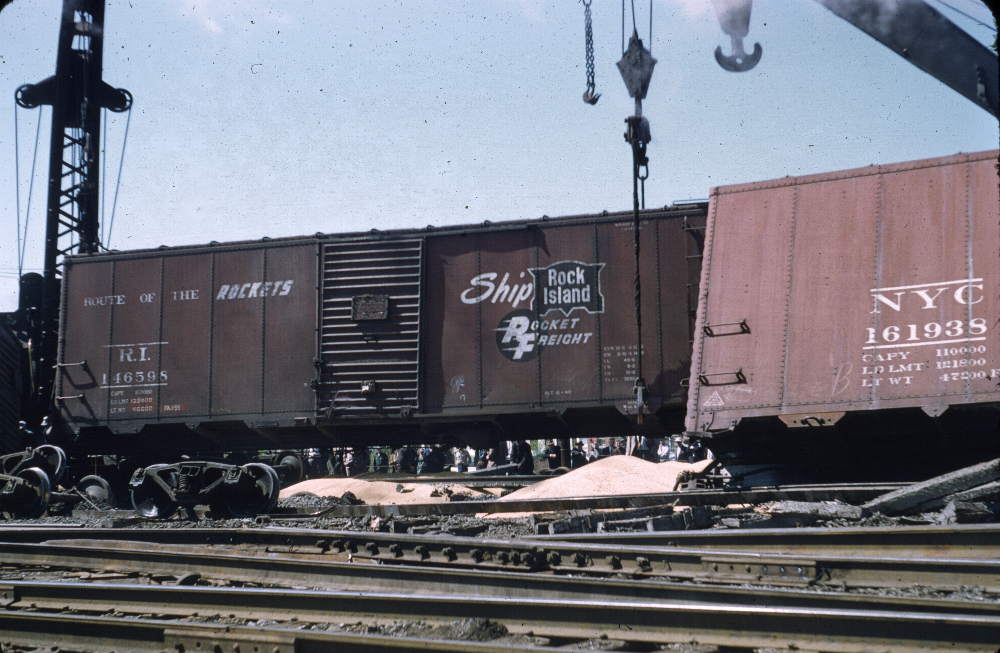
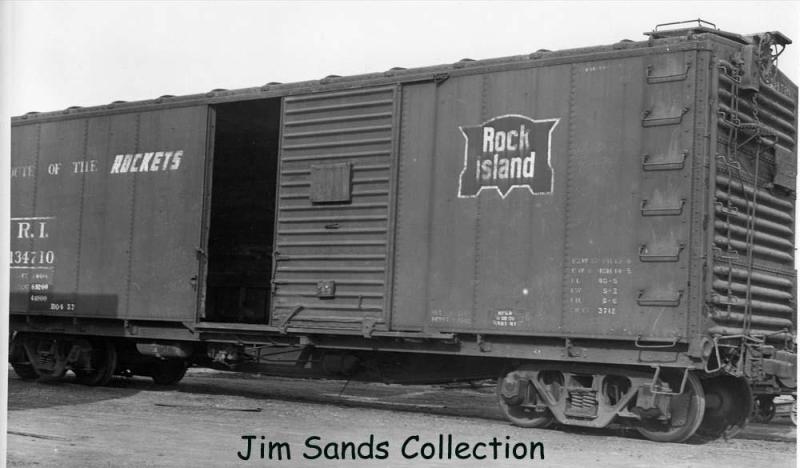
Here’s a Jim Sands photo of a Rock Island car, circa 1960, courtesy Clark Propst.
Here’s my starting point for the rebuild, below. The photo is circa 2008. Why rebuild it? The model is the wrong color, and I got some silvering behind the decals that I could never fix.
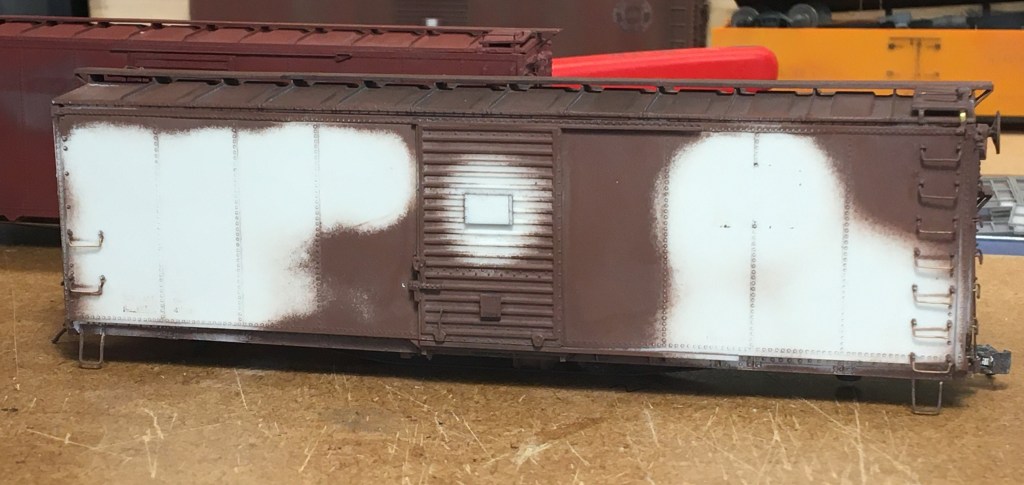
First things first. A trip through the sandblaster cleaned off the weathering, all of the Dullcote, and prepped the surface for new paint. A little more pressure took the decals off.
Details used on the model include A-Line stirrups, Tichy 18-inch drop grabs, Hi-Tech air hoses with brass brackets, Tahoe Model Works 40-ton trucks with semi-scale wheelsets, and a Cal Scale brake gear set.
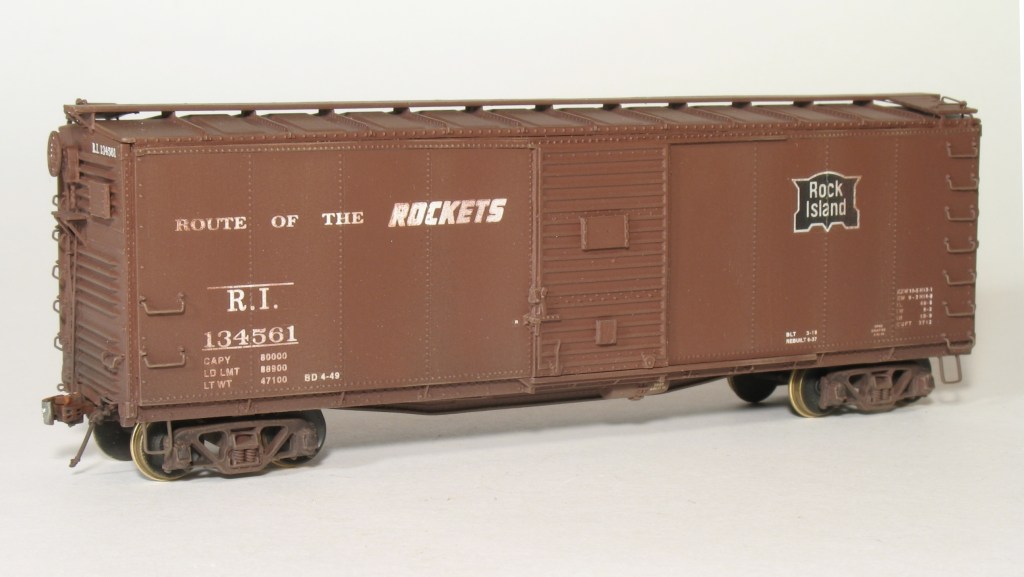
I thought the original build was pretty good, so I went ahead and painted the car without any detail upgrades. Here’s the model repainted with Tru Color TCP-197 again, which as you can see is a lovely, light maroon color.

Decaling was straightforward. I used the same K4 Rock Island box car set for this model, but I had to cut out the numbers to get the right number combination. I also had a leftover Rock Island decal set that came with the original kit I built all those years ago, and used the 80,000 lb. CAPY decals to get it right. Once again I used Walthers Decal Set because it works great with K4 decals.
I referred the prototype photo above for placement of the monogram. Note the monogram is NOT centered within the right side panels.
After decaling the model I hit it with a few light coats of Dullcoat and a few light coats of Testors Light Earth for weathering. I really didn’t want to over-do the weathering on this car.
Below. A closer-up view of the B end. The blank panel in the end is well-represented.
Here’s the finished model, below, on the layout and ready for action. I made the photo black-and-white to add a little period effect.

Hope you all have a great week! – John G

John, I think you are too hard on yourself — all your efforts look great!
LikeLike