

I hope you have all been able to keep safe through all the COVID mess.
When it all kicked off, I said to my wife “There will be a lot of blessings in this.” For my family and I, the blessings have been 1) A LOT of close family time, and 2) Lots of work, and almost no opportunity to spend money–which has allowed us to pay off nearly our bills.
I’ve also had an opportunity to get some modeling done. I set two priorities in March and April; first was finishing layout planning–which I’ll cover in another post–and second was finishing up a lot of freight cars. Here are some of the models I’ve been able to finish.
Models for Eric Reinert
One of the first models I finished in May was this one, below. As I explained in Railroad Prototype Modeler Post No. 144: Freight Car Modeling, February, 2020, Part 2, I offered to weather a few cars for an online modeling friend, Eric Reinert. That post can be found at https://wordpress.com/post/railroadprototypemodeler.wordpress.com/11081.
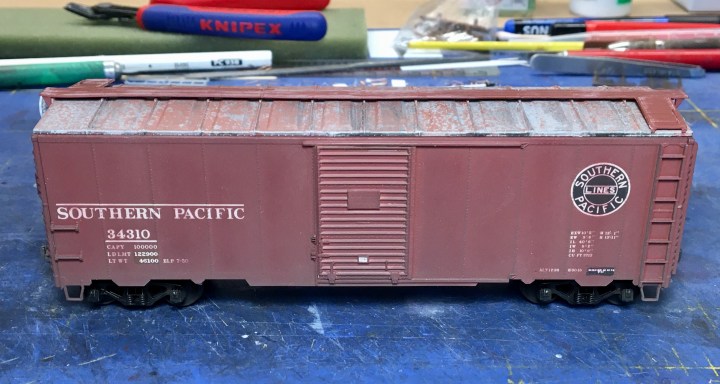
This right-out-of-the-box SP ARA box car is either a Branchline Yardmaster or Accurail model. I removed the roof and gave it the salt-weathering treatment, replaced the original trucks with Tahoe Model Works Double-Truss trucks with .088-width wheelsets, and added Kadee #58 couplers, and Hi-Tech air hoses. I weathered the car with Testors Dark Tan, applied with an airbrush, many coats of Dullcote, and some AIM weathering powders. I also added a few “detail decals”–new shop and repack dates based on Eric’s modeling era–and chalk marks. After about three hours of work I think the model turned out pretty nice.
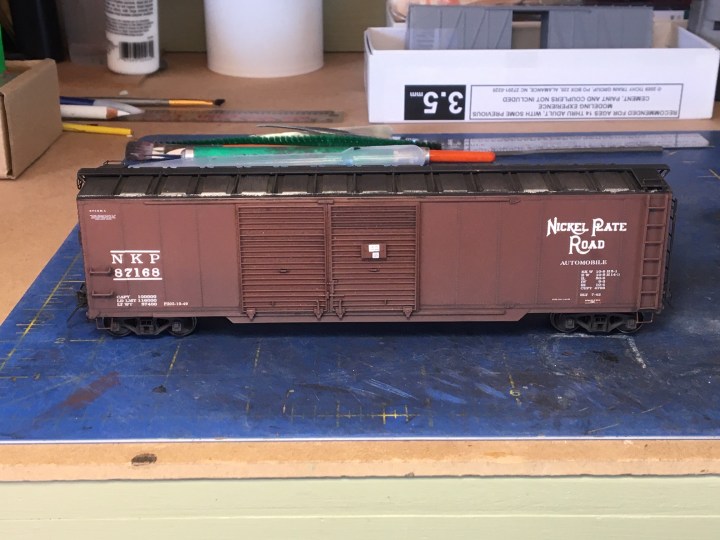
Below. Here is another of Eric’s cars. I painted the roof with a home-mixed galvanized gray color and then went back over the seam caps with Tamiya flat black, then weathered the roof with AIM weathering powders to blend everything in. I weathered the sides and ends by applying Dullcote and then adding a light wash of thinner with a little black artist oil mixed in. I changed the shop date decals, and attached replacement TMW trucks, Kadee couplers, and a few other details. The thin stirrups are from Yarmouth. The placards are from Microscale.
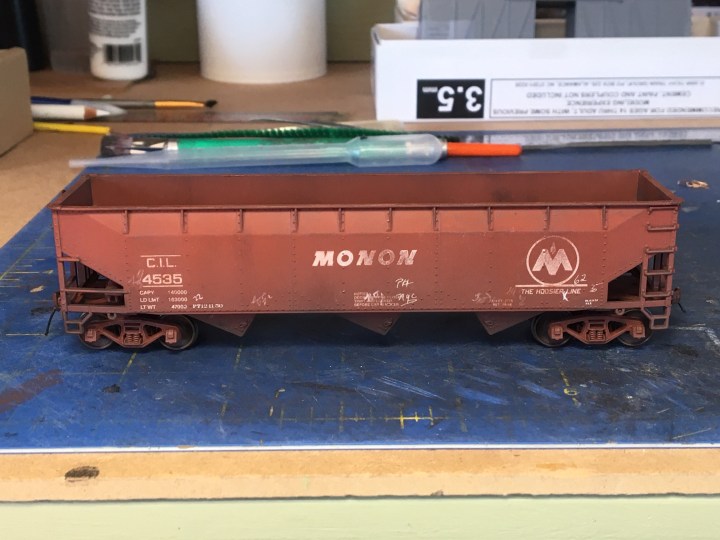
Here’s a model I’m quite proud of. This is, I think, a Bowser model and it came to me with no finish whatsoever, right out of the box. The first thing I did was give it a coat of Testors Dullcote…and 15 minutes later the whole model turned white. I guess water vapor got introduced to the Dullcote at some point. Ugh!
To rescue the finish, I gave it a few coats of paint thinner to break down the Dullcoat finish and scraped it off with a toothbrush. That carried away most of the white cast. Then I gave it a light sandblasting in my North Coast sandblasting booth. That took off almost all the remaining white cast. I also sandblasted a few more areas to take off some of the lettering and provide some “pre-weathering”–see the Monon lettering in the middle of the car. After washing the model I gave it a light airbrushing with Scalecoat PRR FCC and that took off the rest of the white mess.
Then I added TMW trucks, Hi-Tech air hoses, and Kadee scale couplers, along with new shop and repack decals, and hand-drawn chalk marks. I weathered the car lightly with Testors Light Brown, and streaked the sides and ends with a little AIM Soot Black weathering powder, and also weathered up the lower sides with AIM Delta Dirt. Then I gave it a finish coat of Dullcoat. It think it turned out quite well, especially considering I completely botched it at the start. The TMW trucks are a great addition.
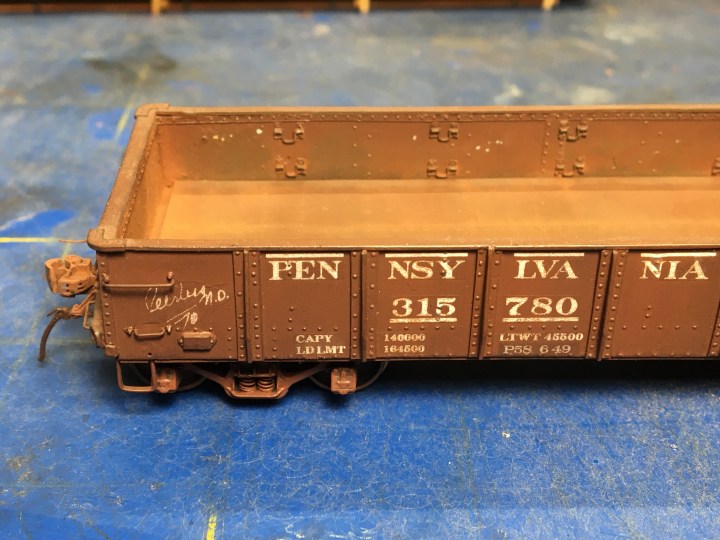
The last of the four cars I completed for Eric is this PRR G-25. I think this is a Walthers Mainline G-25 mill gondola. It was a disaster. The first thing I did was completely strip the underframe and rebuild the brakes and rigging. I used brake gear leftover from a Resin Car Works set to get those details up to standard, then added Kadee PRR trucks with Kadee “scale” wheelsets, Kadee #58 couplers, A-Line stirrups, a lot of wire grabs, Hi-Tech rubber air hoses, and Yarmouth Carmer-type uncoupling devices per the prototype.
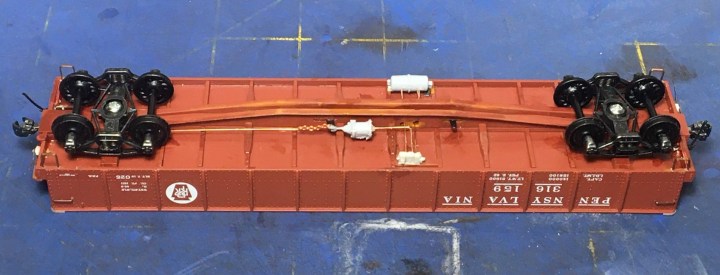
I gave the model new shop and repack decals and used Scalecoat PRR FCC to paint all the new parts. I weathered it alongside the other cars mentioned above. I sealed the model with a mix of Dullcote, paint thinner and the Scalecoat PRR FCC to blend all the colors together and provide a smooth finish.
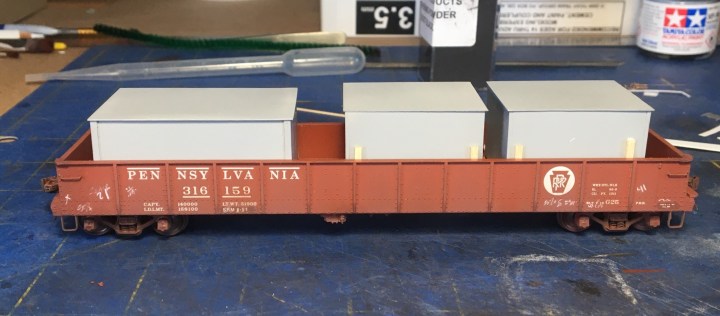
I contacted Eric and told him that there was no interior detail inside the model, therefore it must have a load. He suggested a limestone load–maybe something originating out of southern Indiana. My chances of finding a suitable, scale limestone load in southern Germany are Null, so I decided to whip up a couple of shipping crates like those one might find in the old Sunshine Models mini-kit.
Below. Here is an PRR G-25 from my car fleet. This is a Westerfield model dating back to around 1996. The interior detail is excellent. Unfortunately Eric’s car doesn’t have this detail, but I had a lot of fun building a load to cover the omission.
I made a few big crates and a few little crates. Please see below. I made a big one to fit squarely on one end of the car, and intentionally made two slightly smaller crates so I could add a little cribbing detail.
Below. Here’s what I came up with on very short notice. The “big” crate is on the left, and the two smaller crates are glued to a false floor, painted Scalecoat PRR FCC, with shoring added on the bottom of the crates and also on the side of each crate. This assembly slips right in and out of the model easily.

When loaded, the model looks like this. I really wanted to fix some Westinghouse or General Electric advertising signs to the side of the boxes but couldn’t find anything I liked online. I like the contrast between the dirty red car and the clean shipping crates.
Including the load, this was about five hours of work. These four cars are speeding their way back over the Atlantic to Eric as I write.
New Models for My Car Fleet
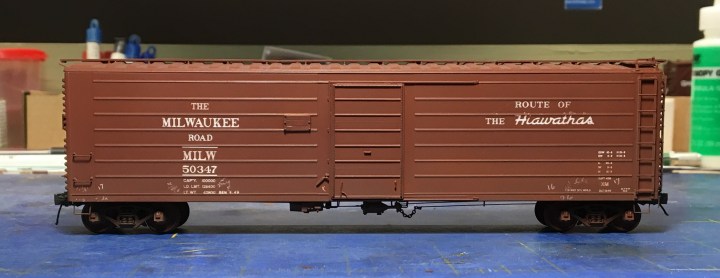
Here are a few models I finished for myself recently. The model below is an old Ribside Models 50-foot, single door box car model. I bought it decorated on eBay and sandblasted it clean, and then added a ton of aftermarket detail parts.

Here’s the completed model. I added Cal Scale brake gear and a lot of additional parts, and a running board made from styrene strip. The stirrups are imported by Yarmouth. The decals are from Tichy. The decals appear to have bubbled up on the right side–above the word Hiawathas. I’ll have to fix that…or just turn the car around when I run it.
This model, below, is the Tichy USRA single-sheathed box car. It will be a Milwaukee Road car. I’ve put a lot of time and replacement parts into this model as well, but it’ll be worth it. I used Tichy 18-inch drop grabs, Tichy 1-7/8″ NBW castings, a whole lot of Tichy and Archer rivets, and A-Line stirrups to bring this model up to speed. The Carmer uncoupling devices are from Yarmouth. More to follow on this car in a later post.
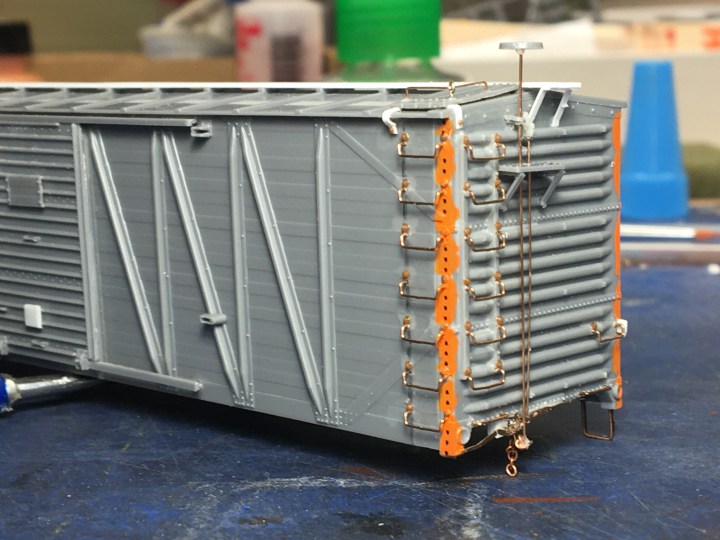
Below. Here’s another view of the entire car under construction. I painted the areas orange where I needed to lay Archer rivets. The running board is HO scale 2 x 6 styrene from Evergreen.
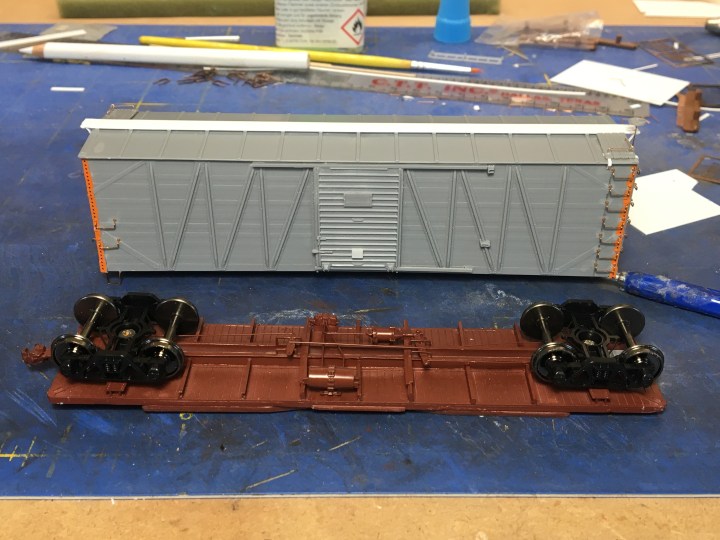
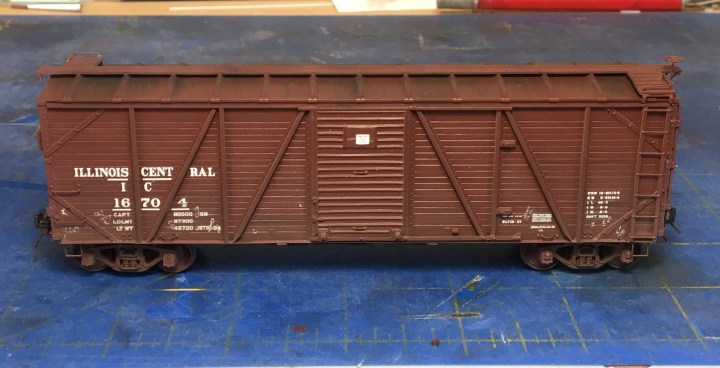
Below. This new model, below, is the recently-released Resin Car Works Illinois Central single-sheathed box car. I’ll be doing a post on this car on the Resin Car Works blog soon.
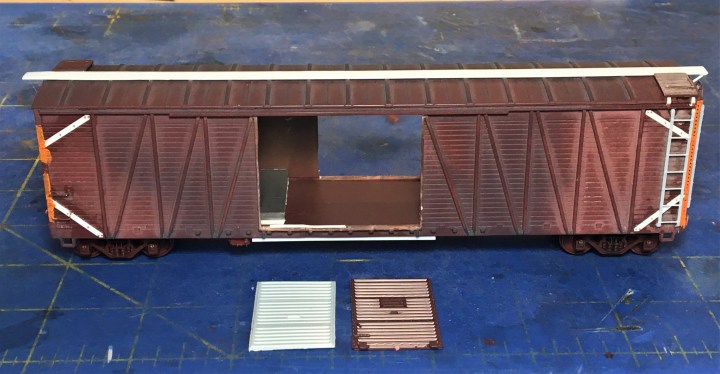
Finally, here is another build that is actively underway as I write. I mentioned this in my last post—this is the MDC/Roundhouse 50-foot single-sheathed auto car that came in a number of versions. The carbody has reasonable detail for one class of Missouri Pacific cars from the 1920s. It has been quite a project and I still need to finish the other side, and I have to cobble together doors, but I’m excited to get this one finished. Speedwitch makes a great decal set specifically for this prototype. Ladders are those provided in the Intermountain 10′-6″ box car, and trucks are Tahoe Model Works Dalman.
Parting Shot
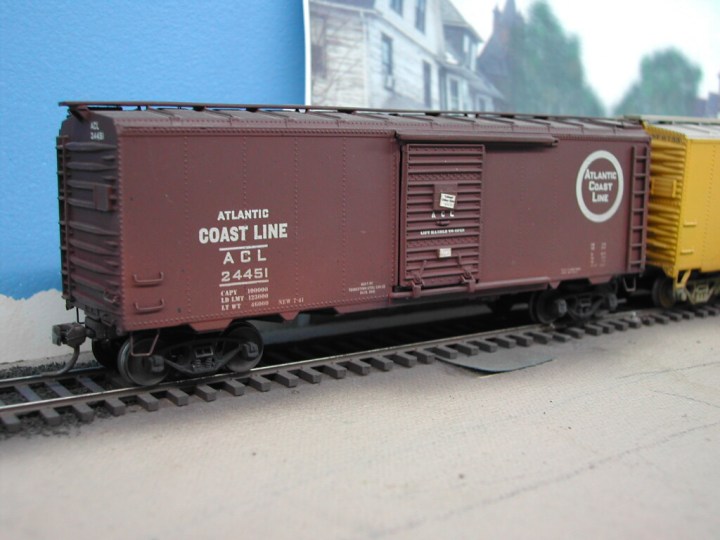
I found this picture recently while going through old computer files. This is a model I completed in the early 1980s and later sold to a friend in New Jersey, Mark Frystacki. I moved away from New Jersey in 1999, but visited Mark ten years later and found this beauty running on his layout. I recall making improvements to the model based on an MR article, including thinning down the door tracks, and adding A-Line stirrups and a thin-profile running board.
We sure have a come a long way since then!
Hope you all have a blessed week! – John G

Beautiful work, John. And nice save on the Monon hopper!! Glad to hear you and yours are doing well in these strange times. Take care! -Todd
LikeLike
Excellent work as always.
HH
LikeLike