

A couple of guys contacted me and asked how I weather models with the “black wash”. I promised them a post to show how I do it. In this post I am not suggesting this is The Only Way to apply this type of weathering, but it does work well if applied carefully.
I apply a black wash on some models, especially single-sheathed and double-sheathed freight cars, to try and provide depth and a prototypical appearance. Many real freight cars have black soot, dirt and grime collected in corners, between boards and other surfaces, and around fixtures. This was especially true in the steam engine era. But getting that effect is impossible with an airbrush or normal painting techniques.
Shown below is a more modern car that shows the effect. This is a Warren Calloway photo taken at the former Seaboard freight yard in Raleigh, North Carolina, in the early 1980s. Note how the car looks dirty, but it is not necessarily dirty. The dirt and grime has collected at corners and fixtures, highlighting the “details”.

I developed my technique a few decades ago before specialized products like those from MIG were available on the market. My technique is simple, cheap, easy, and fast. It is also “a destructive process” as I call it, so you have to be careful when you try it.
Here are the basic steps:
- Finish your model and seal it completely with a sealant like Testors Dullcote.
- Mix a small amount of paint thinner and artist’s oil paint—preferably black paint—in a small container.
- Using a medium, flat brush, “paint” the model with the paint/thinner mixture. The idea is to have just enough black paint in the mixture so it collects in the corners and around details, but not so much that it paints all the surfaces black.
- Keep the model vertical, and dab off any large drips of paint at the bottom of the model.
- Don’t mess with it until it’s completely dry.
Ideally, the mixture will run down the sides and ends of the model and leave the black paint in the nooks and crannies, and dry with a feathered (not weathered) effect.
The reason I apply Dullcote to the model before weathering is because the paint mixture will eat away at decals and finishes if there is no protective coat. A layer of Dullcote therefore is necessary to protect the decals. I usually don’t use this process twice on the same model because if the Dullcoat gets eaten away by numerous coats of thinner, there won’t be anything to keep the thinner from attacking the decals. So, when using this technique, a good coating of Dullcote–I guess Glosscote would work too–is necessary.
There’s a decent, simple tutorial on line at http://www.scalemodelguide.com/painting-weathering/weathering/paint-washes/. This is an armor modeling site and it’s a fast read, and it explains how to use different kinds of washes, thinners, and other weathering solutions.
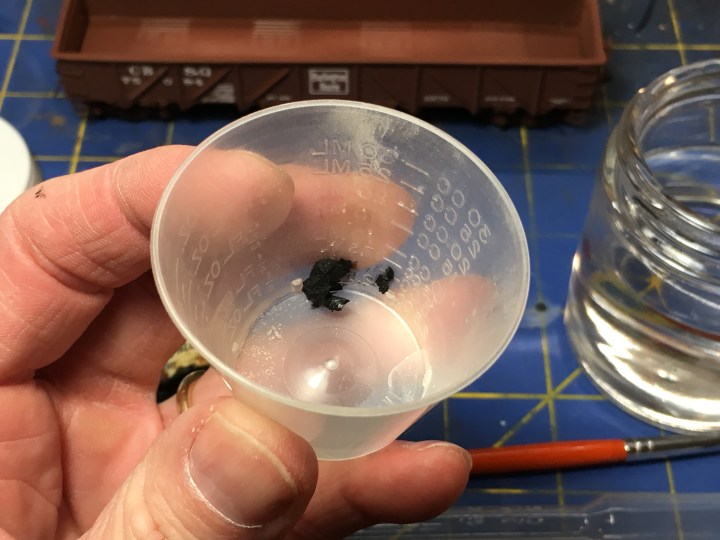
Here are some photos of the process. Below, here is the model and all the basics needed. Paint, a small cup, paint thinner, and a paint brush.

Next, below, I put a tiny blob of artist’s oil paint in the container. A little bit goes a long way!
I use a pipette to add some thinner. You don’t need a lot of thinner.
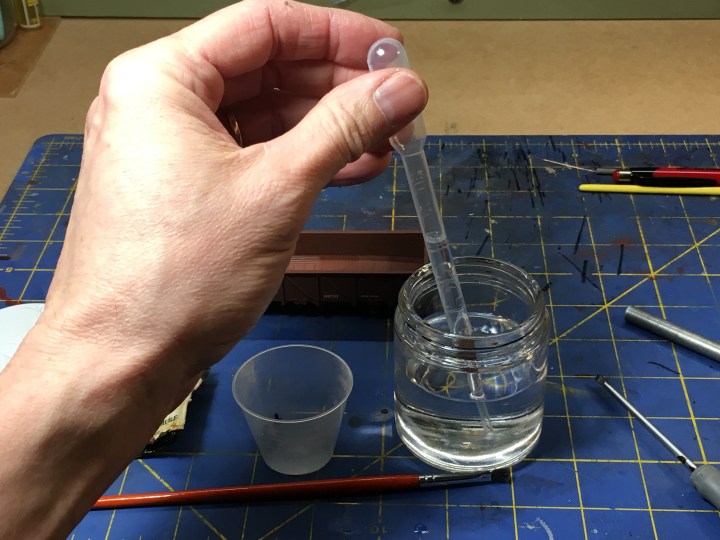
This fuzzy photo shows the paint and thinner mixing up.

Now we’re ready to apply the wash. It will only take a minute or two and the we’re done. To begin, dip the brush in the paint–getting a little bit of paint and some thinner on the brush–and then paint the model with big up-and-down strokes. I usually apply the wash from the top down and let gravity take the black paint down the sides and across all the model’s details.
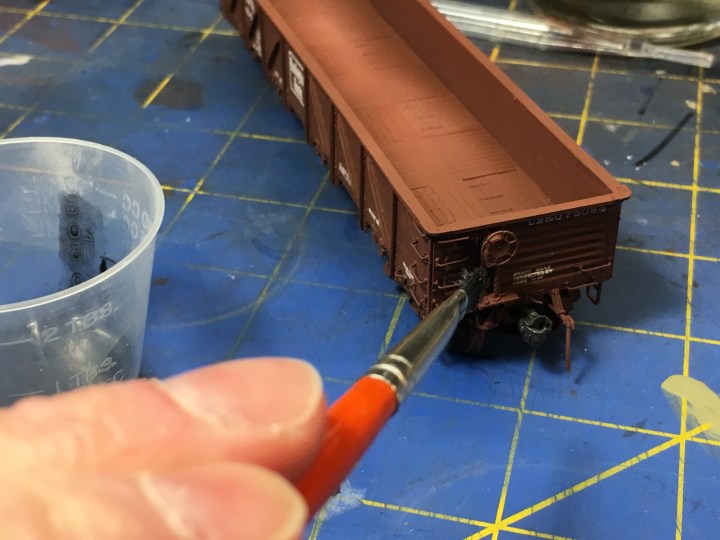
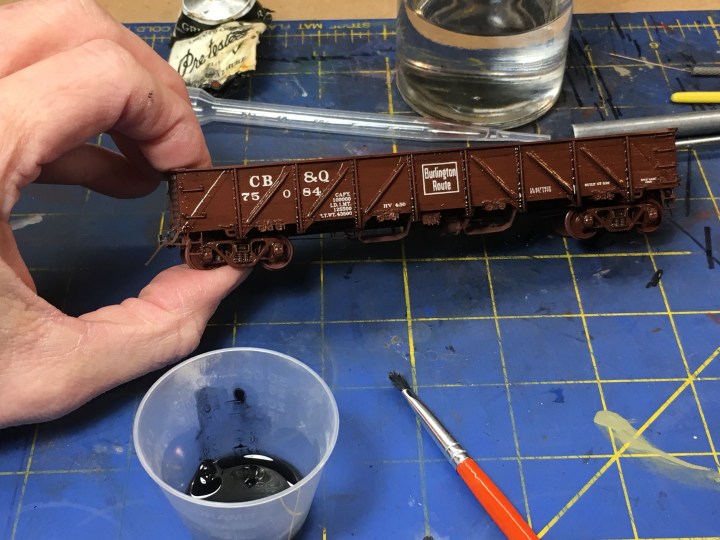
Below, a quick view of what it looks like during the application. You should be able to see some black deposits like those visible on the right side of the model.

Then apply the wash to the car sides, trucks, and anything else you want highlighted. On this model I applied the wash to the whole car, inside and out, including the underframe and trucks.
After the wash is applied, put the model aside for a day to dry.

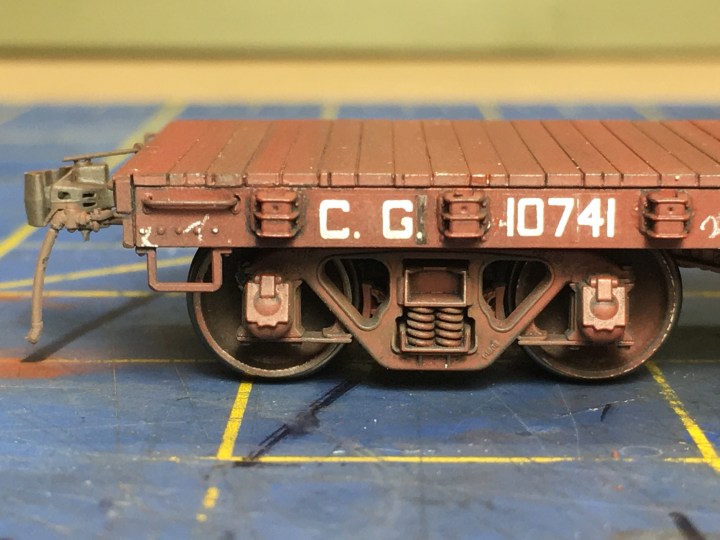
When it dries, it should look something like this. The thinner has dried and the black paint remains, collected around the details and highlights. In this case, I probably could’ve gone with a heavier concentration of black paint. The black paint seemed to collect well on the trucks. Since some artist’s oil paint can rub away easily, I apply another coat of Dullcote to protect the weathering.

Here’s a final view of the car with a little traditional weathering applied with an airbrush. In this case I dusted the underframe, sides and ends very lightly with Testors Earth. Finally the model is done and ready for action on the layout.

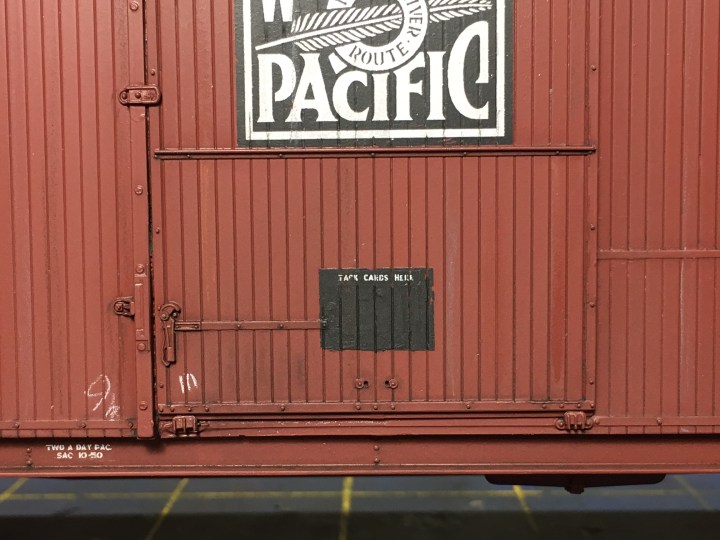
At the same time I finished the Burlington car, I applied the wash to an O scale WP double-sheathed box car. The black paint gathered around the details seems to make all the details pop out.
And that’s it! I’d recommend trying this out on a couple of old train show models first before you attack that last, ultra-rare Sunshine Models kit that you just finished building and decaling.
I still want to try the MIG products and other things at the military modeling stores, and I would encourage you to try those things too. I think those products are a lot more forgiving and less destructive than my method.
I hope this helps! – John G

John, I really like the subtle weathering with the black wash. I use a similar technique using an artist oil wash with turpentine instead of thinner. But, the results are similar. I’m a little reluctant to try lacquer thinner, lol. Also, I like the pics of the Sunshine M&Stl 1923 ARA boxcar listed in previous posts. I’ve been trying to find one these for quite some time.
Best Regards,
Roger
LikeLike
Hi Roger, I have several of those cars. I’ll sell you that one for a song. John G
LikeLike
Hello John,
I would definitely like one of those! You want send me the details?
Thanks,
Roger
LikeLike
Hey John, you have any unbuilt kits you would like to sell? I would like to have one of these.
Best Regards,
Roger
LikeLike
Hi Roger, can you contact me offline at my e-mail, Golden1014 at yahoo.com. Thanks! John G
LikeLike
Pan pastels and a light spray of heavy water (a drop of dish soap added) rubbed off with wedge shaped cosmetic sponges also produces very thin base coat of base weathering and a in the corners look.
Roger Sekera
LikeLike