

It has been a busy week on Albersbach’s only railroad. Some good progress was made on the Portage buildings for Mike Moore’s layout, and I got a little bit done for my layout too
Progress on Portage
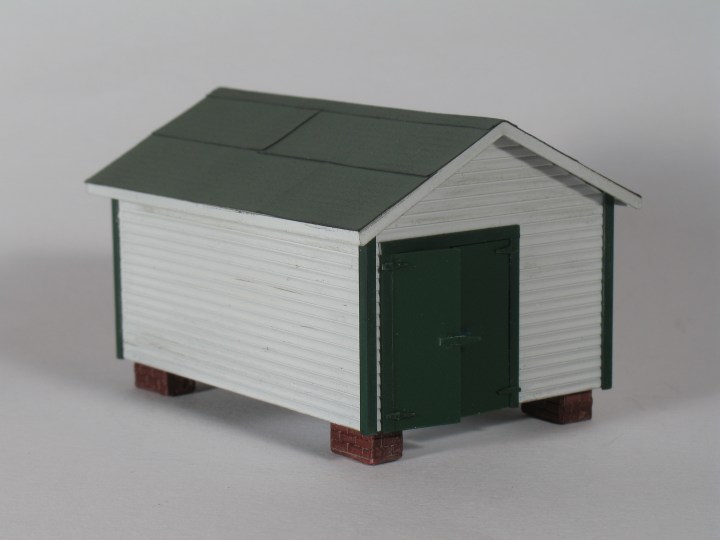
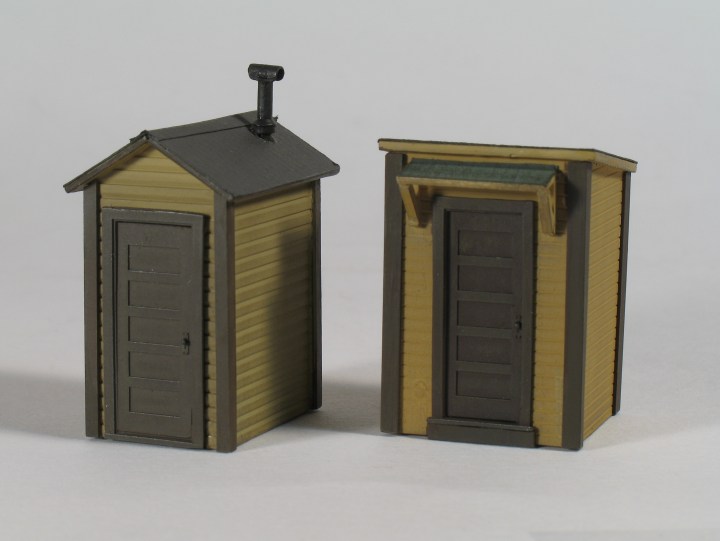
When we last saw the Portage buildings they looked like this:

This week I have been working on cutting, prepping and painting all the trim and detail parts. First I cut out all the trim and all the detail parts and taped them to a piece of cardstock for painting. Cutting out the trim for the corner of the buildings is a little more complicated than it looks, as you have to make a diagonal cut on one side of the angle and a straight cut on the other side of the angle to make it fit correctly on the corners.
I marked the tool houses and the coal shed 1, 2 and 3 and labelled the parts separately to help keep track of all the special-cut parts.
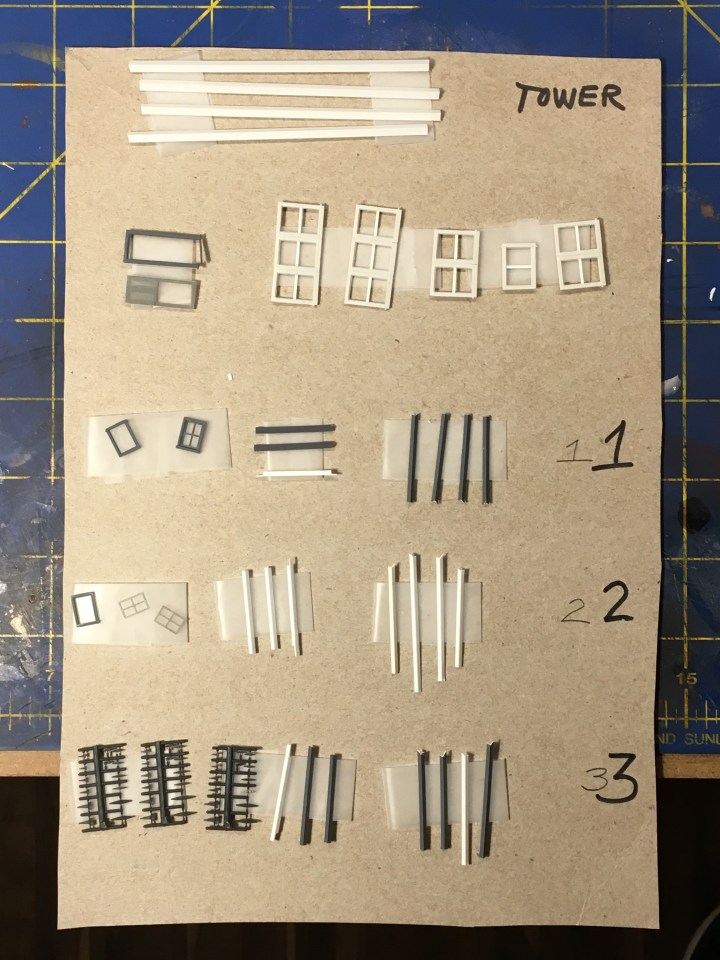
By the way the hinges are Grandt Line No. 5095 and the windows are Grandt Line No. 5059, Outfit Car Windows.
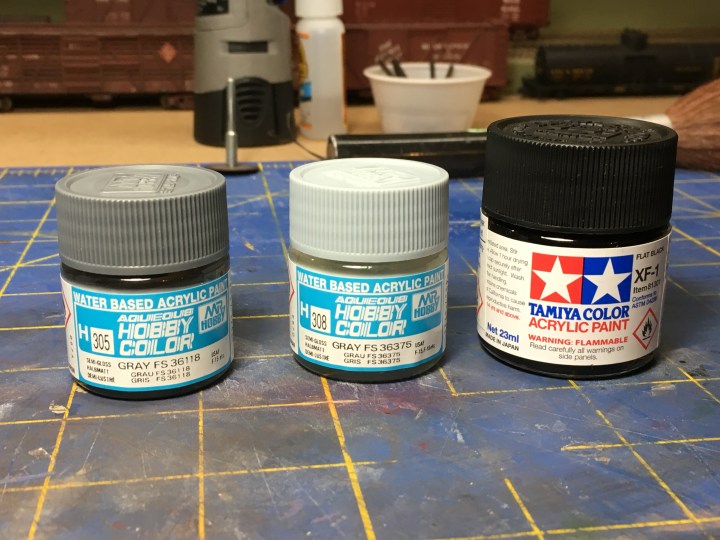
Above. I used water-based paint I got at the local military modeling store for all the models. I used Mr. Hobby No. 305 Gray for the dark gray color and Mr. Hobby No. 308 for the lighter gray body color. The black is Tamiya, not Mr. Tamiya. The light gray seems to have a little blue in it, and I thought that would look great. I painted all the detail parts with the dark color and all the building bodies with the lighter color. I also painted all four IC tool houses for my layout as well. I’m real happy with this paint; I thin it with Lacquer Thinner (who would’ve thought???); everything cleans up beautifully with Lacquer Thinner as well.

I wonder why all the modeling products from Japan are always called “Mister ‘Something'”? I have Mister Paint, Mister Surfacer, Mister Paint Tray, and so forth. Even Homer Simpson’s doppelganger on the Japanese soap box was “Mister Sparkle.” Remember that one–“I am Disrespectful to Dirt!”

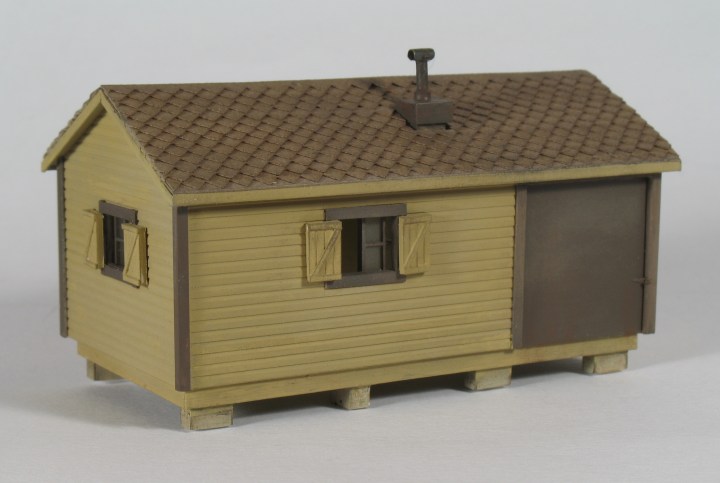
Now that everything is painted and ready for assembly, I need to make doors for the tool houses and coal house, which will simply involve cutting and fitting doors over the styrene slab glued behind the door space. One the doors are in place and the hinges are installed the models will be done. I also need to install window glass on the tower as well, and make a Portage sign for both sides of the tower
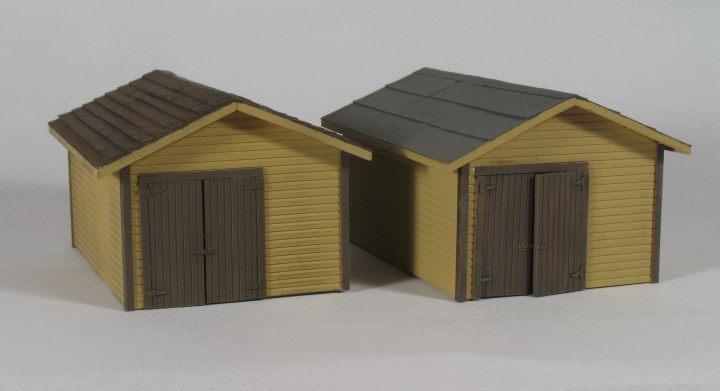
Below. I have a little experience making tool houses. Back around 2009 I built a ton of them for an article in the Seaboard-Coast Line modeler magazine, and that was a fun project. Here are a couple of photos from that article. The buff and brown scheme was a typical Seaboard Air Line scheme, and the green and white was also a latter-day SAL scheme which was later adopted by SCL
Immediately below is a signal maintainer house, and the rest are tool houses of various types and styles. At the bottom are phone booths., all built from prototype dimensions.
I haven’t been able to sit down and make any progress on freight car models this week. However I did take a few minutes last week to make some new cross bucks for the layout.
Crossbucks for Ackley
There aren’t too many crossbucks on the HO scale market that look like the real thing, in my opinion. Seems like manufacturers can’t find a way to use a prototype typeface. For example, a few years ago I ordered a Tomar crossbuck, like the one at https://tomarindustries.com/H-869.jpg, but when I got it the lettering just wasn’t right for my 1950-era layout. This time I wanted to get it right…and to so I would need to go the extra mile.
After a lot of whining my buddy Dan Kohlberg told me to check out Showcase Miniatures. Their website is https://www.showcaseminiatures.net. Unfortunately I didn’t find basic crossbucks on their site but Dan suggested I use the material included with their wig-wag kits. I ordered two No. 2311 Model 10 wig-wag kits with the intention of using the crossbuck art to construct something cool for the layout. Man, I was not disappointed!

The wig-wag parts are nicely cast in soft metal and each kit included a whole bunch of different material for crossbucks and signs. There are paper signs and also photo-etched signs included. I decided to use the paper signs to create the four crossbucks I need at Ackley. Here’s what you get in the kit:

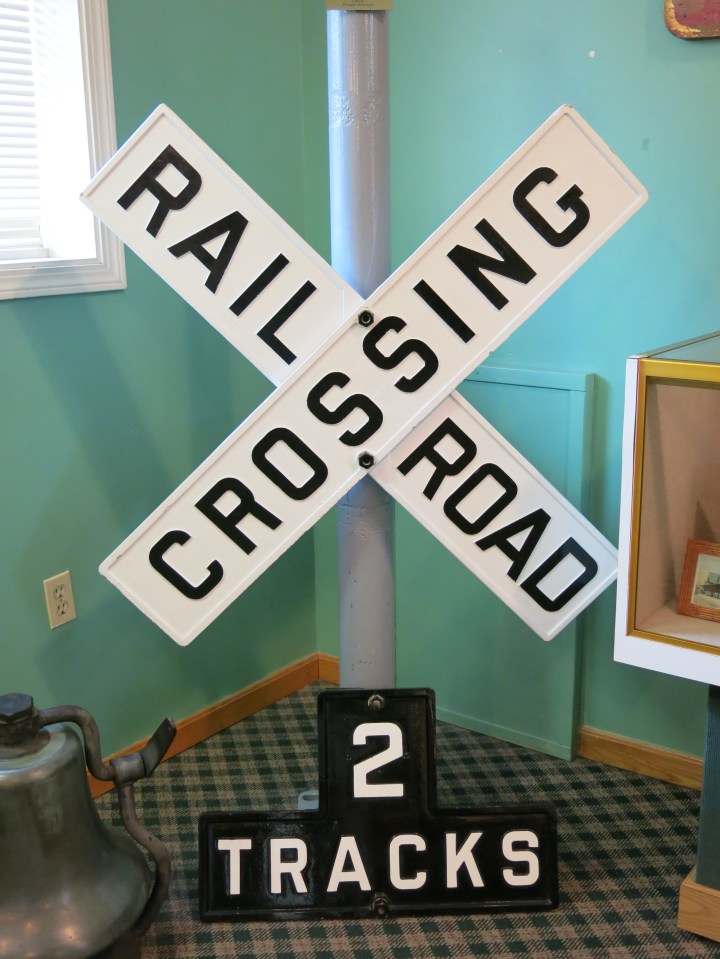
A quick study of transition-era crossbucks showed a common configuration was white crossbucks with a black “number of tracks” sign. As an example I took the photo above at the railroad museum in Dennison, Ohio a few years back.
I built one signal with white crossbuck on a metal pole and second signal with black crossbucks on a metal pole. I used black crossbucks to try and simulate the old black crossbucks with marble beads. The white crossbuck will be installed on the Highway 57 (Sherman Ave.) crossing, which is the paved road by the cannery. The black crossbuck will be installed south of the depot at the Lincoln Ave. crossing. These signs will face outward, toward the operator. I have yet to build the signs facing toward the backdrop.
Below is a view of the first completed signal. I used brass tube from Albion Alloys, item number MBT 16—which I though matched the diameter of the pole—and used the finial from the wig-wag kit to top it off. Then I painted the pole silver, and then I fixed the paper signs on the pole.
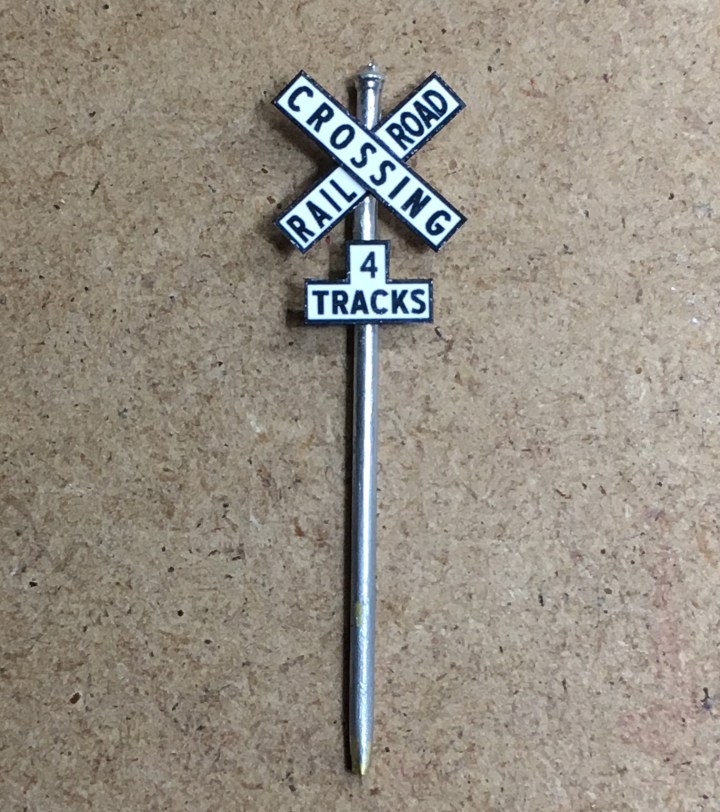
I made a number of other crossbucks from the same material, using artwork and parts from the kit and using other things from my parts bin. I’m very happy with them. Below, are four crossbucks; the one on the far left is a commercial model and the three on the right are made using the Showcase Miniatures parts.
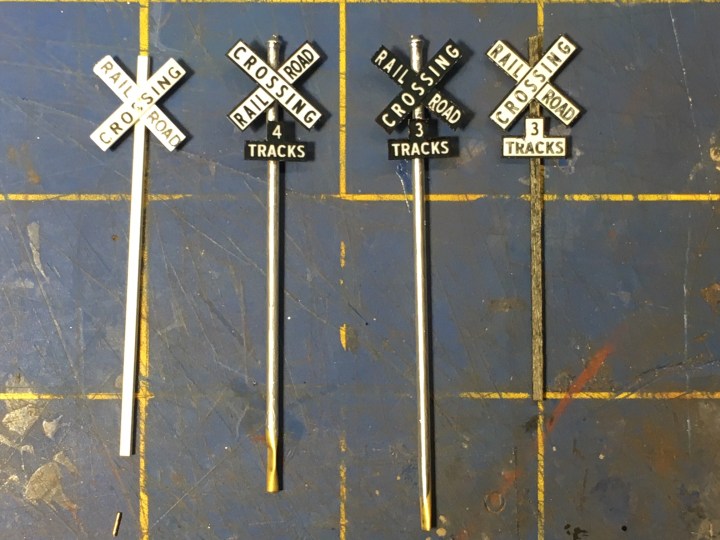
This was a simple job but I’d like to pass alone one construction note. When I cut out the signs, I went around the ends of the paper signs very carefully with a Sharpie pen. That outlined the signs in black, and I think that makes the completed models look a lot nicer.
Showcase Miniatures has a lot of other interesting things that I need to add to my layout, such as the ground relay boxes, power pole sets, and signal detail kits for more crossbucks and other wayside devices. The LED lighting kit is a must-have too.
I hope you all have a great modeling weekend. – John G

John,
In the picture of the 4 crossbucks, your 2nd one is ‘backwards’. “RAIL ROAD” is supposed to go from upper left to lower right……like the other 3 are.
gary
LikeLike
Oh My Goodness!!! That is SO funny! As a hopeless OCD-type person I have the urge to replace the photo immediately, but I’m going to leave it on the site because that is a riot. I’ve already fixed the model but that photo’s going to stay up forever. – John
LikeLike