

San Juan Car Company brought to the O scale market a beautiful Western Pacific double sheathed car some years ago. This is a model of WP’s distinctive eight-foot interior height cars with modified steel dreadnaught ends. WP acquired 2,500 of these cars in several order beginning in 1917. 28 were transferred to the WP subsidiary, Sacramento Northern, in 1941. According to Martin Loftin most of the cars were gone by 1955, but some of them lasted in revenue or roadway maintenance service as late as 1969.
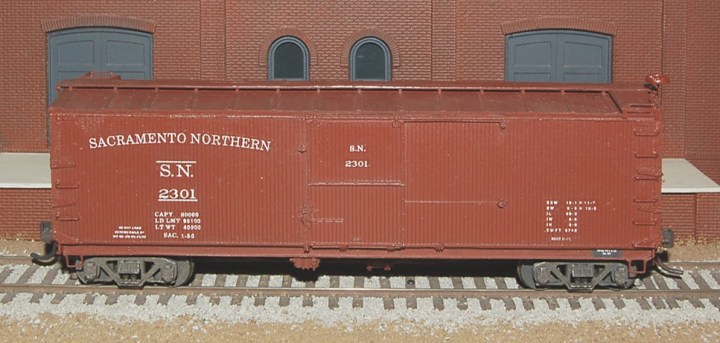
Above. I wasn’t able to get permissions to use a prototype photo in time for this post, so Garth Groff in England sent me a photo of an HO scale car I could use. Garth is a prolific resin carbuilder and finished this old Sunshine Models kit to perfection.
About the model above, Garth wrote Attached is a photo of my model of Sacramento Northern 2301. The prototype was likely originally built as a wood-end ventilator from WP series 18301-18500, built ca. 1918. These cars were rebuilt in 1930 as steel-end box cars with new roofs to match newer sister cars in series 1600-1-18300. IN 1947, 28 of these cars went to SN. When they received AB brakes and Andrews trucks is not known but it was probably before 1954. Photos indicate that most of the surviving cars were last reweighed in 1954-1955. SN 2301 was the only car in the series with Murphy ends (the rest had Inverse Dreadnaught). This particular car became MW 02301 in 1964 and was probably scrapped a few years later.
I wrote a story on the cars which can be found at http://www.wplives.org/sn/boxcar.html.
I bought the San Juan O scale kit in the summer of 2015 before moving to Germany, so I’ve already had it almost two years. I was excited to get it because they are pretty hard to find; my friend John Pautz from Indianapolis found it online and sent me a link. Thanks John!
This is a simple kit, produced by San Juan Car Company (www.sanjuancarco.com, or onFacebook at https://www.facebook.com/sanjuancarco). It is a pretty old model dating back probably ten years or more. The kit is simple, consisting of a basic underframe, two sides, two ends and a roof, and several bags of beautiful detail parts.
I began the built by completing the model in individual components. In other words I built up the underframe and all the brake rigging as an individual component, then finished the roof with the running board and grabs in place–as an individual component–and then each car side and each car end. When building models in HO I find this is a good way to quickly progress through construction.
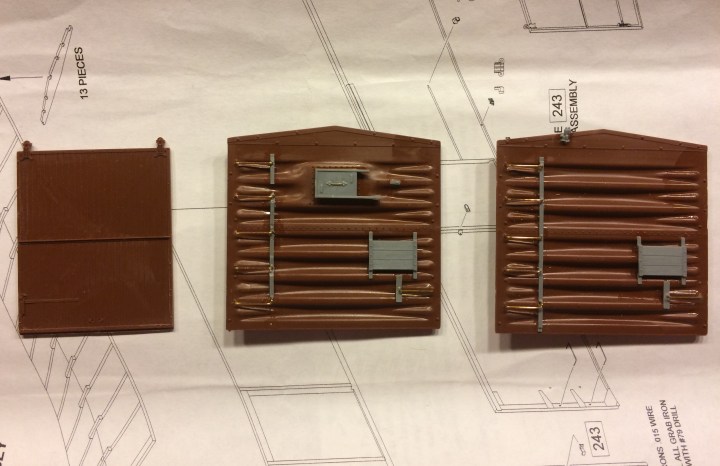
The car ends and doors are shown below. The ends were a simple build but were to cause me A LOT of frustration later. Hint: The grabs and tack boards–when built per the instructions–are out of position per the prototype.
I also found the plastic very soft and difficult to drill…and repair…in the event that you put a majority of the parts in the wrong place.
The underframe, below, was an easy build. I used most of the kit parts but I replaced a few supporting pieces and stringers with styrene members. Again, a simple build, and enjoyable.

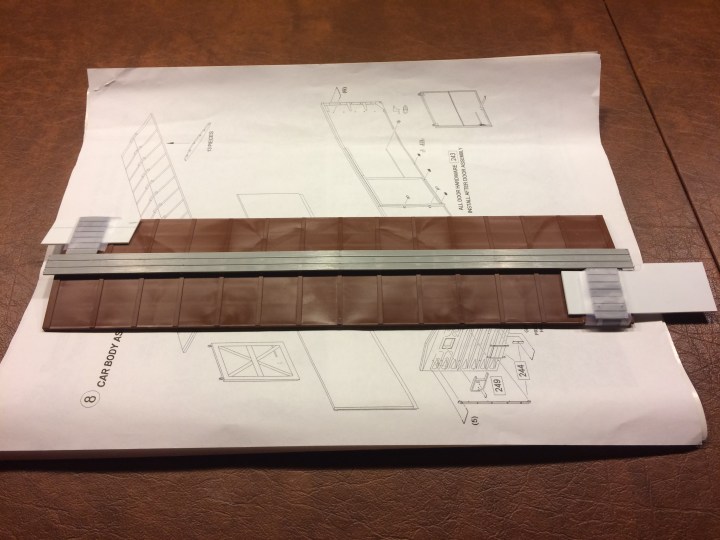
Here’s the roof. This too was a very simple, straightforward build. I used a piece of styrene as a jig to keep the latitudinal running boards properly positioned for gluing. Once they were glued in place I taped them down and let everything dry for a day. This is a technique I use for HO scale cars.
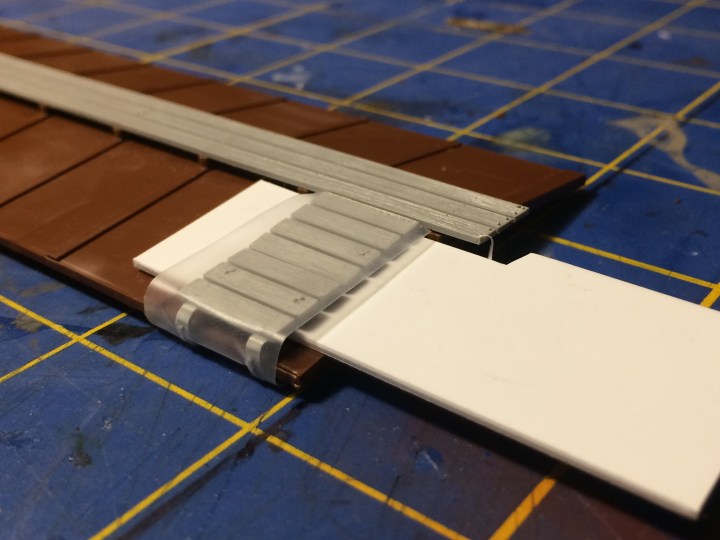
Below is a closer view of how I used a styrene fixture keep the latitudinal running boards upright while gluing them to the roof. I used ACC to glue them at the edge of the roofline and taped everything down to keep it in place.
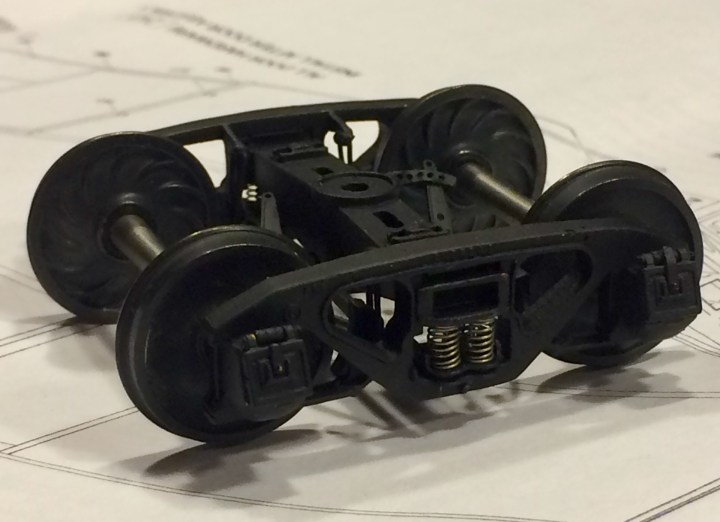
Below. My truck of choice for this car are the new Protocraft P48 trucks, available at http://protocraft.com/category.cfm?Categoryid=31. These are beautiful models with working journal covers and all the brake detail.
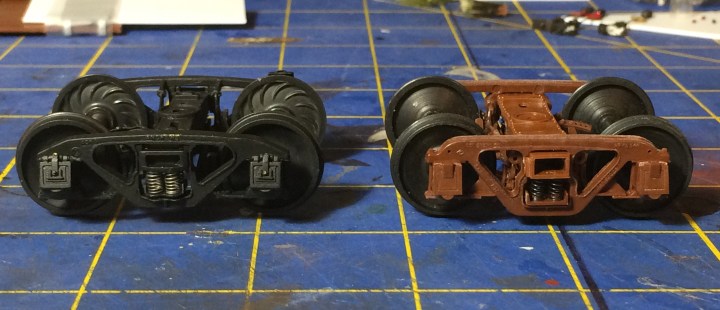
On the left are the new Protocraft P48 trucks. On the right are the older, but nicely-cast, San Juan Andrews trucks. Both are beautiful models. They are a slightly different style (note the top edge of each–one is curved, the other is angled). The trucks on the right have Prototcraft P48 wheelsets installed.
Construction was proceeding happily until I began to assemble the car body. At that point I began to experience homicidal ideations. To my surprise I noticed, when test-fitting the sides and ends, that the grabs did not line up. My 1/48-scale crewmen might lose their footing when walking across these ladders, not knowing the rungs are misaligned. I went ahead and assembled the car anyway expecting to have a big problem to fix…and I wasn’t disappointed. See below. Those @#$%! rungs don’t line up at all.

No manufacturer is perfect and San Juan makes great products at a very reasonable price, but dang, man–this is a lot of work to fix, and drill, and patch, and sand, and clean, and everything else.
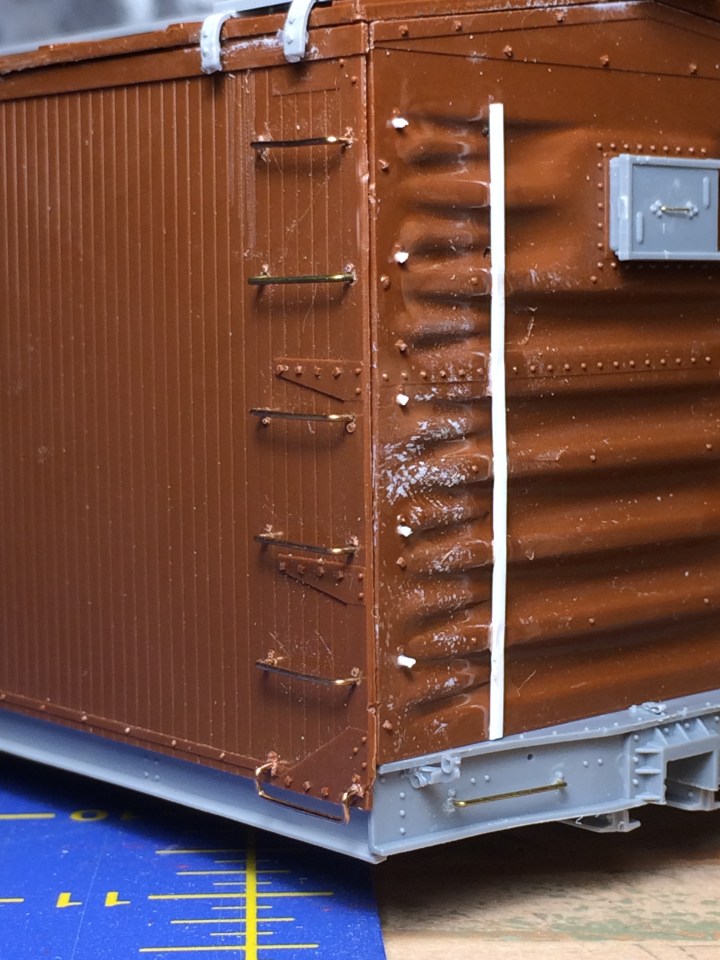
Above. Obviously this is not Gene Deimling’s work. The photo above shows the re-attack on the ladder rungs. The first step was to fill the holes from the old grabs and scrape off the NBW castings so I can install replacement rung fixtures. I chose to leave the rungs in place on the sides because I thought it would be harder to fill the holes without damage to the side sheathing. After studying the prototype photos in Ted Culotta’s Focus on Freight Cars, Single Sheathed Box Car book (available at Speedwitch media.com) I determined that both sets of rungs are slightly out of place. Anyway I filled the holes on the ends with round styrene from Evergreen and used a scrap piece of styrene for the new ladder stile. I glued all these new parts on with Tamiya liquid glue and let dry for a few days. The sandblaster will clean up all the ACC residue and some of the poor modeling work.
Meanwhile, with all the extra handling, I managed to break off the latitudinal running board fixture on the A end. The board assembly broke in half, and I had to cobble that back together, and then re-install the top grabs–what a frickin’ mess. Everything looks horrible now. I broke off all the cut bar fixtures as well and have to re-order new parts.
Hopefully I can clean up a lot of the mess with a thorough sandblasting.
Whoever said O scale is all about detail is right. But allow me to add a caveat: Mistakes in O scale look twice as bad.
More to follow. Happy modeling!

Hi Keith,
Are you aware if John Golden’s blog….
Rick
Sent from my iPhone
>
LikeLike
Welcome to the brotherhood John.
Mike
LikeLike