

Before getting to modeling, here’s some railway preservation news from the Southwest Germany that you never knew you cared about.
Back in August my wife noticed on the front page of our local newspaper, Die Wochenblatt, that a German steam locomotive on display in Kaiserslautern had been moved with great fanfare to the nearby town of Otterbach.

Engine 50-2652 is a 2-10-0 Kriegslocomotiv (War Engine) built in 1943 and it had been on display at the Deutsche Bahn car shops in Kaiserslautern since the 1980s. I reported on it in 2016 at https://railroadprototypemodeler.wordpress.com/wp-admin/post.php?post=3373&action=edit.
Eight plants in Germany and Austria built over 6,000 2-10-0s in the 1940s in two classes (the Class 50 and the Class 52), with the most being built at the Henschel Works in Kassel. At the height of production 51 Class 50 2-10-0s were built every day. Hundreds more of the Class 52 engines were built after the war ended in 1945. In West Germany the engines operated in regular freight service until the end of steam in 1978.
Below. The village of Otterbach is awfully proud of their new engine. The local schoolkids put up a big sign to give the engine a heartfelt welcome to it’s new home.
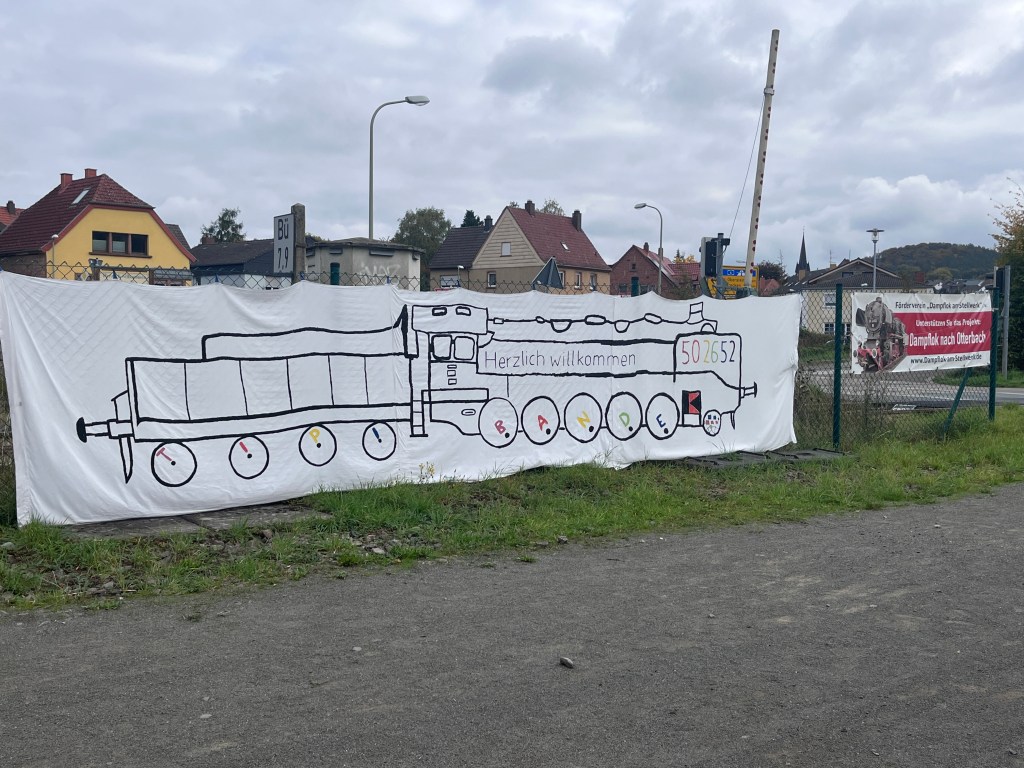
Below. The big engine is now on display at the Stellwerke Museum along an active Deutsche Bahn passenger line, just a few miles away from my home in Eulenbis. Here’s a photo I took last week on a typical bleary, rainy, windy, cold October day.

Here’s a link to a story on the German site LokReport with some neat pics of the move: https://www.lok-report.de/news/deutschland/museum/item/60855-eine-dampflok-zieht-um.html. Here’s another story from the Stadt Kaiserslautern site, with more pictures: https://www.kaiserslautern.de/buerger_rathaus_politik/medienportal/pressemitteilungen/077583/index.html.de.
I found another “50” engine recently while on a work trip to Weiden, in Bavaria (below). This one’s in good shape and under cover at the railroad yards. Yes these engines are everywhere.

Progress on the H&D
I still haven’t quite decided on what town to model on the H&D. I’ve narrowed it down to Chaska or Lakeville because each has an interchange and all the essential elements, plus a little bit of open space for some proto-freelancing. In the meantime, I’m building some typical Milwaukee Road structures as I continue layout planning. Here’s an update.
Tool Sheds
I bought the Speeder Shed kit shown below in New Jersey in the mid-1990s and have been carrying it around with me for decades. I finally opened the package this year and dove into it. This kit is still listed on the Walthers website.

30 years in the package wasn’t good for the kit. The resin castings had warped and shrunk, so I used the original parts as patterns and made my own models using Evergreen 4062 Novelty Siding. I converted my speeder shed to a coal shed and make my own speeder sheds based on a photo seen in the Morning Sun Milwaukee Road in Iowa, Minnesota and the Dakotas book.

I built two speeder sheds, the coal shed, and a telephone booth. I built the superstructures first with the roof attached, then painted them with Tamiya XF-66 Light Gray. When that was dry I masked off all but the lower four feet of the structure and painted the lower structure with a mix of Tamiya XF-66 Light Gray and XF-69 NATO Black with a little XF-50 Field Blue added. I made my own dark gray color because after studying photos it appears to me that the gray used on Milwaukee Road structures has some blue in it.
Next I prepared shingles. These are lightweight paper shingles by BEST and have a self-adhesive back. Before application I taped all the sheets to a piece of cardboard and then painted them with Tru-Color Aged Matte Tar, TCP-434. When they were dry I painted a few of them individually, as seen below, with Testors Flat Black and a very light wash of Tamiya Light Gray. I felt this would provide a little color contrast and depth. Once each shingle strip is cut off the runner, the odd-colored shingles appear in a random order on the roof.
I attached the shingles per the instructions. It is a simple but time-consuming task. Because the BEST shingles are so lightweight it makes them more difficult to apply.
Next, I attached all the trim, corner braces, hinges, doors and details to some cardstock and painted everything with my dark gray-blue mix.

Below. Here are the sheds, with the shingles and details added. Looking pretty good so far. The smokestack is an old Caboose Industries brass jack. Doors and weathering are next.

The almost completed models are shown below. I added the doors, Grandt Line hinges, coal bins, and a few other details. I would still like to weather them a little bit more.

The Depot
The station I’m building is a laser-cut wood kit by HRM Laser Models. It is a beautifully-crafted kit and is easy to build, and not too expensive either at $35.00.

I began building the model in a hotel in Stuttgart while on a work trip. I cut out and sanded the parts and assembled them in steps. I can imagine what the housekeeper thought when she saw this stuff all over the desk.

I followed the kit instructions implicitly. The kit literally fell together in three or four hours. It is beautifully crafted and ready to build right out of the package. I used Gorilla Glue to assemble the superstructure; the rest of the model is peel-and-stick.

Here’s another in-progress photo. The roof is removeable to ease painting. I set the windows, trim and details aside for painting.

I painted the superstructure of the depot with Tamiya XF-66 Light Gray. After the first shot of paint, I noticed I had painted some fuzz/sawdust residue on the model, so I carefully sanded the entire model again and washed it with a moist rag. I repainted it, again with the Tamiya XF-66 and the second coat applied well.
The picture below shows all the window and door trim, corner braces, doors and detail parts set aside for detail painting. Per Milwaukee Road practice I painted the lower four feet of the building and all the trim with my dark gray mix mentioned earlier.

Below. Here is an in-progress picture during installation of windows and trim. Most of these parts are peel-and-stick which made the process fast and easy. The only deviation I made to the kit was the use of Evergreen angles on the corners instead of the kit parts, which are two-piece and more difficult to fit. I really like the two-tone paint scheme although I don’t think my dark gray mix has enough blue in it.

By the way, the HRM kits include interior walls where appropriate, plus scribed floors. They are ready-made for installation of interior lights and details.
Below. Here’s where I am today on the depot. I got new shingles from Rail Scale Models and they are a far-superior product. I highly, highly recommend them. I got this far in an hour. I’ll write more on finishing the depot in my next post.

Water Tower
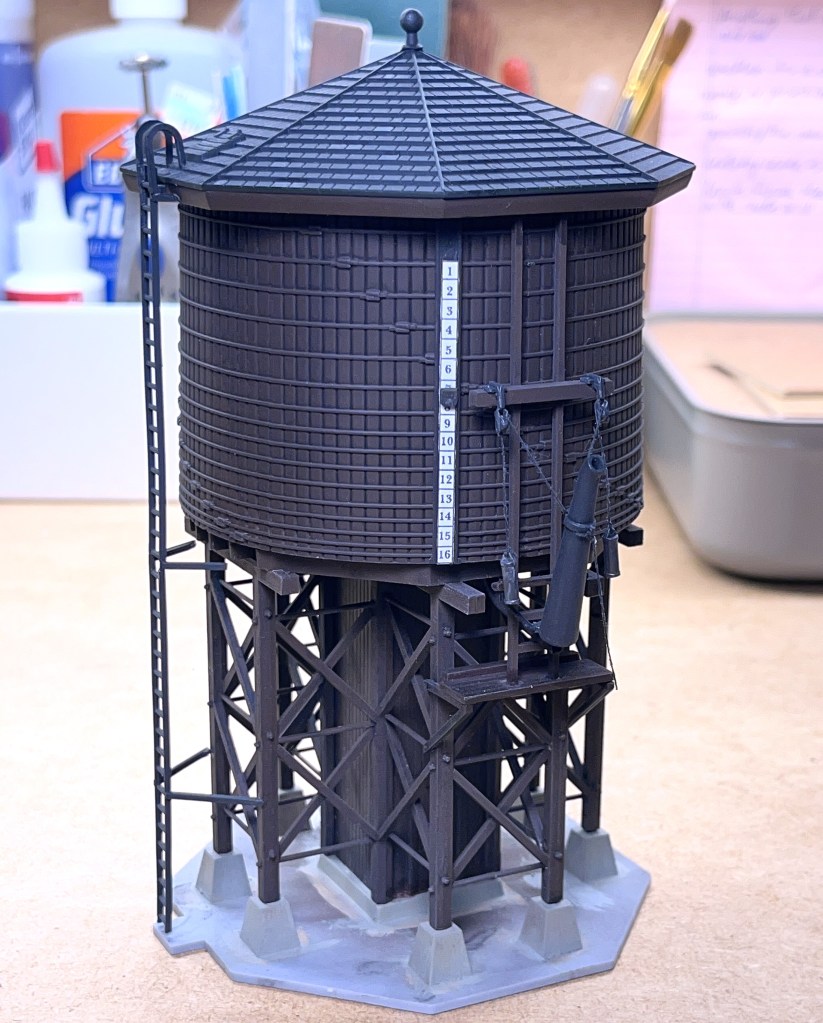
I have also built a water station model. I originally planned to use stained wood and completely scratchbuild a water tower based on Milwaukee Road plans, but I decided to try building up the new Walthers wood water tank kit first. The model I used is the Walthers Cornerstone, Kit No. 933-3531.
This is a surprisingly great model. I built the model per the plans. It was fast and easy. I painted the roof Tru-Color Aged Tar, the wood parts with Testors Rubber, and the concrete pillars with Tru-Color Aged Concrete. Here’s my almost-completed kit, ready for the layout, below. I still need to add a part or two.
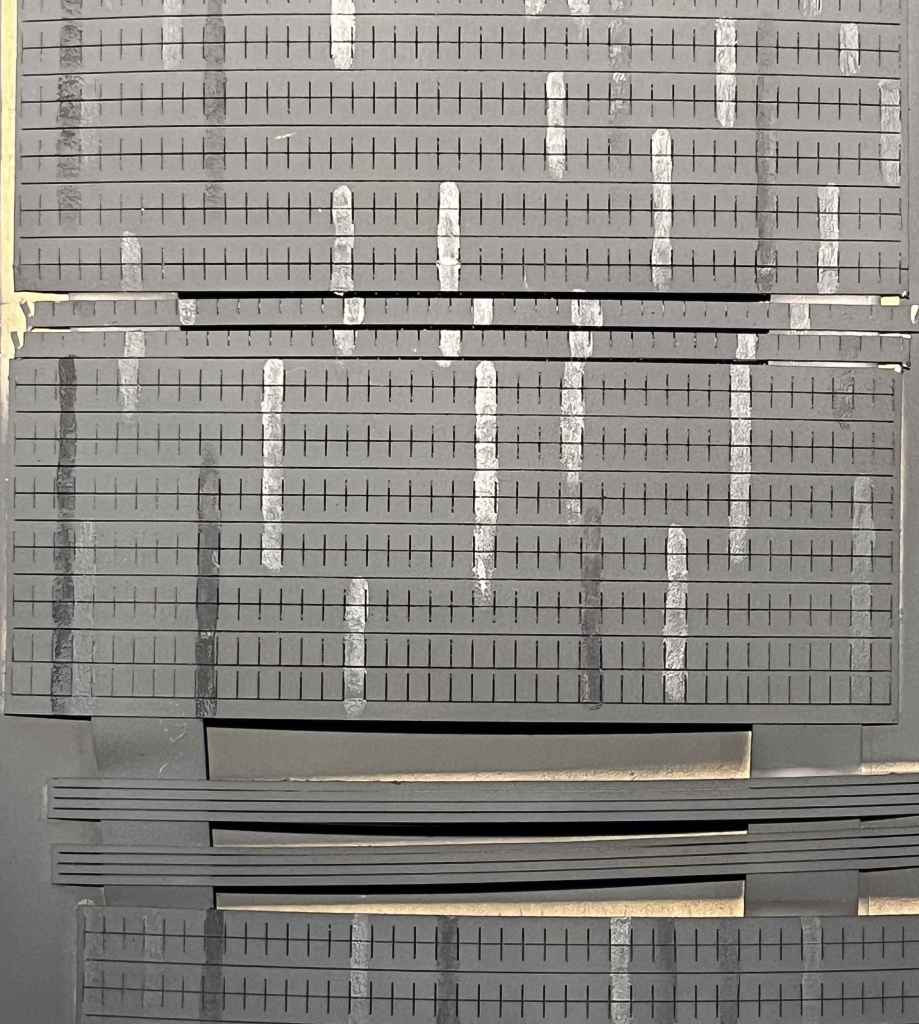
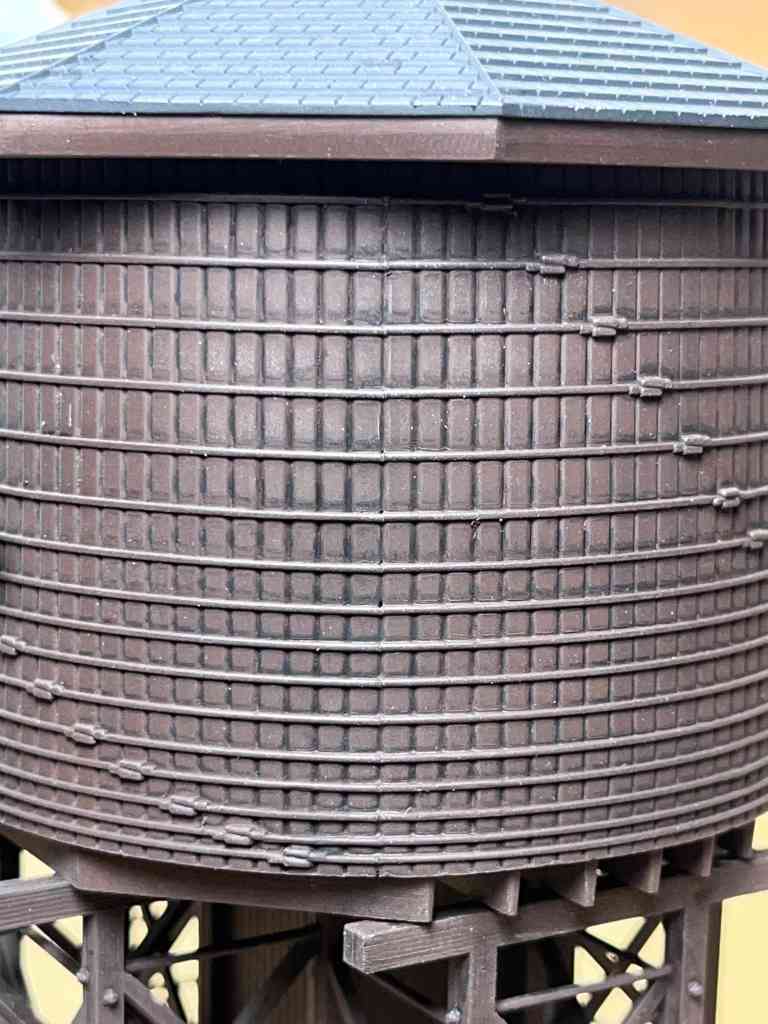
The issue I have with plastic water tanks–which normally assemble using four or five round pieces–is that they never fit together well, leaving unsightly seams and gaps across the tank bands. This model Does Not have that problem. Walthers designed it so the bands extend out a little bit on each section, and when you assemble the model you can trim them to fit almost perfectly. Well Done, Walthers guys!
Here’s one of the seams, below, on the completed model. It’s hard to tell in the picture, and not noticeable at all at the normal three-foot viewing distance.
I airbrushed the tank and all the wood parts with with Testors Rubber and weathered them with a wash made of black artist oil paint and thinner. The black thinner wash gets into the seams, bringing out the detail. I airbrushed the completed model with Testors Light Tan to bring out the detail and then did a little highlighting with a brush, also using the Testors Light Tan. It’s a nice model–easy to build and finish. I highly recommend it.
Ultimately I’d like my little layout to looks something like that pictured below. This is the Reading interchange yard on Todd Herman’s wonderful L&NE Catasauqua Branch layout. I envision a simple layout, three or four tracks and narrow benchwork. I hope my little layout looks this great.
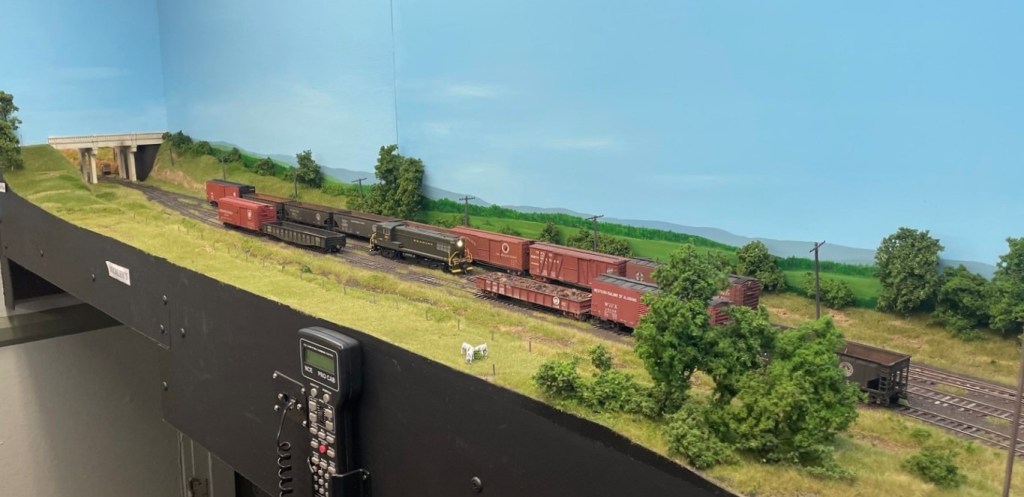
Todd doesn’t have a website, but he has a terrific Flickr photo site available at https://www.flickr.com/photos/77373135@N05/albums/72157660390159495/. A few hours looking at his work is time well-spent! – John

Love seeing updates John. Keep ’em coming!
LikeLike
I hope you take advantage of the DB steam fan trips. They run like clock work so do not be tardy boarding. Germany love their trains and had good hobby shops. The internet was not around when I was there but use it now to advantagr. I lived there for 7years
LikeLike