

At Chicagoland RPM in October, our friend Tony Koester revealed his latest project, an O scale Tribute Layout on the Wabash “High Line” branch from Bluffs, Illinois to Keokuk, Iowa, which he’s building in his four-season porch.
The real railroad gained notoriety in the 1950s for its locomotives. Because of a spindly bridge across the Illinois River the ‘Bash used a small fleet of lightweight 2-6-0s exclusively on the line. The little engines got a lot of press as the steam era ended. The right-of-way was interesting too; it was a friendly little railroad, running through Illinois cornfield country on light rail and cinder ballast, serving a dozen communities and a few interchanges on the way to Keokuk. Tony sure did pick a winner.

A recent view of the layout room is seen above. Considering the size and scope of the project, Tony’s progress is astounding.
Last summer, Tony contacted a number of O scale modelers–most of us known through RPM events–and announced the project. He expressed a desire to build the layout to very high standards, including modeling in “Proto48”, which is 1/48 scale, fine scale. You can read a little more about it at https://proto48.org/about-proto48/.
Even though the layout is in New Jersey, I offered to help. Tony has provided a lot of inspiration and guidance in the hobby and I wanted to do something to pay him back.
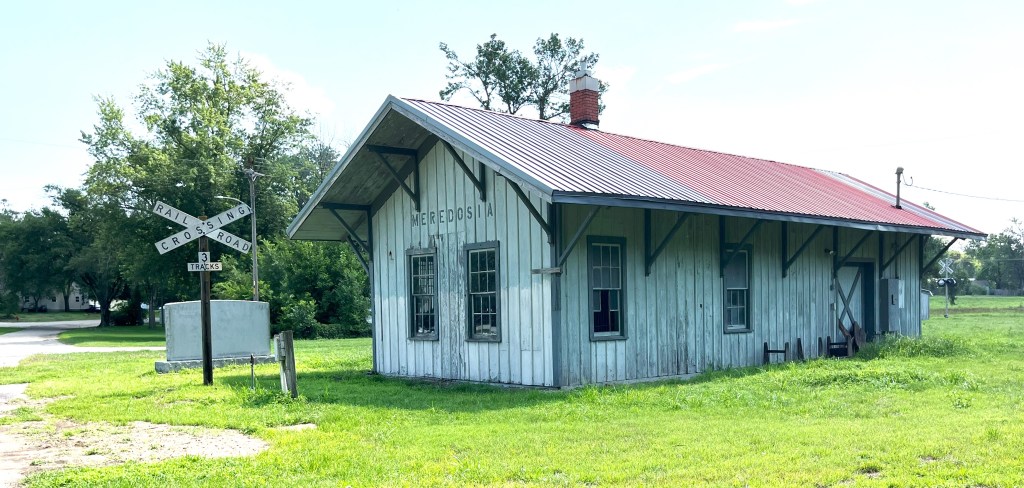
The first thing I did was a little field research. In July I took a day off from work and drove two hours north from my home in O’Fallon to Bluffs, Illinois, and followed 40 or so miles of the line northwest to Timewell. Tony had a few questions about topography and industries in a few of the little towns. Most of the line was torn up in the 1980s but there are still a few things left, including the depot at Meredosia, where the line crossed the Illinois River (below):
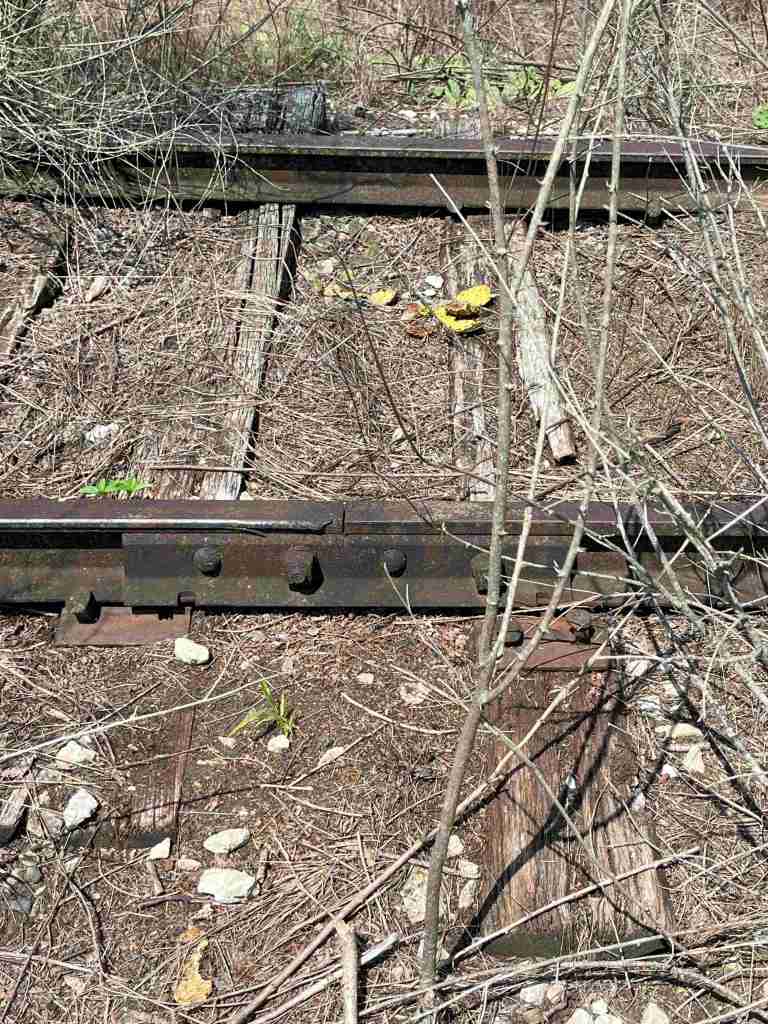
Some original track also still exists at Meredosia too (below)…
…and the Mt. Sterling depot is now a museum.

As requirements for the layout took shape, I offered to help Tony build up his rolling stock roster. My first task was to help create an O scale Wabash GP-7. Tony bought an Atlas Rio Grande GP-7 and I offered to sandblast the paint off for refinishing. Before long the Atlas Geep arrived at my front door in a huge box, and I got right to work.
Below. Here’s how the engine looked after disassembly and sandblasting. It actually took three sandblasting sessions to get everything off. I forwarded the clean model to Mike Bearden, who will do the hard work of repainting and remotoring the giant.

My second task was to provide a few freight cars. Over the last four months I built and finished two cars–a Nickel Plate 1937 ARA box car and a Wabash composite gondola.
I built a NKP box car for myself in 2018 and planned to send it to Tony as-is, but upon further review I felt that it needed some more work and repair before it was ready for The High Line. One of the issues with my original model was I assumed that all NKP 1937 cars had Viking roofs, but in fact they did not. I didn’t do my research. So I decided to rebuild and refinish the entire car, top to bottom, and remove and replace the roof in the process.
By the way, the reference used for finishing this car is Tale of 1,000 Travelers by Peter Shepherd, which appeared in the Spring 1990 Nickel Plate Historical Society magazine.
Below. I couldn’t find a single picture of my original NKP car before refinishing, but below is a photo of the same model after I sandblasted, rebuilt and repainted it. For the rebuild I upgraded the model with aftermarket parts such as Hi-Tech rubber air hoses with brass fixtures, Kadee scale couplers, Chooch ladders and grabs, and plenty of wire details all around. I painted the underframe, sides and ends with Tru Color NKP Freight Car Red.
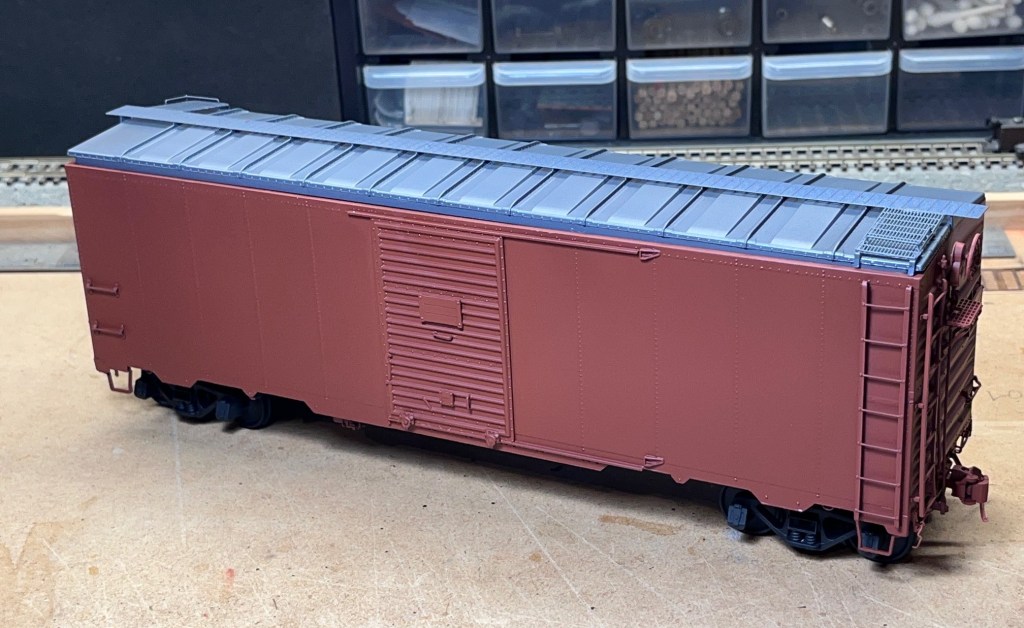
My original model had a Viking roof with a wood running board, which is wrong for NKP’s 1937 cars. For the rebuild I used an Intermountain roof–correct for the prototype–and an Apex 50-foot running board set from Des Plaines Hobbies.

I cut the running board to fit using a cut-off disc in a Dremel motor tool, then secured it to the roof using Formula 560 canopy glue.
Securing the latitudinal running boards wasn’t quite as fast and easy. First I soldered the running board section to the bronze frame seen above. Second, I secured the parts to the roof and running board using canopy glue, taking a lot of care to keep everything in the proper position. I used a piece of styrene as a spacer to keep the latitudinal board in the right place as seen below, then taped it all into position and left it alone for a day to dry. Of course, I had to do this twice–once for each end. The corner grabs were made from Tichy .015 wire and helped keep everything in position.

Once the running board was secured, I sandblasted and painted the new roof. NKP cars were well-known for their galvanized metal finish with black car cement seam caps. I painted the roof with a homemade mix of Tamiya Flat Black and Silver-Gray to simulate a galvanized roof color. Then I masked off the seam caps one by one and painted them with Tamiya black as seen below. After I removed the masking I touched up the roof and called it good…for now.

Another improvement was the trucks. Tony was kind enough to send me a pair the new Kadee Proto48 Barber S-2 trucks for this model. One of these new trucks is seen on the left, below. On the right is a Protocraft ARA Double-Truss truck for comparison. The Kadee truck is made of Kadee’s patented High Grade Compound (HGC) material, while the Protocraft truck is brass.

Below. Here’s the rebuilt and repainted model, ready for decals, with the new trucks installed. The roof needed a little touching up but it looks pretty good.

Below. I didn’t take any photos during the weathering and finishing process, but here is a photo of the completed model.
The decals are from Protocraft and were applied in the usual manner. I applied a few light coats of Testors Dullcote over the entire model once the decals were set and dry. I lightly brushed a little silver on the galvanized roof to provide a little color contrast, and also weathered the roof very lightly with AIM Soot Black weathering powder. I used the Soot Back on the sides and ends of the car as well, lightly streaking the rivet belts and other details with black powder on a wide paintbrush. I used AIM Delta Dirt on the sides, underframe, lower side sills, ends and trucks, streaking it on the sides and dabbing it on the corners and trucks. When I was satisfied with the finish I secured the weathering with a light coat of Testors Dullcote.
Tony’s requirement for the model was a well-used car, not too dirty, with the Nickel Plate logo with the curved K and curved R.

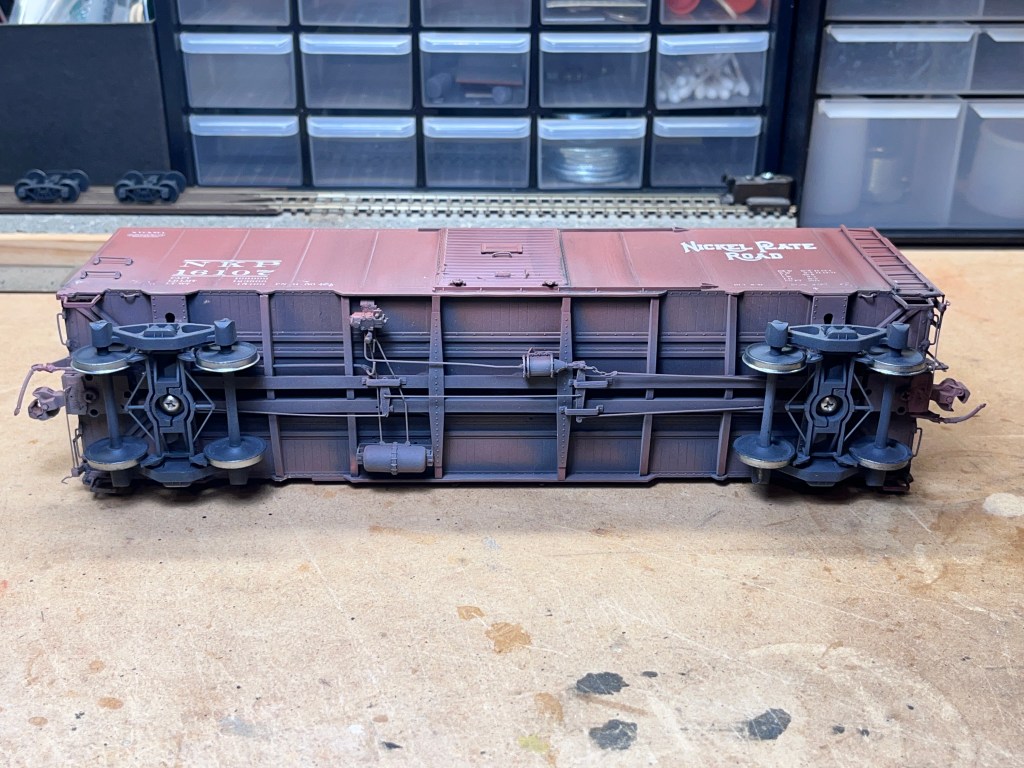
Below. I originally painted the underframe black, but left the any overspray as it happened, just like the prototype railroads do. I like the effect.
The second car I finished for Tony was a Wabash composite gondola. Tony needs a lot of coal gons and hoppers but there’s not much available in O scale. The prototype view below, provided by Rob Adams, shows a USRA lookalike car which we felt could be modeled easily. The Wabash experts assured me it was not a USRA car because it has a fishbelly centersill underframe, which makes it distinctive. The rest of the car, however, nearly matches the USRA prototype in every dimension.
After a lot of discussion between Rob Adams, Gary Roe, Jeff Halloin and I, I committed to building one of these cars for Tony. Rob Adams sent me two Intermountain USRA gondola kits and I got right to work.

Below. The Intermountain O scale gondola kits are virtually the same as their HO scale kits. Here’s a photo of the two cars as I began installing a fishbelly underframe. First, I cut apart the underframe and retained only the bolster covers as seen below. Next, I made fishbelly sideframes of .060 styrene. We had no drawings so I measured using photos to try and get the sideframe dimensions visually close, ensure truck swing clearance, and ensure enough room for stringers. I cut slots for the brake levers before installing the sideframes so I could ensure the slots were lined up.

Below. In this photo, the fishbelly sideframes are attached. The car in the foreground has stringers and coupler boxes already attached. I also attached small styrene squares to extend the bolster covers to the ends of the car.

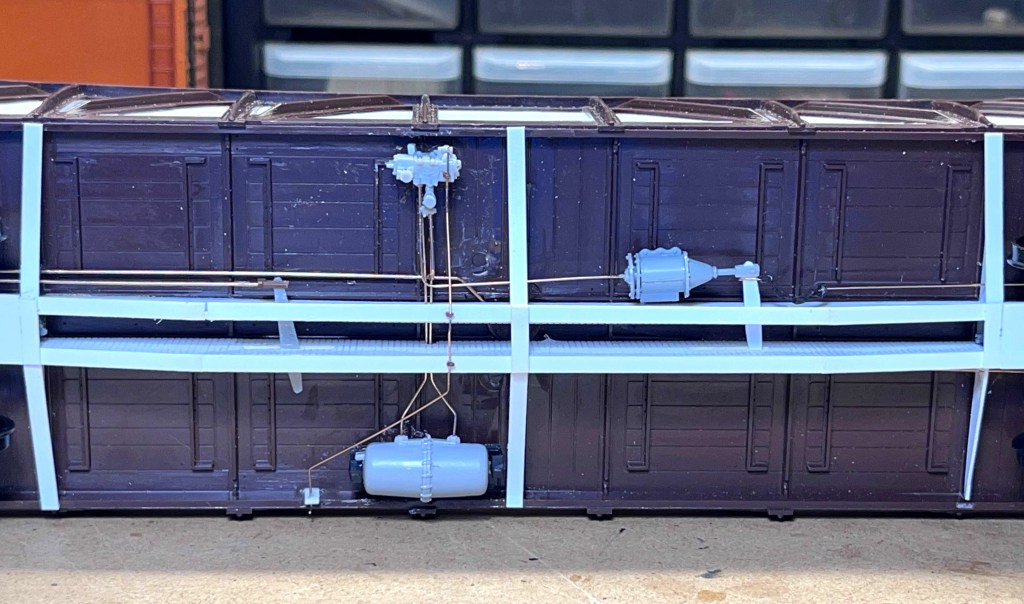
With no guidance from drawings, I decided to install AB brake gear. I doubt these cars ever had AB gear since they were gone by 1953 or 1954. However, all I had on hand was a San Juan AB set, and they are second-to-none in accuracy and appearance. I installed an air line, the three main brake components, and all the piping but omitted piping for the retainer line. I also installed a cut-out lever for the valve which you can see spanning across both sides of the car.
Below. With underframe construction mostly complete, I installed a wood deck made of Evergreen O scale 2 x 8 styrene strip. The kit comes with a laser-cut wood deck but I preferred to install a board-by-board deck so the side appearance was “right”. I’ll show you what I mean by that later on. The photo below also shows that I’ve begun installing grab irons which I bent myself using Tichy .015-inch wire.

Below. A whole lot of work later, the car looked like this. The new floor is installed, and I also installed new side boards made of O scale 2 x 12 styrene. Most of the grabs have also been installed. So far the build has been time-consuming, but easy.

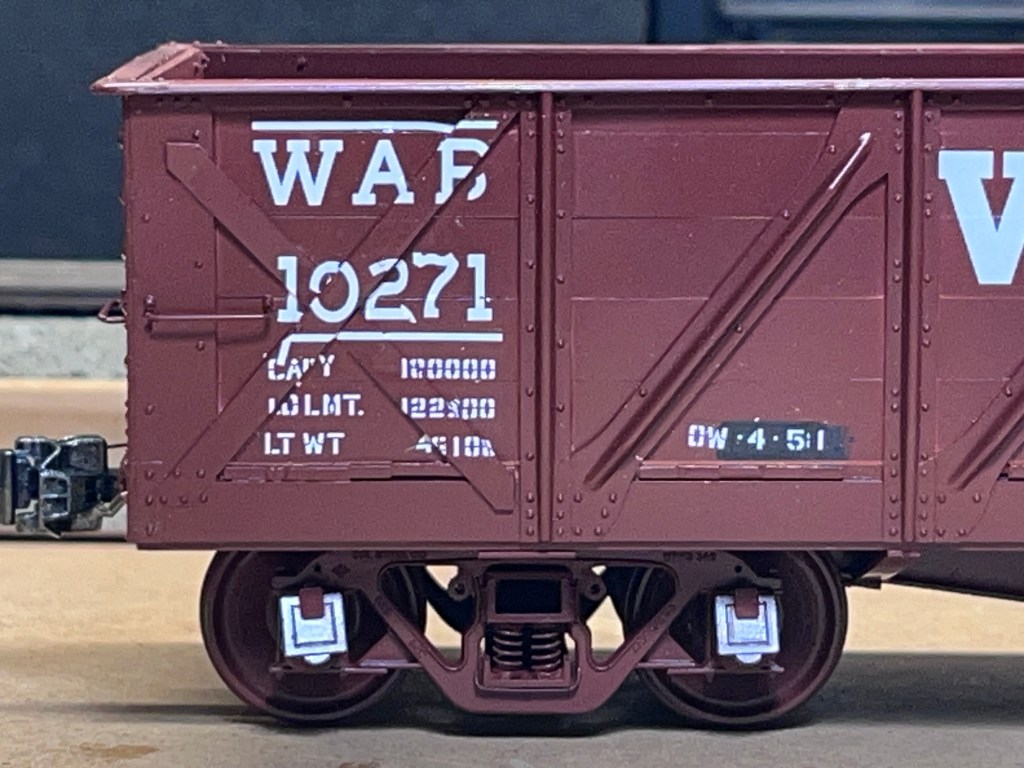
The final part of the build was adding brake gear to the B end. I used parts by Smokey Mountain (the brakewheel and housing), San Juan (the clevis, platform and platform braces) and more hand-bent wire parts for the job. I used a Kadee “scale” coupler and Kadee coupler box per Tony’s requirement. The trucks, by the way, are Andrews trucks built up from the San Juan kit with Protocraft Proto48 wheelsets added.

Below. Once the build was finished, I sandblasted the entire model and painted it with Tru Color CMO Freight Car color. I was agonizing over the Wabash car color but the Wabash experts told me to weather the car pretty heavily and nobody would criticize.

Below. Here’s a view of the underframe after sandblasting and painting. The fishbelly underframe, trucks, and all the details blend together nicely.

Decaling the model was pretty straightforward . I used a Protocraft box car set and changed the dimensional data to match the car as close as reasonably possible. I laid the decals down on Microscale MicroSol, and once the decals were in place and dry I applied Walthers Solvaset to get them to settle over the details.

Below. The major problem with decaling USA gondolas, in both O and HO scales, it laying decals over the thicker end braces. Below, you can see how the decals have distorted somewhat. I touched up the lettering with paint and a detail brush.
Additionally, you can see why I installed individual floor and side boards. On the prototype, floor boards were flush with the side boards in such a way that the individual floor boards were all visual and distinctive. A little extra effort provides a good effect. The individual side boards are slightly separated as well, providing some dimension. The San Juan trucks with scale wheelsets are simply beautiful.
Below. I finished the model by applying several coats of Testors Dullcote to the model, then weathered it with a homemade dirt color airbrushed on the trucks, underframe and lower side sills. I used AIM weathering powders, Soot Black and Delta Dirt in particular, to weather the sides and ends. I applied a finish coat using Testors Dullcote with a few drops of the original car color added to provide an even finish. Finally I also used a white artist’s pencil to add a few chalk marks on the ends of the car.
The last thing I did was glue the all-too-delicate stirrup steps on the model and brush on a little AIM Powders to blend them in. The model passed an ops check and was cleared for sending to Tony’s railroad.

I packed up the cars and sent them up to Tony about ten days ago. As soon as the main line is done, these freight cars will start earning money on The High Line.
May our gracious and loving God bless you and your families during this Christmas! – John

Very nice, John!
I saw your cars on the layout two weeks ago (I am an operator at Tony’s sessions) , and was very impressed! Knowing the backstory of them makes it all that much more impressive!
If you build more for him once you’re all set up in Germany, please let me know, I have my father’s Intermountain collection of parts that are available to the “cause”, if need be! I have reefers, tank cars, hoppers, you name it.
Ralph Heiss
S. Plainfield, NJ
LikeLike
Hi Ralph, good ot hear from you, man. Those cars took quite a while to build up, especially the gondola which required quite a bit of scratch-bashing. It turned out well and I have a second kit to build up for him, but it’ll be a long while before I can get to it. The move and new job are consuming a lot of spare time.
How’s Tony doing? I know he’s busy and has many irons in the fire.
Parts? Sure, I can always use parts. Thanks for the offer and I’ll let you know if I need anything.
How’s your Harbor layout coming along? I have a lot of fun looking at the website. The You Tube videos are neat too. What’s next??
John G
LikeLike
Hey John!
Tony is doing well, he keeps us busy operating here in NJ!
Glad the trip back to Deutschland went well, I’m excited to see what you build in your new space. I recently got my own office at work, and I’m considering building a version of your Hermitage Rd in my 9 x 2 space.
Currently, I am finishing up my harbor layout so it’s operational for ProRail next year that we’re hosting in NJ. After that, it may come down, I’m not sure yet. Looking to do something a little more “rural”, and definitely downsized.
Be well , and hope to talk to you soon!
Ralph
LikeLike