


The Hermitage Road layout is about 95% finished so recently I added some details to the track and industrial settings to help make things come alive.
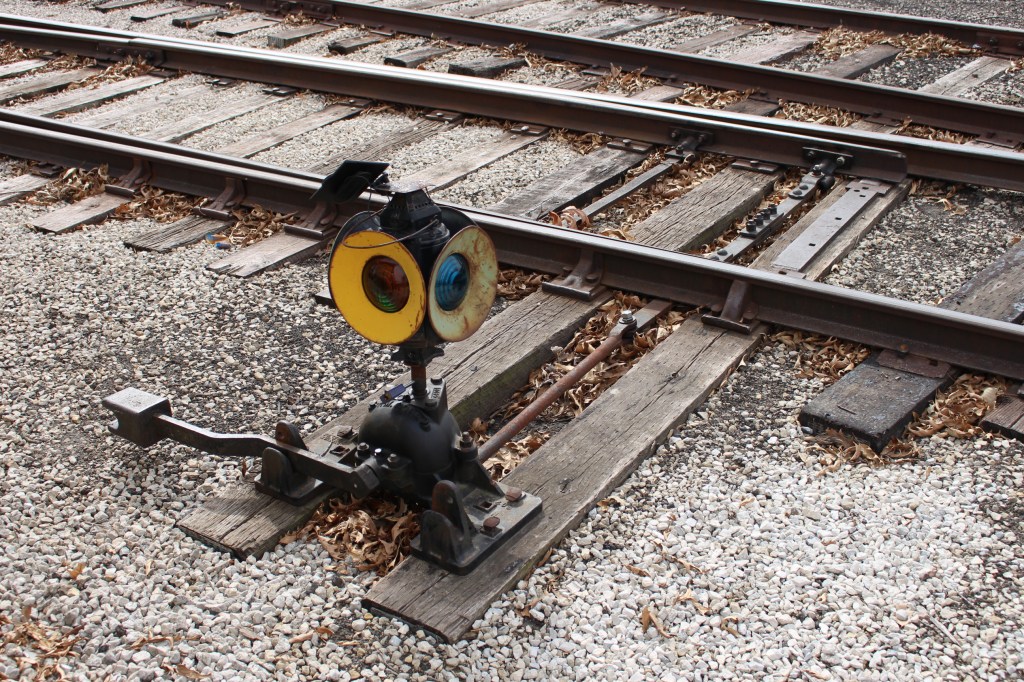
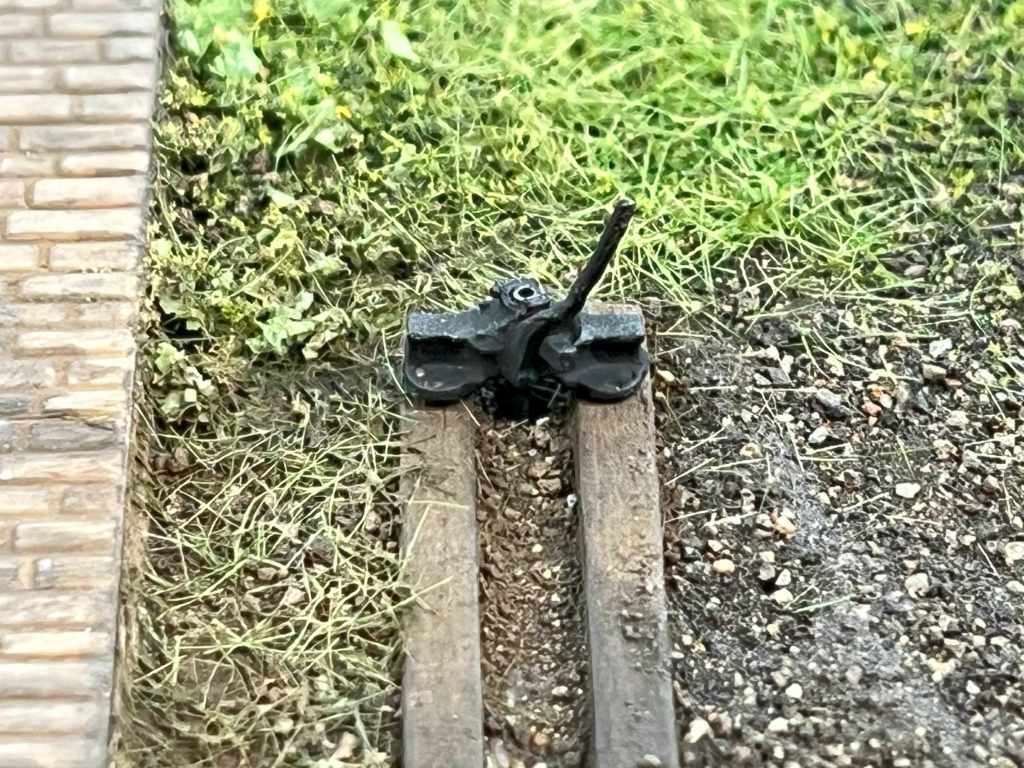
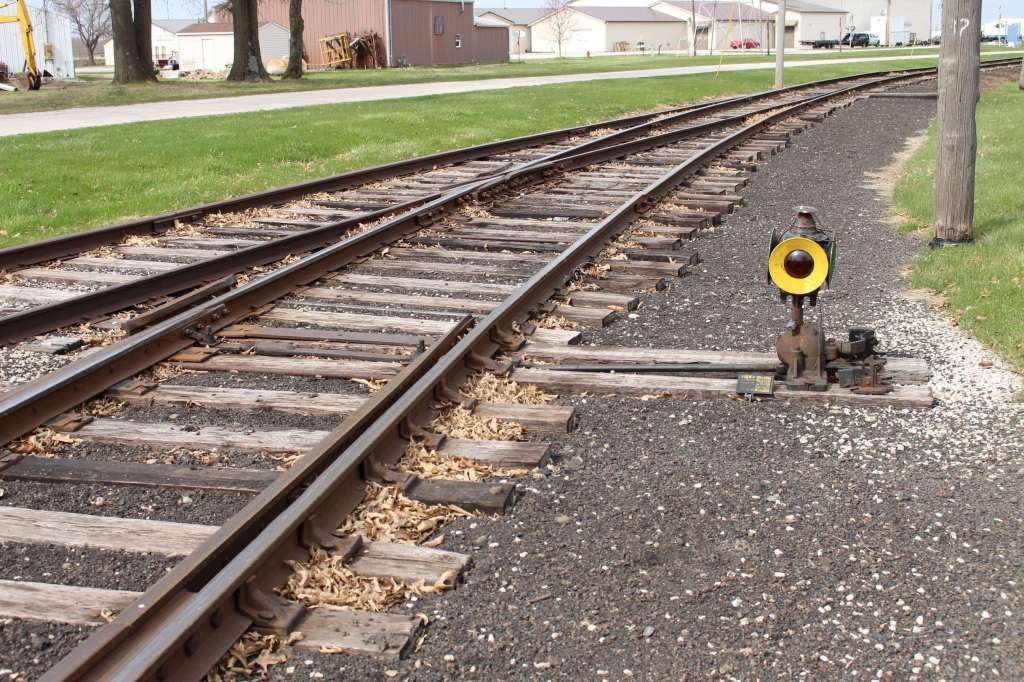
Below. This is a switch stand at the Monticello Railroad Musem in Monticello, Illinois. I’m using this photo and others like it as a guide to finish layout details on my turnouts.
Below. I took this picture last year on the BNSF at Abilene, Kansas. I’ve seen other places like this where new or used track parts are piled up near in-service tracks, so I added something like that below.
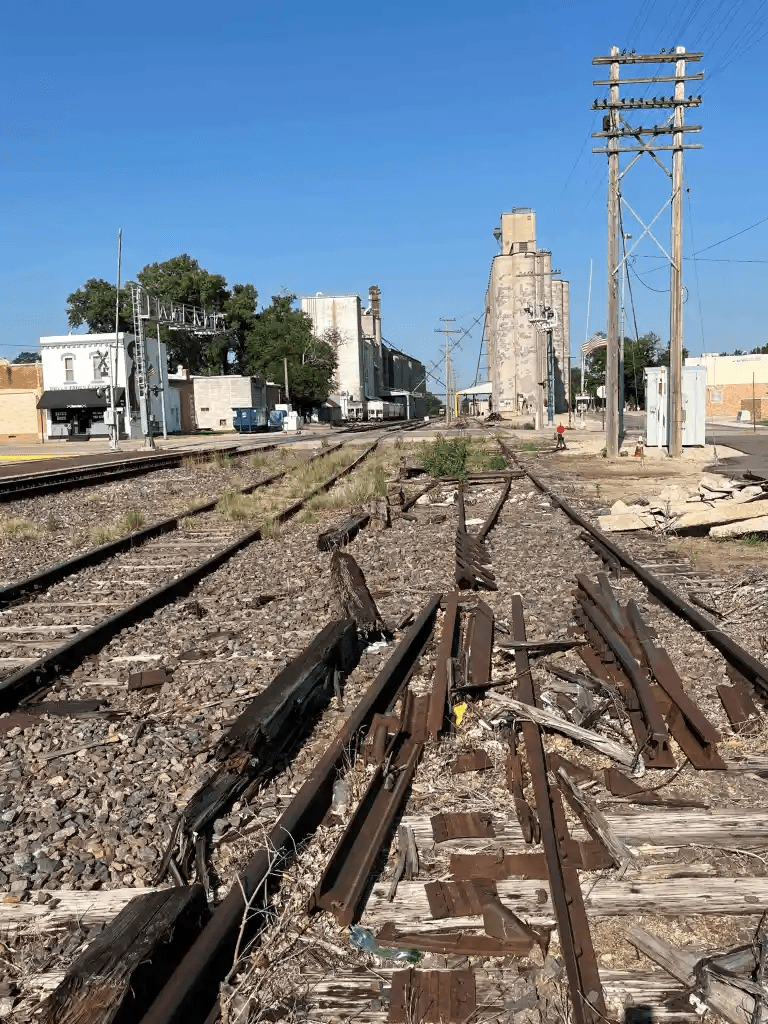
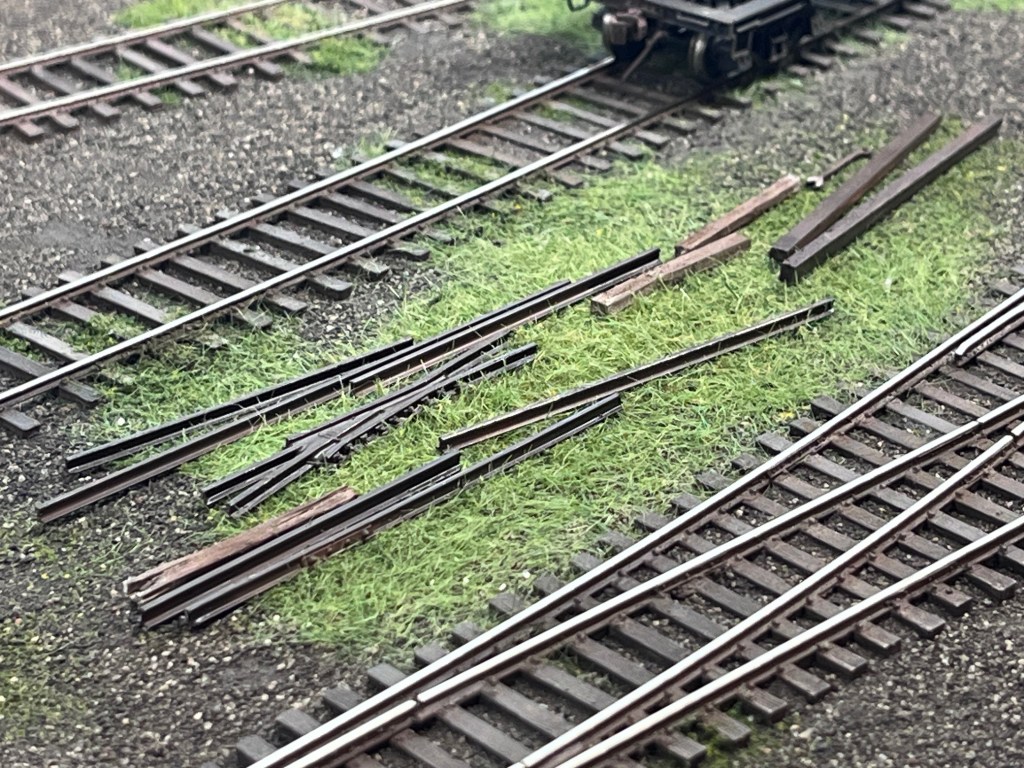
I added my own track dump in the foreground on my layout. Short lengths of Code 70 and Code 55 rail were cut and painted with Testors Rubber along with an unused Details West frog. I weathered the parts with dry weathering powders then fixed them in the grass in the foreground of the layout with ACC. I also added a few tools, some new ties and some older weather-beaten ties to the scene. I also want to add some tie plates, but I still need to buy them–I’m eyeing the cosmetic ones from Proto87 Stores.
Switch Stands
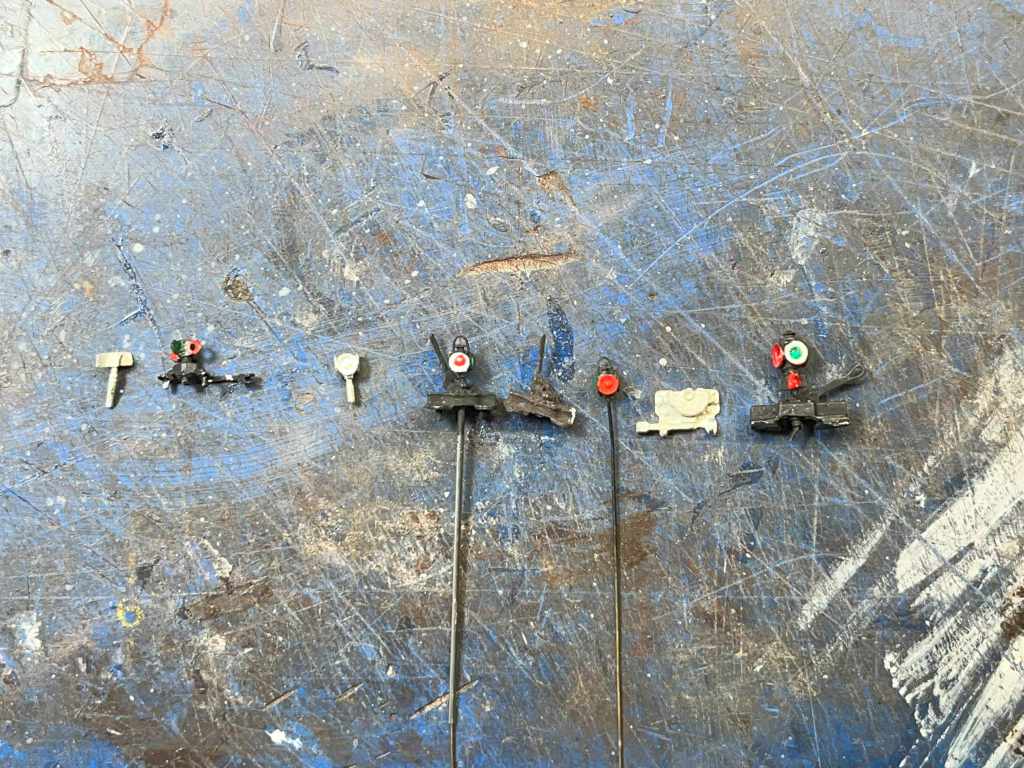
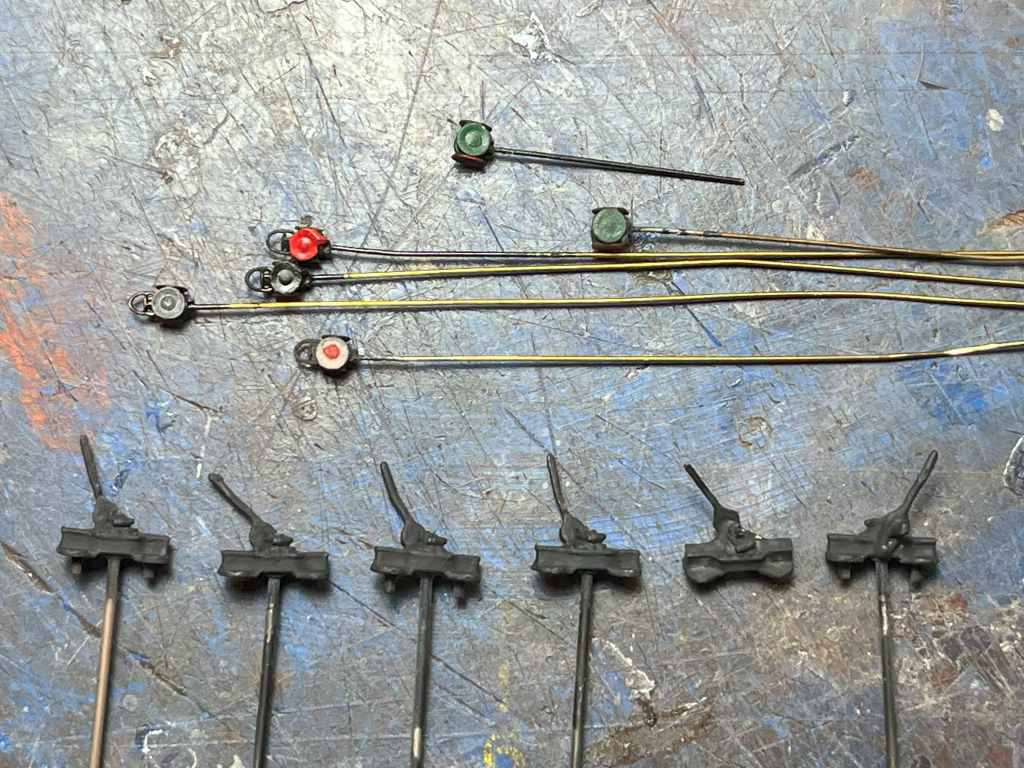
Below. Here are some HO scale switch stands I considered using. From left to right, the first three items are from Details West Ground Throw Switch Detail Set, Part No. GT-957. The kit includes a tiny switch stand and three different types of target–a paddle target, and reflector-type target (the one with holes) and a lantern target. It’s a nice set but I think the stand is quite small. The tall target with the red-on-white lamp is an Overland Models set, released in the 1990s. Next to it, fourth and third from the left, is the Overland Models switch stand and an Overland lamp target. The gray thing second from left comes with the Micro Engineering turnout, along with a nice target or two. The giant thing on the right is I think an old NJ International switch stand. I like this one because the modeler doesn’t have to paint the marker lamp–the modeler just inserts a jewel and it gives a nice, clean appearance.
Compare the different sizes of the stands themselves–they all claim to be HO but they seem to range from N to O.
For Hermitage Road I decided to use the brass switch stands from Overland. I’ve been carrying these around for literally 30 years. The stands are designed to have rotating targets.

The targets are a separate part also from Overland. Painting the lamps perfectly round takes a lot of time and patience. I still workin’ on it…
The stands look great installed. A perfect fit. I still have a lot of work to go to finish the markers.
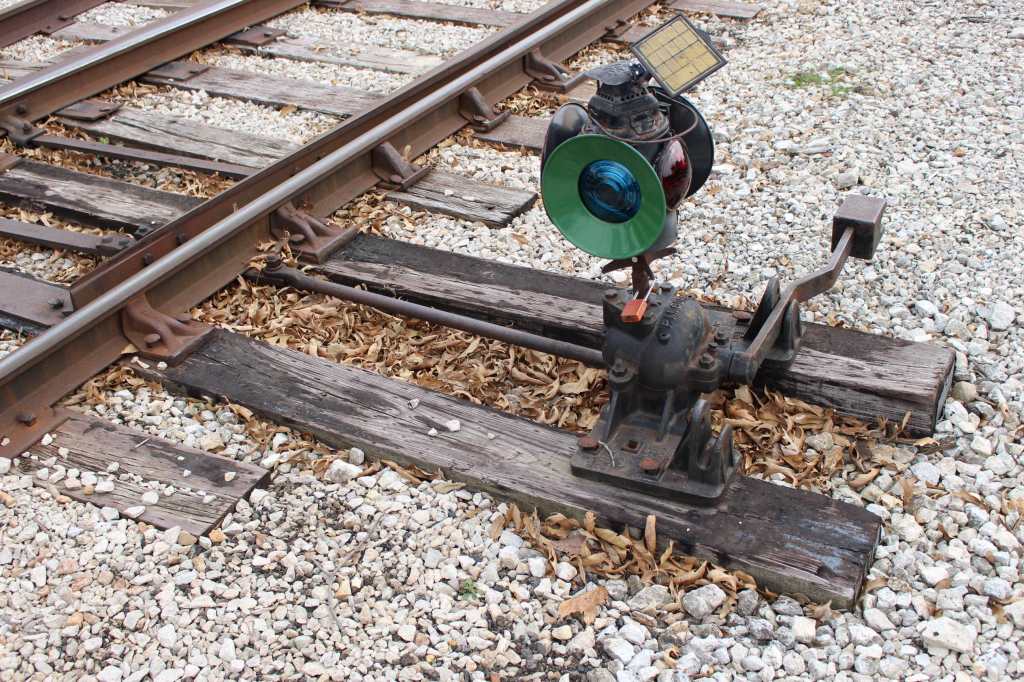
Below. This is another view from the Monticello Museum. Look at all the wonderful detail here–track fasteners, linkage, the lamp colors, variation in tie colors, leaves–it’s beautiful. The unusual thing on top is a solar collector that powers a small lamp in the marker. They don’t use oil lamps at the museum.
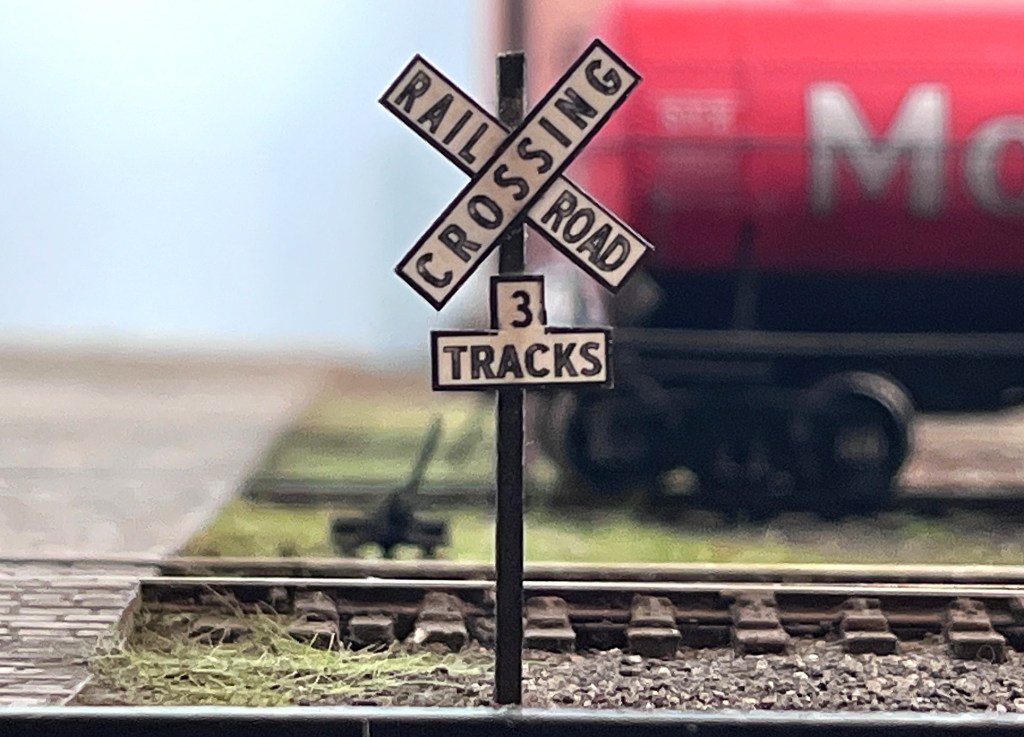
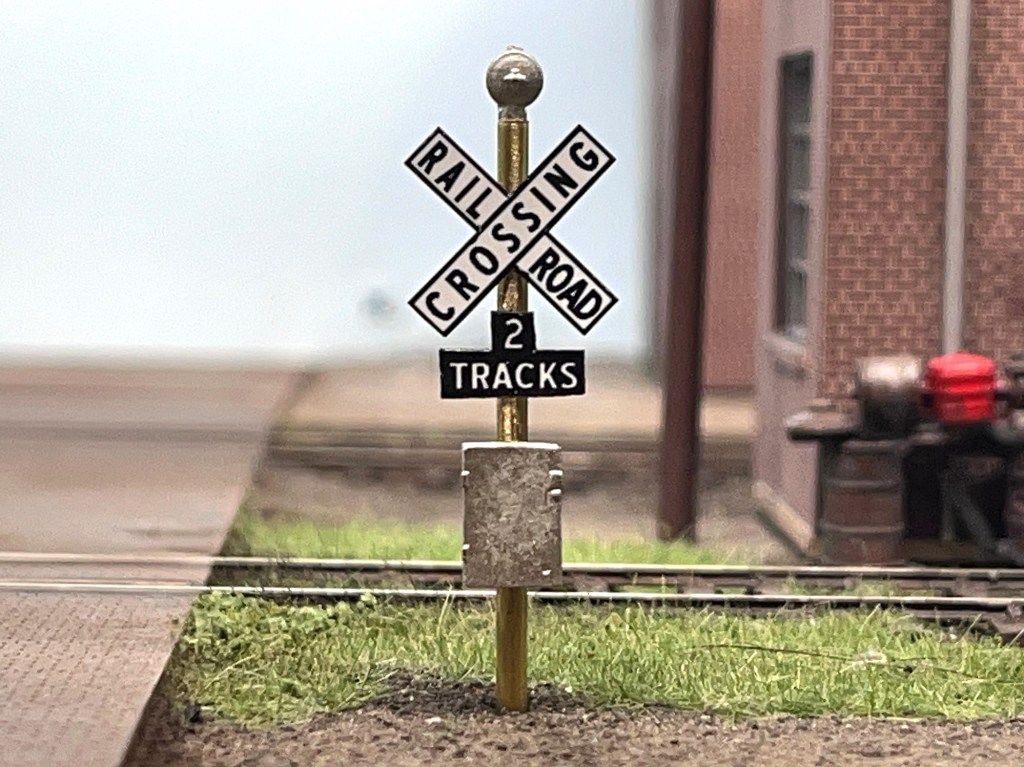
Crossbucks
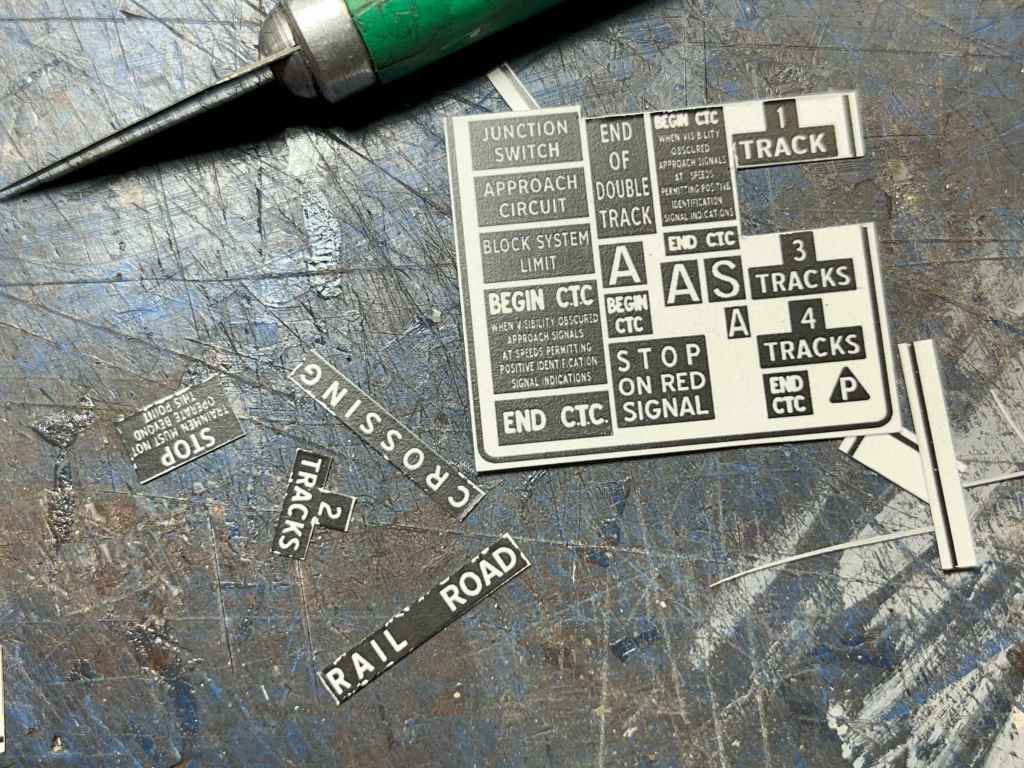
In my opinion most HO scale crossbucks don’t look like the real thing. The lettering most manufacturers use isn’t prototypical. I finally found a better solution a few years ago—paper crossbucks included with wig-wag signals made by Showcase Miniatures. I bought a few wig-wag sets, cut out the crossbucks and made some nicer looking models.
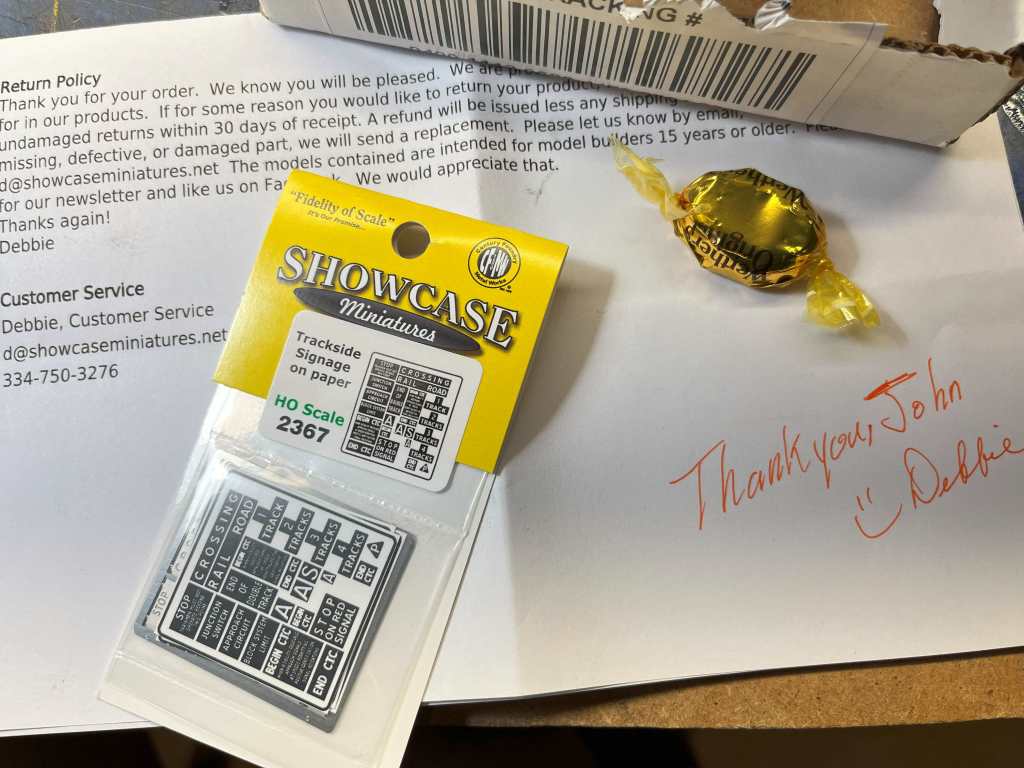
I also sent some pictures to owners Walt and Debbie and encouraged them to make a small set with just the crossbuck parts, and now they’re doing just that. See below.
To make my crossbucks, I carefully cut out the crossbuck parts and the track signs with a sharp Xacto #11 blade…
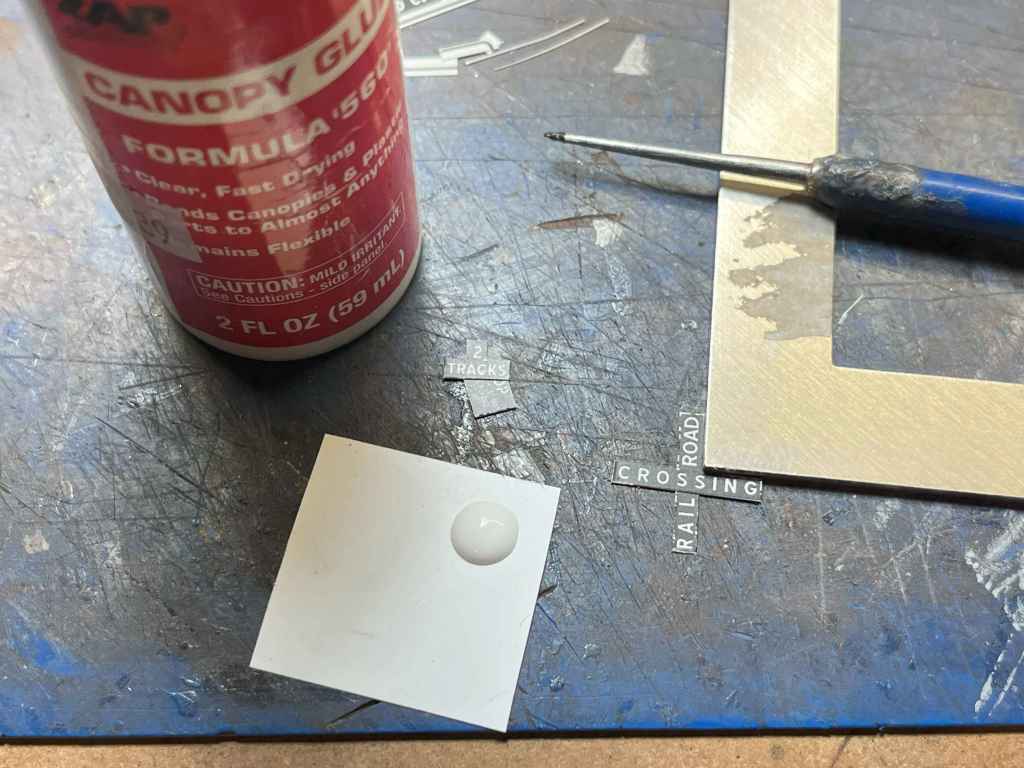
…and glued them together with a tiny dab of Formula 560 canopy glue, using a straight edge to be sure they’re fixed at 90 degrees.
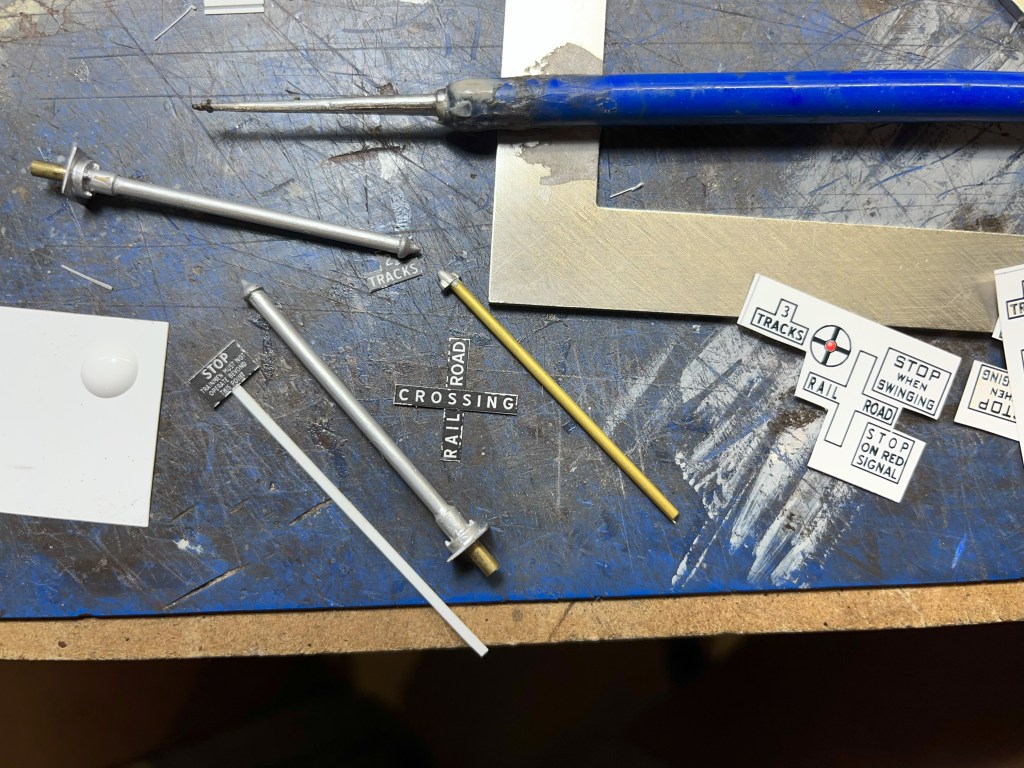
I made several types of posts to fix the crossbucks to. The brass posts are made from old Integrated Signal System parts but they turned out to be too big. I made my own posts with smaller-diameter brass tube and a rain-proof finial casting that comes with the Showcase Miniatures HO Signal Details set, item no. 2199 (another great offering from Showcase Miniatures), and those worked out better.
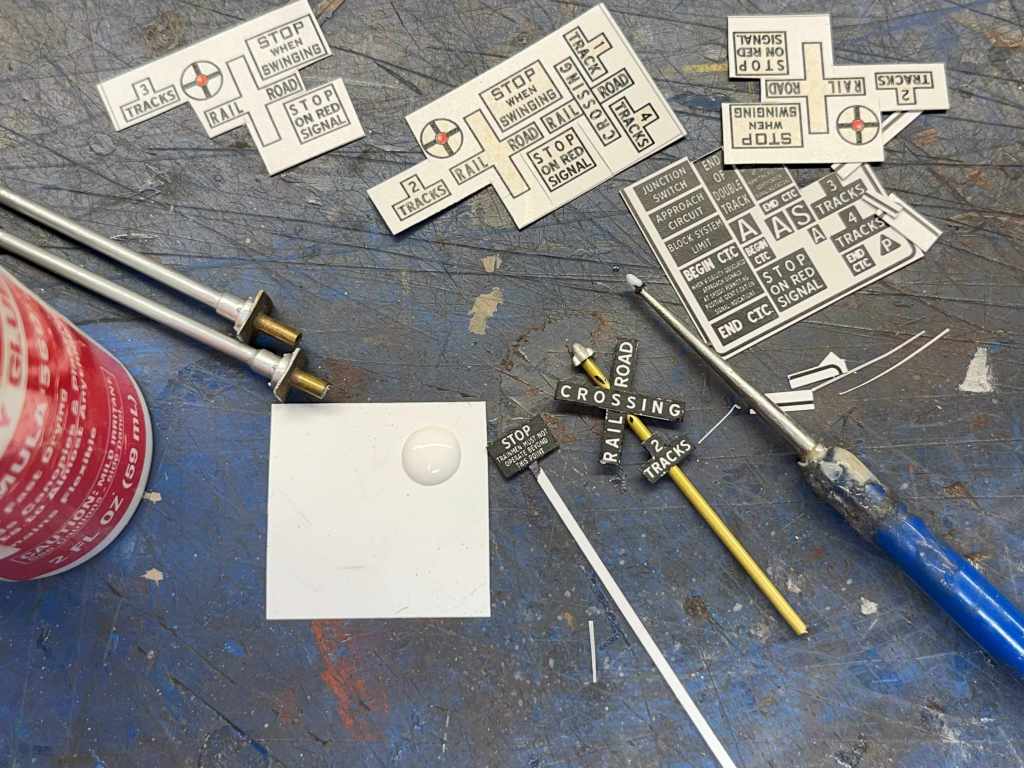
Below. Here’s how some of the crossbucks are turning out. I cleaned up the cut edges with a black Sharpie pen. The off-white signage makes great crossbucks too.
Showcase Miniatures has some great stuff. Check ’em out at http://www.showcaseminiatures.net.
Here’s one on the layout currently. Cameras don’t lie…that “tracks” signs is a little off-center, isn’t it?
And here’s another–a very early crossbuck with a bell device, but no lights. This one still needs a little paint.
More Details
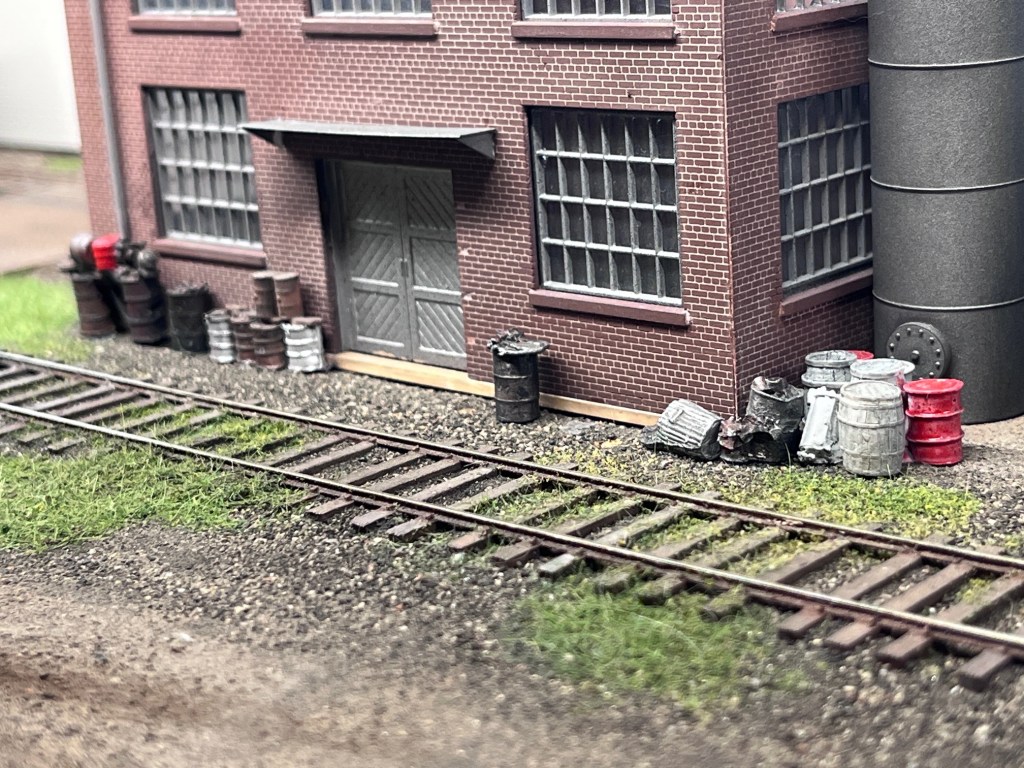
Simple details like barrels and trash cans are cheap and easy to add too. In fact it’s easy to over-do it. Most of the parts seen below are cast-metal details from Century Foundry or Showcase Miniatures. There are plastic parts from Grandt Line mixed it too. Some of the barrels still need a little paint. These details in particular are added behind the paint and varnish manufacturer on my layout. I tried not to make it too junky. A red barrel here and there provides a little contrast to the scene.
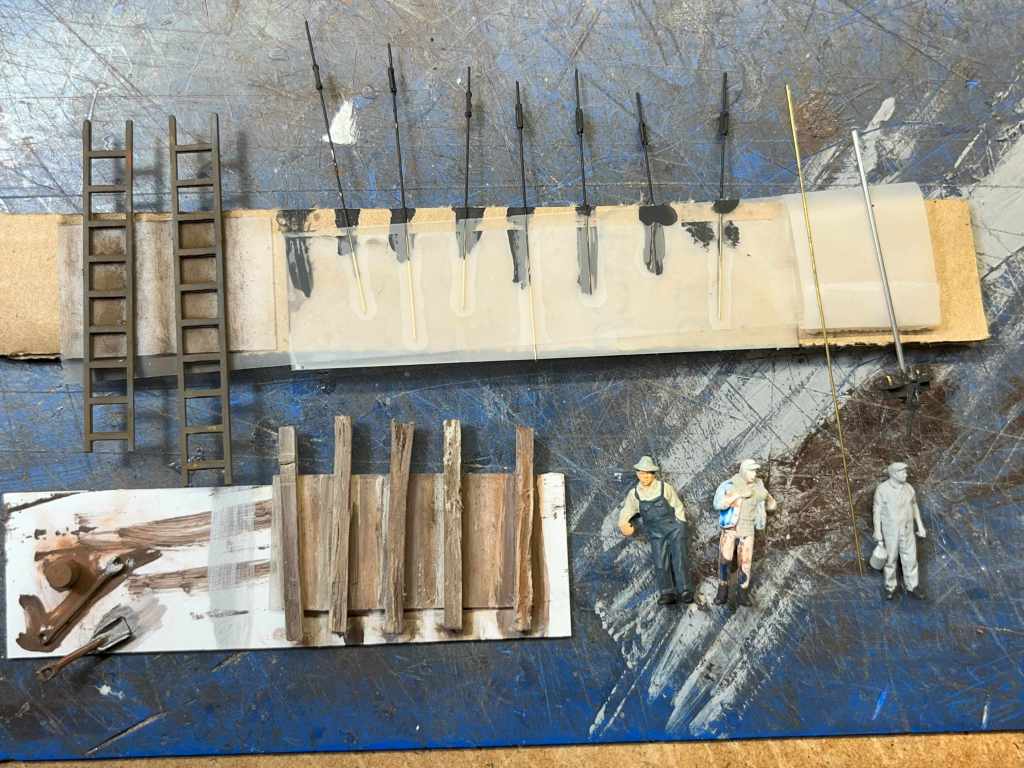
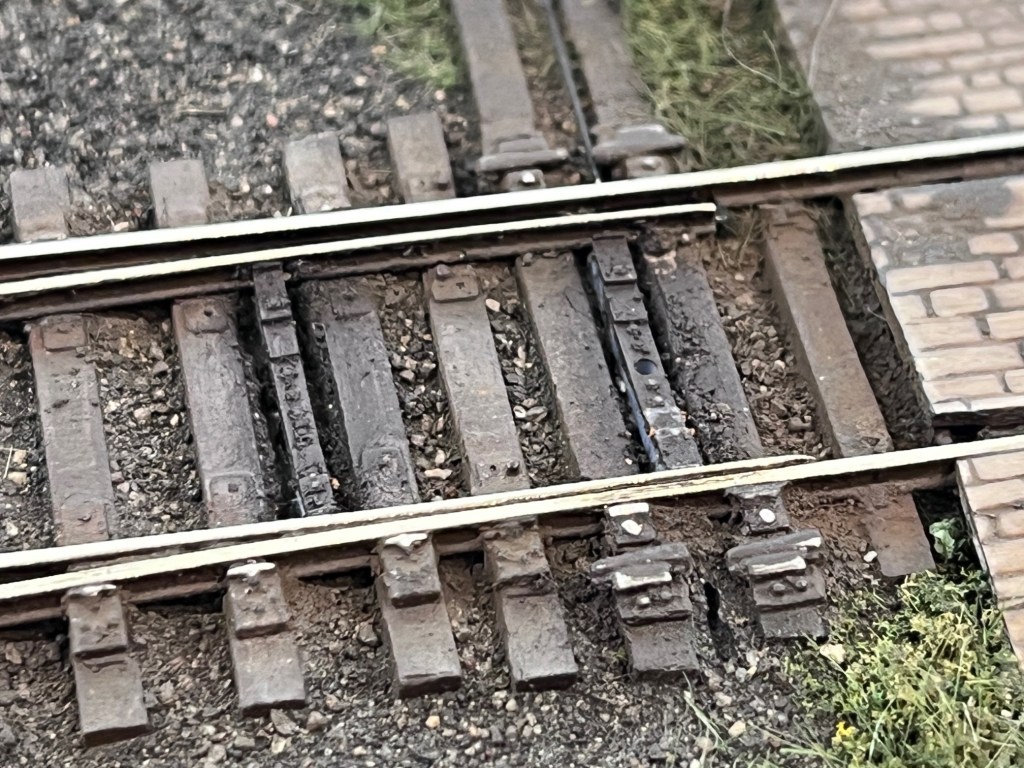
Below. I also made a bunch of small detail parts for the layout and painted them all together. The things in the top middle are linkage parts for the three non-operational turnouts on my layout. There are also weather-beaten ties, some tools and a few figures.
Finally, I have been adding newly-released tie linkage parts from Oak Hill Model Railroad Supply. Owner Jeff Otto is taking over the world with highly-detailed, easy-to-use parts. The new tie rods snap on and you’re done. They are robust plastic pieces and look great. The two tie rods seen below are on a non-operational turnout. They are light-year ahead of the stuff I was using previously from Proto87 Stores.
Here’s the link for the Oak Hill parts: https://ohrtracksupply.com/#!/Tie-Rods-for-turnouts/p/621702458/category=144939264. Try some–you won’t be disappointed.
Below. One final, inspirational view from the Monticello Museum. Clean, simple track, a colorful target, cinder ballast and green grass–this is a great scene at a place we can visit today and study. Also note the non-uniformity of the tie ends and tie colors, and all the leaves tucked into the corners. It all blends together naturally.
I hope you have a nice weekend. – John

Great information, Thanks John
LikeLike
It has been lottsa fun reading this. Entertaining subject within reach of the modeler who is just trying to be better at adding detail. You did a beautiful job and made it so easy to “ follow along at home” while reading your story. Thanks for taking the time to provide the great detail on how to get these parts and take a scene to such realistic detail.
LikeLike