

Last weekend was a busy weekend at the Golden household. My youngest daughter graduated from high school on Saturday afternoon and then attended a prom for another high school the same night, and then hosted an after-prom party here at the house. Saturday was crazy. Sunday was Mother’s Day and after church I made sure the wife was happy, well-fed and didn’t have to do any chores. My other almost-adult-age children kept me busy the rest of the weekend, celebrating another year of college complete.
Meanwhile I celebrated finishing an O scale Pacific Fruit Express R-40-10 refrigerator car model. Here’s the story.

My hobby-within-the-hobby is building Proto48 freight cars for a “someday” O scale layout. The old Intermountain car kits can be found cheap on eBay and I’ve accumulated a small stash over the years. They are very nicely detailed and fun to build. And big!
I started with an undecorated model that looked like this one.

Like my HO scale builds, I begin O scale builds starting with the hardest part, which is building up the brake gear. There are a few parts available in O scale that make brake gear modeling much easier, like San Juan brake gear for example. The San Juan parts are a kit themselves that take 45 minutes to clean and build. The intermountain car includes good mounting brackets for the brake parts which speeds up construction. It is also easier to use brass tube to connect air and retainer lines in the bigger scale.

These cars are really fun to build, especially if you’ve been fighting with HO scale brake gear for decades like I have.
Here’s the undecorated model with the brake work completed. The San Juan parts are in gray. The clevis hangars have an excellent profile and come with the kit. I used the Intermountain air line and connection for the dirt collector to speed things up. Chain is from A-Line. The trucks are ARA spring-plankless from Protocraft in Proto48.
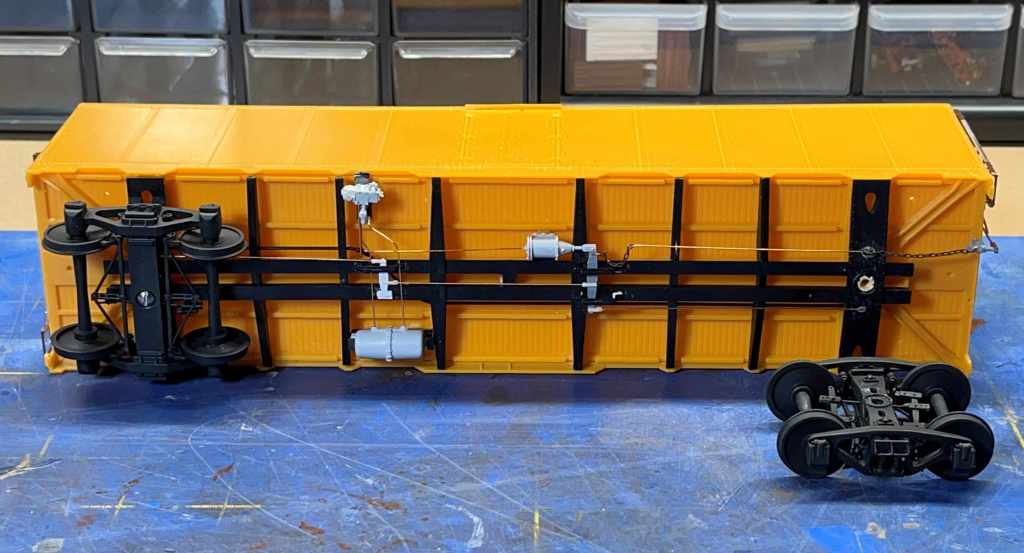
With the underframe and brake gear installed I turned my attention to the B end of the car, then the A end. Here’s a view of the built-up B end during painting. There are excellent aftermarket parts available from Chooch but I chose to use most of the parts that came with the Intermountain kit.
The couplers are Kadee #745 “scale head”–but they’re not scale size, no way. I installed them already and built a draft gear buffer out of styrene sheet.

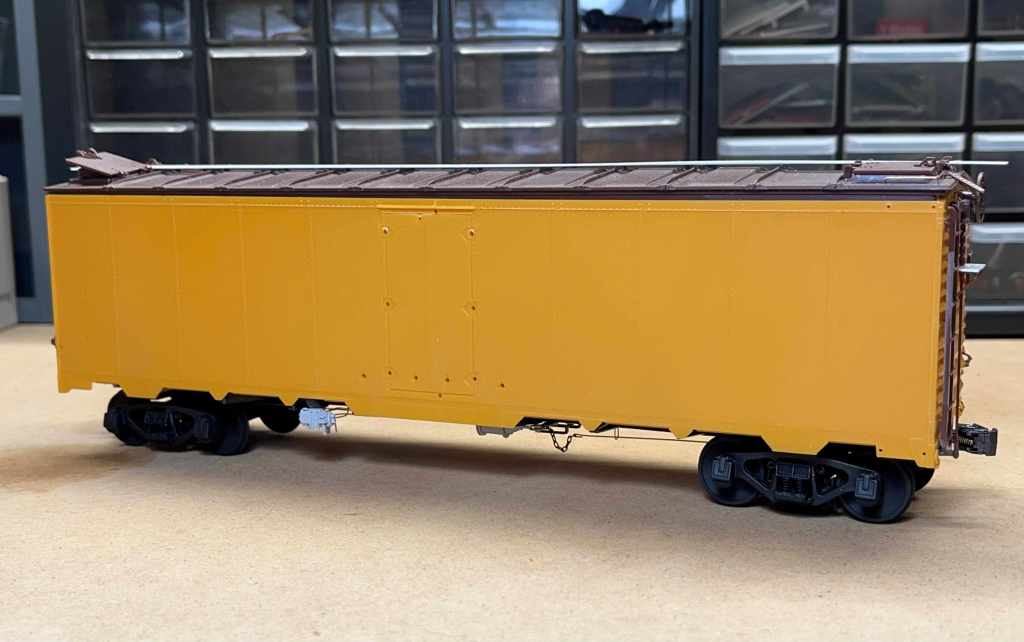
Above. Here’s the model ready for painting. I left all the hardware off the sides and will paint that black separately. All the parts for the roof are kit-supplied parts except the running board, which was made from O scale 2×6 Evergreen styrene strip.
Next the model was sandblasted the model in my North Coast sandblasting booth. I washed the car and set it aside to dry a few days, then I began masking the car for painting. First I painted the sides with Tru Color TC-070 Reefer Orange, then I masked the model again and painted the ends with Tru Color TCP-184 Frisco 1944-1960s Freight Car Brown. When the brown was dry I masked the model one more time and painted the underframe and side hardware with Tru Color TCP-010 Black.
The colors went on beautifully although the painters tape pulled off a little bit of the orange paint on one of the sides. Later I discovered the same company that makes the blue painters tape also makes “purple” painters tape for delicate surfaces. I bought a roll at Lowes and have been using that one ever since. I highly recommend it for model painting.

The colors went on beautifully although the painters tape pulled off a little bit of the orange paint on one of the sides. You can see some paint pulled off on the nearest tab. Later I discovered the same company that makes the blue painters tape also makes “purple” painters tape for delicate surfaces. I bought a roll of the purple tape at Lowes and have been using that one ever since. I highly recommend it for model painting.
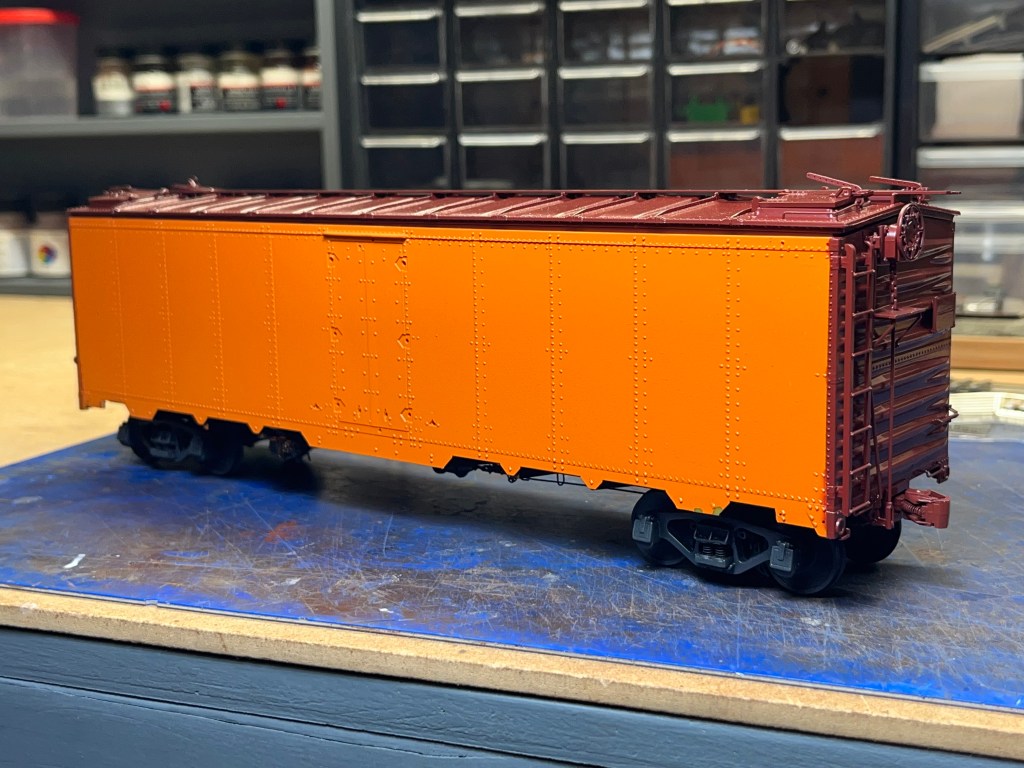
I began decaling the model after the paint was dry. I used Microscale decals, which cost $16 for a double-sheet set. I had to use two sets, as the first set fell apart when I tried to apply them. See below. At $16 per set that’s a pretty costly product failure.

The big monograms broke up even further after they were laid on the sides and setting solution was applied. I ended up “double-decaling” the monograms and a few other decals to get proper coverage. Double-decaling is an old technique where a modeler would put down two identical decals, one on top of another. It is required sometimes when decals are too thin, or when one decal doesn’t provide enough color–especially when, for example, you’re laying a yellow decal on a black surface. Here’s the model with decaling completed and the side details installed. Finally, we’re ready for finish and weathering!

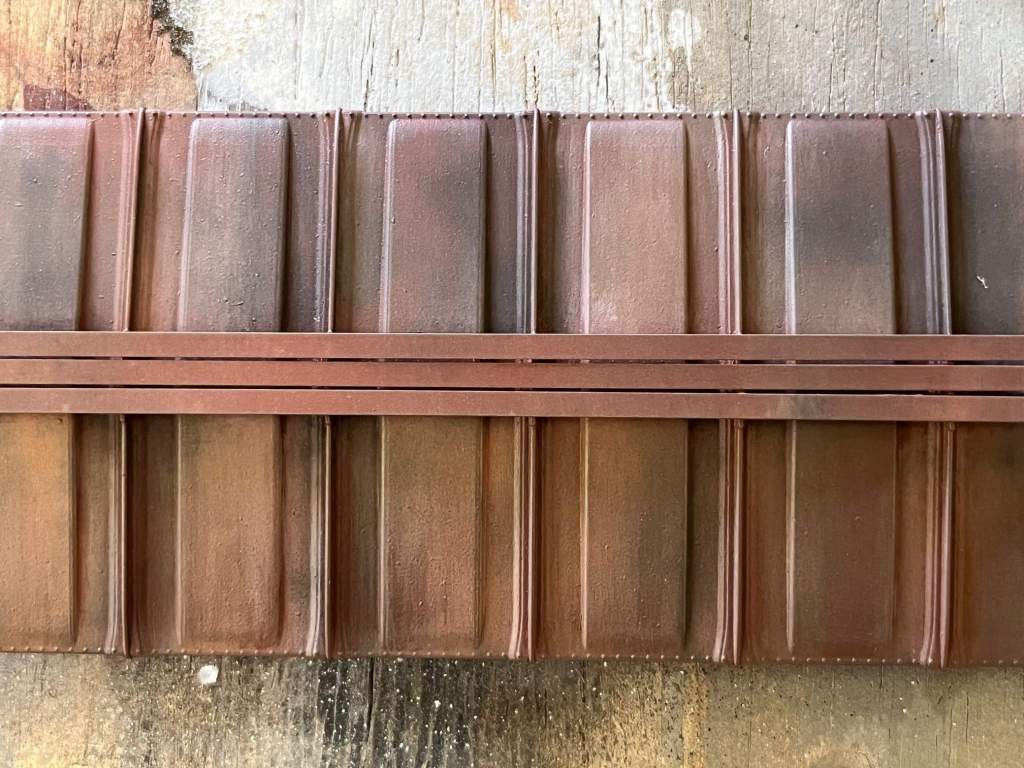
I built, painted and weathered the roof separately. I used a variety of AIM dry weathering powders–Soot Black, Rail Brown, Rust, and mixes of those colors and more. I also used a little silver paint to try and simulate a little paint failure. I’m not too happy with it. I wanted to create a more pronounced chipped paint effect but no matter what I did, it just didn’t look right. I settled on a dusty weathered roof and called it good.
Below. Here’s the finished model with the roof installed. I weathered the sides very lightly with AIM black weathering powder, just trying to get a little on the rivets and panel lines to get them to “pop”. The ends, underframe and trucks were weathered lightly with AIM Delta Dirt–a great color–and then everything was sealed with a light shot of clear Dullcote. The PFE R-40-10s are essential freight cars and I’m glad to have one in the larger scale.

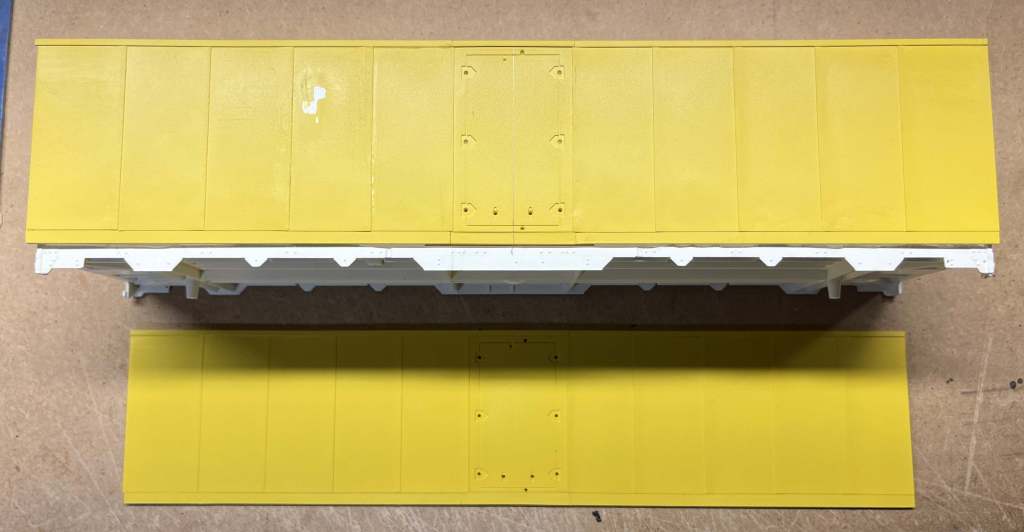
Meanwhile I began work on another refrigerator car, also in O scale. Fruit Growers Express, Western Fruit Express and Burlington Refrigerator Express all had post-war cars that were almost a carbon copy of the R-40-10, except the FGE, WFE and BREX cars had five distinct panels on each side of the door whereas the PFE R-40-10 had only four panels. Some of the FGE, WFE and BREX post-war cars had tabbed lower side sills, and some had long, u-shaped solid steel sills.
My modeling plan is to remove the sides from an Intermountain reefer body and replace them with scratchbuilt sides with the correct panel configuration. Here’s an in-progress shot, below. I cut out the reefer door out of the Intermountain car and built new sides out of .060 styrene sheet. I overlaid five .005 styrene panels on each side of the door, like the prototype cars.

I’m getting a little ahead of myself, but the view below shows the new panels after sandblasting and painting. I had to sand down a few additional blemishes. Next comes fitting and rivet work. My model won’t be pristine but I’m learning a lot and am really enjoying the process.
Below is an Otto Perry photo of one of the post-WWII prototypes I’m interested in. It is almost, but not quite, an R-40-10.

I’ll write a lot more about this kitbash in a later post, and break down making the sides step-by-step.
And…while I was finishing the PFE car I also started work on a companion reefer. This is an old Chooch Ultra Scale II Fruit Grower’s Express wood refrigerator car. I built this model quickly and began painting last weekend. Here’s where the model is tonight. There’s a lot of detail painting to go, but it looks like a Fruit Growers Express Reefer should. Those Protocraft Proto48 trucks are beautiful.

So, there you go–one new O scale car done and two more on the workbench. I had a goal this year to complete 6 O scale and 15 HO scale cars and have already just about done it. Below you can see some of the O scale models, kept safely on my bookcase and ready to move freight on the Someday Lines.

Talk at y’all soon… – John G
